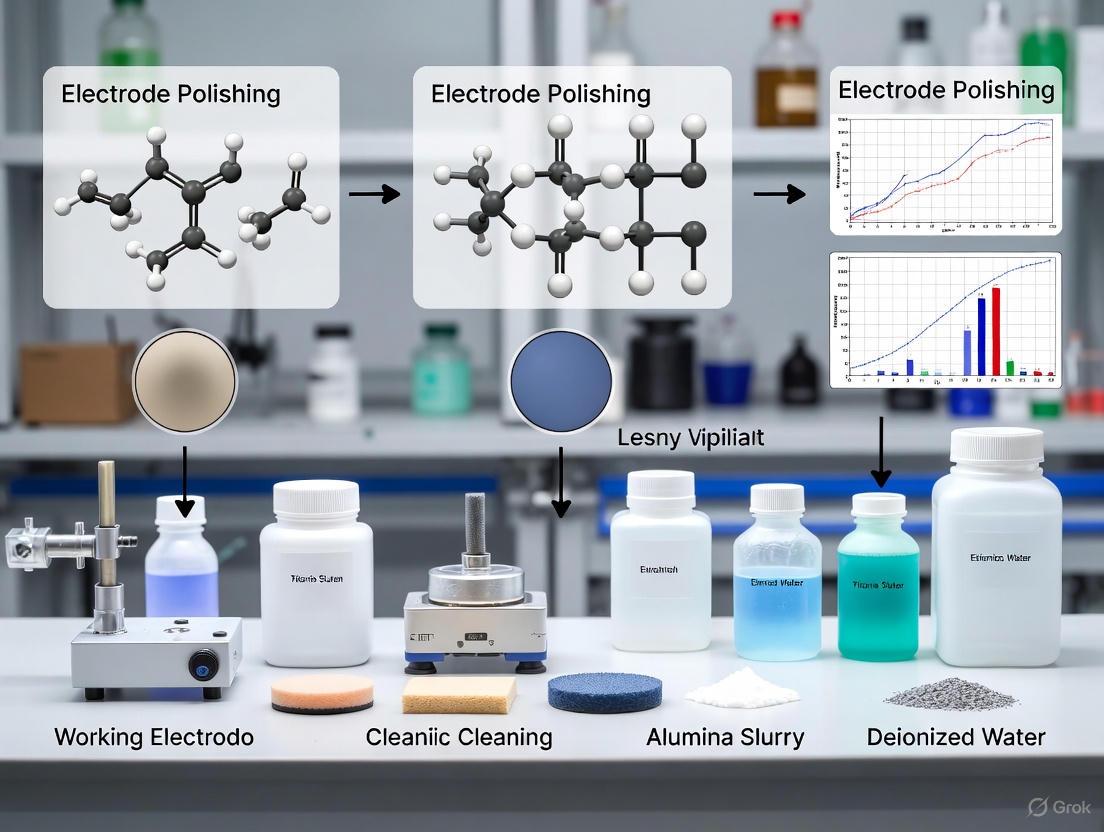
Working Electrode Polishing and Cleaning: A Complete Guide for Reproducible Electrochemical Analysis
This article provides a comprehensive guide to working electrode polishing and cleaning, essential for obtaining reproducible and reliable electrochemical data in research and drug development.
Working Electrode Polishing and Cleaning: A Complete Guide for Reproducible Electrochemical Analysis
Abstract
This article provides a comprehensive guide to working electrode polishing and cleaning, essential for obtaining reproducible and reliable electrochemical data in research and drug development. It covers the fundamental principles of surface contamination and electrode fouling, details step-by-step protocols for mechanical polishing and alternative cleaning methods for various electrode materials, and addresses common troubleshooting scenarios. The content also explores advanced optimization techniques, including automated systems and machine learning, and provides frameworks for validating cleaning efficacy and comparing method performance. This guide is an indispensable resource for scientists seeking to standardize their electrochemical workflows and improve data quality.
The Science of a Clean Surface: Why Electrode Preparation is Fundamental to Electrochemistry
The Critical Role of the Working Electrode Surface in Electron Transfer
Troubleshooting Guides
Guide 1: Poor Electrochemical Response or Irreproducible Results
Problem: Your cyclic voltammetry shows broad peaks, high background current, or a significant shift in peak potential between scans.
Solution: This typically indicates a contaminated or fouled electrode surface. Follow a tiered cleaning approach.
Step 1: Routine Cleaning (Gentle Polishing)
- Methodology: Use a microcloth polishing cloth affixed to a flat glass or polymer surface. Apply a small spot (∼3 mm) of 0.05 μm alumina slurry. Polish the electrode surface using a figure-8 motion while gently rotating the electrode for 30-60 seconds [1].
- Rinsing: Thoroughly rinse the electrode with distilled water to remove all alumina particles [1].
- Optional Ultrasonication: Suspend only the electrode surface (not the entire assembly) in an ultrasonication bath filled with distilled water for 1-5 minutes to dislodge any adhered particles [1].
Step 2: Periodic Cleaning (Moderate Polishing)
- If the routine clean is insufficient, first polish with 0.3 μm alumina slurry on a microcloth using the same technique, followed by the routine cleaning with 0.05 μm alumina [1].
Step 3: Aggressive Cleaning (For heavily contaminated surfaces)
- This three-step process is for visible contaminants or adsorbed species.
- Note: This level of cleaning removes significant material and should be used sparingly [1].
Verification: After cleaning, test the electrode in a standard solution such as 0.01 M K₄[Fe(CN)₆] with 0.5 M Na₂SO₄ electrolyte [2]. A well-defined, reversible redox peak pair with a low peak separation (ΔEp) indicates a successfully renewed surface.
Guide 2: Inconsistent DNA Probe Deposition on Screen-Printed Gold Electrodes (SPGEs)
Problem: Your genosensor gives inconsistent signals, potentially due to manufacturing residues or contaminants on the SPGE surface interfering with probe attachment.
Solution: Implement an electrochemical cleaning protocol to standardize the surface.
- Methodology:
- Apply 150 μL of a cleaning reagent (e.g., 3% H₂O₂ [v/v] and 0.1 M HClO₄) to the SPGE [3].
- Perform Cyclic Voltammetry (CV) for 10 cycles at a scan rate of 100 mV/s, with a potential range from -700 mV to +2000 mV [3].
- Rinse the electrode thoroughly with Milli-Q water [3].
- To activate and stabilize the surface, perform 10 additional CV cycles in a standard buffer at a scan rate of 50 mV/s over a suitable potential range (e.g., -400 mV to +500 mV) [3].
Verification: Characterize the cleaned electrodes using CV and DPV in a [Fe(CN)₆]³⁻/⁴⁻ solution. Effective cleaning is confirmed by stabilized voltammograms and the elimination of surface inhomogeneities, which can be verified by high-resolution SEM [3].
Guide 3: Surface Corrosion or Major Physical Damage
Problem: The electrode surface has visible scratches, deep pits, or has been corroded by application of high over-potentials (e.g., above 1.5 V for glassy carbon) [2].
Solution: A complete re-polish is required. This is a last-resort, labor-intensive process that removes a large amount of material (250-500 μm) and shortens the electrode's lifespan [1].
- Methodology:
- Rough Grinding: Affix 600 grit silicon carbide paper to a flat surface. Add a small volume of deionized water and polish the electrode in a figure-8 pattern to remove major imperfections [1].
- Aggressive Polishing: Follow the three-step Aggressive Cleaning protocol described in Guide 1, starting with 5 μm alumina [1].
- Critical Precaution: Before moving to a finer polishing step, always thoroughly rinse the electrode and the pad to avoid contaminating the finer abrasive with larger particles from the previous step [4].
Verification: The final surface should be mirror-like. Test electrochemically as described above. If performance remains poor after a complete re-polish, the electrode may be damaged beyond repair and should be replaced [1].
Frequently Asked Questions (FAQs)
FAQ 1: Why is the figure-8 motion recommended for manual polishing? Does the pattern truly matter?
- Answer: The figure-8 motion is a long-standing best practice believed to prevent the introduction of directional scratches and ensure even polishing. However, a recent automated study found that the polishing pattern (linear, circular, or figure-8) did not have a significant impact on the final electrode quality when the force was consistently applied [2]. The key factors are the consistent application of force and the use of correct abrasive sequences, rather than the specific pattern itself [2].
FAQ 2: My electrode was stored dry and is no longer performing well. How can I recondition it?
- Answer: For electrodes that have been stored dry, the hydration layer on the glass sensing bulb can be depleted. Recondition the electrode by soaking it in a pH 4.01 buffer or dedicated electrode storage solution for at least 30 minutes to re-establish this critical layer [5]. For severe cases, a full polishing procedure may be necessary.
FAQ 3: What is the consequence of polishing an electrode too aggressively or too frequently?
- Answer: Each polish, especially an aggressive one or a complete re-polish, removes a layer of the electrode material (e.g., precious metal or glassy carbon). Performing 7 to 15 complete re-polishes can wear the electrode down to the underlying stainless steel or conductive epoxy, which will cause strange electrochemical responses and render the electrode unusable [1]. Always use the gentlest effective polishing method.
FAQ 4: How do I remove specific contaminants like proteins or grease from my electrode?
- Answer: Different contaminants require specific cleaning strategies:
- Proteins: Immerse the electrode in a 1% pepsin solution in 0.1 M HCl for five minutes, followed by thorough rinsing with distilled water [5].
- Oil/Grease Films: Wash the electrode bulb with a mild detergent or methanol, then rinse with distilled water [5].
- Salt Deposits: Soak the electrode in 0.1 M HCl for five minutes, then in 0.1 M NaOH for five minutes, with thorough rinsing in between [5].
Table 1: Effectiveness of Automated Polishing Patterns on a Corroded Glassy Carbon Electrode
This data summarizes a robotic study that evaluated different polishing patterns for regenerating a corroded electrode. The results were measured by the change in the integral of the Cyclic Voltammetry (CV) plot, which corresponds to the electrode's capacitance and surface quality [2].
| Polishing Pattern | Impact on CV Integral | Implication for Surface Quality |
|---|---|---|
| Figure-8 | Decreased significantly after polishing | Effectively regenerated the surface; performance was not superior to other patterns. |
| Circular | Decreased significantly after polishing | Equally effective as the figure-8 pattern in restoring the electrode. |
| Linear | Decreased significantly after polishing | No significant difference in effectiveness compared to circular or figure-8 patterns. |
| Complex (Lissajous) | Decreased significantly after polishing | Performed equally well, demonstrating that pattern is not a critical variable. |
Table 2: Comparison of Cleaning Methods for Screen-Printed Gold Electrodes (SPGEs)
This table compares methods for cleaning SPGEs to improve their performance in biosensing applications, based on Cyclic Voltammetry (CV), Differential Pulse Voltammetry (DPV), and Scanning Electron Microscopy (SEM) analysis [3].
| Cleaning Method | Key Procedure | Effectiveness & Outcome |
|---|---|---|
| H₂O₂/HClO₄ (Incubation) | 150 μL reagent incubated on SPGE for 10 minutes at rest [3]. | Less effective; some surface interference may remain. |
| H₂O₂/HClO₄ (Electrochemical) | 10 CV cycles in reagent from -700 mV to +2000 mV [3]. | Most effective; removed surface interferences (dark spots in SEM) and stabilized the surface for consistent DNA probe deposition [3]. |
Experimental Protocols
Protocol 1: Standard Three-Step Polishing for a Glassy Carbon Electrode
This protocol is adapted from manufacturer guidelines and is critical for obtaining a fresh, atomically flat surface [4].
Rough Polishing (Remove large imperfections):
- Use a rough polishing pad (e.g., diamond pad) moistened with water.
- Hold the electrode perpendicular to the pad and polish in a figure-8 or circular motion for 30 seconds to 2 minutes. Apply light force to avoid deep scratches.
- Rinse the electrode thoroughly with distilled water under running water.
Intermediate Polishing (Create a uniform surface):
- Shake a diamond abrasive suspension well and apply 8-10 drops to a dedicated intermediate polishing pad.
- Polish the electrode for approximately 2 minutes until the surface begins to shine.
- Rinse the electrode and pad thoroughly. Wipe the electrode surface with acetone to remove all diamond abrasive.
Finish Polishing (Achieve a mirror finish):
- Apply a few drops of a fine alumina slurry (e.g., 0.05 μm) to a dedicated microcloth or alumina polishing pad.
- Polish for 3-4 minutes.
- Rinse the electrode meticulously with distilled water. Any residual alumina particles can foul experiments.
Protocol 2: Electrochemical Cleaning for Screen-Printed Gold Electrodes
This protocol is designed to remove organic residues and manufacturing contaminants from SPGEs without mechanical damage [3].
- Preparation: Place 150 μL of a cleaning reagent (3% v/v H₂O₂ and 0.1 M HClO₄) onto the electrode cell, covering all three electrodes (working, counter, reference).
- Electrochemical Cleaning: Run Cyclic Voltammetry for 10 cycles with the following parameters:
- Potential Range: -700 mV to +2000 mV
- Scan Rate: 100 mV/s
- Rinsing: Carefully remove the cleaning reagent and rinse the electrode thoroughly with Milli-Q water.
- Activation & Stabilization: Add an appropriate measurement buffer (e.g., PBS or KCl). Perform 10 additional CV cycles in a standard potential window (e.g., -400 mV to +500 mV at 50 mV/s) to stabilize the electrode surface.
Research Workflow and Signaling Pathways
Diagram Title: Working Electrode Surface Troubleshooting Workflow
The Scientist's Toolkit: Essential Research Reagents & Materials
Table 3: Key Materials for Electrode Polishing and Cleaning
| Item | Function & Explanation |
|---|---|
| Alumina Slurry | A suspension of aluminum oxide particles in various sizes (e.g., 5 μm, 0.3 μm, 0.05 μm) used as an abrasive for mechanical polishing to remove material and create a smooth, fresh surface [1]. |
| Polishing Cloths & Pads | Specialized surfaces (e.g., microcloth, Nylon pads, diamond pads) that hold the abrasive and provide a flat, consistent backing for polishing. Using a dedicated pad for each abrasive grit prevents cross-contamination [1] [4]. |
| Silicon Carbide Paper | A coarse abrasive paper (e.g., 600 grit) used for the initial rough grinding to eliminate major scratches, dents, or damage during a complete re-polish [1]. |
| Diamond Suspension | A polishing compound containing fine diamond particles, used for intermediate polishing steps to refine the surface after rough grinding and before the final alumina polish [4]. |
| HClO₄ / H₂O₂ Solution | A chemical/electrochemical cleaning reagent, particularly for gold electrodes. It helps dissolve organic and inorganic contaminants from the electrode surface when applied with or without potential cycling [3]. |
| Pepsin in HCl Solution | A specific cleaning solution designed to digest and remove protein deposits that have adsorbed onto the electrode surface, which are common in bio-sensing experiments [5]. |
Electrode fouling occurs when unwanted materials accumulate on the electrode surface, degrading its electrochemical properties and performance. The common sources can be categorized as follows:
- Organic Contaminants: This is a prevalent cause of fouling. Natural Organic Matter (NOM), such as humic substances in water, can adsorb onto the electrode surface [6]. Furthermore, during the electrochemical oxidation of organic pollutants like phenol, insulating polymeric films can form directly on the anode surface [7].
- Inorganic Precipitation and Passivation: The formation of metal oxide or hydroxide layers on the electrode surface is a major fouling mechanism, especially in processes like electrocoagulation. For aluminum electrodes, a passive aluminum oxide layer forms, which increases electrical resistance and reduces electroactivity [6] [8]. The deposition of metal ions from the solution can also contribute to this type of fouling [8].
- Biological Fouling (Biofouling): The accumulation of biomolecules, such as proteins, on the electrode surface can occur, particularly in biological or complex media [9].
- Chemical Fouling: The deposition of specific chemical species can cause fouling. For example, sulfide ions have been identified as a key agent causing peak voltage shifts by reacting with Ag/AgCl reference electrodes [9].
The table below summarizes these common fouling agents and their impacts.
| Fouling Category | Specific Agents | Primary Impact on Electrode |
|---|---|---|
| Organic Fouling | Natural Organic Matter (e.g., humic substances), Phenolic compounds | Adsorption and formation of insulating polymeric films, reducing active surface area [6] [7]. |
| Inorganic Passivation | Metal oxides/hydroxides (e.g., Al₂O₃) | Forms a passive layer, increasing electrical resistance and decreasing dissolution efficiency [6] [8]. |
| Biofouling | Proteins, biomolecules | Accumulation on the surface, altering electrochemical properties and reducing sensitivity [9]. |
| Chemical Fouling | Sulfide ions (S²⁻) | Reacts with Ag/AgCl reference electrodes, decreasing open circuit potential and causing signal shifts [9]. |
How does electrode fouling affect my experimental results?
Electrode fouling negatively impacts experimental data by altering the fundamental properties of the electrode. Key effects include:
- Reduced Sensitivity and Signal Diminishment: Fouling layers block active sites on the electrode surface, leading to a decrease in the Faradaic current. This results in a lower signal-to-noise ratio and reduced sensitivity for detecting target analytes [9].
- Peak Potential Shifts: The fouling layer can interfere with the electron transfer kinetics, causing the oxidation or reduction peaks in techniques like cyclic voltammetry to shift from their original positions [9].
- Increased Electrical Resistance and Energy Consumption: Passivation layers, such as metal oxides, act as insulators. This increases the overall system resistance, requiring higher applied voltages or currents to achieve the same electrochemical effect, thereby increasing energy consumption [6] [8].
- Loss of Reproducibility: As fouling progresses, the electrode surface changes continuously, leading to poor repeatability between experiments and unreliable quantitative data [10].
What are the standard procedures for polishing glassy carbon and metal electrodes?
Mechanical polishing is a fundamental method for regenerating a clean and reproducible electrode surface. The following protocol, based on manufacturer guidelines, outlines a systematic approach using progressively finer abrasives [1].
Experimental Protocol: Electrode Polishing
Principle: To remove contaminants and a thin layer of the underlying electrode material using abrasive alumina slurries, restoring a smooth and fresh surface.
Research Reagent Solutions & Materials:
| Item | Function |
|---|---|
| Alumina Slurry Suspensions (5 μm, 0.3 μm, 0.05 μm) | Aqueous suspensions of finely ground aluminum oxide particles for abrasive polishing. |
| Polishing Microcloth (e.g., Buehler) | A soft, non-abrasive cloth that holds the alumina slurry and provides a flat polishing surface. |
| Silicon Carbide Abrasive Paper (600 grit) | A coarse abrasive paper for aggressive removal of material from severely damaged electrodes. |
| Ultrasonication Bath | Used to dislodge and remove residual alumina particles from the electrode surface after polishing. |
Workflow Diagram: Electrode Polishing Protocol
Step-by-Step Methodology:
- Surface Preparation: Affix an adhesive-backed polishing cloth to a stiff, flat surface (e.g., a glass plate). Ensure the surface is clean and level.
- Slurry Application: Dispense a small volume (approximately a 3 mm spot) of the appropriate alumina slurry onto the center of the polishing cloth.
- Polishing Motion: Hold the electrode perpendicular to the polishing surface. Using gentle pressure, polish the electrode in a figure-8 pattern while slowly rotating the electrode body. Continue for 5-10 minutes per slurry grade.
- Rinsing: After each polishing step, thoroughly rinse the electrode surface with distilled water to remove all alumina residue.
- Ultrasonication (Optional but Recommended): Place the electrode in an ultrasonication bath filled with distilled water for 1-5 minutes to dislodge any particles trapped in microscopic surface features. Caution: Do not submerge the entire electrode assembly if it is not waterproof.
- Progression: Always proceed from the largest to the smallest abrasive particle size (e.g., 5 μm → 0.3 μm → 0.05 μm) to achieve a mirror-like finish.
What chemical methods are effective for cleaning electrodes?
Chemical cleaning utilizes solvents or reactive solutions to dissolve or oxidize fouling layers. The optimal method depends on the electrode material and the nature of the contaminant.
Experimental Protocol: Screen-Printed Electrode Cleaning Evaluation
Principle: A study systematically evaluated the efficiency of different chemical cleaning methods for screen-printed electrodes (SPEs) by measuring the reduction in polarization resistance (Rₚ) using Electrochemical Impedance Spectroscopy (EIS) [10].
Research Reagent Solutions & Materials:
| Item | Function |
|---|---|
| Acetone | Organic solvent effective for removing organic contaminants and grease. |
| Ethanol | Polar solvent for rinsing and removing certain biological contaminants. |
| Hydrogen Peroxide (H₂O₂) | Oxidizing agent that breaks down organic contaminants through radical formation. |
| Phosphate Buffered Saline (PBS) | Electrolyte solution for performing electrochemical cleaning cycles. |
Data Summary: Cleaning Efficiency for Different Electrode Materials
The table below presents quantitative data on the efficiency of various cleaning methods for gold and platinum screen-printed electrodes, as measured by the percentage reduction in polarization resistance (Rₚ) [10].
| Cleaning Method | Gold Electrode (% Δ Rₚ) | Platinum Electrode (% Δ Rₚ) |
|---|---|---|
| Acetone | 35.33% | 49.94% |
| Ethanol | 44.50% | 81.68% |
| H₂O₂ Solution | 47.34% | 92.78% |
| Electrochemical (CV cycles) | 3.70% | 67.96% |
Conclusions from the Data:
- Hydrogen Peroxide was the most effective chemical treatment for both gold and, especially, platinum electrodes, indicating its potency in removing surface contaminants that contribute to resistance.
- Electrochemical Cleaning (involving multiple cyclic voltammetry cycles at low scan rates) was highly effective for platinum but showed minimal effect on gold under the tested conditions.
- The study concluded that a combination of H₂O₂ treatment followed by electrochemical CV cycles provided the most significant improvement to the electrode surface [10].
How can I prevent or mitigate electrode fouling during experiments?
Preventing fouling is often more efficient than cleaning a fouled electrode. Mitigation strategies can be categorized into operational parameters and system design modifications.
Operational Strategies:
- Optimize Applied Potential/Current: Controlling the anode potential in electro-oxidation can prevent reactions that lead to polymer film formation. Similarly, optimizing current density in electrocoagulation minimizes faradaic losses and excessive passivation [6] [7].
- Polarity Reversal: Periodically switching the polarity of the anode and cathode in an electrocoagulation system can help dissolve forming passivation layers and prevent their buildup [8].
- Introduce Chloride Ions: The presence of chloride ions (Cl⁻) can significantly mitigate electrode fouling. At high anode potentials, chloride is oxidized to active chlorine species (e.g., Cl•, Cl₂), which prevent the formation of polymeric films [7]. In electrocoagulation, chloride ions can help suppress oxide film layers [6] [8].
System Design Strategies:
- Electrode Material and Design: Using perforated electrodes or optimizing electrode spacing can enhance mass transfer and reduce solid precipitation on the surface [6]. Designing new electrode materials with anti-fouling properties is an area of active research [8].
- Pre-treatment of Sample: For complex water matrices like tannery wastewater, pre-treatment with processes like electrocoagulation can remove a significant portion of the foulants (e.g., organic matter, colloids) before they reach the primary electrode, drastically reducing the fouling potential for subsequent treatment steps [11].
- Coupling Processes: Combining electrocoagulation with other processes like electro-Fenton or ultrasound has been shown to enhance contaminant degradation and reduce fouling [6] [8].
Diagram: Integrated Fouling Mitigation Strategies
Passivation is a critical phenomenon in electrochemistry where a surface becomes "passive" or less affected by environmental factors due to the formation of a protective layer. In the context of working electrodes, this often manifests as an undesirable blockage that can hinder redox reactions, increase circuit resistance, and compromise experimental data. This guide provides troubleshooting and methodological support for researchers dealing with electrode passivation.
Frequently Asked Questions (FAQs)
1. What is electrode passivation and why is it a problem in electrochemistry? Passivation is the formation of a protective, often non-conductive layer on an electrode surface during experiments. This layer, which can be a metal oxide, a polymer, or other reaction products, blocks active sites on the working electrode. This leads to increased resistance, interferes with electron transfer, and can cause a decay in current response over time, reducing the accuracy and reproducibility of electrochemical measurements [12].
2. I am using TEMPO derivatives in flow battery research. Why is my electrode performance degrading? Research indicates that during the electrooxidation of 4-hydroxy-TEMPO, a polymeric-type layer composed of 4-hydroxy-TEMPO-like subunits can form on the electrode surface. This layer passivates the electrode and is not typically observed with unmodified TEMPO. The extent of this passivation is dependent on operational parameters like voltage scan rate and analyte concentration [13].
3. How can I mitigate or remove passivation from my working electrode? Several strategies can be employed:
- Mechanical Polishing: Regular polishing with alumina slurry can remove adsorbed layers and refresh the electrode surface [1].
- Polarity Reversal: In some systems, like electrocoagulation with aluminum electrodes, periodically reversing the current polarity can effectively reduce passivation layer buildup [14].
- Ultrasonic Cleaning: Using an ultrasonication bath after polishing can help dislodge any residual particles or weakly adsorbed species [1].
4. What is the difference between desired passivation and undesirable "fouling"? Desired passivation is an intentional process to protect a material from its environment, such as the chromium oxide layer on stainless steel that prevents rust [12] [15]. Undesirable passivation, often called "fouling" in an electrochemical context, is the accidental formation of blocking layers during an experiment, which interferes with the intended measurements or application [12] [14].
5. Can my experimental conditions contribute to electrode passivation? Yes, the conditions of your experiment are often key factors. The concentration of your redox species, voltage scan rates, the composition of your electrolyte, and the presence of specific ions can all influence the rate and extent of passivation. Studying materials at conditions relevant to their final application is crucial to identify these issues [13] [14].
Troubleshooting Guides
Problem: Gradual Current Drop During Cyclic Voltammetry
Potential Cause: Progressive passivation of the working electrode surface by reactants, products, or impurities.
Steps to Resolve:
- Inspect and Clean: Remove the electrode and inspect the surface. Clean it following an aggressive cleaning or complete re-polish protocol ( [1] and table below).
- Validate System: Test the freshly polished electrode in a well-known redox couple (e.g., Potassium Ferricyanide) to confirm its performance has been restored.
- Modify Method: If passivation recurs, consider adjusting your experimental parameters. This could include reducing the concentration of the passivating species, modifying the potential window, or adding a brief conditioning or cleaning step between scans.
Problem: High Background Noise and Unstable Baseline
Potential Cause: Incomplete or non-uniform passivation layer, or the presence of a conductive but poorly adhered film on the electrode surface.
Steps to Resolve:
- Systematic Polishing: Perform a multi-step polishing regimen, finishing with the finest alumina grit (0.05 µm) to ensure a smooth, uniform surface [1].
- Ultrasonic Rinse: After polishing, rinse the electrode in an ultrasonic bath with distilled water for 1-5 minutes to remove any embedded alumina particles that could cause noise [1].
- Check Electrolyte: Ensure your electrolyte solution is clean and free of contaminants. Filter if necessary.
Experimental Protocols for Electrode Maintenance
Detailed Working Electrode Polishing and Cleaning Procedure
Maintaining a clean, reproducible electrode surface is the first line of defense against passivation and is fundamental to reliable data. The following protocols, adapted from established guides, are categorized by the level of cleaning required [1].
Summary of Polishing Protocols
| Protocol | Grit Sequence | Typical Use Case | Key Steps |
|---|---|---|---|
| Routine Cleaning | 0.05 µm Alumina | Daily touch-up; gentlest cleaning. | Polish with 0.05 µm alumina in a figure-8 pattern, rinse, and optional ultrasonication. |
| Periodic Cleaning | 0.3 µm → 0.05 µm Alumina | Several times per week; more aggressive surface renewal. | Polish sequentially with 0.3 µm and then 0.05 µm alumina, with rinsing between steps. |
| Aggressive Cleaning | 5 µm → 0.3 µm → 0.05 µm Alumina | Contaminated surfaces or visible adsorbed material. | Three-step polish with 5 µm (on Nylon pad), 0.3 µm, and 0.05 µm alumina. |
| Complete Re-polish | 600 grit SiC → Aggressive Cleaning | Major surface damage; removes 250-500 µm of material. | Start with 600 grit silicon carbide paper, then follow the aggressive cleaning protocol. Use sparingly. |
Materials Required (The Scientist's Toolkit)
- Alumina Slurry Suspensions: 5 µm, 0.3 µm, and 0.05 µm particle sizes. Function: Abrasive for leveling and refining the electrode surface [1].
- Silicon Carbide Abrasive Paper: 600 grit. Function: For initial, aggressive material removal on damaged electrodes [1].
- Micropolishing and Nylon Polishing Pads: Function: A flat, adhesive-backed surface to hold the abrasive slurries [1].
- Deionized (DI) or Distilled Water: Function: To rinse away abrasive particles and contaminants without leaving residues [1].
- Ultrasonication Bath: Function: Uses cavitation to dislodge stubborn particles from the electrode surface [1].
Step-by-Step Methodology for Aggressive Cleaning This is the recommended starting point for addressing passivation.
- Preparation: Affix a Nylon polishing pad to a stiff, flat surface (e.g., a glass plate).
- Coarse Polish: Dispense a small spot (~3 mm) of 5 µm alumina slurry onto the pad. Polish the electrode face using a gentle figure-8 pattern while slowly rotating the electrode shaft. Continue for 5-10 minutes.
- Rinse: Thoroughly rinse the electrode with DI water to remove all 5 µm alumina particles.
- Intermediate Polish: Switch to a micropolishing cloth with 0.3 µm alumina slurry. Repeat the figure-8 polishing motion for several minutes.
- Rinse: Rinse again with DI water.
- Fine Polish: On a clean area of a micropolishing cloth, use the 0.05 µm alumina slurry for the final polish.
- Final Rinse and Ultrasonication: Rinse with DI water. Suspend only the electrode tip in an ultrasonic bath filled with DI water for 1-5 minutes to remove any final particles.
- Dry: Gently dry the electrode surface. It is now ready for use.
Electrode Cleaning Workflow
Advanced: Mechanisms and Case Studies
Passivation Mechanism During 4-hydroxy-TEMPO Electrooxidation
Recent investigations into nitroxide-radical molecules like 4-hydroxy-TEMPO, relevant for flow batteries, have uncovered a specific passivation behavior. A combination of surface microscopy, X-ray photoelectron spectroscopy, and quartz-crystal gravimetry confirmed that oxidation leads to the formation of a polymeric film over the electrode. This film is composed of 4-hydroxy-TEMPO-like subunits and acts as a blocking layer. The study highlights that molecular design for higher solubility (e.g., adding the -OH group) can introduce unintended reactivity, leading to passivation. Evidence also suggests the process may not be fully permanent, with observations of an "incomplete passivation" and a "self-cleaning" process under certain conditions [13].
Passivation from TEMPO Electrooxidation
Depassivation via Polarity Reversal in Electrocoagulation
Electrode passivation is a major challenge in electrocoagulation (EC) for wastewater treatment, where it lowers Faradaic efficiency. Research has shown that switching from direct current (DC) to polarity reversal (PR) mode can serve as an effective in situ depassivation technique. For aluminum electrodes, PR was found to reduce surface layer buildup, convert the insulating Al₂O₃ layer into porous Al(OH)₃, and enhance dye removal efficiency. Interestingly, the effectiveness of this strategy is highly dependent on the electrode material, as the same PR technique was detrimental to Faradaic efficiency when using iron electrodes [14]. This case study underscores that mitigation strategies must be tailored to the specific electrochemical system.
Troubleshooting Guides
Why is my voltammetry data inconsistent between experiments?
Problem: Unreliable or shifting voltammetry results, such as changing peak currents or potentials, often stem from a contaminated or poorly prepared electrode surface. A dirty electrode can cause poor reproducibility, a significant issue in electrochemical research [16] [2].
Solutions:
- Implement a Rigorous Cleaning Protocol: Establish and consistently follow a validated cleaning procedure before each experiment. The effectiveness of different methods (electrochemical, chemical, mechanical) varies by electrode material [3] [10].
- Polish the Electrode Surface: For solid electrodes like glassy carbon, mechanical polishing with alumina slurry on a microcloth pad can regenerate a clean, uniform surface. A robotic study found that 120 seconds of polishing generally restored a corroded glassy carbon electrode, though the polishing pattern (figure-eight vs. circular) was less critical than consistent application [2].
- Verify Cleaning Efficacy: Use a standard redox probe like Potassium Ferricyanide/Ferrocyanide ([Fe(CN)₆]³⁻/⁴⁻) to check your electrode. A clean electrode will show a well-defined, stable cyclic voltammogram with the expected peak separation [3].
Why are my current densities lower than expected, or why is the signal noisy?
Problem: Reduced current or a noisy signal can indicate a passive layer or adsorbed impurities on the electrode surface, which impede electron transfer.
Solutions:
- Identify and Eliminate Impurity Sources: Electrolyte purity is critical. Impurities present at part-per-billion levels can substantially alter the electrode surface and interfere with measurements. Use high-purity reagents and consider cleaning protocols for your electrochemical cell [16].
- Employ Electrochemical Cleaning: For certain electrodes, like screen-printed gold, applying multiple cycles of cyclic voltammetry in a suitable cleaning solution (e.g., H₂O₂ and HClO₄) can effectively remove organic contaminants and stabilize the surface [3].
- Inspect for In-Situ Contamination: Be aware of impurities generated during the experiment. For example, dissolution of a platinum counter electrode can accidentally contaminate the system when testing "platinum-free" electrocatalysts [16].
How can I be sure my electrode cleaning method is effective?
Different cleaning methods yield different results. The table below summarizes findings from studies on screen-printed electrodes to help you select an appropriate method [3] [10].
| Cleaning Method | Electrode Type | Key Outcome | Recommendation |
|---|---|---|---|
| H₂O₂ + HClO₄ (Electrochemical) | Screen-printed Gold (SPGE) | Effectively eliminated surface interference (dark spots), stabilized the surface, and allowed correct DNA probe deposition [3]. | Most effective method tested for gold SPGEs in a biosensing context [3]. |
| H₂O₂ (Solution) | Gold & Platinum SPGE | Significant reduction in polarization resistance (Rp): 47.34% for Au, 92.78% for Pt [10]. | A very effective chemical method for improving the electrode surface [10]. |
| Ethanol (Solution) | Gold & Platinum SPGE | Reduced polarization resistance (Rp): 44.50% for Au, 81.68% for Pt [10]. | An effective organic solvent treatment [10]. |
| Acetone (Solution) | Gold & Platinum SPGE | Reduced polarization resistance (Rp): 35.33% for Au, 49.94% for Pt [10]. | A less effective but still common solvent treatment [10]. |
| Multiple CV Cycles (Low Scan Speed) | Gold & Platinum SPGE | The most important reduction in polarization resistance was observed when combined with H₂O₂ treatment [10]. | A key component of an effective cleaning protocol for these electrodes [10]. |
Detailed Experimental Protocol: Electrochemical Cleaning for Screen-Printed Gold Electrodes
This protocol is adapted from research investigating cleaning methods for mutation detection. It was found to be the most effective for removing manufacturing residues and providing a uniform, bio-active surface [3].
- Reagent Preparation: Prepare a cleaning solution of 3% v/v H₂O₂ and 0.1 M HClO₄.
- Application: Pipette 150 µL of the cleaning solution onto the screen-printed gold electrode (SPGE).
- Electrochemical Cleaning: Perform Cyclic Voltammetry (CV) under the following conditions:
- Scan Rate: 100 mV/s
- Potential Range: -700 mV to +2000 mV (vs. the integrated Ag/AgCl reference)
- Number of Cycles: 10
- Rinsing: Carefully wash the electrode with copious amounts of Milli-Q water after the CV cycles.
- Surface Activation (Optional): To further stabilize and activate the gold surface, perform 10 additional CV cycles in a standard electrolyte (e.g., PBS buffer) from -400 mV to +500 mV at a scan rate of 50 mV/s.
Workflow for Electrode Cleaning and Validation
Frequently Asked Questions (FAQs)
What is the real-world impact of poor electrode cleaning on research?
Poor electrode preparation is a significant contributor to the broader reproducibility crisis in science [16]. When results are not based on a clean, well-defined electrode surface, they become difficult to reproduce, even by the original researcher. This lack of reproducibility undermines trust in published data, delays scientific progress, and wastes resources. In clinical or drug development settings, it can lead to faulty diagnostic assays or incorrect conclusions about a drug's electrochemical behavior [3] [17].
Is the "figure-eight" polishing pattern really necessary?
A recent automated study challenges this common laboratory belief. A robotic system polishing glassy carbon electrodes found that the polishing pattern (figure-eight, circular, linear) did not significantly affect the final polishing quality within the tested parameters. The key was the consistent application and duration of polishing. This suggests that consistent technique may be more important than the specific pattern used [2].
My electrode is "clean," but my data is still inconsistent. What else should I check?
Electrode cleanliness is just one part of experimental reproducibility. You should also investigate:
- Electrolyte Purity: As highlighted in a metrology perspective, electrolytes are often in enormous excess relative to the electrode interface. Trace impurities can poison catalyst sites or participate in competing reactions [16].
- Reference Electrode Stability: Ensure your reference electrode is stable, chemically compatible, and correctly positioned using a Luggin-Haber capillary to minimize errors in reported potential [16].
- Instrumentation and iR Compensation: Understand the limits of your potentiostat and correctly apply iR compensation when measuring material properties, as uncompensated resistance can distort your data [16].
The Scientist's Toolkit: Key Research Reagents & Materials
| Item | Function/Brief Explanation |
|---|---|
| Alumina (Al₂O₃) Slurry | An abrasive suspension for mechanical polishing. Used in sequential grit sizes (e.g., 5µm, 0.3µm, 0.05µm) to progressively smooth and clean the electrode surface [1]. |
| Microfiber Polishing Cloth | A soft, adhesive-backed cloth used with alumina slurry for the final stages of polishing to achieve a mirror finish [1]. |
| Nylon Polishing Pad | A stiffer pad used with larger grit alumina for more aggressive polishing to remove significant contamination or damage [1]. |
| Potassium Ferricyanide/Ferrocyanide | A standard redox probe ([Fe(CN)₆]³⁻/⁴⁻) used to validate electrode cleanliness and function via Cyclic Voltammetry. A reversible system indicates a clean surface [3]. |
| Hydrogen Peroxide (H₂O₂) & Perchloric Acid (HClO₄) | Chemical agents used in electrochemical cleaning protocols to oxidize and remove organic contaminants from electrode surfaces [3]. |
| Screen-Printed Electrodes (SPEs) | Disposable, miniaturized electrodes that integrate working, reference, and counter electrodes. Require pre-treatment to ensure performance and reproducibility [3] [10]. |
FAQs: Assessing Electrode Surface Cleanliness
What are the primary indicators of a properly cleaned electrode surface?
A properly cleaned electrode surface is primarily indicated by its electrochemical performance and physical characteristics. Key indicators include a stable baseline in cyclic voltammetry, well-defined redox peaks for standard probes like ferrocyanide, and a high signal-to-noise ratio. Physically, a mirror-like finish on mirror-finish electrodes or a uniform, scratch-free surface under magnification is desirable [4]. Contamination is often signaled by sluggish response, drifting signals, longer titration times, smaller potential jumps, or a worse-shaped titration curve [18].
How can I quantitatively measure the cleanliness of my electrode?
You can quantitatively measure electrode cleanliness using several methods:
- Electrochemical Activity: Perform cyclic voltammetry (CV) in a standard solution (e.g., 0.01 M K₄[Fe(CN)₆] with electrolyte). A clean electrode shows a characteristic, stable redox peak pair. The peak separation (ΔEp) should be small (close to 59 mV for a reversible system), and the peak current integral can be used as a quantitative measure of surface quality, with a lower integral sometimes indicating reduced capacitance from surface corrosion [2].
- Chronological Monitoring: Track parameters like titration duration and potential jump over time during a standardized test. A consistent, sharp endpoint indicates a clean electrode, while progressive deterioration suggests contamination or fouling [18].
My electrode is clean but performance is poor. What could be wrong?
A freshly polished electrode often requires an equilibration period before stable performance is achieved. One study on pulsed amperometric detection found that abrasive polishing temporarily alters electrode response, requiring 3 to 5 hours of delay before stable peak response is obtained [19]. If performance remains poor after equilibration, potential issues include:
- Adsorbed Polishing Residues: Inadequate rinsing after polishing can leave abrasive particles (e.g., alumina, diamond) on the surface [1] [4].
- Surface Damage: Overly aggressive polishing can create deep scratches or alter the surface morphology [4].
- Chemical Contamination: The electrode or polishing materials may have been exposed to oils, greases, or other contaminants [20].
Troubleshooting Guide: Common Electrode Cleaning Issues
| Problem | Possible Causes | Recommended Solutions |
|---|---|---|
| Sluggish Response / Drifting Signal | • Adsorbed contaminants (proteins, organics)• Blocked diaphragm (reference electrode)• Old or contaminated electrolyte [18] | • Perform chemical cleaning (e.g., pepsin/HCl for proteins) [18]• Replace reference electrolyte and clean diaphragm [18]• Use ultrasonication in distilled water [1] |
| Unstable Baseline in CV | • Incomplete cleaning• Post-polish equilibration time too short [19]• Electrical interference | • Extend polishing time or use more aggressive protocol [1]• Allow 3-5 hours for electrode to equilibrate after polishing [19]• Ensure proper grounding and shielding |
| Reduced Peak Current / Small Potential Jump | • Fouled or poisoned surface• Non-specifically adsorbed species [1]• Worn-out electrode surface | • Perform an aggressive cleaning sequence (e.g., 5 μm → 0.3 μm → 0.05 μm alumina) [1]• Use electrode-specific chemical treatments (e.g., nitric acid for amalgam electrodes) [4] |
| Visible Residue or Discoloration | • Precipitated salts or reaction products• Oxidized surface• Polymer films | • Clean with appropriate solvents (e.g., dilute ammonium hydroxide for chlorides) [18]• Apply electrochemical cleaning potentials• Use a complete re-polish starting with sandpaper (for major damage) [1] |
Quantitative Metrics for Surface Cleanliness
The following table summarizes key quantitative metrics used to define and validate a clean electrode surface, drawing parallels from both electrochemistry and regulated industries.
| Metric Category | Specific Metric | Description & Target Value | Applicable Analytical Method |
|---|---|---|---|
| Electrochemical Performance | Peak Separation (ΔEp) | For a reversible redox couple (e.g., Fe(CN)₆³⁻/⁴⁻), ΔEp should be close to the theoretical 59 mV [2]. | Cyclic Voltammetry (CV) |
| Current Integral / Capacitance | The integrated current in a CV scan reflects surface area and capacitance; a polished surface shows a controlled, stable value [2]. | Cyclic Voltammetry (CV) | |
| Potential Jump at Endpoint | In titration, a large, sharp potential change at the equivalence point indicates a responsive, clean electrode [18]. | Potentiometric Titration | |
| Physical & Chemical Residues | Ionic Contamination | Measures soluble salts (chlorides, sulfates). Limits are set in µg/cm². Target depends on application sensitivity [20]. | Conductivity Meter, Ion Chromatography [20] [21] |
| Particulate Contamination | Quantifies dust, fibers, or abrasive particles. Visually assessed against charts or by tape test [20]. | Visual Inspection, Microscopy, Dust Tape Test [20] | |
| Organic Residue | Detects residual organic compounds from samples or handling. Limits in ppm or µg/cm² [21]. | Total Organic Carbon (TOC), HPLC [21] | |
| Visual Inspection | Visible Residue Limit (VRL) | The level below which a residue is not visible to a trained inspector. Used as a pass/fail limit test [21]. | Visual Inspection under controlled lighting [21] |
Experimental Protocol: Validating Electrode Cleanliness via Cyclic Voltammetry
This standard protocol assesses electrode cleanliness and activity using the ferrocyanide redox couple.
Principle: A clean, electrochemically active electrode will facilitate the rapid, reversible electron transfer of the Fe(CN)₆³⁻/⁴⁻ couple, resulting in cyclic voltammograms with a small peak separation and symmetric waves.
Materials & Reagents:
- Potentiostat and three-electrode cell
- Working Electrode (to be tested)
- Counter Electrode (Platinum wire)
- Reference Electrode (e.g., Ag/AgCl)
- Standard Solution: 0.01 M Potassium ferrocyanide (K₄[Fe(CN)₆]), 0.5 M Sodium sulfate (Na₂SO₄), and 0.25 M Acetate buffer in distilled water [2]
Procedure:
- Setup: Place the standard solution in the electrochemical cell. Insert the clean working, reference, and counter electrodes.
- Instrument Parameters: Configure the potentiostat for Cyclic Voltammetry.
- Voltage Window: -0.1 V to +0.5 V (vs. Ag/AgCl) or as appropriate for your setup [2].
- Scan Rate: 50-100 mV/s.
- Number of Cycles: 3-5.
- Measurement: Initiate the scan and record the voltammograms.
- Data Analysis: For the third cycle, measure the anodic peak potential (Epa) and cathodic peak potential (Epc). Calculate the peak separation (ΔEp = Epa - Epc). Also, inspect the shape of the curves for symmetry.
Interpretation:
- Clean Electrode: A ΔEp value close to 59 mV and symmetric anodic and cathodic peaks indicate a clean, electrochemically active surface with fast electron transfer kinetics.
- Contaminated/Damaged Electrode: A large ΔEp (> 70-100 mV), suppressed peak currents, or distorted peak shapes indicate a fouled, poorly cleaned, or damaged electrode surface.
The Scientist's Toolkit: Essential Reagents & Materials
| Item | Function & Purpose |
|---|---|
| Alumina (Al₂O₃) Polishing Slurries | A fine abrasive for final electrode polishing. Available in different particle sizes (e.g., 1.0, 0.3, and 0.05 μm) for progressively finer finishes to create a mirror-like surface [1] [4]. |
| Diamond Polishing Paste | A harder abrasive used for intermediate polishing of hard materials like glassy carbon, effectively removing scratches from previous, coarser steps [4]. |
| Silicon Carbide Abrasive Paper | A coarse abrasive paper (e.g., 600 grit) used for the initial, aggressive re-shaping of an electrode to remove major damage or deep pits [1]. |
| Potassium Ferrocyanide | A standard redox probe used in cyclic voltammetry to quantitatively test electron transfer kinetics and validate the electrochemical activity of a freshly polished electrode surface [2]. |
| Electrode Cleaning Solvents | Specific chemical solutions for removing stubborn contaminants. Examples include thiourea in HCl for silver sulfide, pepsin in HCl for proteins, and dilute ammonium hydroxide for chloride salts [18]. |
| Microfiber & Nylon Polishing Cloths | Specialized pads and cloths used as a backing surface for abrasives. Using a dedicated, flat pad for each abrasive grade prevents cross-contamination [1]. |
Step-by-Step Protocols: Mastering Mechanical Polishing and Modern Cleaning Techniques
Standard Mechanical Polishing Protocol for Glassy Carbon Electrodes
This technical guide is formulated within the broader research context of establishing reproducible and reliable working electrode polishing and cleaning procedures. The performance of a glassy carbon electrode (GCE) is critically dependent on its surface condition, making standardized mechanical polishing a foundational requirement for generating trustworthy electrochemical data in research and drug development [22]. This document provides a detailed, step-by-step protocol for the mechanical polishing of GCEs, accompanied by troubleshooting guidance and a catalog of essential materials.
Standard Step-by-Step Polishing Protocol
The following procedure outlines the standard method for repolishing a glassy carbon electrode to restore its electroactive surface. The goal is to achieve a pristine, mirror-finish surface that is free of contaminants and scratches.
Preliminary Cleaning
Before polishing, remove any loose debris from the electrode surface. Rinse the electrode thoroughly with deionized or distilled water, followed by a rinse with methanol or ethanol. Gently wipe the surface dry with a clean, lint-free lab tissue [23] [22] [24].
Polishing Motion and Technique
Hold the electrode perpendicular to the polishing surface. Apply gentle, even pressure and move the electrode in a smooth figure-eight pattern or a circular motion. Periodically rotate the electrode 90 degrees in your hand to ensure uniform polishing and prevent uneven wear [23] [25] [1]. Avoid excessive pressure, as this can cause deep scratches or compromise the seal between the carbon and the insulating sheath [4].
Multi-Step Abrasive Polishing
A multi-step approach using progressively finer abrasives is required to obtain a smooth, mirror-like finish. The process is summarized in the diagram below, which illustrates the decision-making workflow for selecting the appropriate polishing regimen.
Step 1: Rough Polishing (If Required)
For electrodes with significant scratches, visible damage, or heavy contamination, begin with a rough polishing step.
- Abrasive: Use 600-grit silicon carbide paper or a 5 μm alumina slurry on a nylon polishing pad [1].
- Procedure: Moisten the pad with water, polish for 30 seconds to 2 minutes, and rinse thoroughly with distilled water [4] [1].
Step 2: Intermediate Polishing
This step removes scratches from the rough polishing and further smoothens the surface.
- Abrasive: Use a 1.0 μm or 0.3 μm alumina slurry on a microcloth pad [22] [1] [24].
- Procedure: Apply the slurry to a moistened pad. Polish for 1-2 minutes, then rinse the electrode extensively with distilled water to remove all abrasive particles [23] [1].
Step 3: Final Polishing (Mirror Finish)
This final step produces the ultra-smooth surface required for reproducible electron transfer.
- Abrasive: Use a 0.05 μm alumina slurry on a fresh, clean microcloth pad [22] [1] [24].
- Procedure: Apply the slurry to a moistened pad. Polish for 1-2 minutes until a mirror finish is achieved [4].
Post-Polishing Cleaning
After the final polishing step, it is crucial to remove all residual alumina particles.
- Rinse: Rinse the electrode surface copiously with distilled water from a squeeze bottle [23] [1].
- Sonicate: Sonicate the electrode in distilled water for 1-5 minutes using a low-power ultrasonic cleaner (≤150 W) to dislodge any adhered particles. Do not sonicate for extended periods, as overheating can damage the electrode [23] [1] [24].
- Final Rinse: Rinse again with methanol or ethanol to remove organic residues and promote drying. Gently wipe dry with a clean lab tissue [23] [22]. Allow the electrode to air dry completely at room temperature. Do not use heat [23].
Performance Validation
After polishing and cleaning, validate the electrode's performance by running cyclic voltammetry (CV) in a standard solution such as 1 mM potassium ferricyanide in 1 M KCl. A well-polished electrode will show a symmetrical, reversible redox peak with a peak separation (ΔEp) close to the theoretical value of 59 mV [22]. A visually shiny surface is not a reliable indicator of electrochemical activity.
Tiered Polishing Approach & Material Selection
The standard protocol can be adapted based on the level of contamination. The following table outlines a tiered approach to electrode maintenance.
Table 1: Tiered Polishing Approach for Glassy Carbon Electrodes
| Polishing Tier | Recommended Use Case | Procedure Sequence | Key Considerations |
|---|---|---|---|
| Routine Cleaning [1] | Daily touch-up; minimal contamination | Final polish only (0.05 µm alumina) | Gentlest method; preserves electrode material. |
| Periodic Cleaning [1] | Weekly/bi-weekly use; gradual response decrease | Intermediate (0.3 µm) → Final (0.05 µm) | Balances effectiveness with material removal. |
| Aggressive Cleaning [1] | Heavy contamination; adsorbed species | Rough (5 µm) → Intermediate (0.3 µm) → Final (0.05 µm) | More abrasive; use only when necessary. |
| Complete Re-polish [1] | Visible scratches or major damage | SiC Paper (600-grit) → All alumina steps | Removes significant material; shortens electrode lifespan. |
The success of the protocol depends on using the correct materials. The table below lists the essential reagents and tools required.
Table 2: Research Reagent Solutions and Essential Materials for GCE Polishing
| Item Category | Specific Examples & Specifications | Function / Purpose |
|---|---|---|
| Abrasive Slurries | Alumina (γ-Al₂O₃) powders: 5.0 µm, 1.0 µm, 0.3 µm, 0.05 µm [1] [24]; Diamond slurries (e.g., 1-µm) [23] | Physical removal of surface material and contaminants. Progressively finer grits create a smoother finish. |
| Polishing Substrates | Microcloth pads (soft, felt-like) [23] [1]; Nylon pads (white, woven) [23] [1]; Silicon Carbide (SiC) Paper (600-grit) [1] | Provides a flat, abrasive surface for polishing. Different textures are optimal for different abrasive types. |
| Cleaning Solvents | Deionized/Distilled Water [23]; Methanol or Ethanol (Lab grade) [22] [24]; Acetone [4] | Rinsing and removing polishing residues. Methanol/acetone is particularly useful for oil-based diamond slurries [23]. |
| Supporting Equipment | Heavy glass or flat polymer plate [1]; Low-power Ultrasonic Cleaner (≤150 W) [23]; Squeeze bottles [23]; Lint-free tissues [23] | Ensures a flat polishing surface, removes adhered particles, and enables safe handling. |
Troubleshooting and Frequently Asked Questions (FAQs)
FAQ 1: I just polished my electrode and it looks shiny, but my CV still shows poor reversibility. What went wrong?
- Cause: The most likely cause is residual alumina nanoparticles adsorbed onto the electrode surface, which inhibit electron transfer. A shiny appearance does not guarantee electrochemical activity [22].
- Solution: Ensure thorough sonication after the final polishing step. After sonication in water, perform a final electrochemical activation by cycling the potential in a clean supporting electrolyte (e.g., 0.5 M H₂SO₄) or in your measurement buffer. Always validate with a known redox couple like ferricyanide [22].
FAQ 2: How can I prevent deep scratches on my electrode surface during polishing?
- Cause: Applying excessive pressure, using a contaminated polishing pad, or skipping grit sizes can cause deep scratches.
- Solution: Use a light, even pressure during polishing. Always use a dedicated pad for each abrasive grade to prevent cross-contamination with larger particles [23]. Follow the progressive sequence from coarser to finer abrasives without skipping steps. Ensure the polishing pad is properly adhered to a hard, flat surface like a glass plate to maintain a uniform electrode surface [23] [4].
FAQ 3: My electrode is heavily contaminated with polymerized organic films. Will mechanical polishing alone be sufficient?
- Cause: Some experiments can form strongly adherent films that are difficult to remove mechanically.
- Solution: For stubborn organic contamination, a chemical or electrochemical cleaning step may be necessary prior to polishing. A brief rinse with a mild acid or base (e.g., 0.1 M HNO₃ or NaOH) can help [24]. In severe cases, electrochemical cleaning within a suitable potential window in an acidic or basic solution can oxidize or reduce the contaminants from the surface. After chemical/electrochemical treatment, proceed with the standard mechanical polishing protocol.
FAQ 4: How often should I polish my glassy carbon electrode?
- Answer: There is no fixed schedule. The frequency depends on the application, the analytes, and their concentration. A good practice is to monitor the electrode's response regularly. Polish the electrode when you observe a gradual decrease in peak current, an increase in peak separation, or a noisy baseline that cannot be resolved by a simple methanol rinse [23] [22]. Over-polishing should be avoided as it unnecessarily removes electrode material and shortens its usable lifetime [1] [24].
Proper polishing and cleaning of working electrodes are critical steps in electrochemical research to ensure reproducible, reliable, and accurate data. Surface contaminants, oxide layers, and physical imperfections can significantly degrade performance by inhibiting electron transfer, causing signal drift, and introducing unwanted noise. This guide provides material-specific protocols for maintaining platinum, gold, and specialty electrodes, framed within the broader context of methodological research on electrode pretreatment.
Frequently Asked Questions (FAQs)
FAQ 1: What are the most common causes of electrode performance degradation?
Electrode performance degradation, often termed "poisoning" or "fouling," can arise from several sources [26]:
- Chemical Adsorption: Elements like sulfur and chlorine can strongly adsorb to electrode surfaces (especially platinum), blocking active sites [26].
- Cation-Induced Degradation: For platinum electrodes, the identity of cations in the electrolyte influences dissolution rates. Smaller cations like Li⁺ can accelerate degradation compared to larger ones like Cs⁺ [27].
- Surface Contamination: Organic residues, adsorbed biological molecules, and impurities from manufacturing (e.g., binder components in screen-printed inks) can foul the surface [3] [10].
- Physical Damage: Scratches or deformation of the soft electrode material (e.g., gold or platinum) from improper handling [26].
- Oxide Formation: The formation of oxide layers on the electrode surface over time and with use [2].
FAQ 2: My electrode produces inconsistent CV results. Could the polishing technique be the cause?
Yes, inconsistent manual polishing is a known source of error. A 2025 study systematically evaluated this using a robotic arm and found that the polishing pattern (figure-eight, circular, linear) did not significantly affect the final polishing quality for glassy carbon electrodes [2]. The key to consistency is the application of a stable, controlled force and a standardized protocol, rather than a specific pattern. Automation can eliminate this variability [2].
FAQ 3: Can I reuse screen-printed electrodes (SPEs), which are often marketed as disposable?
Yes, with proper cleaning, many SPEs can be reused, which is valuable for method development. Research comparing cleaning methods for gold and platinum SPEs found that electrochemical treatments and chemical methods like H₂O₂ can effectively restore the electrode surface, as measured by a significant reduction in polarization resistance (Rp) [10]. However, aggressive cleaning may damage the electrode or insulating layer, so the method should be chosen carefully [3].
Troubleshooting Common Electrode Issues
Table 1: Troubleshooting Common Electrode Problems and Solutions
| Problem | Possible Cause | Recommended Solution |
|---|---|---|
| Sluggish or Non-Linear Response | Surface contamination, passivation layer, or clogged diaphragm (reference electrodes). | Perform mechanical polishing followed by electrochemical cleaning in a suitable supporting electrolyte [1] [10]. For reference electrodes, clean the diaphragm with a recommended solvent [18]. |
| High Background Current | Rough or corroded surface, or adsorbed contaminants. | Repolish the electrode to a mirror finish using progressively finer abrasives (e.g., down to 0.05 µm alumina) [1]. |
| Irreproducible Results Between Polishing | Inconsistent manual polishing technique. | Adopt a standardized protocol with controlled pressure and duration. Consider automated polishing if available [2]. |
| Visible Scratches or Damage | Improper polishing technique or use of overly abrasive slurry. | Begin with a coarser grit (e.g., 5 µm alumina) to remove deep scratches, then progress through finer slurries (0.3 µm, 0.05 µm) [1]. |
| Unstable Potential (Reference Electrodes) | Chloride depletion, contaminated electrolyte, or dried-out glass frit. | Refill with fresh KCl solution, replace contaminated electrolyte, or soak the dried frit in electrolyte [18] [28]. |
Detailed Experimental Protocols
Mechanical Polishing of Solid Electrodes (Gold, Platinum, Glassy Carbon)
This protocol is adapted from standard laboratory practices and recent research on polishing automation [1] [2].
Workflow Overview:
Materials & Reagents:
- Abrasive Slurries: Alumina powder suspensions (5 µm, 0.3 µm, 0.05 µm) [1].
- Polishing Substrates: Nylon polishing pads (for aggressive polishing), microfiber polishing cloths (for fine polishing) [1].
- Flat Surface: A stiff, flat plate (e.g., glass or polymer) [1].
- Ultrasonication Bath: Filled with distilled water.
Step-by-Step Procedure:
- Inspection: Visually inspect the electrode surface. Choose the starting point in the workflow above based on the level of contamination or damage.
- Polishing:
- Affix the appropriate polishing pad to a flat surface.
- Dispense a small spot (~3 mm) of the alumina slurry onto the pad.
- Hold the electrode perpendicular to the pad and apply gentle, consistent pressure.
- Polish the electrode using a figure-eight or circular motion while gently rotating the electrode body. For automated systems, a constant force and predefined pattern are applied [2].
- Duration: 5-10 minutes per step for aggressive cleaning; 2-5 minutes for routine cleaning.
- Rinsing & Ultrasonication:
- After each polishing step, thoroughly rinse the electrode surface with distilled water to remove all alumina particles.
- Optional but recommended: Place the electrode tip in an ultrasonication bath containing distilled water for 1-5 minutes to dislodge any stubborn particles [1].
- Final Rinse: Rinse the electrode with distilled water and dry gently with a lint-free tissue or air dry.
Electrochemical Cleaning of Screen-Printed Gold Electrodes (SPGEs)
This protocol is optimized for regenerating disposable SPGEs for biosensing applications, based on a 2025 study [3].
Workflow Overview:
Materials & Reagents:
- Cleaning Solution: 3% (v/v) H₂O₂ and 0.1 M HClO₄ [3].
- Stabilization Solution: 2.5 mM [Fe(CN)₆]³⁻/⁴⁻ in 0.01 M PBS (pH 7.4) [3].
- Equipment: Potentiostat and screen-printed gold electrodes (SPGEs).
Step-by-Step Procedure:
- Apply Reagent: Pipette 150 µL of the H₂O₂/HClO₄ cleaning solution directly onto the SPGE surface.
- Electrochemical Cleaning: Run 10 cycles of cyclic voltammetry (CV) from -700 mV to +2000 mV (vs. the SPGE's integrated Ag/AgCl reference) at a scan rate of 100 mV/s [3].
- Rinse: Thoroughly rinse the electrode with Milli-Q water to remove the cleaning solution.
- Surface Stabilization: Perform 10 additional CV cycles in the [Fe(CN)₆]³⁻/⁴⁻ probe solution from -400 mV to +500 mV at 50 mV/s to stabilize the surface and verify cleanliness [3].
Comparison of Cleaning Methods for Screen-Printed Electrodes
Table 2: Quantitative Comparison of Cleaning Efficiency for Screen-Printed Electrodes. Data shows percentage reduction in Polarization Resistance (Rₚ), indicating improved surface condition [10].
| Cleaning Method | Reduction in Rₚ for Gold SPE | Reduction in Rₚ for Platinum SPE |
|---|---|---|
| Acetone (Incubation) | 35.33% | 49.94% |
| Ethanol (Incubation) | 44.50% | 81.68% |
| H₂O₂ (Incubation) | 47.34% | 92.78% |
| Electrochemical Method (CV cycles) | 3.70% | 67.96% |
| H₂O₂ + Low-Speed CV Cycles | Most significant Rₚ reduction | Most significant Rₚ reduction [10] |
The Scientist's Toolkit: Key Research Reagents & Materials
Table 3: Essential Materials for Electrode Polishing and Cleaning Protocols
| Item | Function/Benefit | Example Use Case |
|---|---|---|
| Alumina Slurry (0.05 µm) | Fine abrasive for final polishing; creates a mirror finish for reproducible electron transfer kinetics [1]. | Routine cleaning of glassy carbon electrodes [1] [2]. |
| Microfiber Polishing Cloth | Soft substrate for fine polishing slurries; minimizes introduction of deep scratches [1]. | Used with 0.3 µm and 0.05 µm alumina slurries [1]. |
| Nylon Polishing Pad | More aggressive substrate for coarser slurries to remove deeper imperfections [1]. | Used with 5 µm alumina slurry for aggressive cleaning [1]. |
| H₂O₂ / HClO₄ Solution | Electrochemical cleaning reagent; oxidizes and removes organic contaminants from noble metal surfaces [3]. | Regeneration of screen-printed gold electrodes [3]. |
| Potassium Ferricyanide/Ferrocyanide | Redox probe ([Fe(CN)₆]³⁻/⁴⁻) for characterizing electrode surface cleanliness and activity via CV [3]. | Standard method for validating cleaning efficacy and measuring electroactive surface area [3] [2]. |
The Role of Slurries, Pads, and Sonication in Mechanical Polishing
Troubleshooting Guides
Troubleshooting Common Electrode Polishing Issues
This guide addresses frequent problems encountered during the mechanical polishing of working electrodes.
Q1: My electrode is producing inconsistent electrochemical responses. What should I check?
A: Inconsistent responses often stem from surface contamination or inadequate polishing. Follow this systematic approach:
- Inspect Electrode Surface: Visually examine for signs of fouling, contamination, or physical damage [29].
- Re-polish the Electrode: Perform a full polishing sequence. If the surface is contaminated or has adsorbed species, use an aggressive cleaning protocol, starting with a 5 μm alumina slurry on a nylon pad, followed by 0.3 μm and 0.05 μm alumina on a microcloth [1].
- Verify Instrument Calibration: Ensure your potentiostat or other instrumentation is properly calibrated [29].
- Check Experimental Conditions: Confirm that factors like temperature, pH, and electrolyte composition are controlled and appropriate for your experiment [29].
Q2: After polishing, my baseline is noisy and unstable. How can I fix this?
A: An unstable baseline is frequently caused by electrical noise or residual polishing material.
- Minimize Electrical Interference: Use shielding techniques like a Faraday cage and ensure all instrumentation is properly grounded [29].
- Remove Abrasive Residue: After mechanical polishing, thoroughly rinse the electrode with distilled water. For a final clean, rinse the electrode surface in an ultrasonication bath containing distilled water for 1-5 minutes to dislodge any embedded alumina particles [1].
- Inspect for Surface Damage: A pitted or rough surface can also cause noise. If simple cleaning fails, a complete re-polish may be necessary [1].
Q3: I've polished my electrode, but the surface finish isn't smooth. What went wrong?
A: An unsatisfactory finish can result from an incorrect polishing sequence or technique.
- Use a Progressive Polishing Sequence: Never skip grit sizes. A complete sequence for a heavily damaged electrode involves 600 grit SiC paper, followed by 5 μm, 0.3 μm, and finally 0.05 μm alumina slurries [1].
- Apply Consistent Technique: When polishing manually, keep the electrode surface flat against the pad. Use a figure-8 or circular motion while gently rotating the electrode to ensure even material removal [1]. Note that recent automated studies suggest the pattern itself (linear, circular, figure-8) may be less critical than applying constant, even pressure [2].
Troublesguide for Sonication Cleaning
This guide addresses issues specifically related to using sonication for electrode cleaning.
Q1: Sonication doesn't seem to be cleaning my electrode effectively. Why?
A: Ineffective sonication is often due to incorrect setup or parameters.
- Check Probe Placement: For probe sonicators, the tip should be placed centrally, typically no less than 1 inch below the liquid surface and more than halfway from the bottom of the vessel to create optimal fluid flow [30].
- Verify Parameters: The intensity (amplitude) and duration must be sufficient. Higher amplitudes generally provide more intense cleaning but generate more heat. For cleaning electrode surfaces, a series of short pulses (e.g., 30 seconds on/off cycles) can be more effective and prevent overheating than continuous operation [31].
- Confirm Solution Properties: Sonication works best with low-viscosity liquids. If your suspension is too viscous, the ultrasonic energy will not be transmitted effectively [30].
Q2: My electrode surface appears pitted after sonication. What caused this damage?
A: Cavitation damage can occur if the sonication is too aggressive.
- Reduce Power/Amplitude: Lower the amplitude setting on your sonicator to decrease the intensity of cavitation bubbles [30].
- Use Pulse Mode: Switch from continuous mode to pulse mode (e.g., 30 seconds on, 30 seconds off) to allow the solution to cool and reduce sustained exposure to intense energy [31] [30].
- Increase Distance: Ensure the electrode is not placed too close to the tip of the probe, where the ultrasonic energy is most concentrated and powerful [30].
Frequently Asked Questions (FAQs)
Q: What is the proper sequence for polishing a glassy carbon electrode? A: A standard protocol for routine maintenance is a "Periodic Cleaning": first polish with 0.3 μm alumina slurry on a microcloth, followed by a final polish with 0.05 μm alumina slurry on a microcloth. Between each step, rinse thoroughly with distilled water. For a contaminated electrode, start with a more aggressive step using 5 μm alumina on a nylon pad [1].
Q: How important is the polishing pattern (e.g., figure-8 vs. circular) for achieving a uniform surface? A: While the figure-8 pattern is a long-standing manual practice to avoid introducing circular grooves, recent robotic studies indicate that the polishing pattern (linear, circular, figure-8, or complex) may not significantly affect the final polishing quality when consistent, automated pressure is applied [2]. The key is ensuring even, consistent contact across the entire electrode surface.
Q: When should I use sonication versus mechanical polishing for electrode cleaning? A: The methods are complementary. Use mechanical polishing to remove physical damage, corrosion, or deeply embedded contaminants and to redefine the electrode's geometric surface [29] [1]. Use sonication for removing loose particles, adsorbed molecular contaminants, and residual polishing abrasives after mechanical polishing [1] [31]. Sonication is a gentler process that does not abrade the surface.
Q: How do I know when my electrode is properly cleaned and polished? A: Electrochemical testing is the most reliable method. A properly polished electrode should produce a stable baseline and well-defined, reproducible voltammetric peaks in a standard redox probe solution like potassium ferrocyanide. The peak separation (ΔEp) should be close to the theoretical value (59/n mV for a reversible system), and the current response should be consistent across multiple scans [2].
Experimental Protocols & Data
Detailed Methodology: Automated Polishing Performance Evaluation
The following protocol is adapted from a robotic study investigating polishing patterns [2].
1. Objective: To quantitatively evaluate the effect of different mechanical polishing patterns on the restoration of a corroded glassy carbon electrode surface.
2. Materials:
- Electrode: Planar Glassy Carbon Electrode (e.g., BioLogic)
- Polishing Abrasive: 0.05 μm Alumina suspension
- Polishing Substrate: Alumina Polishing Pad (e.g., BASi)
- Electrochemical Cell: Standard 3-electrode system with a pseudo-reference electrode (e.g., Silver wire) and a counter electrode.
- Test Solution: 0.01 M K₄[Fe(CN)₆] analyte, 0.5 M Na₂SO₄ electrolyte, and 0.25 M HOAc/NaOAc buffer.
- Instrumentation: Potentiostat, Robotic Arm (e.g., Franka Emika), XY Polishing Station, Microscope Camera.
3. Procedure:
- Step 1: Induce Corrosion. Apply a high voltage (5 V) to the glassy carbon working electrode for 30 seconds in an appropriate solution to corrode the surface. Validate corrosion via cyclic voltammetry (CV) and microphotography.
- Step 2: Program Polishing Patterns. Implement different polishing motions (e.g., linear, circular, eight-figure, complex Lissajous) on the automated polishing station.
- Step 3: Automated Polishing & Measurement Loop. For each pattern type, run multiple cycles of:
- a. The robot arm positions the electrode over the moving polishing pad for a set duration (e.g., 30 seconds).
- b. The electrode is moved to a washing station for rinsing.
- c. The electrode is moved to the measurement station.
- d. CV measurements are performed (e.g., 5 cycles between -1.0 V to 1.0 V at 500 mV/s).
- Step 4: Data Analysis. Calculate the integral of the CV plot for the last cycle. The integral corresponds to the electrode's capacitance, which serves as a quantitative measure of surface quality, with a lower integral indicating a better surface.
Quantitative Data on Polishing and Sonication Parameters
Table 1: Standard Alumina Slurry Sizes and Their Applications in Electrode Polishing [1]
| Slurry Abrasive Size | Primary Use Case | Polishing Pad Type |
|---|---|---|
| 5.0 μm | Aggressive cleaning for contaminated surfaces or visible damage | Nylon Pad |
| 0.3 μm | Periodic cleaning to refresh electrode surface | Microcloth |
| 0.05 μm | Routine cleaning for a final, mirror-like finish | Microcloth |
Table 2: Exemplary Sonication Parameters for Electrode Cleaning [31]
| Sonicator Type | Key Parameters | Typical Application |
|---|---|---|
| Bath Sonicator (e.g., Diagenode Bioruptor Pico) | 5 cycles (30 sec ON / 30 sec OFF), high power | General cleaning of electrodes post-polishing |
| Probe Sonicator (e.g., Qsonica XL-2000) | 60 pulses total (~0.5 sec each), pausing every 10-12 pulses, power level 2 | Dispersing agglomerated materials; use with caution on delicate surfaces |
Workflow Visualization
Polishing Workflow
The Scientist's Toolkit: Key Research Reagents & Materials
Table 3: Essential Materials for Electrode Polishing and Cleaning
| Item Name | Function / Purpose | Example Specifications |
|---|---|---|
| Alumina (Al₂O₃) Slurry | Abrasive for mechanical removal of material and smoothing the electrode surface. | Various grit sizes: 5.0 μm (coarse), 0.3 μm (fine), 0.05 μm (ultra-fine) [1]. |
| Polishing Pads/Cloths | Substrate for holding the abrasive slurry and providing a flat, resilient polishing surface. | Microfiber cloth (for fine polishing), Nylon pad (for more aggressive polishing) [1]. |
| Silicon Carbide (SiC) Paper | For initial, aggressive material removal on heavily damaged electrodes. | 600 grit [1]. |
| Ultrasonication Bath | Uses cavitation to remove loosely bound particles and contaminants from the electrode surface after mechanical polishing. | Bench-top bath; used with distilled water [1]. |
| Electrochemical Redox Probe | A standard solution used to validate the quality and reproducibility of the polished electrode surface. | 0.01 M Potassium Ferrocyanide (K₄[Fe(CN)₆]) in a supporting electrolyte [2]. |
FAQs: Understanding Electrocleaning Fundamentals
What is electrocleaning and how does it work? Electrocleaning is an in-situ regeneration method that uses a mild electric field to clean surfaces, primarily fouled membranes or electrodes. It works by generating reactive species, such as hydroxyl radicals, directly at the surface of the conductive material. These radicals then break down and oxidize organic foulants. This process offers a sustainable cleaning alternative, eliminating the need for aggressive chemicals and reducing system downtime [32].
What are the key advantages of electrocleaning over chemical cleaning? Electrocleaning provides several key benefits:
- Chemical-Free Operation: It avoids using harsh, corrosive chemicals, reducing hazardous waste and safety risks [33] [32].
- Minimal Downtime and On-Demand Regeneration: Cleaning can be triggered with "the flip of a switch," enabling in-place regeneration without significant process interruption [32].
- High Efficiency: Studies on contracted carbon fibrous filters have demonstrated a mean flux recovery of 99.6% over nine filtration cycles when electrocleaning was combined with pore size adjustment [33].
In which applications is electrocleaning particularly promising? This method shows significant promise for maintaining performance in various separation and sensing technologies, including:
- Wastewater Treatment: For cleaning ultrafiltration (UF), nanofiltration (NF), and reverse osmosis (RO) membranes [32].
- Industrial Separations and Desalination [32].
- Electrochemical Sensors: For regenerating fouled working electrodes, thereby restoring their analytical performance [34] [35].
Troubleshooting Guide: Common Electrocleaning Issues
The table below outlines common problems, their potential causes, and recommended solutions for electrocleaning processes.
| Symptom | Possible Cause | Recommended Solution |
|---|---|---|
| Inconsistent cleaning results | Clogged nozzles or uneven distribution of the electric field [36]. | Inspect and clean application hardware; verify electrode alignment and connection [36]. |
| Low flux recovery / Persistent fouling | Insufficient cleaning power; inappropriate electrical parameters [33]. | Optimize applied voltage/current and treatment duration. Combine with physical methods (e.g., pore size adjustment in filters) [33]. |
| Excessive noise or vibration in system | Loose electrical connections or hardware [36]. | Tighten all bolts and mounting hardware; check for worn bearings [36]. |
| Signal drift in electrochemical sensors | Electrode surface fouling or unstable electrical contacts [37]. | Implement regular electrocleaning cycles; use an ohmmeter to check continuity between leads and electrodes [37]. |
| No cleaning response upon activation | Power supply failure; electrode passivation [37]. | Ensure stable power supply; check for passivation layers and clean or recondition the electrode surface [37]. |
Experimental Protocols for Validation
Protocol 1: Electrocleaning a Fouled Conductive Membrane
This protocol is adapted from research demonstrating high-efficiency in-situ regeneration [33] [32].
1. Objective: To regenerate a fouled conductive membrane using electrocleaning and quantify the recovery of water flux. 2. Materials:
- Fouled conductive membrane (e.g., contracted carbon fibrous filter)
- Potentiostat or DC power supply
- Electrolyte solution (e.g., phosphate buffer saline, pH 7)
- Filtration cell setup with permeate collection
- Balance or flow meter
3. Procedure:
- Step 1: Baseline Measurement. Measure the initial water flux (L·m⁻²·h⁻¹) of the fouled membrane under standard pressure.
- Step 2: Setup. Immerse the membrane in the electrolyte solution within the filtration cell. Connect the membrane as the working electrode and install a counter electrode (e.g., platinum wire) and a reference electrode.
- Step 3: Electrocleaning. Apply a mild electric potential or current density. For example, researchers have used this method to achieve a 99.6% flux recovery [33]. The specific parameters (e.g., +1.0 V vs. Ag/AgCl for 10 minutes) should be optimized for your system.
- Step 4: Rinsing. After the electrocleaning cycle, gently rinse the membrane with deionized water to remove any dislodged foulants.
- Step 5: Performance Evaluation. Re-measure the water flux under the same conditions as Step 1. Calculate the flux recovery percentage.
4. Data Analysis:
Flux Recovery (%) = (Final Flux / Initial Clean Membrane Flux) × 100
A successful electrocleaning process should yield a high flux recovery, closely approaching 100%.
Protocol 2: Regenerating a Fouled Working Electrode
This protocol is crucial for maintaining the performance of electrochemical sensors used in drug analysis [37] [35].
1. Objective: To restore the electrochemical activity of a fouled working electrode via electrocleaning. 2. Materials:
- Fouled working electrode (e.g., Glassy Carbon Electrode - GCE)
- Potentiostat
- A standard redox probe solution (e.g., 5 mM K₃[Fe(CN)₆]/K₄[Fe(CN)₆] in 0.1 M KCl)
- Supporting electrolyte (e.g., 0.1 M Phosphate Buffer Saline - PBS)
3. Procedure:
- Step 1: Baseline Test. Perform Cyclic Voltammetry (CV) in the redox probe solution with the fouled electrode. Note the peak-to-peak separation (ΔEp) and peak current intensity.
- Step 2: Electrocleaning. Transfer the electrode to a cell containing a clean supporting electrolyte (e.g., PBS). Apply a suitable cleaning potential program. This could involve holding at a positive potential to oxidize organic foulants, followed by a negative potential, or continuous cycling over a wide potential range (e.g., from -0.5 V to +1.5 V) for multiple cycles.
- Step 3: Rinsing. Rinse the electrode thoroughly with deionized water.
- Step 4: Performance Verification. Re-run the CV measurement from Step 1 in the fresh redox probe solution. A successful cleaning is indicated by a decreased ΔEp (improved kinetics) and increased peak current.
4. Data Analysis: Compare the CV parameters before and after cleaning. The electrode surface is considered regenerated when the peak current and ΔEp return to the values characteristic of a clean, un-fouled electrode.
Workflow Visualization
The diagram below illustrates the logical decision-making process for diagnosing and addressing electrode performance issues.
Electrode Regeneration Workflow
Research Reagent Solutions
The table below lists essential materials and their functions for experiments involving electrocleaning and electrode regeneration.
| Reagent / Material | Function in Experiment |
|---|---|
| Phosphate Buffer Saline (PBS) | A common electrolyte that provides a stable pH environment for electrochemical reactions and cleaning [38]. |
| Potentiostat / Galvanostat | The core instrument used to apply controlled potentials or currents to the working electrode during electrocleaning [39]. |
| Screen-Printed Electrodes (SPEs) | Disposable, cost-effective three-electrode systems (working, reference, counter) ideal for portable and quick testing [39]. |
| Potassium Ferricyanide/Ferrocyanide | A standard redox probe used to characterize electrode surface cleanliness and electron transfer kinetics before and after cleaning [38]. |
| Platinum Counter Electrode | An inert electrode that completes the electrical circuit in the three-electrode setup, allowing current to flow [38]. |
| Silver/Silver Chloride (Ag/AgCl) Reference Electrode | Provides a stable and known reference potential against which the working electrode's potential is controlled [38]. |
Frequently Asked Questions
Q1: What is the fundamental mechanism behind oxygen plasma cleaning? Oxygen plasma cleaning works by generating an ionized gas containing reactive species like oxygen atoms (O), ions (O₂⁺), and UV photons. These species interact with organic contaminants on a surface, breaking carbon-hydrogen and carbon-carbon bonds through bombardment and oxidizing them into volatile by-products like carbon dioxide and water vapor, which are then evacuated from the cleaning chamber [40]. This process efficiently removes organic residues without the use of liquid solvents.
Q2: Can oxygen plasma treatment damage sensitive electrode surfaces? Yes, this is a critical consideration. While plasma is often described as a gentle cleaning method, a 2024 study specifically on Fluorine-doped Tin Oxide (FTO) electrodes found that oxygen plasma treatment can deactivate the electrode surface for certain electrochemical reactions. The treatment was shown to implant oxyanions into oxygen vacancy sites, reducing the majority carrier density and leading to a loss of electrochemical activity, which could not be easily reversed [41]. Therefore, the suitability of plasma cleaning is highly material-dependent.
Q3: For which materials is chemical cleaning a better alternative than plasma? Chemical cleaning is often preferable for specific, delicate contaminants that require selective dissolution. For example:
- Protein Contamination: Soaking in a solution of 5% Pepsin in 0.1 mol/L Hydrochloric Acid (HCl) for one hour is recommended [42].
- Sulphide Blockages: A Thiourea solution should be used until the discoloration disappears [42].
- Severe Organic Residues: Aggressive chemical polishing with alumina slurries of varying grit sizes (from 5 μm down to 0.05 μm) can remove adsorbed species and visible material [1].
Q4: How long do the cleaning effects of plasma treatment last? The clean surface achieved by plasma treatment is at its optimal state immediately after the process. However, the effectiveness degrades over time due to exposure to atmospheric pollutants, dust, and handling. The duration of cleanliness depends on the storage environment and the material. In sensitive applications, re-treatment may be necessary to maintain standards [43].
Q5: What are the main types of plasma cleaning equipment? There are two primary types of plasma cleaning systems:
- Low-Pressure Plasma Cleaners: These operate in a vacuum chamber, providing a highly controlled environment for uniform treatment, ideal for delicate components like electronic sensors [43] [44].
- Atmospheric Plasma Cleaners: These operate at or near standard atmospheric pressure, allowing for the treatment of larger or more complex objects without the need for a vacuum chamber [43].
Troubleshooting Guides
Issue: Inconsistent Electrochemical Readings After Plasma Cleaning
Possible Causes and Solutions:
- Cause 1: Surface Deactivation. As noted in the FAQ, oxygen plasma can deactivate certain transparent conductive oxide (TCO) electrodes like FTO.
- Solution: For TCOs, avoid oxygen plasma if subsequent electrochemical activity is required. Consider alternative cleaning methods like gentle mechanical polishing or annealing at high temperatures (e.g., 450°C), which has been shown to partially recover FTO's electrochemical response [41].
- Cause 2: Incomplete Contaminant Removal. The plasma parameters may be insufficient.
- Solution: Optimize the plasma process. A scientific study on optical components used Langmuir probes and optical spectroscopy to correlate plasma parameters (like discharge power and gas pressure) with cleaning efficacy. Ensure the plasma is generating sufficient ion density and reactive species for your specific contaminant [44].
- Cause 3: Surface Over-treatment and Etching.
- Solution: Reduce the plasma treatment time and power. Excessive exposure can modify the surface morphology and chemistry beyond the desired cleaning effect [40].
Issue: Electrode Performance Decline After Chemical Cleaning
Possible Causes and Solutions:
- Cause 1: Particle Embedment. Abrasive particles from polishing slurries can become embedded in the electrode surface.
- Solution: After polishing, thoroughly rinse the electrode with distilled water. An optional but recommended step is to use an ultrasonic bath containing distilled water for 1-5 minutes to shake loose any adhered alumina or other particles [1].
- Cause 2: Scratching of Delicate Glass Surfaces.
- Solution: When cleaning traditional glass pH electrodes, never rub or wipe the bulb. This can create scratches and an electrostatic charge. Instead, gently swirl the electrode in the cleaning or rinsing solution, taking care not to knock it against the container [42].
- Cause 3: Chemical Residue or Junction Blockage.
- Solution: Rinse the electrode thoroughly with an appropriate solvent (e.g., distilled water, ethanol) between cleaning steps and samples. Ensure the correct chemical solution is used for the specific contaminant (e.g., Thiourea for sulphides) [42].
Data Presentation: Cleaning Method Comparison
The table below summarizes key quantitative data and characteristics of advanced cleaning methods.
Table 1: Comparison of Advanced Electrode Cleaning Methods
| Parameter | Oxygen Plasma Cleaning | Mechanical Polishing (with Alumina) | Chemical Soak (Specialized) |
|---|---|---|---|
| Primary Mechanism | Oxidation & volatilization of organics [40] | Abrasive physical removal [1] | Chemical dissolution [42] |
| Typical Gases/Chemicals | Oxygen (O₂), Argon (Ar), Air [43] [40] | Alumina Slurry (0.05 μm, 0.3 μm, 5 μm) [1] | Pepsin/HCl, Thiourea, HF-based Regeneration Solution [42] |
| Spatial Effect | Isotropic (all-directional) [45] | Directional (anisotropic) | Isotropic |
| Typical Process Duration | Minutes to hours (e.g., 6000s in one study [44]) | 5-30 minutes per step [1] | 1 hour to overnight [42] |
| Material Removal | Nanoscale (primarily contaminants) | Micron-scale (removes substrate material) [1] | Nanoscale to micron-scale (etching) [42] |
| Key Limitation | Can deactivate some metal oxide electrodes [41] | Consumes electrode material; can cause scratches [1] | Hazardous chemicals required (e.g., HF) [42] |
Experimental Protocols
Protocol 1: Oxygen Plasma Treatment for Contaminant Removal
This protocol is adapted from studies on cleaning optical components and electrodes [44] [45].
1. Sample Preparation:
- Begin with substrates (e.g., fused silica with chemical coatings or electrode surfaces) that have been pre-contaminated with organic films.
- For quantitative analysis, establish a baseline relationship between contaminant functional groups and a measurable property like optical transmittance [44].
2. Plasma System Setup:
- Use a low-pressure RF capacitive coupling plasma system [44].
- Ensure the main components are functional: vacuum chamber, gas supply (e.g., O₂), RF generator, and pumping system [43].
3. Treatment Process:
- Place the sample in the vacuum chamber.
- Evacuate the chamber to a low-pressure condition (significantly below atmospheric pressure) [43] [44].
- Introduce oxygen gas into the chamber with a controlled flow rate.
- Initiate the RF capacitive discharge to generate plasma. Key parameters to control and optimize include:
4. Post-Treatment Analysis:
- Use X-ray Photoelectron Spectroscopy (XPS) to characterize changes in surface chemistry and the removal of carbon contamination [44].
- Measure the recovery of the primary functional property (e.g., optical transmittance or electrochemical response) [44] [41].
Protocol 2: Chemical Restoration of Damaged pH Electrodes
This protocol details methods to revive electrodes exposed to specific contaminants [42].
1. Contaminant Identification:
- Identify the source of electrode damage or blockage (e.g., proteins, sulphides, or poor storage).
2. Targeted Chemical Soaking:
- For Protein Contamination:
- Prepare a solution of 5% Pepsin in 0.1 mol/L Hydrochloric Acid (HCl).
- Soak the electrode tip in the solution for 1 hour [42].
- For Sulphide Blockage:
- Use a Thiourea solution.
- Soak the electrode until the discoloration (e.g., from Silver Sulphide) disappears [42].
- For Electrodes Damaged by Poor Storage or Scratches:
- WARNING: This step involves highly hazardous Hydrofluoric Acid (HF). Use full PPE (goggles, gloves, lab coat) and an HF-resistant container.
- Use a commercial regeneration solution containing HF.
- Soak only the sensor tip for approximately 1 minute [42].
3. Rinsing and Re-conditioning:
- After chemical soaking, rinse the electrode thoroughly with distilled water [42].
- For electrodes treated with HF regeneration solution, subsequently soak them in pH 7 buffer for 1 hour [42].
- Finally, let the sensor rest overnight in the reference electrolyte solution specific to the sensor (e.g., 3M KCl) [42].
Workflow Visualization
The following diagram illustrates the decision-making workflow for selecting and applying an advanced electrode cleaning procedure.
Diagram Title: Electrode Cleaning Method Decision Workflow
The Scientist's Toolkit
Table 2: Key Research Reagent Solutions for Electrode Cleaning
| Reagent / Material | Function / Application | Key Considerations |
|---|---|---|
| Oxygen Gas (O₂) | Feed gas for plasma; generates reactive oxygen radicals to oxidize and remove organic contaminants [43] [40]. | Can deactivate some metal oxide electrodes (e.g., FTO); requires a vacuum plasma system [41]. |
| Argon Gas (Ar) | Inert feed gas for plasma; cleans via physical sputtering/ion bombardment without chemical reaction, ideal for surface activation [40]. | Post-treatment exposure to air introduces hydrophilic groups; good for metals where oxidation is undesirable [40]. |
| Alumina Slurry | Abrasive suspension (0.05-5 μm) for mechanical polishing of electrode surfaces to remove contaminants and refresh the material [1]. | Particle size dictates aggressiveness; requires thorough rinsing/ultrasonication to remove embedded particles [1]. |
| Pepsin/HCl Solution | Enzyme-acid mixture designed to break down and dissolve protein-based contaminants blocking pH electrodes [42]. | Soak time ~1 hour; handle acid with care [42]. |
| Thiourea Solution | Chemical agent used to dissolve sulphide-based blockages (e.g., Silver Sulphide) in electrode junctions [42]. | Soak until discoloration clears [42]. |
| HF-based Regeneration Solution | Highly aggressive etchant that removes a thin layer of glass, reviving scratched or poorly stored pH electrodes [42]. | Extreme hazard. Use full PPE and HF-resistant labware. Limit treatment to ~1 minute [42]. |
Beyond the Basics: Troubleshooting Common Issues and Optimizing Your Protocol
Frequently Asked Questions
What is the primary objective of electrode polishing? The goal is to remove redox reaction products and contaminants that accumulate on the electrode surface during experiments. This restoration is crucial for maintaining reproducible results, sensitivity, and a well-defined electrochemical response [23].
How often should I polish my working electrode? The frequency depends heavily on usage conditions, including the type of analytes, their concentration, and the electrode material [23].
- Routine Cleaning: Can be performed daily or after a few uses to touch up the surface [1].
- Periodic Cleaning: May be needed several times a week for more intensive use [1].
- Aggressive Cleaning: Reserved for visible contamination or a significant drop in performance [1].
My electrode response has dropped. Should I immediately polish it? Not necessarily. First, try gently buffing the electrode surface with a methanol-soaked lab tissue. If this does not restore responsiveness, then proceed with abrasive polishing [23].
Are there any polishing methods I should avoid? Yes. The use of concentrated acids, jeweler's rouge, toothpaste, or other non-standard abrasive compounds is strongly discouraged, as they can permanently damage the electrode surface [23].
Troubleshooting Guides
Problem: Gradual decrease in electrode response over time.
- Potential Cause: Normal buildup of reaction products or non-specifically adsorbed species [1] [23].
- Solution: Perform a Routine Cleaning with 0.05 µm alumina slurry. If improvement is insufficient, escalate to a Periodic Cleaning [1].
Problem: Visible material or severe contamination on the electrode surface.
- Potential Cause: The electrode is heavily contaminated or coated.
- Solution: An Aggressive Cleaning protocol is required, starting with a coarse polish (e.g., 5 µm alumina) and progressing through finer grades [1].
Problem: Sluggish response, unstable signal, or longer titration times.
- Potential Cause: Inefficient cleaning or a worn-out electrode surface. A scientific study found that some cleaning methods can lead to low sensor repeatability [10].
- Solution: Ensure you are using the correct polishing method for your electrode material. Check the electrode with a standardized test. If performance does not improve after proper cleaning, the electrode may need to be replaced [18].
Problem: Strange electrochemical response after multiple polishing sessions.
- Potential Cause: Excessive material has been removed, potentially exposing underlying conductive epoxy or stainless steel components.
- Solution: A complete re-polish removes 250-500 µm of material. After 7-15 such operations, the electrode may be irreparably damaged and must be discarded [1].
Experimental Data and Cleaning Efficiency
Table 1: Percentage Reduction in Polarization Resistance (Rp) After Various Cleaning Methods [10]
| Cleaning Method | Gold Electrode | Platinum Electrode |
|---|---|---|
| Acetone | 35.33% | 49.94% |
| Ethanol | 44.50% | 81.68% |
| Hydrogen Peroxide (H₂O₂) | 47.34% | 92.78% |
| Electrochemical Method | 3.70% | 67.96% |
Table 2: Summary of Polishing and Cleaning Protocols [1]
| Protocol Level | Recommended Grit/Compound Sequence | Typical Use Case |
|---|---|---|
| Routine Cleaning | 0.05 µm Alumina Slurry | Daily touch-up; gentlest cleaning. |
| Periodic Cleaning | 0.3 µm → 0.05 µm Alumina Slurry | Several times per week; more aggressive surface renewal. |
| Aggressive Cleaning | 5 µm → 0.3 µm → 0.05 µm Alumina Slurry | Visible contamination or adsorbed species. |
| Complete Re-polish | 600 Grit Paper → 5 µm → 0.3 µm → 0.05 µm | Major surface damage; significantly reduces electrode lifetime. |
Detailed Experimental Protocols
Protocol 1: Routine Cleaning with Alumina Slurry This is the standard method for refreshing a glassy carbon electrode surface [23].
- Preparation: Affix a microfiber polishing cloth (microcloth) to a stiff, flat surface like a glass plate.
- Application: Shake the bottle of 0.05 µm alumina slurry well. Dispense a small spot (approx. 3 mm) onto the cloth and wet with distilled water [1] [23].
- Polishing: Hold the electrode surface parallel to the cloth. Polish using a figure-8 pattern while gently turning the electrode. Apply even pressure for 1-2 minutes [1] [23].
- Rinsing: Thoroughly rinse the electrode with distilled water to remove all alumina particles [1] [23].
- Sonication (Optional): Suspend only the electrode surface in an ultrasonic bath filled with distilled water for 1-5 minutes to dislodge any trapped particles. Do not submerge the entire assembly [1].
- Drying: Rinse the electrode with methanol and wipe it dry with a clean lab tissue. Do not touch the polished surface [23].
Protocol 2: Electrode Performance Verification Test (e.g., Silver Electrode) A standardized procedure to check if a metal electrode is functioning correctly [18].
- Standardized Titration: Perform a threefold determination using a known sample, such as hydrochloric acid (c(HCl) = 0.1 mol/L) titrated with silver nitrate (c(AgNO₃) = 0.1 mol/L).
- Data Evaluation: Compare the results to optimal specifications:
- The volume of titrant used at the equivalence point (EP).
- The time taken to reach the equivalence point.
- The potential jump (difference) between the potential measured at 90% and 110% of the EP volume.
- Assessment: If the evaluated data falls outside acceptable ranges, clean the electrode thoroughly and repeat the test. If no improvement is observed, the sensor must be replaced [18].
The Scientist's Toolkit: Essential Research Reagents & Materials
Table 3: Key Materials for Electrode Polishing and Maintenance
| Item | Function | Application Notes |
|---|---|---|
| Alumina Slurry (5 µm, 0.3 µm, 0.05 µm) | Aqueous suspension of aluminum oxide particles for abrasive polishing. | Progress from larger to smaller particle sizes for aggressive cleaning. The 0.05 µm grade provides a final mirror-like finish [1]. |
| Microfiber Polishing Cloth (Microcloth) | Soft, velvety pad used with alumina slurries for fine polishing. | Typically brown in color. Can be reused several times, but must be dedicated to a single grit size to prevent cross-contamination [1] [23]. |
| Nylon Polishing Pad | A woven pad with a tighter texture than microcloth. | Often white in color. Used for more aggressive polishing steps, typically with larger particle size slurries [1] [23]. |
| Silicon Carbide Abrasive Paper (600 grit) | Coarse abrasive paper for initial material removal. | Used only in a "complete re-polish" to level a significantly damaged surface. Removes a substantial amount of material [1]. |
| Diamond Slurry (e.g., 1 µm) | Oil-based polishing compound for specific materials. | Used for polishing precious metals like platinum and gold. Requires a methanol or acetone flush after use [23]. |
| Hydrogen Peroxide (H₂O₂) Solution | Chemical cleaning agent. | Study data shows it is highly effective at reducing polarization resistance on gold and platinum screen-printed electrodes [10]. |
Polishing Decision Workflow
The diagram below outlines a systematic workflow for assessing electrode condition and selecting the appropriate cleaning method.
Identifying and Resolving Electrode Fouling from Specific Analytes
### Troubleshooting Guide: Common Symptoms and Solutions
This guide helps you diagnose and address electrode fouling based on specific experimental symptoms.
Symptom 1: Gradual decrease in current response or signal sensitivity during detection.
| Possible Cause | Diagnostic Steps | Recommended Solution |
|---|---|---|
| Biofouling (accumulation of proteins, lipids) [46] [47] | Check if signal loss occurs in complex matrices (serum, tissue). | Apply antifouling coatings like Nafion or PEDOT:PSS to the working electrode [46] [47]. |
| Polymer Formation (e.g., from dopamine or phenol oxidation) [47] | Verify if the analyte (e.g., dopamine) is known to form insulating polymers upon oxidation [47]. | Use a pulsed waveform instead of constant potential; implement regular mechanical polishing [1]. |
Symptom 2: Shift in peak potential or peak broadening during voltammetric detection.
| Possible Cause | Diagnostic Steps | Recommended Solution |
|---|---|---|
| Reference Electrode Fouling (e.g., Ag/AgCl by sulfide ions) [46] | Measure Open Circuit Potential (OCP); check for shifts in both oxidative and reductive peaks [46]. | Use a different reference system (e.g., double-junction); coat reference electrode with Nafion [46] [48]. |
| Chemical Fouling (adsorption of reaction products) [46] [47] | See if the shift is analyte-specific (common with serotonin and dopamine) [46]. | Switch electrode material; use electrode coatings (e.g., vertically-ordered mesoporous silica-nanochannel films) to block fouling agents [47] [49]. |
Symptom 3: Increased background noise or unstable baseline.
| Possible Cause | Diagnostic Steps | Recommended Solution |
|---|---|---|
| Physical Degradation (cracking, roughening of surface) [50] | Inspect electrode surface under a microscope for physical damage [50]. | Perform an aggressive cleaning and polishing regimen to restore the surface [1]. |
| Partial Fouling (non-uniform surface coverage) [47] | Test electrode with a standard redox probe (e.g., Fe(CN)₆³⁻/⁴⁻); look for distorted voltammogram [47]. | Perform routine electrode polishing and sonication in distilled water or mild acid [1] [51]. |
### Frequently Asked Questions (FAQs)
Q: What is the difference between biofouling and chemical fouling? A: Biofouling is the accumulation of biological materials like proteins, cells, or lipids on the electrode surface, which is common in implanted or biological fluid analysis [46] [47]. Chemical fouling (or chemical contamination) involves the adsorption of chemical species or the formation of polymeric by-products from electrochemical reactions, which is often analyte-specific (e.g., occurs with neurotransmitters like dopamine and serotonin) [46] [47].
Q: My Ag/AgCl reference electrode was implanted in the brain and now my measurements are shifted. What happened? A: This is a classic sign of reference electrode fouling. In biological environments, ions like sulfide (S²⁻) can react with the silver chloride layer, decreasing its open circuit potential (OCP) and causing a cathodic polarization that shifts your voltammetric peaks [46] [48]. A mitigation strategy is to use a Nafion-coated Ag/AgCl reference electrode to delay this onset [48].
Q: How can I prevent fouling when the analyte itself is the fouling agent? A: This is a key challenge. Strategies include:
- Using protective coatings: Modify your electrode with a permselective membrane (e.g., Nafion or Vertically-Ordered Mesoporous Silica-nanochannel Films (VMSF)) that allows your analyte to pass through but blocks larger polymeric by-products [47] [49].
- Optimizing the electrochemical protocol: Use a waveform that periodically applies a cleaning potential to desorb fouling materials [47].
- Selecting alternative materials: Electrodes made of carbon nanotubes, graphene, or modified with metallic nanoparticles can offer higher fouling resistance [47].
Q: How often should I polish my working electrode, and what is the correct procedure? A: The frequency depends on use, but a routine cleaning (gentlest polish) can be done daily. For more stubborn fouling, a periodic or aggressive cleaning is needed [1]. The general procedure is:
- Affix a polishing cloth to a flat surface.
- Apply a slurry of alumina powder (start with a larger micron size for heavy fouling, finish with 0.05 µm for a mirror finish).
- Polish the electrode using a figure-8 pattern while gently rotating it.
- Rinse thoroughly with distilled water between each grit size and after polishing.
- (Optional) Sonicate in distilled water for 1-5 minutes to remove embedded alumina particles [1] [51].
### Experimental Protocols for Fouling Mitigation and Study
Protocol 1: In-Vitro Chemical Fouling with Dopamine [46]
- Objective: To study the effects of dopamine fouling on a Carbon Fiber Micro-Electrode (CFME).
- Materials: CFME, Ag/AgCl reference electrode, Tris buffer (pH 7.4), 1 mM Dopamine hydrochloride solution.
- Method:
- Stabilize the CFME in Tris buffer by applying a triangular waveform from -0.4 V to 1.0 V at 400 V/s.
- Submerge the stabilized electrode in a Tris buffer solution containing 1 mM dopamine.
- Apply the same waveform for 5 minutes to induce fouling.
- Return the electrode to the clean dopamine-free buffer and measure the electrochemical response to a standard dopamine dose. Compare the sensitivity and peak position to pre-fouling data.
Protocol 2: Assessing Antifouling Coatings with VMSF [49]
- Objective: To evaluate the anti-fouling performance of a coated electrode in a complex sample.
- Materials: ITO electrode modified with VMSF, unmodified ITO electrode (control), pharmaceutical sample (e.g., acetaminophen tablet solution), standard 4-aminophenol (4-AP) solution.
- Method:
- Using Differential Pulse Voltammetry (DPV), record the signal for 4-AP in a standard solution with both the VMSF/ITO and unmodified ITO electrodes.
- Introduce the pharmaceutical sample directly onto both electrodes without any pretreatment.
- Measure the DPV response again.
- Compare the signal for 4-AP and the baseline stability. The VMSF/ITO electrode should show superior resistance to signal decay and interference from the complex matrix.
### Visualizing Fouling Mechanisms and Workflows
Fouling Mechanisms and Causes
Electrode Fouling Troubleshooting Flow
### The Scientist's Toolkit: Research Reagent Solutions
| Reagent/Material | Function/Brief Explanation |
|---|---|
| Alumina Polishing Slurries (0.05 µm, 0.3 µm, 5 µm) | Used in a sequential polishing procedure (aggressive to routine) to mechanically remove fouling layers and restore a pristine, mirror-like electrode surface [1] [51]. |
| Nafion | A perfluorosulfonated ionomer coating that confers anti-biofouling properties and cation selectivity by repelling negatively charged proteins and interfering anions [48] [47]. |
| PEDOT-based Coatings (e.g., PEDOT:PSS, PEDOT:PC) | Conductive polymer coatings that form a stable, biocompatible layer on the electrode, reducing the accumulation of biomacromolecules and improving fouling resistance in vivo [46] [47]. |
| Vertically-Ordered Mesoporous Silica-nanochannel Films (VMSF) | An ultra-thin, ordered membrane coating that provides excellent anti-fouling and anti-interference ability via size and charge exclusion, allowing small target analytes to reach the electrode while blocking larger molecules [49]. |
| Bovine Serum Albumin (BSA) / F12-K Nutrient Mix | Commonly used agents to simulate and study biofouling in controlled in-vitro experiments by introducing proteins and complex biological nutrients to the electrode environment [46]. |
| Sodium Sulfide (Na₂S) | Used to experimentally investigate reference electrode fouling, as sulfide ions mimic the in-vivo conditions that lead to Ag/AgCl reference electrode degradation and potential shifts [46]. |
Frequently Asked Questions (FAQs)
FAQ 1: Why is my electrode surface not bright after polishing and shows grey or dark patches? This issue typically arises from incomplete removal of surface oxide layers or contaminated polishing abrasives. The oxide scale persists locally, preventing a uniform mirror finish. To resolve this, ensure you are using fresh, high-quality abrasives and strengthen the oxide removal step in your pre-treatment protocol. Electrochemical cleaning methods may also be required to remove tenacious surface films that mechanical polishing alone cannot address [52].
FAQ 2: What causes excessive corrosion at the edges and tips of my workpiece after electropolishing? This is caused by a higher current density at sharp edges and protrusions, which accelerates anodic dissolution in these areas. This can be mitigated by adjusting the current density or electrolyte temperature, or by shortening the processing time. Proper workpiece positioning and the use of shielding on edges and corners can also help distribute the current more evenly [52].
FAQ 3: How often should I clean or polish my electrodes? The maintenance frequency depends heavily on the fluid type and operating conditions. For clean fluids like treated water, maintenance every six months may suffice. For processes involving sludge, pulp, or aggressive chemicals, monthly cleaning might be necessary. Monitor for signs of contamination, such as sudden fluctuations in readings or an unstable zero point, which indicate immediate cleaning is required [53].
FAQ 4: Is a specific polishing pattern, like a figure-eight, necessary for a good finish? Recent automated studies suggest that the polishing pattern (linear, circular, or figure-eight) does not significantly affect the final polishing quality. The key factors are the application of constant force and the use of appropriate abrasive materials. Therefore, a consistent technique is more important than the specific pattern used [2].
Troubleshooting Guides
Table 1: Common Polishing Problems and Solutions
| Problem Symptom | Potential Cause | Recommended Solution |
|---|---|---|
| Grey/black patches on surface [52] | Incomplete removal of oxide layer. | Strengthen oxide removal pre-treatment; check abrasive quality. |
| Dull, grey-dark surface after electropolishing [52] | Electrolyte is ineffective or quality is degraded. | Check electrolyte composition and age; replace if necessary. |
| White stripes on polished surface [52] | Solution relative density is too high; liquid is too thick. | Dilute solution; increase stirring. |
| Uneven brightness (yin-yang surface) [52] | Incorrect workpiece alignment or shielding. | Adjust position relative to cathode for even power distribution. |
| Non-bright spots or vertical stripes [52] | Gas bubbles adhering to surface; flow lines. | Increase current density or solution stirring to detach bubbles. |
| Brown spots upon removal from bath [52] | Insufficient polishing time or low current density/temperature. | Extend polishing time; check and adjust process parameters. |
Table 2: Optimized Process Parameters for Specific Applications
| Material | Process | Optimal Parameters | Resulting Surface Quality / Material Removal Rate |
|---|---|---|---|
| Single-crystal GaN [54] | Cluster Electrochemically Assisted CMP | Mixed abrasive (0.5 wt% 0.2µm diamond + 15 wt% 100nm silica sol), 65 r/min, 49 kPa pressure. | Surface Roughness (Sa) = 0.64 nm; MRR = 1.78 µm/h |
| Stainless Steel 316L [55] | Electropolishing (NaCl-based electrolyte) | Applied Voltage: 10 V; Ethanol Concentration: 20 vol%; Machining Gap: 5 mm. | Maximized Material Removal Rate |
| Titanium (Grade 1) [56] | Electropolishing (Eco-friendly electrolyte) | 20 V, 21 min, 42°C, Choline Chloride:Ethylene Glycol (1:4), 0% distilled water. | Surface Roughness = 4.162 nm |
Experimental Protocols
Protocol 1: Routine Mechanical Polishing for Electrodes
This protocol is adapted from standard electrode polishing kits and is suitable for routine maintenance of glassy carbon and precious metal electrodes [1] [4].
- Preparation: Affix an adhesive-backed microfiber polishing cloth to a hard, flat surface (e.g., glass plate).
- Abrasive Application: Dispense a small spot (approx. 3 mm diameter) of 0.05 µm alumina slurry onto the cloth.
- Polishing: Hold the electrode surface parallel to the cloth. Polish using a gentle, figure-eight or circular motion while gently rotating the electrode. Apply light pressure for 30-60 seconds.
- Cleaning: Rinse the electrode thoroughly with distilled water to remove all abrasive particles.
- Optional Ultrasonication: Suspend only the electrode surface in distilled water in an ultrasonication bath for 1-5 minutes to dislodge any adhered particles. Do not submerge the entire electrode assembly.
- Inspection: The electrode surface should be clean and reflective.
Protocol 2: Systematic Optimization using Taguchi Design
This methodology is used to efficiently determine the most influential parameters and their optimal settings for a polishing process, minimizing experimental time [55] [56].
- Parameter Selection: Identify key process parameters to investigate (e.g., voltage, time, temperature, abrasive/electrolyte composition, pressure).
- Define Levels: Choose a range of values (levels) for each parameter.
- Orthogonal Array Selection: Select an appropriate orthogonal array (e.g., L9 for 3-4 parameters, L27 for more) that allows the effect of each parameter to be tested in a balanced way.
- Experiment Execution: Conduct the experiments as per the array layout.
- Data Analysis: Use Analysis of Variance (ANOVA) and signal-to-noise (S/N) ratio analysis to statistically determine the effect of each parameter on the output (e.g., surface roughness, MRR). The optimal condition is the combination of parameter levels that yields the highest S/N ratio.
Workflow and Parameter Relationships
Diagram 1: Electrode Polishing Optimization Workflow
The Scientist's Toolkit: Research Reagent Solutions
Table 3: Essential Materials for Electrode Polishing and Cleaning
| Item | Function / Purpose | Example Use Case |
|---|---|---|
| Alumina Slurry (0.05 µm, 0.3 µm, 5 µm) | Fine abrasive for mechanical polishing to create a smooth, mirror-like finish. [1] | Final finishing polish of glassy carbon electrodes. [4] |
| Diamond Suspension | Harder abrasive for intermediate polishing to remove larger scratches. [4] | Rough polishing of gold electrodes for amalgam formation. [4] |
| Silica Sol & Diamond Abrasive Mix | Combined chemical-mechanical action for high-quality surfaces on hard materials like GaN. [54] | Cluster electrochemical-mechanical polishing (CMP). [54] |
| Eco-friendly Electrolyte (e.g., Choline Chloride + Ethylene Glycol) | Acts as a medium for anodic dissolution in electropolishing; less hazardous than strong acids. [56] | Electropolishing of titanium and its alloys. [56] |
| H₂O₂ / HClO₄ Solution | Strong chemical oxidizer for electrochemical cleaning of organic contaminants. [3] | Pre-treatment of screen-printed gold electrodes for biosensing. [3] |
| Nitric Acid (6N) | Used to dissolve and remove old mercury amalgam from gold electrodes. [4] | Regeneration of gold/mercury amalgam electrodes. [4] |
In the realm of electrochemistry, the preparation of working electrode surfaces is a critical step that directly impacts the reproducibility and reliability of experimental data. Mechanical polishing, traditionally a manual and labor-intensive process, has long been a source of variability in electrochemical research. Recent advances in laboratory automation have introduced robotic systems capable of performing electrode polishing with unprecedented consistency. This technical support center addresses the implementation, optimization, and troubleshooting of automated polishing systems, framed within the broader thesis research on working electrode polishing and cleaning procedures. The following sections provide detailed guidance for researchers, scientists, and drug development professionals seeking to enhance their electrochemical methodologies through automation.
Experimental Protocols & Workflows
Core Robotic Polishing System Setup
The foundational automated polishing system comprises several integrated components that work in concert to deliver consistent electrode pretreatment [2].
Robot Arm: A 7-axis Franka Emika robot provides the manipulation capability. The end-effector consists of a 3D-printed jig designed to hold the electrode vertically while applying consistent force through a spring mechanism. This jig should be sanded and greased to minimize friction during operation [2].
Polishing Station: Unlike traditional fixed pads, the automated system features a moving polishing station with two linear actuators (EBX1605-100mm driven by Nema23 stepper motors) that move an alumina polishing pad in two axes. This design maintains a stable Z-coordinate, ensuring consistent contact force between the electrode surface and polishing pad [2].
Control System: An Arduino Uno board connected to a robot controller PC via USB provides the interface for driving the polishing station. Python code controls the generation of pre-programmed Lissajous patterns that define the polishing motions, including linear, circular, and figure-eight patterns [2].
Electrochemical Measurement Station: Integration with a portable potentiostat enables immediate quality assessment of the polished electrodes using cyclic voltammetry (CV) in a standard three-electrode system with silver wire as pseudo-reference and counter electrodes [2].
The complete workflow for electrode preparation and validation can be visualized as follows:
Quantitative Polishing Performance Assessment
The quality of polished electrodes must be quantitatively assessed to ensure proper surface regeneration. Research demonstrates that cyclic voltammetry integration values provide an effective metric for evaluating polishing effectiveness, with decreased values indicating reduced surface capacitance and improved electrode condition [2].
Table 1: Electrode Quality Assessment via CV Integration
| Electrode Condition | Polishing Duration | CV Integration Value | Surface Characteristics |
|---|---|---|---|
| Corroded (5V, 30s) | 0 seconds | High | Increased capacitance, visible corrosion |
| Partially Regenerated | 60 seconds | Moderate | Reduced capacitance, improving surface |
| Fully Regenerated | 120 seconds | Low | Clean, flat surface with minimal capacitance |
Troubleshooting Guides
Common Technical Issues and Solutions
Table 2: Robotic Polishing System Troubleshooting
| Problem | Potential Causes | Solutions |
|---|---|---|
| Fluctuations in Z-axis force | Loose end-effector, worn spring, inconsistent polishing station | Implement moving polishing station with stable Z-coordinate; inspect and replace spring mechanism; ensure secure mounting [2] |
| Inconsistent polishing patterns | Stepper motor calibration, Arduino pulse signal issues | Recalibrate linear actuators; verify pulse signals to DM542 drivers; check Python interface code for pattern generation [2] |
| Poor electrode surface regeneration | Insufficient polishing time, wrong abrasive, incorrect force | Increase polishing duration to 120 seconds; use 0.05 μm alumina suspension; verify spring force application [2] |
| Variable CV measurements after polishing | Incomplete cleaning, residual alumina, surface recontamination | Implement thorough rinsing station; use standardized cleaning protocol; ensure proper drying before measurement [2] |
Electrode Performance Issues
Table 3: Post-Polishing Electrode Performance Problems
| Symptoms | Diagnosis | Resolution |
|---|---|---|
| Decreasing signal sensitivity | Electrode surface fouling | Implement plasma cleaning (oxygen, 100W, 5 min) between experiments to remove organic residues [45] |
| High background noise | Residual surface contamination | Combine mechanical polishing with chemical cleaning (H₂O₂ solution for platinum, KOH for gold) [10] |
| Irreproducible results across users | Manual polishing inconsistency | Adopt fully automated robotic polishing system with predefined parameters [2] |
| Rapid electrode degradation | Incomplete polishing or corrosive analytes | Extend polishing time; incorporate periodic plasma treatment to restore surface [45] |
Frequently Asked Questions (FAQs)
Q1: Does the polishing pattern (figure-eight vs. circular) significantly affect electrode quality in automated systems?
A: Contrary to conventional wisdom, recent automated system research demonstrates no significant difference in electrode quality between figure-eight, circular, linear, or complex Lissajous pattern polishing. The critical factors are consistent force application and duration, not the specific pattern itself [2].
Q2: What is the optimal polishing duration for corroded glassy carbon electrodes?
A: Research indicates approximately 120 seconds of automated polishing effectively regenerates severely corroded electrodes (induced by 5V application for 30 seconds). However, continuous improvement can be observed with extended polishing up to this point [2].
Q3: How can I validate the success of my electrode polishing procedure?
A: Implement immediate electrochemical validation using cyclic voltammetry in a standard solution (e.g., 0.01 M K₄[Fe(CN)₆] with 0.5 M Na₂SO₄ electrolyte). The integral of the CV plot provides quantitative data on surface capacitance, with lower values indicating better surface conditions [2].
Q4: Are there cleaning alternatives to mechanical polishing for sensitive electrodes?
A: Yes, plasma cleaning offers an effective alternative, particularly for nanoelectrodes where mechanical polishing might alter geometry. Oxygen plasma treatment (low power settings) efficiently removes organic contamination without affecting bulk electrode properties [45].
Q5: How do I maintain consistency when multiple researchers use the same automated system?
A: Develop standardized protocols that define all parameters: polishing duration (120 seconds), force application (via calibrated spring), abrasive type (0.05 μm alumina suspension), and validation criteria (CV integration thresholds). Automated systems inherently reduce inter-operator variability when parameters are fixed [2].
Q6: What quality control metrics should I implement for ongoing electrode polishing validation?
A: Establish a routine quality control procedure including: (1) periodic measurement of standard solutions with known peak separations, (2) tracking CV integration values over time to detect system drift, and (3) microscopic surface inspection (1000× magnification) to visually confirm surface uniformity [2].
The Scientist's Toolkit: Essential Research Reagents & Materials
Table 4: Key Materials for Automated Electrode Polishing Systems
| Item | Specification | Function | Source/Reference |
|---|---|---|---|
| Alumina Polishing Suspension | 0.05 μm particle size | Abrasive material for mechanical polishing of electrode surfaces | [2] |
| Polishing Pad | Alumina-coated pad | Surface for mechanical abrasion of electrodes | [2] |
| Glassy Carbon Electrode | Planar electrode (BioLogic) | Standard working electrode for polishing studies | [2] |
| Standard Validation Solution | 0.01 M K₄[Fe(CN)₆], 0.5 M Na₂SO₄, 0.25 M HOAc/NaOAc buffer | Electrochemical validation of polished electrode quality | [2] |
| Portable Potentiostat | PalmSens 4 or equivalent | Electrochemical measurement for quality control | [2] [57] |
| Oxygen Plasma System | Low-pressure RF plasma | Alternative cleaning method for organic contamination removal | [45] |
| Robotic Arm | 7-axis (Franka Emika) | Precise manipulation and force application during polishing | [2] |
| Linear Actuators | EBX1605-100mm with Nema23 stepper motors | Precise movement of polishing station in XY plane | [2] |
Advanced Methodologies & Integration
Alternative Cleaning Methods
While robotic mechanical polishing provides excellent results for many applications, certain research scenarios benefit from alternative or complementary approaches:
Plasma Cleaning: Low-pressure plasma cleaning efficiently removes organic contaminants from electrode surfaces without affecting bulk properties. This method is particularly valuable for nanoelectrodes where mechanical polishing might alter geometry. Oxygen plasma treatment has been shown to significantly enhance thermopower of graphene films from ~80 μV/K to ~700 μV/K [45].
Chemical Cleaning: Screen-printed electrodes respond well to specific chemical treatments. Research indicates H₂O₂ solution provides the most significant reduction in polarization resistance (47.34% for gold, 92.78% for platinum) when combined with multiple CV cycles at low scanning speed (10 mV/s) [10].
Electrochemical Pretreatment: For screen-printed electrodes specifically, pretreatment using SWV (equilibration time 3s, potential scan 0-1.5V with frequency 15Hz, amplitude 25mV, step potential 5mV) effectively prepares surfaces for modification [57].
Integration with Analytical Workflows
Modern electrochemical research increasingly integrates surface preparation with advanced analytical techniques:
Machine Learning Enhancement: When working with complex matrices like saliva for drug detection (e.g., cocaine sensors), machine learning algorithms can analyze electrochemical data to overcome matrix effects and variations. This approach has achieved 85% accuracy in detecting target analytes despite sample-to-sample variability [57].
Real-Time Quality Monitoring: Incorporating immediate electrochemical validation after polishing creates a closed-loop system that automatically adjusts parameters based on CV integration results, ensuring consistent electrode quality regardless of initial condition [2].
The implementation of automated robotic polishing systems represents a significant advancement in electrochemical methodology, addressing long-standing challenges in reproducibility while enabling higher throughput experimentation. By adhering to the protocols, troubleshooting guides, and best practices outlined in this technical support center, researchers can achieve unprecedented consistency in electrode preparation, ultimately enhancing the reliability of their electrochemical analyses.
Leveraging Machine Learning for Process Optimization
Technical Support Center: Working Electrode Polishing & Cleaning
Frequently Asked Questions (FAQs)
FAQ 1: How does automated electrode polishing compare to manual methods, and is the polishing pattern important?
Recent research utilizing robotic automation has demonstrated that automated mechanical polishing successfully regenerates electrode surfaces, with performance comparable to manual polishing. Contrary to long-standing beliefs in electrochemical practice, the polishing pattern (figure-8, circular, or linear) shows no significant impact on final surface quality when performed with consistent force and motion. Automation primarily enhances reproducibility and reduces operator-dependent variability [2].
FAQ 2: What are the critical considerations for cleaning screen-printed electrodes (SPEs)?
Cleaning is crucial for restoring the electroactive surface of SPEs. Studies evaluating chemical and electrochemical methods found that:
- Hydrogen peroxide (H₂O₂) solutions and multiple cyclic voltammetry (CV) cycles at low scan rates (10 mV/s) yielded the most significant reduction in polarization resistance, indicating effective surface regeneration.
- The cleaning efficiency varies between electrode materials; for instance, platinum generally shows greater responsiveness to cleaning than gold.
- Avoid cleaning methods that might damage the insulating layer or alter surface chemistry critical for your application [10].
FAQ 3: After polishing an electrode, how long should I wait before using it to ensure stable measurements?
Abrasive polishing temporarily alters electrode response, requiring an equilibration period. For pulsed amperometric detection (PAD), studies recommend a delay of 3-5 hours post-polish to achieve stable signals. Polishing immediately before sensitive experiments is not advised; ideally, polish the day before and allow for overnight equilibration [19].
FAQ 4: What are the different levels of electrode polishing, and when should each be applied?
Pine Research outlines a tiered approach, from routine maintenance to aggressive refurbishment [1]:
- Routine Cleaning: Use 0.05 µm alumina slurry for gentle, daily touch-ups.
- Periodic Cleaning: Progress from 0.3 µm to 0.05 µm alumina for more thorough weekly cleaning.
- Aggressive Cleaning: Employ a three-step sequence (5 µm → 0.3 µm → 0.05 µm alumina) for contaminated surfaces or visible adsorbates.
- Complete Re-polish: A last-resort procedure using 600-grit sandpaper followed by aggressive cleaning, which removes significant material and shortens electrode lifespan.
Detailed Experimental Protocols
Protocol 1: Automated Robotic Polishing for Reproducible Surface Regeneration
This protocol is adapted from research demonstrating an automated workflow for electrode polishing and evaluation [2].
- Objective: To consistently regenerate a reproducible electrode surface using an automated robotic system, minimizing human intervention and variability.
- Materials & Equipment:
- 7-axis robotic arm (e.g., Franka Emika)
- Custom 3D-printed electrode jig with spring mechanism
- XY-movable polishing station with linear actuators
- Alumina Polishing Pads (e.g., BASi)
- 0.05 µm alumina suspension
- Portable potentiostat
- Standard electrochemical test solution (e.g., 0.01 M K₄[Fe(CN)₆], 0.5 M Na₂SO₄, buffer)
- Methodology:
- System Setup: Mount the electrode jig on the robotic arm. Program the polishing station to execute specific Lissajous patterns (e.g., linear, circular, figure-8).
- Induce Corrosion (Optional): Apply a high voltage (e.g., 5 V for 30 seconds) to the working electrode to simulate surface degradation for testing the protocol.
- Polishing Sequence: a. The robot moves the electrode to the polishing station and maintains a fixed position. b. The polishing pad moves in the pre-programmed pattern for a set duration (e.g., 30-120 seconds) with alumina slurry applied. c. The robot transfers the electrode to a washing station for rinsing.
- Quality Control: The electrode is moved to an electrochemistry station for CV measurements. The integral of the CV curve is used as a quantitative metric for surface quality, with a decreasing integral indicating reduced capacitance and successful polishing.
- Key Workflow Diagram:
Protocol 2: Machine Learning-Guided Optimization of Electropolishing Parameters
This protocol details a data-driven approach for optimizing electropolishing, a specific type of electrochemical polishing, using Artificial Neural Networks (ANN) [56].
- Objective: To determine the optimal combination of electropolishing parameters for minimizing titanium surface roughness using an ANN model.
- Materials & Equipment:
- Titanium specimens (Grade 1, ASTM B265)
- Eco-friendly deep eutectic solvent electrolyte (e.g., Choline Chloride & Ethylene Glycol)
- Potentiostat/Galvanostat with a 3-electrode cell
- Surface profilometer for roughness measurement
- Data processing and machine learning software (e.g., Python with TensorFlow/PyTorch)
- Methodology:
- Experimental Design: Use a Taguchi L27 orthogonal array to efficiently test five key parameters across three levels each: Applied Voltage (12, 16, 20 V), Processing Time (15, 20, 25 min), Temperature (25, 35, 45 °C), Electrolyte Ratio (ChCl:EG 1:2, 1:3, 1:4), and Distilled Water Concentration (0%, 15%, 30%).
- Data Collection: Perform electropolishing experiments according to the design matrix. Precisely measure the resulting surface roughness (Ra) for each condition.
- Model Training & Validation: a. Create an ANN model (e.g., a Multilayer Perceptron) with the five process parameters as inputs and surface roughness as the output. b. Train the model on the experimental dataset. Use techniques like Gaussian noise injection to augment data and improve model generalization. c. Validate model predictions against a separate test set, targeting a high coefficient of determination (R² > 0.98).
- Prediction & Validation: Use the trained ANN model to predict the parameter combination for minimum surface roughness. Conduct a confirmation experiment under these predicted optimal conditions.
- Key Workflow Diagram:
Data Presentation
Table 1: Comparison of Cleaning Efficiency for Screen-Printed Electrodes [10]
This table summarizes the percentage reduction in polarization resistance (Rₚ) for different cleaning methods, indicating their effectiveness.
| Cleaning Method | Gold Electrode (% Δ Rₚ) | Platinum Electrode (% Δ Rₚ) |
|---|---|---|
| Acetone | 35.33% | 49.94% |
| Ethanol | 44.50% | 81.68% |
| H₂O₂ Solution | 47.34% | 92.78% |
| Electrochemical (CV cycles) | 3.70% | 67.96% |
Table 2: Optimal Electropolishing Parameters for Titanium Predicted by ANN [56]
This table displays the machine learning-predicted and experimentally validated optimal conditions for electropolishing titanium in an eco-friendly electrolyte.
| Process Parameter | Optimal Level | Experimental Value |
|---|---|---|
| Applied Voltage | Level 3 | 20 V |
| Processing Time | Level 2 | 21 min |
| Electrolyte Ratio (ChCl:EG) | Level 3 | 1:4 |
| Distilled Water Concentration | Level 1 | 0% |
| Temperature | Level 3 | 42 °C |
| Predicted Surface Roughness | 4.162 nm |
The Scientist's Toolkit: Research Reagent Solutions
Table 3: Essential Materials for Electrode Polishing and Cleaning Protocols
| Item | Function / Application |
|---|---|
| Alumina Slurry Suspensions (5 µm, 0.3 µm, 0.05 µm) | Standard abrasive particles for mechanical polishing in sequential steps to achieve a mirror finish [1]. |
| Microfiber & Nylon Polishing Cloths | Adhesive-backed pads providing a compliant surface for holding abrasives during polishing [1]. |
| Deep Eutectic Solvent Electrolyte (e.g., Choline Chloride : Ethylene Glycol) | Eco-friendly electrolyte for electropolishing metals like titanium, offering a less hazardous alternative to strong acids [56]. |
| Hydrogen Peroxide (H₂O₂) Solution | Effective chemical cleaning agent for removing organic contaminants from noble metal screen-printed electrodes [10]. |
| Standard Electrochemical Test Solution (e.g., K₄[Fe(CN)₆] in buffer) | A well-characterized redox couple used for quality control to evaluate electrode surface cleanliness and activity via Cyclic Voltammetry [2]. |
Ensuring Success: How to Validate Cleaning Efficacy and Compare Method Performance
Technical Support Center
Frequently Asked Questions (FAQs)
1. My cyclic voltammogram looks unusual or changes shape with repeated cycles. What should I check? This problem is most frequently linked to the reference electrode. Ensure it is correctly set up and in proper electrical contact with the solution. A blocked frit or air bubbles at the bottom of the electrode are common culprits. You can troubleshoot by temporarily using the reference electrode as a quasi-reference electrode; if the correct response is obtained, it confirms something is blocking the original connection [58].
2. Why is my baseline not flat, and what can I do about it? A non-flat baseline can be caused by issues with the working electrode itself [58]. Furthermore, the electrode-solution interface acts like a capacitor, leading to charging currents that cause a reproducible hysteresis in the baseline. You can mitigate this by decreasing the scan rate, increasing the analyte concentration, or using a working electrode with a smaller surface area [58].
3. The potentiostat reports a "voltage compliance" error. What does this mean? This error indicates the potentiostat cannot maintain the desired potential between the working and reference electrodes. This can happen if you are using a quasi-reference electrode that is touching the working electrode, or if the counter electrode has been removed from the solution or is not properly connected [58].
4. I am only detecting a very small, noisy current. What is the likely cause? This typically suggests that the working electrode is not properly connected to the electrochemical cell. The potential will still change, but no Faradaic current outside of the residual system current will flow [58].
5. I see an unexpected peak in my voltammogram. How can I identify its source? First, run a background scan of just the electrolyte without your analyte. If the peak persists, it could be from an impurity in the solvent, electrolyte, or from atmospheric contamination. Peaks can also appear if the scanning potential approaches the edge of the solvent's electrochemical window [58].
6. How long should I wait after polishing an electrode before using it? Research indicates that abrasive polishing temporarily alters electrode response, requiring a significant equilibration period. For stable results, it is recommended to wait 3 to 5 hours after polishing before starting quantitative experiments. Ideally, polish electrodes the day before and allow them to equilibrate overnight [19].
Troubleshooting Guide: Common CV Issues and Solutions
| Problem | Observable Signs | Possible Causes | Corrective Actions |
|---|---|---|---|
| Unusual Voltammogram | Shape changes each cycle; distorted peaks [58] | Blocked reference electrode frit; air bubbles; poor electrical contact [58] | Check reference electrode setup; use as quasi-reference to test; ensure all connections are secure [58] |
| Non-Flat Baseline | Significant slope or hysteresis in baseline [58] | Charging currents (capacitive effect); working electrode issues [58] | Reduce scan rate; increase analyte concentration; use smaller working electrode; polish WE [58] |
| Voltage Compliance Error | Potentiostat error message [58] | Counter electrode disconnected or out of solution; quasi-reference electrode touching WE [58] | Verify all electrodes are submerged and properly connected; ensure electrodes are not touching [58] |
| Small/Noisy Current | Current is minimal, noisy, and unchanging [58] | Working electrode not properly connected to the cell or potentiostat [58] | Check connection to working electrode; inspect cables for damage [58] |
| Unexpected Peaks | Peaks not attributable to the analyte [58] | Impurities; electrolyte/solvent decomposition; edge of potential window [58] | Run a background CV with pure electrolyte; use fresh, high-purity chemicals; adjust potential window [58] |
Quantitative Data: Cleaning Method Efficiency
The following table summarizes the effectiveness of different cleaning methods for screen-printed electrodes, as measured by the percentage reduction in polarization resistance (R~p~). A greater reduction indicates a more effective cleaning process [10].
| Cleaning Method | Gold Electrode (% Reduction in R~p~) | Platinum Electrode (% Reduction in R~p~) |
|---|---|---|
| Acetone | 35.33% | 49.94% |
| Ethanol | 44.50% | 81.68% |
| H~2~O~2~ | 47.34% | 92.78% |
| Electrochemical Cleaning | 3.70% | 67.96% |
| H~2~O~2~ + Multiple Slow CV Cycles | Most Important Reduction | Most Important Reduction [10] |
Experimental Protocols
Protocol 1: Routine Mechanical Polishing of Solid Electrodes
This protocol is adapted from general electrode polishing guides and is suitable for routine cleaning of glassy carbon, platinum, and gold electrodes [1] [23].
- Objective: To remove adsorbed species and refresh the electrode surface to restore electrochemical activity.
- Materials:
- Alumina slurry (0.05 µm)
- Microfiber polishing cloth
- Flat surface (e.g., glass plate)
- Distilled water
- Ultrasonic bath (optional)
- Procedure:
- Affix a microfiber polishing cloth to a flat, stiff surface like a glass plate [1].
- Shake the alumina slurry bottle well and dispense a small spot (approx. 3 mm diameter) onto the cloth [1] [23].
- Add a few drops of distilled water to moisten the pad [23].
- Hold the electrode surface parallel to the cloth and polish using a figure-8 pattern, gently rotating the electrode. Apply even pressure for 1-2 minutes [1] [23].
- Rinse the electrode thoroughly with distilled water to remove all alumina particles [1].
- (Optional) Sonicate the electrode in distilled water for 1-5 minutes to dislodge any adhered particles [1].
- The electrode is now ready for use. Do not touch the polished surface [23].
Protocol 2: Electrochemical Cleaning of Screen-Printed Gold Electrodes
This method has been identified as particularly effective for cleaning screen-printed electrodes (SPGEs) [10].
- Objective: To electrochemically remove contaminants and stabilize the electrode surface for biosensing applications.
- Materials:
- Screen-printed gold electrode (SPGE)
- Aqueous solution of 3% (v/v) H~2~O~2~ and 0.1 M HClO~4~
- Potentiostat
- Procedure:
- Apply 150 µL of the H~2~O~2~/HClO~4~ cleaning solution directly onto the electrode surface [10].
- Perform cyclic voltammetry (CV) with the following parameters [10]:
- Potential Range: -700 mV to 2000 mV
- Scan Rate: 100 mV/s
- Cycles: 10
- Wash the electrode with Milli-Q water.
- To activate the surface, perform 10 additional CV cycles in a clean electrolyte (e.g., PBS) at 50 mV/s over a relevant potential range (e.g., -400 to 500 mV) [10].
Workflow Visualization
The Scientist's Toolkit: Research Reagent Solutions
| Item | Function / Purpose |
|---|---|
| Alumina Slurries (5 µm, 0.3 µm, 0.05 µm) | Abrasive powders for mechanical polishing. Progressively finer grits (5µm→0.05µm) remove contaminants and create a mirror-like finish [1]. |
| Diamond Polishing Slurries (1 µm, 3 µm) | Oil-based abrasive slurries used on nylon pads for finer polishing of precious metal electrodes like platinum and gold [23]. |
| Potassium Ferricyanide/Ferrocyanide ([Fe(CN)~6~]~3−/4−~) | A common, well-behaved redox probe used to characterize electrode performance and cleanliness via cyclic voltammetry [3] [10]. |
| Perchloric Acid (HClO~4~) & Hydrogen Peroxide (H~2~O~2~) | Chemical agents used in electrochemical cleaning solutions to remove organic and inorganic contaminants from electrode surfaces [10]. |
| Phosphoric & Sulfuric Acid Electrolyte | A high-viscosity electrolyte mixture used in the electropolishing process to remove a thin, controlled layer of metal from the electrode [59]. |
| Microfiber & Nylon Polishing Pads | Specialized cloths attached to flat surfaces. Microfiber is used with alumina, while nylon is used with diamond slurries for different polishing stages [1] [23]. |
Frequently Asked Questions (FAQs)
Q1: Why has the peak separation (ΔEp) in my cyclic voltammetry experiments increased? A wider peak separation often indicates poor charge transfer kinetics at the electrode surface, frequently caused by surface contamination or fouling. Organic adsorbates, oxide layers, or residual polishing materials can create a barrier to electron transfer, increasing the measured ΔEp. This metric serves as a sensitive indicator of electrode cleanliness and electrochemical reversibility.
Q2: What does a decreased current response signal in my experiments? A diminished current response typically suggests either a loss of electroactive surface area or the presence of a passivating layer on your electrode. This can result from incomplete cleaning, physical damage to the electrode surface, or the buildup of non-conductive contaminants that block access to active sites.
Q3: How can I quantitatively validate my electrode cleaning procedure? Electrochemical validation using standard redox probes is essential. Record cyclic voltammograms in a known redox couple like [Fe(CN)₆]³⁻/⁴⁻ and calculate both the peak separation (ΔEp) and the electroactive surface area. A ΔEp接近59 mV (for a one-electron transfer) and stable, reproducible currents indicate a properly cleaned and active electrode surface [60].
Q4: My electrode polishing seems inconsistent. How can I improve reproducibility? Implement a standardized protocol with clear progression through abrasive sizes (e.g., from 5 μm to 0.05 μm alumina) and consistent polishing motions. Use a figure-8 pattern while gently rotating the electrode to ensure even surfacing. Always use dedicated polishing areas for each abrasive grit to prevent cross-contamination [1].
Troubleshooting Guides
Issue 1: Irreproducible Cyclic Voltammetry Results
Symptoms: High variability in peak currents and positions between successive scans; non-overlapping CV curves.
Possible Causes and Solutions:
- Cause: Residual adsorbates from previous experiments or the laboratory environment.
- Solution: Implement a more aggressive cleaning protocol, potentially including electrochemical cycling in sulfuric acid or chemical oxidation to remove stubborn contaminants [60].
- Cause: Inconsistent electrode polishing creating heterogeneous surface areas.
- Solution: Standardize polishing pressure, duration, and pattern. Verify the flatness of your polishing surface [1].
- Cause: Incomplete removal of alumina particles after polishing.
- Solution: Incorporate ultrasonic cleaning in distilled water for 1-5 minutes after polishing to dislodge embedded particles [1].
Issue 2: Persistent Poor Charge Transfer Efficiency
Symptoms: Consistently large peak separation (>100 mV for [Fe(CN)₆]³⁻/⁴⁻); low, drawn-out peak currents.
Possible Causes and Solutions:
- Cause: Formation of an oxide layer or carbonaceous deposit on the electrode surface.
- Solution: For gold electrodes, employ electrochemical cycling in sulfuric acid to reduce surface oxides. For carbon electrodes, consider potential cycling in alkaline media or gentle mechanical polishing [60].
- Cause: Permanent surface damage or deep scratching from overly aggressive polishing.
- Solution: For minor damage, perform a complete repolish starting with 600 grit silicon carbide paper, followed by sequential alumina polishing. For severe damage, electrode replacement may be necessary [1].
- Cause: Chemical modification of the electrode surface incompatible with your target analyte.
- Solution: Characterize your surface with techniques like XPS or SEM to identify the specific contaminant and tailor your cleaning approach accordingly [60].
Experimental Protocols for Electrode Characterization
Protocol 1: Electrochemical Validation Using Ferri/Ferrocyanide
Purpose: To quantitatively assess electrode cleanliness and activity following polishing procedures.
Materials:
- Potassium ferricyanide (K₃[Fe(CN)₆])
- Potassium ferrocyanide (K₄[Fe(CN)₆])
- Potassium chloride (KCl) or other supporting electrolyte
- Phosphate buffered saline (PBS), pH 7.4
Procedure:
- Prepare a solution of 1 mM each K₃[Fe(CN)₆] and K₄[Fe(CN)₆] in PBS with 0.1 M KCl as supporting electrolyte [60].
- Setup a standard three-electrode system with your polished working electrode, appropriate counter electrode, and reference electrode.
- Record cyclic voltammograms between -0.1 V and +0.6 V vs. Ag/AgCl at a scan rate of 20 mV/s [60].
- Measure the anodic peak potential (Epa), cathodic peak potential (Epc), anodic peak current (Ipa), and cathodic peak current (Ipc).
Data Analysis:
- Calculate peak separation: ΔEp = Epa - Epc
- Determine the Ipa/Ipc ratio
- Compare these values to theoretical expectations (ΔEp ≈ 59 mV for reversible one-electron transfer; Ipa/Ipc ≈ 1)
Protocol 2: Electrochemical Impedance Spectroscopy (EIS) Characterization
Purpose: To quantify charge transfer resistance at the electrode-electrolyte interface.
Procedure:
- Use the same ferri/ferrocyanide solution as in Protocol 1.
- Apply a DC potential of 0.2 V (the formal potential of the redox couple) with an AC amplitude of 10 mV [60].
- Measure impedance across a frequency range of 0.1 Hz to 100 kHz.
- Fit the resulting Nyquist plot to a Randles equivalent circuit to extract the charge transfer resistance (Rct) [60].
Quantitative Data from Electrode Cleaning Studies
Table 1: Impact of Cleaning Methods on Gold Electrode Electrochemical Properties [60]
| Electrode Substrate | Cleaning Method | Atomic % Gold (XPS) | ΔEp (mV) in [Fe(CN)₆]³⁻/⁴⁻ | Charge Transfer Resistance (kΩ) |
|---|---|---|---|---|
| LTCC (screen printed) | Potential cycling in H₂SO₄ | 89.2 | 76 | 1.8 |
| PEN (inkjet printed) | KOH + H₂O₂ / KOH Sweep | 85.7 | 84 | 2.3 |
| PCB (electroplated) | KOH + H₂O₂ | 78.3 | 112 | 4.1 |
| LTCC (screen printed) | UV-Ozone only | 72.5 | 145 | 6.9 |
Table 2: Expected Electrochemical Metrics for Properly Maintained Electrodes
| Parameter | Theoretical Ideal | Acceptable Range | Indication of Problem |
|---|---|---|---|
| ΔEp for [Fe(CN)₆]³⁻/⁴⁻ | 59 mV | 60-80 mV | >100 mV |
| Ipa/Ipc ratio | 1.0 | 0.8-1.2 | <0.8 or >1.2 |
| Electroactive surface area variation | <5% between polishes | 5-10% | >15% |
| Charge transfer resistance (Rct) | Minimized | <2 kΩ | >5 kΩ |
The Scientist's Toolkit: Essential Research Reagents and Materials
Table 3: Key Materials for Electrode Polishing and Characterization
| Material/Reagent | Function | Application Notes |
|---|---|---|
| Alumina slurry (5 μm, 0.3 μm, 0.05 μm) | Sequential abrasive polishing | Remove contaminants and create mirror finish; use coarse to fine progression [1] |
| Microfiber polishing cloth | Polishing substrate | Provides appropriate surface for final polishing steps [1] |
| Nylon polishing pads | Aggressive polishing substrate | Used with larger abrasives for initial contaminant removal [1] |
| Silicon carbide paper (600 grit) | Initial surfacing | For major surface reconstruction of damaged electrodes [1] |
| Potassium ferricyanide/ferrocyanide | Electrochemical validation | Standard redox probe for quantifying electrode activity [60] |
| Sulfuric acid (0.5 M) | Electrochemical cleaning | Removes oxides and contaminants from noble metal electrodes [60] |
| Potassium hydroxide-hydrogen peroxide | Chemical cleaning | Effective for organic contaminant removal from gold surfaces [60] |
Experimental Workflow Visualization
Electrode Troubleshooting Workflow
Electrode Polishing Protocol Selection
Comparative Analysis of Cleaning Methods for Different Electrode Substrates
This technical support center provides definitive guidelines for electrode cleaning and polishing, a critical foundation for reproducible results in electrochemical research and drug development. Proper electrode maintenance directly impacts data quality by ensuring consistent electron transfer kinetics and surface properties. This guide synthesizes the latest research and established protocols to help you select and execute optimal cleaning procedures for your specific electrode substrates.
The following decision workflow will help you select the appropriate cleaning strategy based on your electrode material and contamination type:
Comparative Performance Data of Cleaning Methods
Table 1: Quantitative Comparison of Electrode Cleaning Methods
| Electrode Material | Cleaning Method | Key Performance Metrics | Optimal Parameters | Experimental Conditions |
|---|---|---|---|---|
| Screen-Printed Gold Electrodes (SPGE) [3] | Electrochemical Cleaning (H₂O₂/HClO₄) | Eliminated 100% of surface interference (dark spots); Enabled correct DNA probe deposition | 10 cycles CV, -700 mV to 2000 mV, 100 mV/s in 3% H₂O₂ + 0.1 M HClO₄ | Mutation detection of K-ras gene; SEM characterization at ×5,000-×50,000 magnification |
| Glassy Carbon Electrodes [2] | Robotic Mechanical Polishing | Decreased electrode capacitance by ~40%; No significant pattern effect (8-shape vs circular) | 0.05 μm alumina, 30-120 sec, constant force application | 0.01 M K₄[Fe(CN)₆] in 0.5 M Na₂SO₄; CV scans at 500 mV/s |
| Aluminum & Stainless Steel [61] | Electrode Dissolution Monitoring | Achieved 69-72% COD removal in vinasse treatment | Current densities: 0.01-0.05 A/cm² over 8 hours | Electrocoagulation for wastewater treatment |
| Gold & Platinum [23] | Multi-Step Mechanical Polishing | Restored mirror-like finish; Prevented uneven wear | 1-μm diamond → 0.05-μm alumina; Figure-8 pattern | BASi polishing protocols; LCEC applications |
Detailed Experimental Protocols
Protocol 1: Electrochemical Cleaning for Screen-Printed Gold Electrodes
Application: Removal of manufacturing residues and surface interference for biosensor development [3]
Reagents and Equipment:
- Screen-printed gold electrodes (DS 250AT, Dropsens)
- Cleaning solution: 3% v/v H₂O₂ + 0.1 M HClO₄
- Phosphate buffered saline (PBS, pH 7.4)
- [Fe(CN)₆]³⁻/⁴⁻ solution (2.5 mM in 0.01 M PBS)
- Potentiostat (Bioanalytical Systems BAS-100)
Procedure:
- Apply 150 μL of H₂O₂/HClO₄ cleaning solution to SPGE surface
- Perform cyclic voltammetry (CV) with the following parameters:
- Potential range: -700 mV to 2000 mV
- Scan rate: 100 mV/s
- Number of cycles: 10
- Rinse electrode thoroughly with Milli-Q water
- Perform additional 10 CV cycles in clean electrolyte to stabilize surface:
- Potential range: -400 mV to 500 mV
- Scan rate: 50 mV/s
- Validate cleaning efficacy via SEM characterization and [Fe(CN)₆]³⁻/⁴⁻ redox response
Validation: Electrodes showed uniform surfaces without dark spots and enabled successful deposition of DNA probes for K-ras gene mutation detection.
Protocol 2: Robotic Mechanical Polishing for Glassy Carbon Electrodes
Application: Standardized polishing for reproducible electrochemical measurements [2]
Reagents and Equipment:
- Glassy carbon electrode
- Alumina suspension (0.05 μm)
- Robotic polishing system (Franka Emika Robot)
- Alumina polishing pad (BASi)
- 2-dimensional polishing station with linear actuators
- Ultrasonic cleaner (150W maximum)
Procedure:
- Mount electrode in 3D-printed jig with spring mechanism for constant force application
- Program polishing station for Lissajous patterns (8-shape, circular, or linear)
- Apply 0.05 μm alumina suspension to polishing pad
- Execute automated polishing for 30-120 seconds with stable contact force
- Transfer electrode to washing station for rinsing
- Optional: Sonicate in distilled water for ≤5 minutes to remove residual particles
- Validate via CV in standard K₄[Fe(CN)₆] solution
Key Finding: No significant difference was observed between polishing patterns (8-shape, circular, linear), contradicting traditional beliefs.
Protocol 3: Multi-Step Polishing for Precious Metal Electrodes
Application: Gold, platinum, and other precious metal electrodes requiring mirror-like finishes [23]
Reagents and Equipment:
- Precious metal electrode (gold or platinum)
- Diamond polishing slurries (1-μm, oil-based)
- Alumina suspension (0.05 μm aqueous)
- Nylon polishing pads (white)
- Microcloth polishing pads (brown)
- Glass polishing plates
- Methanol for rinsing
Procedure:
- Initial Cleaning: Rinse electrode with water followed by methanol
- Coarse Polishing (white nylon pad):
- Apply 1-μm diamond slurry
- Polish using figure-8 motion for 1-2 minutes
- Rinse thoroughly with methanol
- Fine Polishing (brown microcloth pad):
- Apply 0.05-μm alumina suspension
- Polish using figure-8 motion for 1-2 minutes
- Rinse thoroughly with distilled water
- Sonication: Immerse in distilled water and sonicate for ≤5 minutes
- Final Rinse: Rinse with methanol and wipe dry
Critical Notes: Use separate pads for each abrasive; Label plates to prevent cross-contamination; Avoid excessive pressure that could damage electrode.
The Scientist's Toolkit: Essential Research Reagents & Materials
Table 2: Key Reagents and Materials for Electrode Maintenance
| Item | Function/Application | Specifications & Variants |
|---|---|---|
| Abrasive Slurries [1] [23] | Mechanical polishing to remove contaminants and refresh surface | Alumina (0.05 μm, 0.3 μm, 5 μm); Diamond slurries (1 μm, 3 μm, 6 μm, 15 μm) |
| Polishing Pads [1] [23] | Substrate for abrasives during polishing | Microfiber cloth (routine); Nylon pads (aggressive); Silicon carbide paper (complete repolish) |
| Chemical Cleaning Solutions [5] [3] [18] | Dissolve specific contaminants | HCl (salt deposits); HClO₄/H₂O₂ (electrochemical cleaning); Pepsin/HCl (proteins); Thiourea/HCl (silver sulfide) |
| Electrochemical Cells [3] | Container for electrochemical cleaning | Dedicated 3D-printed tanks for powder suspension in dielectric fluids |
| Ultrasonic Cleaners [1] [23] | Remove residual abrasive particles | Low-power (≤150W) with distilled water bath |
| Reference Electrodes [3] | Provide stable potential reference during electrochemical cleaning | Ag/AgCl reference electrodes |
Frequently Asked Questions (FAQs)
Q1: Which polishing pattern provides the best results - figure-eight or circular motion?
Recent automated studies demonstrate that polishing pattern (figure-eight, circular, or linear) shows no significant effect on final electrode quality when consistent force is applied [2]. The traditional preference for figure-eight patterns appears to be based on anecdotal evidence rather than empirical data. Consistency in applied pressure and duration matters more than the specific motion pattern.
Q2: How can I validate that my electrode cleaning procedure was successful?
The most reliable validation method depends on your application:
- For general electrochemical work: Test electrode response in standard solutions like [Fe(CN)₆]³⁻/⁴⁻ and monitor peak separation and current response [2] [3]
- For biosensor applications: Verify surface uniformity via SEM and confirm bio-affinity through successful probe deposition [3]
- For quantitative analysis: Perform standardized titrations and monitor equivalence point sharpness, titration duration, and potential jumps [18]
Q3: My electrode shows sluggish response after cleaning. What could be wrong?
Several factors could cause this issue:
- Residual Polishing Material: Ensure thorough rinsing and sonication after polishing to remove embedded abrasive particles [23]
- Chemical Contamination: Check that cleaning solutions are properly prepared and rinsed
- Surface Damage: Aggressive polishing can create micro-scratches that interfere with electron transfer; use progressively finer abrasives [23]
- Incomplete Contaminant Removal: Specific contaminants require targeted cleaning approaches (see Table 2) [5] [18]
Q4: How often should I polish my electrodes?
Polishing frequency depends entirely on usage conditions:
- Electrodes in liquid chromatography may function for months without repolishing [23]
- Biosensors often require pretreatment before each use due to sensitivity requirements [3]
- Routine cleaning between polishing sessions can extend intervals - try gentle buffing with methanol-soaked tissue first [23]
- Monitor performance degradation rather than following a fixed schedule
Q5: Are there electrode types that shouldn't be mechanically polished?
Yes, certain electrodes require alternative cleaning approaches:
- Glass membranes and polymer membranes (on ISEs) must not be polished with abrasives [18]
- Electrodes with visible damage or those that have been polished multiple times (approaching the underlying stainless steel) should be replaced [1]
- Chemically modified electrodes may have delicate surfaces incompatible with mechanical polishing [23]
Troubleshooting Common Electrode Issues
Problem: Inconsistent Results Between Measurements
Possible Causes & Solutions:
- Cause: Residual contamination from previous experiments
- Solution: Implement standardized cleaning protocol between runs; Use appropriate solvents for specific contaminants [5]
- Cause: Uneven polishing leading to non-uniform surface
- Solution: Ensure electrode remains parallel to polishing surface; Apply even pressure; Rotate electrode regularly during polishing [23]
- Cause: Aging electrode approaching end of lifespan
- Solution: Monitor electrode history; Replace after 7-15 complete repolishing operations or when hitting underlying stainless steel [1]
Problem: Poor Signal-to-Noise Ratio in Sensitive Measurements
Possible Causes & Solutions:
- Cause: Surface oxidation or corrosion
- Solution: Implement electrochemical cleaning to remove oxide layers [3]
- Cause: Adsorption of atmospheric contaminants
- Cause: Manufacturing residues on new electrodes
- Solution: Always pre-clean new electrodes, particularly screen-printed devices [3]
The following workflow illustrates the complete electrode maintenance process from initial assessment through final validation:
Within the scope of this thesis on working electrode polishing and cleaning procedures, the verification of surface quality is paramount. A meticulously polished and cleaned electrode surface is a prerequisite for obtaining reliable, reproducible data in electrochemical experiments and biosensor applications. Surface characterization provides the objective, quantitative evidence needed to confirm that preparation procedures have been successful. This technical support center outlines how to use Electrochemical Impedance Spectroscopy (EIS), X-ray Photoelectron Spectroscopy (XPS), and various microscopy techniques to troubleshoot and verify electrode surfaces, directly addressing common challenges faced by researchers in drug development and related fields.
Core Concepts: The Analyst's Toolkit
This section defines the key techniques and materials central to electrode surface preparation and verification.
Key Characterization Techniques
- Electrochemical Impedance Spectroscopy (EIS): This technique measures the impedance of an electrode interface as a function of frequency. It is exceptionally sensitive to surface contamination, the presence of monolayers, and changes in the double layer. A key parameter, the polarization resistance (Rp), can be used to quantify cleaning efficiency, where a significant reduction post-cleaning indicates the successful removal of contaminants [10].
- X-ray Photoelectron Spectroscopy (XPS): Also known as ESCA, XPS is a surface-sensitive quantitative spectroscopic technique that provides information about the elemental composition and chemical state of elements within the top 1-10 nm of a surface [62] [63]. It is indispensable for identifying carbonaceous contamination, oxide layers, and verifying the successful grafting of functional groups in self-assembled monolayers (SAMs) [64].
- Microscopy (SEM/AFM):
- Scanning Electron Microscopy (SEM) provides high-resolution images of surface topography and morphology at high magnifications, allowing researchers to visualize surface roughness, scratches from polishing, and particulate contamination [3].
- Atomic Force Microscopy (AFM) generates three-dimensional topographical maps of a surface by scanning a sharp probe across it. It is excellent for quantifying surface roughness at the nanoscale and assessing the homogeneity of molecular layers [65].
Essential Research Reagents and Materials
The following table details key materials used in electrode polishing and subsequent characterization.
Table 1: Essential Research Reagents and Materials for Electrode Preparation and Characterization
| Item | Function and Application | Example Use in Experiments |
|---|---|---|
| Alumina (Al₂O₃) Slurries | A suspension of aluminum oxide particles used for abrasive polishing of electrode surfaces to a mirror finish. | Available in different micron sizes (e.g., 5 µm, 0.3 µm, 0.05 µm) for multi-step polishing from coarse to fine [1]. |
| Polishing Cloths and Pads | Specialized surfaces (e.g., microfiber, nylon) used with abrasive slurries to ensure even polishing. | A unique pad is often dedicated to each grit size to prevent cross-contamination [1]. |
| Potassium Ferricyanide/Ferrocyanide ([Fe(CN)₆]³⁻/⁴⁻) | A redox probe used in electrochemical characterization (CV, EIS) to assess electron transfer kinetics at an electrode surface. | A well-cleaned, active surface shows a reversible, peak-shaped CV; a contaminated surface shows a suppressed response [3] [64] [10]. |
| Chemical Cleaning Agents | Reagents such as H₂O₂, HClO₄, and Piranha solution (H₂SO₄:H₂O₂) used to remove organic and inorganic contaminants. | Used in incubation or electrochemical cleaning protocols to oxidize and dissolve surface contaminants [3] [10]. |
| Self-Assembled Monolayer (SAM) Precursors | Molecules like 3-Mercaptopropionic acid (3MPA) that form ordered monolayers on gold surfaces, used for biosensor functionalization. | XPS is used to verify the success of the SAM formation and subsequent activation/deactivation steps by tracking elemental ratios [64]. |
Troubleshooting Guides & FAQs
This section addresses specific, common problems encountered during electrode preparation and characterization.
FAQ: Surface Preparation and Cleaning
Q1: What is the most effective method for cleaning screen-printed gold electrodes (SPGEs)?
- A: A comparative study evaluated several methods and found that an electrochemical cleaning method using H₂O₂ and HClO₄ was highly effective. This method, complemented by cyclic voltammetry (CV) in a ferricyanide/ferrocyanide solution, stabilized the electrode surface and effectively removed interferences observed as dark spots in SEM imaging. The cleaned electrodes showed excellent performance for subsequent deposition of DNA probes [3].
Q2: Can I use oxygen plasma to clean my glassy carbon electrode instead of mechanical polishing?
- A: Yes, evidence suggests oxygen plasma is a superior and simpler alternative. A 2023 study demonstrated that a short oxygen plasma treatment effectively removes organic contamination and can even restore electrodes fouled with benzediazonium deposits. The treatment improves hydrophilicity, surface energy, and electron transfer kinetics, with effects remaining stable for over a week when electrodes are stored in water [66].
Q3: My laboratory has multiple polishing protocols. How do I choose the right one?
- A: The choice should be guided by the condition of the electrode and the required level of cleanliness. The following workflow, based on established polishing guides, is recommended to standardize procedures across your team.
FAQ: Data Interpretation and Surface Analysis
- Q4: How can I quantitatively confirm that my cleaning procedure worked?
- A: EIS is an excellent tool for this. Measure the polarization resistance (Rp) of a standard redox probe like [Fe(CN)₆]³⁻/⁴⁻ before and after cleaning. A successful cleaning is indicated by a significant reduction in Rp. One study reported the following percentage reductions in Rp for different cleaning methods, demonstrating the superior performance of H₂O₂ and optimized CV cycles [10]:
Table 2: Quantitative Efficiency of Electrode Cleaning Methods via EIS
| Cleaning Method | Gold Electrode (% Reduction in Rp) | Platinum Electrode (% Reduction in Rp) |
|---|---|---|
| Acetone | 35.33% | 49.94% |
| Ethanol | 44.50% | 81.68% |
| H₂O₂ | 47.34% | 92.78% |
| Electrochemical Method | 3.70% | 67.96% |
Q5: I've functionalized my gold electrode with a SAM. How can I use XPS to verify the surface chemistry?
- A: XPS can track the success of each reaction step. For a carboxyl-terminated SAM (e.g., 3MPA) activated with EDC/NHSS and deactivated with ethanolamine, you would monitor two key regions:
- Sulfur (S) 2p region: The presence of a S 2p peak confirms the formation of the Au-S bond, indicating the SAM is anchored to the gold surface.
- Nitrogen (N) 1s and Carbon (C) 1s regions: After deactivation, XPS should show a new N 1s signal, confirming the introduction of ethanolamine. The C 1s spectrum can be deconvoluted to show peaks for the amide bond (N-C=O) formed during deactivation, providing evidence of a successful reaction [64]. Shortening activation times can optimize this process and minimize side products.
- A: XPS can track the success of each reaction step. For a carboxyl-terminated SAM (e.g., 3MPA) activated with EDC/NHSS and deactivated with ethanolamine, you would monitor two key regions:
Q6: My electrochemical response is still poor after cleaning. What are other potential surface issues?
- A: A poor response after cleaning suggests persistent issues that require deeper characterization. Follow the integrated workflow below to diagnose the problem systematically using a combination of techniques.
Establishing a Quality Control Checklist for Your Lab
Frequently Asked Questions (FAQs) on Electrode Polishing and Cleaning
FAQ 1: Why is a proper electrode polishing and cleaning procedure critical for electrochemical experiments?
A clean, well-defined electrode surface is essential for minimizing non-faradaic processes and obtaining consistent, reproducible results. Surface degradation, such as the adsorption of solution species, formation of oxide layers, or physical contamination, can significantly alter electrochemical responses, leading to inaccurate data. Proper pretreatment ensures a clean, flat surface with predictable electrochemical behavior [2] [66] [3].
FAQ 2: Is the "figure-eight" polishing pattern truly better than a simple circular motion?
A 2025 automated robotic study systematically evaluated this long-standing practice and found that the polishing pattern (linear, circular, eight-figure, or complex) did not significantly affect the final polishing quality. The key to consistent results is the application of constant, even pressure, which can be more reliably achieved through automation than by manual polishing. Therefore, within an automated system, the pattern is not a critical variable [2].
FAQ 3: What are the main alternatives to mechanical polishing for electrode cleaning?
While mechanical polishing is the most common method, several other effective techniques exist, depending on the electrode material:
- Plasma Cleaning: Oxygen plasma treatment is a highly effective, person-independent method for cleaning and activating glassy carbon electrodes. It removes organic contaminants and improves surface hydrophilicity, with effects stable for up to a week when stored in water [66].
- Electrochemical Cleaning: This involves cycling the electrode potential within a specific range in an electrolyte (e.g., sulfuric acid for gold electrodes). It is a common method for in-situ cleaning and activating electrode surfaces [3] [60].
- Chemical Cleaning: Methods include using "piranha solution" (a mixture of concentrated sulfuric acid and hydrogen peroxide) or potassium hydroxide with hydrogen peroxide. These are aggressive methods that require extreme caution but can remove stubborn contaminants [3] [60].
FAQ 4: How can I tell if my working electrode needs cleaning or polishing?
A gradual decrease in electrochemical response over successive experiments is a primary indicator. For a more diagnostic approach, you can use the troubleshooting workflow below to systematically identify and address issues related to the working electrode surface [23] [37].
Diagram 1: Troubleshooting workflow for electrode performance issues.
Experimental Protocols & Data
Protocol: Automated Electrode Polishing and Evaluation
This protocol, adapted from a 2025 study, describes an automated method for polishing and evaluating glassy carbon (GC) electrodes [2].
1. Materials:
- Robotic arm with 3D-printed electrode jig.
- XY-moving polishing station with linear actuators.
- Alumina polishing pad (e.g., BASi).
- 0.05 μm alumina suspension.
- Portable potentiostat.
- Standard solution: 0.01 M K₄[Fe(CN)₆], 0.5 M Na₂SO₄, 0.25 M HOAc/NaOAc buffer.
- Working electrode: Planar glassy carbon electrode.
- Counter electrode: Silver wire.
- Pseudo-reference electrode: Silver wire.
2. Method:
- Corrosion Induction: Apply a high voltage (5 V for 30 s) to the GC electrode to corrode its surface.
- Automated Polishing Cycle: The robot executes the following sequence: a. Brings the electrode to the polishing station and fixes its position. b. The polishing station moves in a pre-programmed pattern (e.g., Lissajous curves for linear, circular, or eight-figure motions) for 30 seconds with constant force. c. The robot transfers the electrode to the measurement station.
- Electrochemical Evaluation: Perform cyclic voltammetry (CV) in the standard solution. Use a window between −1.0 V to 1.0 V at a scan rate of 500 mV s⁻¹ for five cycles.
- Analysis: The integral of the CV plot, which corresponds to the electrode's capacitance and surface quality, is calculated for the last cycle. A decreasing integral indicates successful removal of corroded material and improved surface quality.
3. Key Findings: The study quantitatively demonstrated that all tested polishing patterns performed similarly in restoring the electrode surface, challenging the necessity of the traditional figure-eight pattern for automated systems [2].
Table 1: Quantitative comparison of polishing patterns on electrode surface quality (CV integral).
| Polishing Pattern | Effect on CV Integral (vs. Unpolished) | Polishing Time to Restore Surface |
|---|---|---|
| Eight-Figure | Significant decrease | ~120 seconds |
| Circular | Significant decrease | ~120 seconds |
| Linear | Significant decrease | ~120 seconds |
| Complex | Significant decrease | ~120 seconds |
| Manual (Figure-Eight) | Significant decrease | ~120 seconds |
Protocol: Oxygen Plasma Treatment for Glassy Carbon Electrodes
This protocol offers a non-abrasive alternative to mechanical polishing [66].
1. Materials:
- Low-pressure oxygen plasma cleaner.
- Glassy carbon electrodes.
- Storage vessel with distilled water.
2. Method:
- Place the GC electrode in the plasma cleaner chamber.
- Evacuate the chamber and introduce pure oxygen gas.
- Expose the electrode to the RF-generated oxygen plasma for a defined period (typically a few minutes).
- Remove the electrode and store it in distilled water if not used immediately to maintain hydrophilicity and stability for up to one week.
3. Key Findings: Plasma treatment produced CV responses with improved features, close to theoretical values, and was more effective than standard polishing at removing electrografted organic layers (e.g., benzediazonium deposits) [66].
Comparison of Electrode Cleaning Methods
The optimal cleaning procedure depends heavily on the electrode material and construction. The table below summarizes methods for different electrode types.
Table 2: Overview of cleaning methods for different electrode types.
| Electrode Type | Cleaning Method | Protocol Summary | Key Efficacy Finding |
|---|---|---|---|
| Gold Screen-Printed (SPGE) [3] | Electrochemical (H₂O₂/HClO₄) | CV in 3% H₂O₂ / 0.1 M HClO₄; 10 cycles, -700 to 2000 mV, 100 mV/s. | Effectively eliminated surface interference and stabilized the surface for DNA probe deposition. |
| Glassy Carbon (GC) [66] | Oxygen Plasma | Exposure to low-pressure RF-generated O₂ plasma for a short duration. | Superior to polishing for cleaning/activation; stable for 1 week in water. |
| Various Au Surfaces (LTCC, PEN, PCB) [60] | H₂SO₄ CV | Potential cycling in 0.5 M H₂SO₄ between -500 and 1700 mV until a stable Au CV is obtained. | Most effective for LTCC-based Au electrodes; highest Au content and charge transfer. |
| Platinum & Native Gold [23] | Multi-Step Abrasive | 1. Polish with 1-µm diamond slurry on nylon pad.2. Polish with alumina polish on microcloth pad.3. Rinse and sonicate. | Standard manufacturer-recommended procedure for restoring a mirror-like finish. |
The Scientist's Toolkit: Essential Research Reagents & Materials
Table 3: Key materials and reagents for electrode polishing and cleaning protocols.
| Item | Function / Application | Example Specifications |
|---|---|---|
| Alumina Slurry Suspension | Abrasive for mechanical polishing of electrodes like glassy carbon. | Various grit sizes: 5 µm (aggressive), 0.3 µm (periodic), 0.05 µm (fine/routine polish) [1]. |
| Diamond Slurry Suspension | Abrasive for polishing harder electrode materials like platinum and gold. | Oil-based slurries; common particle sizes: 1-µm, 3-µm, 6-µm [23]. |
| Microfiber & Nylon Polishing Pads | Surfaces for applying abrasive slurries during polishing. | Microfiber (soft, for alumina); Nylon (tight weave, for diamond) [1] [23]. |
| Oxygen Plasma Cleaner | Equipment for non-contact cleaning and activation of carbon electrodes. | Low-pressure, RF-generated plasma in 100% O₂ atmosphere [66]. |
| Potassium Hydroxide (KOH) & Hydrogen Peroxide (H₂O₂) | Chemical cleaning solution for removing organic contaminants from gold surfaces. | 50 mM KOH + 30% H₂O₂ in a 3:1 ratio; used for (electro-)chemical treatment [60]. |
| Sulfuric Acid (H₂SO₄) | Electrolyte for electrochemical cleaning and activation of gold electrodes. | 0.5 M solution, deoxygenated; used for potential cycling [60]. |
Conclusion
A rigorous and well-understood electrode polishing and cleaning protocol is not merely a preparatory step but the foundation of high-quality, reproducible electrochemistry. As this guide illustrates, moving beyond anecdotal practices to methodical, validated procedures is crucial. The future points toward greater standardization and automation, with robotic systems and data-driven optimization eliminating human variability. For biomedical and clinical research, where electrochemical sensors play an increasingly vital role in diagnostics and drug monitoring, adopting these robust practices ensures the generation of reliable data, ultimately accelerating discovery and improving the fidelity of analytical results. Embracing these advanced cleaning and validation techniques will be key to developing the next generation of sensitive and reliable biosensors.
References
- 1. Electrode Polishing Guide [https://pineresearch.com/support-article/electrode-polishing-guide/]
- 2. Does one need to polish electrodes in an eight pattern ... [https://pubs.rsc.org/en/content/articlehtml/2025/dd/d4dd00323c]
- 3. Impact of cleaning procedures on screen-printed gold ... [https://link.springer.com/article/10.1007/s10800-025-02271-8]
- 4. EC_electrode_handbook/Section 6. Polishing method [https://www.als-japan.com/2022.html]
- 5. How to Store, Clean, and Recondition pH Electrodes [https://www.coleparmer.com/tech-article/how-to-store-clean-and-recondition-ph-electrodes]
- 6. Unveiling challenges of aluminium electrode fouling and ... [https://www.sciencedirect.com/science/article/abs/pii/S0013935125002567]
- 7. Characterization of electrode fouling during ... [https://link.springer.com/article/10.1007/s11783-020-1345-7]
- 8. Current status of electrode corrosion passivation and its ... [https://www.sciencedirect.com/science/article/abs/pii/S025527012500042X]
- 9. Understanding the different effects of fouling mechanisms ... [https://pubs.rsc.org/en/content/articlelanding/2024/an/d3an02205f]
- 10. What Is the Optimal Method for Cleaning Screen-Printed ... [https://www.mdpi.com/2227-9717/10/4/723]
- 11. Advanced pre-treatment strategies to control membrane ... [https://link.springer.com/article/10.1007/s13201-025-02558-3]
- 12. Passivation (chemistry) [https://en.wikipedia.org/wiki/Passivation_(chemistry)]
- 13. Investigation of electrode passivation during oxidation of a ... [https://pubs.rsc.org/en/content/articlelanding/2025/ta/d5ta00481k]
- 14. Uncovering the key determinants of electrode passivation ... [https://www.sciencedirect.com/science/article/abs/pii/S0013935125011405]
- 15. What is Passivation? How Does Stainless Steel ... [https://www.besttechnologyinc.com/passivation-systems/what-is-passivation/]
- 16. Error, reproducibility and uncertainty in experiments for electrochemical energy technologies | Nature Communications [https://www.nature.com/articles/s41467-022-34594-x]
- 17. No raw data, no science: another possible source of the reproducibility crisis | Molecular Brain | Full Text [https://molecularbrain.biomedcentral.com/articles/10.1186/s13041-020-0552-2]
- 18. Best practice for electrodes in titration [https://www.metrohm.com/en/discover/blog/20-21/best-practice-for-electrodes-in-titration.html]
- 19. A consideration of electrode polishing prior to application ... [https://www.sciencedirect.com/science/article/abs/pii/S0039914098000186]
- 20. Measuring the Surface Cleanliness [https://www.elcometer.com/en/measuring-the-surface-cleanliness]
- 21. Test method validation for cleaning validation samples [https://www.europeanpharmaceuticalreview.com/article/1112/test-method-validation-for-cleaning-validation-samples/]
- 22. What Maintenance Procedures Are Required For A Glassy ... Carbon [https://kindle-tech.com/faqs/what-maintenance-procedures-are-required-for-a-glassy-carbon-electrode]
- 23. Working Electrodes [https://www.basinc.com/manuals/LC_epsilon/Maintenance/Working/working]
- 24. Methods for cleaning substrates and glass chambers for... [https://redox.me/blogs/good-measurement-practices/methods-for-cleaning-substrates-and-glass-chambers-for-electrochemical-measurements]
- 25. How to clean Working Glassy ? – Electrochemistry... Carbon Electrode [https://electrochemistrystore.com/blogs/electrodes/how-to-clean-glassy-carbon-working-electrode]
- 26. What can cause poisoning of a platinum disk electrode and ... [https://www.linkedin.com/pulse/what-can-cause-poisoning-platinum-disk-electrode-how-prevented-kwdle]
- 27. Cations found to be the culprit behind degraded platinum ... [https://resou.osaka-u.ac.jp/en/research/2025/20250319_1]
- 28. How to Repair Ag/AgCl Reference Electrode: A Complete ... [https://electrochemistrystore.com/blogs/electrodes/how-to-repair-ag-agcl-reference-electrodes-a-complete-guide?srsltid=AfmBOophVf2w6KBCNBjTekx4DMQT_UR_VuG-pmWdPjpbcoWmCrTjxlxP]
- 29. Electrochemistry Troubleshooting Guide [https://www.numberanalytics.com/blog/electrochemistry-troubleshooting-guide]
- 30. Best Practices for Ultrasonic Homogenization [https://www.sonicator.com/pages/best-practices-for-ultrasonic-homogenization?srsltid=AfmBOootVU-MlFaPEOgYPb-gIJugLH8lLYhlQwY1JRQK_1fSpBtmY5IU]
- 31. Protocols | Sonication of PFFs [https://www.stressmarq.com/support/technical-support/protocols/sonication-protocol/?srsltid=AfmBOorvOmYCK1oWAJeCrD90yZRSzJ78BsZwp-gnexchMf6RQnHTGiYI]
- 32. Electrochemistry cleans membranes sustainably [https://www.linkedin.com/posts/swatantra-p-singh-9267284b_membranetechnology-electrochemicalcleaning-activity-7350049362506403841-JGeI]
- 33. Dynamic pore modulation of contracted carbon fiber filter ... [https://www.sciencedirect.com/science/article/abs/pii/S1385894723039748]
- 34. Modern designs of electrochemical sensor for accurate ... [https://www.sciencedirect.com/science/article/abs/pii/S0254058425002342]
- 35. Recent Advances in Electrochemical Sensors for the ... [https://www.mdpi.com/2079-6374/15/10/676]
- 36. Troubleshooting Common Issues with PCB Cleaning ... [https://www.allpcb.com/allelectrohub/troubleshooting-common-issues-with-pcb-cleaning-equipment]
- 37. Troubleshooting Electrochemical Cell [https://redox.me/blogs/good-measurement-practices/troubleshooting-electrochemical-cell]
- 38. Electrochemical detection of sulfamethoxazole antibiotics ... [https://www.nature.com/articles/s41699-025-00555-3]
- 39. Recent Advances in the Development of Portable ... [https://pmc.ncbi.nlm.nih.gov/articles/PMC10058808/]
- 40. Plasma surface treatment process and mechanism [https://piescientific.com/plasma-surface-treatment-process-and-mechanism/]
- 41. Is the oxygen plasma cleaning technique indicated for any ... [https://www.sciencedirect.com/science/article/abs/pii/S0013468624013860]
- 42. How should I clean a pH electrode, or revive a damaged ... [https://www.camlab.co.uk/blog/how-should-i-clean-a-ph-electrode-or-revive-a-damaged-electrode]
- 43. FAQ [https://www.sciplasma.com/faq]
- 44. Low-pressure plasma cleaning of organic contamination from ... [https://pmc.ncbi.nlm.nih.gov/articles/PMC12624504/]
- 45. Electrode Cleaning [https://harrickplasma.com/electrode-cleaning/]
- 46. Understanding the different effects of fouling on working... mechanisms [https://pmc.ncbi.nlm.nih.gov/articles/PMC11648937/]
- 47. Recent strategies to minimise fouling in electrochemical .. ... [https://www.degruyterbrill.com/document/doi/10.1515/revac-2015-0008/html?lang=en&srsltid=AfmBOoqSag-0dCET1j9R94B60FNqkCdUcCfW26n9PvCjnU6kR5SvhUq8]
- 48. Mitigating the Effects of Electrode Biofouling-Induced ... [https://pmc.ncbi.nlm.nih.gov/articles/PMC8281608/]
- 49. Direct electrochemical detection of 4-aminophenol in ... [https://www.sciencedirect.com/science/article/abs/pii/S1572665720307967]
- 50. : Causes and Consequences Electrode Fouling [https://www.numberanalytics.com/blog/electrode-fouling-causes-consequences]
- 51. How to Use the Ossila Electrode Cleaning Polishing Kit [https://www.ossila.com/pages/how-to-use-the-ossila-electrode-cleaning-polishing-kit]
- 52. Summary Of Common Problems In Electropolishing - SANS [https://www.sansmachining.com/summary-of-common-problems-in-electropolishing/]
- 53. Electrode Cleaning & Maintenance for Electromagnetic Flow ... [https://www.burak.in/blog/electrode-cleaning-maintenance-for-electromagnetic-flow-meters?srsltid=AfmBOoqvbyLmkPKZTuLFRmHbTFrTQ_qrHVGWb5RsUV1dcgLtdpYnbnc6]
- 54. Optimization of process parameters for cluster ... [https://www.sciencedirect.com/science/article/abs/pii/S1369800125009242]
- 55. Optimization of Process Parameters in Electropolishing ... [https://www.mdpi.com/2504-4494/9/4/127]
- 56. Machine learning based optimization of titanium ... [https://www.nature.com/articles/s41598-025-09416-x]
- 57. Target analyte assisted sensitive electrochemical detection of ... [https://pubs.rsc.org/en/content/articlehtml/2025/lf/d5lf00006h]
- 58. Troubleshooting Cyclic Voltammetry and Voltammograms [https://www.ossila.com/pages/cyclic-voltammetry-troubleshooting]
- 59. What is Electropolishing? How Does Electropolishing Work? [https://www.besttechnologyinc.com/electropolishing-equipment/how-does-electropolishing-work/]
- 60. Cleaning of LTCC, PEN, and PCB Au electrodes towards ... [https://www.nature.com/articles/s41598-022-23395-3]
- 61. Comparative study of electrode material (aluminium and ... [https://www.sciencedirect.com/science/article/abs/pii/S2405830025000023]
- 62. Review on surface-characterization applications of X-ray ... [https://www.sciencedirect.com/science/article/pii/S2666523922001222]
- 63. X-ray Photoelectron Spectroscopy (XPS) [https://www.stinstruments.com/chemical-analysis/surface-analysis/x-ray-photoelectron-spectroscopy-xps/]
- 64. Electrochemical and X-ray Photoelectron Spectroscopy ... [https://pmc.ncbi.nlm.nih.gov/articles/PMC8912756/]
- 65. Surface Analysis Laboratory - XPS and AFM [https://chemistry.osu.edu/research-support-services-core-facilities/surface-analysis-laboratory-xps-and-afm]
- 66. Easy cleaning plus stable activation of glassy carbon ... [https://www.sciencedirect.com/science/article/abs/pii/S1567539423001883]