Troubleshooting Distorted Cyclic Voltammograms: A Comprehensive Guide for Biomedical Researchers
This article provides a systematic guide for researchers and scientists in drug development facing challenges with distorted cyclic voltammograms.
Troubleshooting Distorted Cyclic Voltammograms: A Comprehensive Guide for Biomedical Researchers
Abstract
This article provides a systematic guide for researchers and scientists in drug development facing challenges with distorted cyclic voltammograms. It covers foundational principles for identifying common distortion types, methodological strategies for electrode modification and parameter optimization, step-by-step troubleshooting protocols for equipment and cell setup, and advanced validation techniques using experimental design and machine learning. The content synthesizes the latest research to offer practical solutions for obtaining high-quality, reproducible electrochemical data critical for sensor development, biomarker detection, and material characterization in biomedical applications.
Understanding Cyclic Voltammetry and Identifying Common Distortions
Principles of Cyclic Voltammetry and the Ideal Voltammogram
Cyclic Voltammetry (CV) is a powerful and versatile electrochemical technique used to study the redox properties of chemical species. It involves applying a linearly cycled potential sweep to a working electrode in an electrochemical cell and measuring the resulting current. This technique is fundamental in fields like analytical chemistry, materials science, and drug development for characterizing reaction mechanisms, energy levels of analytes, and the kinetics of electron-transfer reactions [1] [2] [3]. The resulting plot of current versus applied potential is called a cyclic voltammogram, which provides a characteristic "duck-shaped" profile for a reversible, diffusion-controlled redox reaction [2].
The Ideal Voltammogram: A Step-by-Step Guide
An ideal voltammogram for a reversible, one-electron transfer process reveals key thermodynamic and kinetic information. The diagram below illustrates the typical workflow and key components of a Cyclic Voltammetry experiment, from the applied potential waveform to the resulting current response.
The CV experiment begins at the Initial Potential (a), where no significant redox activity occurs. The potential is swept linearly towards more positive values. As the potential reaches the redox potential of the analyte, the current begins to increase exponentially (b) due to oxidation at the working electrode surface. The current reaches a maximum at the Anodic Peak Current (Ipa) at the Anodic Peak Potential (Epa) (c). The current then decreases (d) as the analyte near the electrode surface becomes depleted, creating a diffusion layer. Upon reversing the potential sweep, the scan direction changes, and the reduced species begins to be re-oxidized (e), leading to a Cathodic Peak Current (Ipc) at the Cathodic Peak Potential (Epc) (f) on the return scan [2] [4].
Key Quantitative Features of a Reversible System
For a reversible redox couple, the voltammogram has specific, quantifiable characteristics, as summarized in the table below.
Table 1: Key Characteristics of an Ideal, Reversible Cyclic Voltammogram
| Feature | Description | Ideal Value/Relationship |
|---|---|---|
| Peak Separation (ΔEp) | Difference between anodic and cathodic peak potentials. | ΔEp = Epa - Epc ≈ 59/n mV at 298 K [1] [4] |
| Peak Current Ratio (Ipa/Ipc) | Ratio of the magnitudes of the anodic and cathodic peak currents. | Ipa / Ipc ≈ 1 [1] |
| Peak Current (Ip) | Magnitude of the current at the peak maximum. | Governed by the Randles-Ševčík equation [1] [2] |
| Formal Potential (E°') | Midpoint potential between the anodic and cathodic peaks. | E°' = (Epa + Epc)/2 [4] [3] |
The peak current in a reversible system is directly described by the Randles-Ševčík equation, which at 298 K is [2] [3]:
[ i_p = (2.69 \times 10^5) \ n^{3/2} \ A \ D^{1/2} \ C \ v^{1/2} ]
Where:
- ( i_p ) = peak current (A)
- ( n ) = number of electrons transferred
- ( A ) = electrode area (cm²)
- ( D ) = diffusion coefficient (cm²/s)
- ( C ) = concentration (mol/cm³)
- ( v ) = scan rate (V/s)
The Scientist's Toolkit: Essential Experimental Setup
A proper experimental setup is crucial for obtaining high-quality, interpretable voltammograms.
The Three-Electrode System
CV employs a three-electrode system to precisely control the potential at the working electrode interface and accurately measure the current [1] [2].
Table 2: The Three-Electrode System Components and Functions
| Component | Material Examples | Critical Function |
|---|---|---|
| Working Electrode (WE) | Glassy Carbon, Platinum, Gold [1] | Surface where the redox reaction of interest occurs. Potential is measured vs. RE. |
| Reference Electrode (RE) | Ag/AgCl, Saturated Calomel (SCE) [2] [5] | Provides a stable, known reference potential against which the WE potential is controlled. |
| Counter Electrode (Auxiliary) | Platinum, Graphite [1] | Completes the electrical circuit, allowing current to flow without passing it through the RE. |
Reagents and Solutions
Table 3: Essential Research Reagents and Materials
| Reagent/Material | Purpose | Common Examples & Notes |
|---|---|---|
| Analyte | The species of interest whose redox properties are being probed. | Must be redox-active within the chosen potential window. Ferrocene is a common standard [2]. |
| Supporting Electrolyte | Minimizes resistive drop (iR drop) and ensures current is carried by ionic migration [1]. | High concentration (e.g., 0.1 M). For non-aqueous: Tetrabutylammonium hexafluorophosphate [1]. |
| Solvent | Dissolves the analyte and electrolyte. | Must be electrochemically inert in the potential window (e.g., Acetonitrile, Water) [1]. |
Troubleshooting Guides & FAQs
FAQ 1: Why is my voltammogram flat or featureless?
A flat voltammogram indicates no significant faradaic current is being detected.
- Check Electrode Connections: Ensure all three electrodes are properly connected to the potentiostat and are fully submerged in the solution. A poor connection to the working electrode can result in only a small, noisy residual current being measured [6].
- Verify Current Range Setting: If the expected current exceeds the potentiostat's set current range, the signal can appear clipped or flat. Adjust the current range to a higher value to ensure it encompasses the expected signal [7].
- Confirm Analyte Presence and Activity: Ensure your analyte is redox-active within the selected potential window. Run a background scan of only the electrolyte and solvent to establish the baseline [1] [6].
- Inspect the Reference Electrode: A blocked frit in the reference electrode can break electrical contact with the solution. Check for blockages or air bubbles [6].
FAQ 2: Why are the peaks in my voltammogram distorted or the baseline is sloping?
Distortions often relate to high resistance or capacitive effects.
- High Uncompensated Resistance (iR Drop): This is a common cause of peak broadening and separation. Ensure a high concentration of supporting electrolyte is used (typically 0.1 M or higher) to improve solution conductivity [1] [6].
- Capacitive Charging Currents (Hysteresis): The electrode-solution interface acts as a capacitor. A large hysteresis in the baseline between forward and reverse scans is often due to these charging currents. This can be mitigated by using a smaller working electrode, decreasing the scan rate, or increasing the analyte concentration [6].
- Electrode Fouling: Contaminants adsorbed on the working electrode surface can distort signals. Polish the working electrode (e.g., with 0.05 μm alumina slurry for glassy carbon) and rinse thoroughly before use [6].
FAQ 3: Why do I see unexpected peaks in my voltammogram?
Unexpected peaks are typically due to impurities or side reactions.
- Identify System Impurities: Peaks can originate from impurities in the solvent, electrolyte, or from atmospheric contaminants (e.g., oxygen in non-aqueous experiments). Purity all components and ensure an inert atmosphere if necessary [6].
- Run a Background Scan: Always perform a CV scan using only the solvent and supporting electrolyte (without analyte) under identical conditions. This "blank" experiment will reveal peaks from the electrolyte or solvent, allowing you to assign peaks correctly in your analyte experiment [6].
- Check Electrode History: If the working electrode has not been cleaned properly from a previous experiment, redox-active species can remain adsorbed, creating peaks. Follow a rigorous electrode cleaning protocol between experiments [1] [6].
FAQ 4: Why is the peak separation (ΔEp) much larger than the theoretical 59/n mV?
Excessive peak separation is a classic sign of experimental issues.
- iR Drop: This is the most prevalent cause. The solution resistance between the working and reference electrodes causes a voltage drop, making the applied potential different from the experienced potential. Use a higher concentration of supporting electrolyte and place the reference electrode close to the working electrode (but not touching) to minimize this [1] [6].
- Quasi-Reversible Kinetics: If the electron transfer kinetics of the analyte are slow (quasi-reversible), the peak separation will naturally be larger than the theoretical value for a reversible system and will increase with scan rate [1].
- Faulty Reference Electrode: A degraded or contaminated reference electrode can fail to maintain a stable potential, leading to shifting or distorted potentials [6].
For quick reference, the table below consolidates the key quantitative relationships for a reversible system.
Table 4: Summary of Key Quantitative Relationships in Cyclic Voltammetry
| Parameter | Governing Equation/Relationship | Application |
|---|---|---|
| Formal Potential | ( E°' = \dfrac{E{pa} + E{pc}}{2} ) [4] [3] | Determines the thermodynamic redox potential. |
| Peak Separation | ( \Delta Ep = E{pa} - E_{pc} \approx \dfrac{59}{n} \text{ mV} ) (at 298 K) [1] [4] | Diagnoses reversibility and system health. |
| Peak Current | ( i_p = (2.69 \times 10^5) \ n^{3/2} \ A \ D^{1/2} \ C \ v^{1/2} ) (at 298 K) [2] [3] | Determines concentration, diffusion coefficient, or verifies diffusion control. |
| Scan Rate Dependence | ( i_p \propto v^{1/2} ) (diffusion control) [1] | Diagnoses the nature of the rate-determining step. |
Frequently Asked Questions
Why is my voltammogram baseline not flat? A non-flat or sloping baseline is often attributed to issues with the working electrode or other processes at the electrode interface [6]. It can also be caused by a high charging current, which can be mitigated by decreasing the scan rate, increasing the analyte concentration, or using a working electrode with a smaller surface area [6].
What causes large, reproducible hysteresis in the baseline? Hysteresis, where the baseline differs on the forward and backward scans, is primarily due to the charging current at the electrode-solution interface, which behaves like a capacitor [6]. This is an expected phenomenon but can be exaggerated by faults in the working electrode itself [6].
I see an unexpected peak in my voltammogram. What is it? Unexpected peaks can arise from several sources. Common causes include the scanning potential approaching the edge of the system's electrochemical window, or the presence of impurities from the solvent, electrolyte, atmosphere, or from the degradation of a cell component [6]. Running a background scan in the absence of your analyte can help identify if the peak is from the system itself [6].
My peak currents are lower than expected. What could be wrong? If you are using a modern potentiostat that employs staircase voltammetry (rather than a true analog ramp), the step size can influence the result. Larger step sizes can lead to suppressed peak currents [8]. Ensure you are using the correct equation for peak current analysis if your instrument uses staircase voltammetry [8].
Troubleshooting Guide: Common Distortions and Solutions
The following table catalogs common cyclic voltammetry distortions, their likely causes, and recommended corrective actions.
| Distortion Type | Observable Symptoms | Common Causes | Corrective Actions & Experimental Protocols |
|---|---|---|---|
| Unusual / Unexpected Peaks | Peaks not attributable to the analyte of interest [6]. | - System Impurities: Contaminated solvent, electrolyte, or atmosphere [6].- Edge Effects: Scanning too close to the solvent/electrode limit [6].- Analyte Degradation: The compound breaks down into electroactive species [6]. | Protocol 1: Identify System Peaks1. Prepare and run a cyclic voltammetry scan with only the solvent and electrolyte (a "background" scan) [6].2. Compare the background scan to the scan containing your analyte. Peaks present in both are system-specific.3. Adjust your potential window to avoid the edges of the electrochemical window where background currents intensify [6]. |
| Sloping Baseline | The baseline current before and/or after the redox event is not horizontal, often sloping upward or downward [6]. | - Working Electrode Issues: Poor electrical contacts, poor seals, or adsorbed species [6].- High Charging Current: The capacitive current is significant relative to the faradaic current [6]. | Protocol 2: Minimize Capacitive Effects1. Polish the Working Electrode: Polish the electrode with a fine alumina slurry (e.g., 0.05 µm) and wash thoroughly [6].2. Reduce Scan Rate: Lower the potential scan rate to reduce the charging current (Ic = Cdl × ν) [6].3. Use a Smaller Electrode: Employ a working electrode with a smaller surface area to decrease the total capacitance [6]. |
| Hysteresis in Baseline | The current-potential curve forms a large, reproducible "hysteresis loop" even in regions without faradaic activity [6]. | - Charging Current: The electrode-solution interface acts as a capacitor, requiring current to charge and discharge as the potential scans [6].- Faulty Working Electrode: Internal issues like poor contacts can add extra capacitance [6]. | Protocol 3: Electrode Cleaning & Validation1. Clean the Electrode: For a Pt electrode, clean by cycling the potential in 1 M H2SO4 between the regions where H2 and O2 are evolved [6].2. Test the Setup: Follow a general troubleshooting procedure to isolate the problem to the working electrode [6]. |
| Excessive Peak Separation | ΔEp (Epa - Epc) is significantly larger than the expected value (e.g., >59/n mV for a reversible system) [9]. | - Slow Electron Transfer Kinetics: The reaction is not electrochemically reversible at the used scan rate [9].- Uncompensated Resistance (Ru): Solution resistance causes an iR drop, distorting the potential [9]. | Protocol 4: Diagnosing Kinetics vs. Resistance1. Vary Scan Rate: Run experiments at different scan rates. A ΔEp that increases with scan rate indicates kinetic limitations [9].2. Vary Concentration: Run experiments at different analyte concentrations. A ΔEp that increases with concentration suggests significant iR drop, whereas a standard rate constant (k°) is independent of concentration [9]. |
The Scientist's Toolkit: Key Research Reagent Solutions
| Item | Function | Application Note |
|---|---|---|
| Alumina Polish (0.05 µm) | To finely abrade and clean the surface of solid working electrodes (e.g., glassy carbon), removing adsorbed contaminants and providing a fresh, reproducible surface [6]. | Essential for restoring electrode activity when baselines are sloping or peaks are broadened. Follow by thorough rinsing with solvent [6]. |
| Electrolyte (Supporting Electrolyte) | To provide sufficient ionic conductivity in the solution, minimize the solution resistance (Ru), and eliminate electromigration of the analyte [6]. | Use at a concentration typically 100 times greater than the analyte concentration. Must be inert and soluble in the chosen solvent [6]. |
| Quasi-Reference Electrode (e.g., bare silver wire) | A simple reference electrode alternative used for diagnostic troubleshooting to check if the primary reference electrode is malfunctioning [6]. | If a normal voltammogram is obtained with a quasi-reference electrode, the issue likely lies with a blocked frit or air bubble in the primary reference electrode [6]. |
| Test Cell Chip / Resistor | A dummy cell used to verify the proper function of the potentiostat and cables independently of the electrochemical cell [6]. | Connecting the potentiostat to a 10 kΩ resistor should produce a straight-line current response obeying Ohm's law (V=IR), confirming the instrument is working correctly [6]. |
Experimental Workflow for Systematic Diagnosis
The following diagram outlines a logical, step-by-step protocol for diagnosing the source of a distorted voltammogram, integrating the troubleshooting procedures and toolkit items listed above.
Diagnostic Diagram: Kinetics vs. Resistance
A key challenge is distinguishing between slow electron transfer kinetics and uncompensated solution resistance, as both can cause increased peak separation. The following decision tree guides this diagnosis.
Impact of Ohmic Losses and Uncompensated Resistance on Curve Shape
In cyclic voltammetry, the ideal experiment controls the potential difference directly at the working electrode interface. However, uncompensated resistance (Ru) in the electrochemical cell prevents this ideal scenario. When current (i) flows through the solution, it encounters resistance, resulting in a voltage drop known as the iR drop or ohmic loss [10] [11]. This phenomenon means the potential applied by the potentiostat (Eapp) is not equal to the potential actually experienced at the working electrode surface (Esurface). The relationship is defined by Ohm's Law: Esurface = Eapp - iRu [11]. This uncompensated iR drop leads to distorted voltammograms, shifted peak potentials, and inaccurate measurements of electrochemical parameters [6] [12].
The resistance arises from the ionic conductivity of the electrolyte solution between the reference electrode and the working electrode [10]. In a properly configured three-electrode system, the potentiostat compensates for resistance between the counter and reference electrodes (Rc), but the resistance between the reference and working electrodes (Ru) remains uncompensated without special techniques [11]. The impact of R_u becomes particularly severe in low-conductivity solutions, high-current experiments, and when the reference electrode is positioned too far from the working electrode surface [10].
Troubleshooting Guide: Identifying iR-Related Distortions
When analyzing cyclic voltammograms, certain characteristic distortions can indicate problems with ohmic losses. The table below summarizes common observable issues and their likely causes related to uncompensated resistance.
Table 1: Common Cyclic Voltammetry Issues Related to Ohmic Losses
| Observed Issue | Possible Causes Related to R_u | Additional Diagnostic Checks |
|---|---|---|
| Shifted Peak Potentials | Significant iR drop causing the applied potential to differ from the actual interfacial potential [12]. | Compare with theoretical peak positions; check electrolyte conductivity [12]. |
| Peak Broadening | Non-uniform current distribution due to iR drop across the electrode surface [12]. | Examine peak shape symmetry; test at different scan rates [6]. |
| Reduced Peak Current | iR drop limiting the driving force for the electrochemical reaction [6]. | Compare measured currents with theoretical values calculated from the Randles-Sevcik equation [6]. |
| Unexpected or Shifting Baselines | High uncompensated resistance interacting with the cell's capacitance [6]. | Run a background scan without analyte; inspect for sloping or hysteretic baselines [6]. |
| Voltage Compliance Errors | Potentiostat unable to maintain the desired potential due to large iR drops [6]. | Verify counter electrode connection and placement; check solution conductivity [6]. |
The following diagram illustrates the decision-making process for diagnosing iR-related issues in a cyclic voltammetry experiment.
Diagram 1: Diagnostic workflow for iR-related distortions.
Experimental Protocols for Diagnosing Uncompensated Resistance
General Potentiostat and Electrode Troubleshooting
A systematic approach is essential for isolating the source of electrochemical issues. The following procedure, adapted from Bard and Faulkner, helps identify whether problems originate from the potentiostat, cables, or electrodes [6]:
- Potentiostat and Cable Verification: Disconnect the electrochemical cell and connect the electrode cable to a 10 kΩ resistor. Connect the reference and counter cables to one side of the resistor and the working electrode cable to the other. Scan the potentiostat over a range (e.g., +0.5 V to -0.5 V). A correct result is a straight line where all currents follow Ohm's law (V = IR). If using a system with a test chip (e.g., Ossila Potentiostat), this can be used instead for a more specific validation [6].
- Reference Electrode Check: Set up the cell normally, but connect the reference electrode cable to the counter electrode (in addition to the counter electrode cable). Run a linear sweep voltammetry experiment. A standard, though potential-shifted and slightly distorted, voltammogram should be obtained. If not, the issue likely lies with the working electrode. If a standard voltammogram is obtained, the problem is with the reference electrode. Check for a blocked frit or air bubbles [6].
- Working Electrode Inspection: Polish the working electrode with 0.05 μm alumina and wash it thoroughly. For Pt electrodes, an additional cleaning method involves cycling the potential in 1 M H₂SO₄ solution between the regions where H₂ and O₂ are evolved [6].
Quantitative Measurement of R_u
To determine if the uncompensated resistance is significant, it must be measured. The following table compares two common methods for determining R_u.
Table 2: Methods for Measuring Uncompensated Resistance (R_u)
| Method | Protocol | Key Output | Advantages & Limitations |
|---|---|---|---|
| Electrochemical Impedance Spectroscopy (EIS) | Record the impedance spectrum of the cell over a wide frequency range (e.g., 100 kHz to 1 Hz). | R_u is the real component of the impedance at the high-frequency intercept on the Nyquist plot [10]. | Advantage: Highly accurate. Limitation: Requires additional equipment and software; not always feasible mid-experiment [10]. |
| Current Interrupt (DC Transient) | In the potentiostat software, activate the current-interrupt function. The instrument rapidly turns off the current and measures the instantaneous voltage drop [10]. | Ru is calculated from the immediate voltage change (ΔV) divided by the current before interruption (i): Ru = ΔV / i [10]. | Advantage: Can be performed simultaneously with other voltammetric techniques. Limitation: Accuracy can be affected by sampling speed and cell capacitance [10]. |
A simple rule of thumb is that if the iR error (i × Ru) is smaller than a few millivolts, it is generally negligible for most applications. For example, if Ru = 100 Ω and the cell current is 10 μA, the iR drop is 1 mV, which is insignificant. However, if the current is 100 μA, the 10 mV drop may require compensation depending on the required accuracy [10].
Techniques for iR Compensation and Mitigation
Experimental Design Solutions
Before resorting to electronic compensation, several physical methods can minimize R_u:
- Increase Electrolyte Conductivity: Adding a high concentration of inert "supporting electrolyte" (e.g., 0.1 M to 1.0 M salt, acid, or base) dramatically increases conductivity and reduces R_u [10]. This is the most common and effective approach, but it may not be suitable for studies where electrolyte composition is critical, such as in corrosion studies or biological simulations [10].
- Optimize Cell Geometry: Use a Luggin capillary to position the tip of the reference electrode very close to the working electrode surface. This minimizes the solution path through which the iR drop occurs [10] [11]. However, placing it too close can shield the working electrode surface and distort the current distribution [10].
- Adjust Electrochemical Parameters: Reducing the scan rate or the analyte concentration can lower the peak current, thereby reducing the magnitude of the iR drop (iR_u) [6]. Using a smaller working electrode also reduces the total current [6].
Electronic iR Compensation
When experimental mitigation is insufficient, potentiostats can electronically compensate for R_u. The two primary methods are:
- Positive-Feedback iR Compensation: This method actively adds a compensation potential equal to + (i × Rcomp) to the applied potential, where Rcomp is a user-set value intended to match Ru. If set correctly, it effectively nullifies the iR drop. However, if Rcomp is set too high, it can cause oscillation and instability in the potentiostat feedback loop [10].
- Current-Interrupt iR Compensation: This is a "measure-and-correct" technique. The potentiostat periodically interrupts the current for a very short time (microseconds), measures the instantaneous voltage drop, which is equal to iR_u, and then corrects the applied potential accordingly. This method is less prone to oscillation but requires fast electronics and can be sensitive to cable capacitance [10].
The general guideline is to use iR compensation for quantitative tests where a numerical result (e.g., a rate constant) is needed, when the solution has low conductivity, or when currents are high. A simple test is to run a scan with and without compensation; if the shape of the voltammogram changes significantly, compensation is necessary [10].
The Scientist's Toolkit: Essential Research Reagents and Materials
Table 3: Key Reagents and Materials for Mitigating Ohmic Losses
| Item | Function/Purpose | Application Notes |
|---|---|---|
| Supporting Electrolyte (e.g., TBAPF₆, KCl, LiClO₄) | To increase solution conductivity and reduce R_u without participating in the redox reaction [10]. | Choose an electrolyte with a wide potential window that is electrochemically inert in the region of interest. Must be soluble in the solvent and not interact with the analyte [10]. |
| Luggin Capillary | To minimize the distance between the reference electrode and the working electrode, thereby reducing the uncompensated resistance (R_u) [10] [11]. | Position the tip correctly (~1-2 times the capillary diameter from the WE surface) to avoid current shielding [10]. |
| Alumina Polishing Powder (0.05 μm) | To clean and rejuvenate the working electrode surface, ensuring reproducible behavior and good current flow [6]. | Used for polishing glassy carbon and metal electrodes. Follow with thorough rinsing with pure solvent to remove all polishing residue [6]. |
| Quasi-Reference Electrode (e.g., silver wire) | A simple reference electrode to troubleshoot a potentially blocked commercial reference electrode [6]. | Its potential is not well-defined, so it is best used for diagnostics rather than for reporting formal potentials in publications [6]. |
| Potentiostat with iR Compensation | Instrumentation capable of actively measuring and correcting for the iR drop during an experiment [10]. | Essential for high-precision work in resistive media. Current-interrupt and positive-feedback are common modes [10]. |
Frequently Asked Questions (FAQs)
Q1: How can I quickly tell if my voltammogram is distorted by ohmic drop? A: Look for tell-tale signs such as a larger separation between oxidation and reduction peaks than theoretically expected for a reversible system, peak potentials that shift with increasing scan rate or concentration, and asymmetric or broadened peak shapes [6] [12]. Running a background scan in pure electrolyte can also help identify resistive backgrounds [6].
Q2: When should I be most concerned about iR compensation? A: iR compensation becomes critical when you are performing quantitative experiments to determine parameters like rate constants or formal potentials, when using low-conductivity solvents (e.g., dichloromethane, toluene), when measuring high currents (e.g., from high analyte concentrations or fast kinetics), or when the cell geometry is non-ideal and the reference electrode cannot be placed close to the working electrode [10].
Q3: Why does my potentiostat give a "Voltage Compliance" error when I run my experiment? A: This error indicates that the potentiostat cannot maintain the desired potential between the working and reference electrodes. A common cause related to iR drop is that the counter electrode has been disconnected or removed from the solution. It can also occur if the solution resistance is so high (or the current so large) that the iR_u drop exceeds the voltage range the instrument can output [6]. Check all connections and your solution's conductivity.
Q4: Can I use a simple resistor to test my potentiostat's function? A: Yes. Replacing the electrochemical cell with a known resistor (e.g., 10 kΩ) is a standard diagnostic procedure. When you run a potential sweep, the resulting current-voltage plot should be a perfect straight line that obeys Ohm's Law (V = IR). Any deviation indicates a problem with the potentiostat or its connections [6].
This guide addresses common sources of interference and distortion in Cyclic Voltammetry (CV) data, providing researchers with methodologies for identification and resolution.
Frequently Asked Questions
What are the most common equipment-related issues that distort CV measurements?
Poor electrode connections and setup are frequent sources of significant noise and distortion.
- Problem: The potentiostat reports voltage compliance errors, indicating it cannot maintain the desired potential between the working and reference electrodes [6].
- Cause: This often occurs if the counter electrode is disconnected from the solution or the potentiostat, or if a quasi-reference electrode is touching the working electrode [6].
Solution: Verify all electrodes are fully submerged in the electrolyte and properly connected. Ensure no electrodes are physically touching within the cell [6].
Problem: The measured current is very small, noisy, and unchanging [6].
- Cause: This typically indicates a poor connection at the working electrode. Although the measured potential changes, no Faradaic current outside of residual circuitry current flows [6].
Solution: Check the connection of the working electrode cable. If using a solid electrode, ensure the surface is clean and properly positioned in the solution [6].
Problem: The voltammogram looks unusual or changes shape on repeated cycles [6].
- Cause: This is commonly due to an incorrectly set up reference electrode. A blocked frit or air bubbles can break electrical contact with the solution, causing the reference electrode to act like a capacitor and leak current [6].
- Solution: Check the reference electrode's frit for blockages and tap it gently to dislodge any air bubbles. Test by temporarily using a bare silver wire as a quasi-reference electrode; if this works, the original reference electrode is likely faulty [6].
How can I determine if my working electrode is the source of the problem?
Working electrode issues often manifest as a non-flat baseline or large, reproducible hysteresis [6].
- Diagnostic Test: A general troubleshooting procedure suggests bypassing the electrochemical cell [6]. Disconnect the cell and connect a 10 kΩ resistor between the working electrode connection and the combined reference/counter electrode connections. Scanning the potentiostat over a small range (e.g., ±0.5 V) should produce a straight line obeying Ohm's law (V=IR). Any deviation indicates a problem with the potentiostat or cables [6].
- Baseline Hysteresis: A large, reproducible hysteresis in the baseline is primarily due to charging currents at the electrode-solution interface, which acts as a capacitor [6].
- Electrode Cleaning:
What is non-Faradaic current, and how does it differ from a Faradaic process?
Understanding this distinction is fundamental to interpreting CV baselines and peaks [13].
- Faradaic Process: In a Faradaic process, charged particles (e.g., electrons, ions) transfer across the electrode interface from one bulk phase to another. This is the electron-transfer reaction of interest (e.g., Fe²⁺ → Fe³⁺ + e⁻). After applying a constant current, the electrode charge, voltage, and composition reach constant values [13].
- Non-Faradaic Current (Capitive Process): In a non-Faradaic process, no net charge transfer occurs across the interface. Instead, charge is progressively stored and released at the electrode-solution interface, much like a capacitor being charged and discharged. This is the main contributor to the background current or charging current in a CV [13].
- Key Insight: The presence of broad peaks in a CV diagram does not exclusively confirm a Faradaic process. Some capacitive materials can show similar peak shapes, and diagnosis should not rely on this feature alone [13].
Why am I seeing unexpected peaks in my voltammogram?
Unexpected peaks can arise from several sources, including system impurities and experimental conditions.
- System Impurities: Contamination from chemicals, the atmosphere, or degradation of cell components can introduce electroactive species [6].
- Edge of Potential Window: Approaching the solvent/electrolyte's electrochemical stability limit can cause a rapid rise in current [6].
- Measurement Artifact: In specific applications, like fuel cell catalyst testing, the CV measurement itself can be destructive. One study showed that the cyclic voltammetry performed at the end of an accelerated stress test caused more structural change in a degraded platinum catalyst than the stress test itself, representing a significant "measurement artefact" [14].
How can I use scan rate to diagnose the nature of an electrochemical reaction?
Analyzing how peak currents and potentials shift with scan rate provides key kinetic information [15].
The table below summarizes diagnostic criteria for a simple electron-transfer reaction.
| Behavior | Peak Current (iₚ) vs. Scan Rate (v) | Peak Potential (Eₚ) vs. Scan Rate (v) | Key Information |
|---|---|---|---|
| Reversible (Nernstian) | iₚ ∝ v¹⸍² [15] [2] | Constant [15] | Fast electron transfer; governed by mass transport (diffusion). |
| Irreversible | iₚ ∝ v¹⸍² | Eₚ shifts with scan rate | Slow electron transfer; kinetics limit the reaction. |
| Quasi-Reversible | Intermediate behavior between reversible and irreversible [15] | Intermediate behavior | Electron transfer rate is comparable to the scan rate. |
For a reversible system, the peak current is described by the Randles-Ševčík equation (at 25°C) [2]: [ ip = (2.69 \times 10^5) \, n^{3/2} \, A \, D^{1/2} \, C \, v^{1/2} ] where ( ip ) is the peak current (A), ( n ) is the number of electrons, ( A ) is the electrode area (cm²), ( D ) is the diffusion coefficient (cm²/s), ( C ) is the concentration (mol/cm³), and ( v ) is the scan rate (V/s).
Experimental Protocols for Troubleshooting
General Equipment Diagnostic Test
This procedure helps isolate problems to the potentiostat, cables, or electrodes [6].
- Disconnect the electrochemical cell from the potentiostat.
- Connect a 10 kΩ resistor between the working electrode (WE) cable and the reference (RE) and counter (CE) electrode cables, which are connected together [6].
- Run a linear sweep voltammetry experiment over a small potential range (e.g., from +0.5 V to -0.5 V) [6].
- Expected Result: A straight line between the limiting currents that follows Ohm's law (V = IR). Any other result indicates a fault with the potentiostat or its cables [6].
Protocol for Testing and Cleaning Working Electrodes
A properly prepared working electrode surface is critical for reproducible data.
- Polishing (for solid electrodes like Glassy Carbon):
- Use a microporous polishing pad.
- Apply a slurry of 0.05 μm alumina in deionized water.
- Polish the electrode surface in a figure-8 pattern for 30-60 seconds.
- Rinse thoroughly with pure solvent (e.g., acetonitrile) and deionized water to remove all alumina particles [6].
- Electrochemical Cleaning (for Pt electrodes):
- Place the electrode in a cell containing 1 M H₂SO₄.
- Using a potentiostat, cycle the electrode potential between the regions where hydrogen evolution (H₂) and oxygen evolution (O₂) occur for multiple cycles (e.g., between -0.2 V and +1.2 V vs. Ag/AgCl) [6].
- Rinse the electrode with clean solvent and water before use.
The Scientist's Toolkit: Key Research Reagent Solutions
The table below lists essential materials for CV experiments and their primary functions.
| Item | Function/Brief Explanation |
|---|---|
| Supporting Electrolyte (e.g., TBAPF₆, LiClO₄) | Minimizes solution resistance (ohmic drop) and suppresses electromigration of the analyte by providing excess inert ions [2]. |
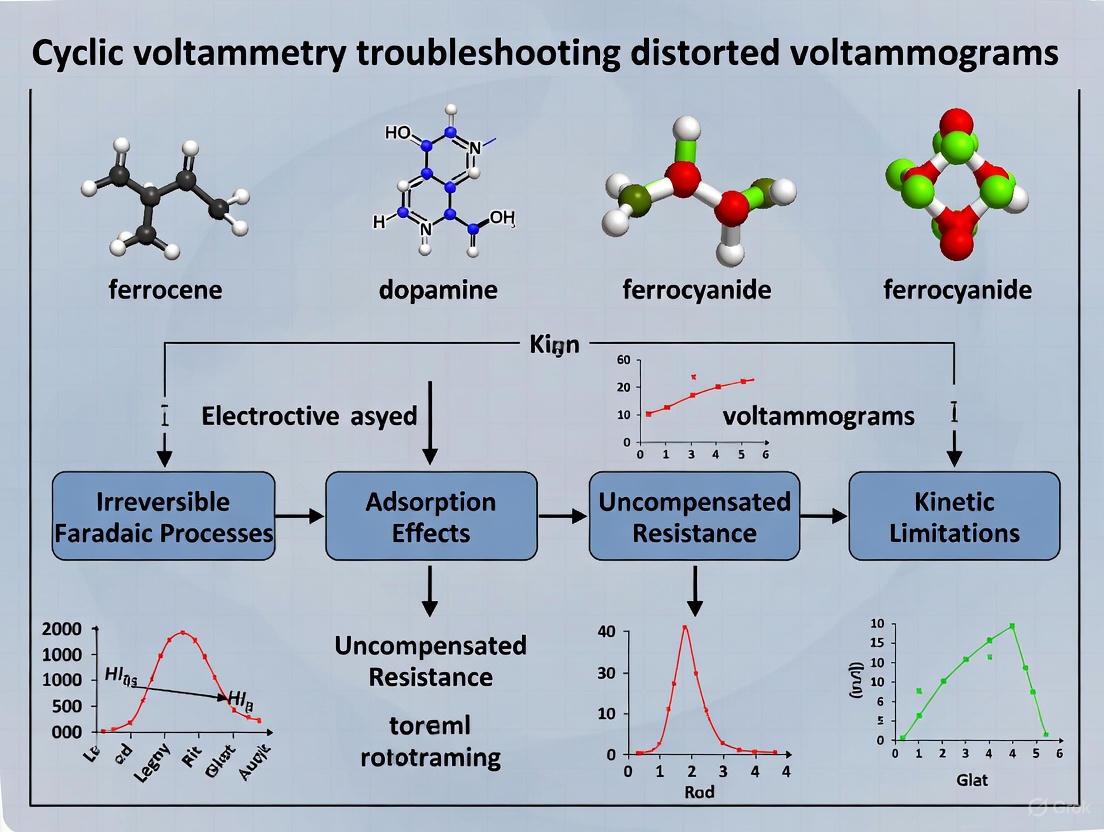
| Internal Standard (e.g., Ferrocene) | A redox couple with well-known, stable electrochemistry (e.g., Fc/Fc⁺) used to reference potentials and verify instrument/electrode performance [2]. |
| Quasi-Reference Electrode (e.g., bare Ag wire) | A simple, temporary reference electrode used for diagnostic tests to check the functionality of a primary reference electrode [6]. |
| Alumina Polish (0.05 μm) | A fine abrasive slurry for polishing solid working electrodes (Glassy Carbon, Pt) to create a fresh, reproducible surface [6]. |
| Test Resistor (10 kΩ) | Used in the general equipment diagnostic procedure to simulate an electrochemical cell and verify potentiostat and cable functionality [6]. |
Diagnostic Workflow for Common CV Issues
The following diagram outlines a logical troubleshooting pathway for diagnosing distorted voltammograms.
The Role of Electrode Surface State and Contamination in Signal Distortion
FAQs: Electrode Surface State and Signal Integrity
Q1: How does electrode surface contamination specifically lead to distorted voltammograms? Contamination, often in the form of adsorbed species or biofouling, directly interferes with the electron transfer kinetics at the electrode-solution interface [16]. This can manifest in several ways:
- Peak Potential Shifts: The oxidation and reduction peaks may shift to higher overpotentials.
- Reduced Peak Currents: The sensitivity decreases, leading to lower peak currents, as the contaminated surface blocks active sites for redox reactions [16].
- Broader Peaks: The voltammetric peaks can become less sharp and wider.
- Increased Hysteresis: The difference between the forward and reverse scans can become more pronounced.
Q2: What are the most common sources of electrode contamination? Common sources include:
- Biofouling: Adsorption of proteins and other biological macromolecules from the sample matrix, especially in in vivo or complex biological media [16].
- Atmospheric Contaminants: Adsorption of impurities from the air onto the electrode surface.
- Solution Impurities: Contaminants present in solvents, electrolytes, or from the analyte itself.
- Electrochemical By-products: Reaction products that adsorb strongly to the electrode surface, such as those from the oxidation of neurotransmitters like serotonin [16].
Q3: My baseline current is not flat and shows large hysteresis. Is this related to the electrode surface? Yes. A non-flat baseline with significant hysteresis between forward and backward scans is often attributable to charging currents at the electrode-solution interface, which acts like a capacitor [6]. This effect can be exacerbated by:
- High Scan Rates: Reducing the scan rate can minimize this effect [6].
- Electrode Microstructure: Faults in the working electrode, such as poor internal contacts, can introduce additional capacitive effects [6].
- Surface Roughness: A rougher surface has a larger effective area and thus a higher capacitance.
Q4: How can I verify that signal distortion is due to surface contamination and not another experimental error? A systematic approach is recommended [6]:
- Run a Background Scan: Perform a CV measurement in your supporting electrolyte without the analyte. Any peaks are likely due to contaminants on the electrode or in the solution [6].
- Test with a Standard Redox Couple: Use a well-known, reversible redox probe like [Fe(CN)₆]³⁻/⁴⁻. A distorted response for the standard indicates a surface issue.
- Reproduce the Signal: Clean the electrode thoroughly (see protocols below) and re-run your experiment. If the distortion is reduced or eliminated, surface contamination was likely the cause.
Q5: Can a contaminated electrode be salvaged, or does it need to be replaced? In most cases, electrodes can be effectively regenerated through appropriate cleaning procedures, making replacement unnecessary. Standard cleaning protocols include:
- Mechanical Polishing: Using alumina slurry on glassy carbon or metal electrodes to physically remove the contaminated layer [6] [17].
- Electrochemical Cleaning: Applying potential cycles in a clean supporting electrolyte (e.g., H₂SO₄) to oxidize and reduce off adsorbed contaminants [6].
- Chemical Rinsing: Washing with appropriate solvents or acids to dissolve contaminants [17].
Troubleshooting Guide: Identifying and Rectifying Surface-Related Distortions
The following table summarizes common symptoms, their likely causes related to electrode surface state, and recommended corrective actions.
| Observed Symptom | Probable Cause | Corrective Action |
|---|---|---|
| Unexpected peaks in the voltammogram [6] | Impurities adsorbed on the electrode surface or in the solution. | Perform a background scan in pure electrolyte [6]. Clean the electrode via polishing and/or electrochemical pretreatment [6] [17]. |
| Shifted peak potentials and decreased peak currents [16] | Biofouling or passivation layer formation on the electrode surface. | Implement an electrochemical pretreatment protocol [17]. Use a Nafion coating or other antifouling membranes to protect the surface. |
| Sloping or non-flat baseline [6] | High capacitance due to surface roughness or poor electrode seals. | Polish the electrode to a mirror finish [6]. Decrease the scan rate. Check the electrode for physical defects. |
| Large hysteresis in the baseline on forward/backward scans [6] | Charging currents from the electrode-solution interface capacitance. | Reduce the scan rate. Use an electrode with a smaller surface area. Ensure the electrode is properly cleaned and polished [6]. |
| Signal decays over multiple cycles or between experiments [16] | Gradual fouling of the electrode surface during the experiment. | Clean the electrode between scans by rinsing and/or applying a cleaning potential [17]. Consider using a fresh electrode for each experiment if cleaning is ineffective. |
Experimental Protocols for Electrode Diagnosis and Restoration
Protocol 1: Standard Mechanical Polishing of Solid Electrodes
This protocol is essential for restoring a reproducibly clean surface on glassy carbon, platinum, or gold electrodes [6] [17].
- Materials: Alumina powder (0.05 µm), polishing cloth or lapping pads, ultrapure water.
- Procedure:
- Place a small amount of alumina powder on the polishing cloth and add a few drops of ultrapure water to create a slurry.
- Hold the electrode firmly and polish it on the cloth using a figure-"8" pattern for 60 seconds. Apply gentle, even pressure.
- Rinse the electrode thoroughly with ultrapure water to remove all alumina residues.
- Sonicate the electrode for 60 seconds each in ultrapure water and then ethanol to remove any embedded particles [17].
- Rinse again with ultrapure water before use.
Protocol 2: Electrochemical Pretreatment for Glassy Carbon Electrodes (GCE)
This two-step cyclic voltammetry method activates the GCE surface, enhancing its electrochemical activity by creating a rough, porous surface with oxygen-containing functional groups [17].
- Materials: Potentiostat, pretreated GCE, Phosphate Buffer (PB, 0.2 M, pH 5.0).
- Procedure:
- Oxidation Stage: Immerse the cleaned GCE in 0.2 M PB (pH 5.0). Perform CV scans between 0.5 V and 2.0 V at a scan rate of 50 mV s⁻¹ for 10 cycles.
- Reduction Stage: Without removing the electrode, change the potential window to -0.5 V to 1.0 V. Perform CV scans at 50 mV s⁻¹ for 6 cycles.
- The resulting electrode is an activated GCE (AGCE) with improved sensitivity and a lower detection limit for analytes like epinephrine [17].
Protocol 3: Electrochemical Cleaning of a Platinum Electrode
This method is effective for removing adsorbed organic species from Pt surfaces [6].
- Materials: Potentiostat, Pt working electrode, 1 M H₂SO₄ solution.
- Procedure:
- Immerse the Pt electrode in a 1 M H₂SO₄ solution.
- Run cyclic voltammetry scans (e.g., between -0.2 V and 1.2 V vs. a suitable reference electrode) at 100 mV/s for 20-50 cycles.
- The cycling process, which evolves H₂ and O₂ at the potentials extremes, helps to desorb contaminants. Continue until a stable, characteristic Pt cyclic voltammogram is obtained [6].
Electrode Surface State and Signal Distortion: A Conceptual Workflow
The diagram below outlines the logical relationship between electrode surface state, the underlying physical or chemical issue, and the resulting distorted signal in cyclic voltammetry.
Research Reagent Solutions: Essential Materials for Electrode Maintenance
This table lists key reagents and materials used for maintaining and characterizing electrode surfaces.
| Reagent/Material | Function/Brief Explanation |
|---|---|
| Alumina Polishing Slurry (0.05 µm) | An abrasive for mechanical polishing to remove the outermost contaminated layer and regenerate a smooth, fresh electrode surface [6] [17]. |
| Potassium Hexacyanoferrate(II/III) (K₄[Fe(CN)₆] / K₃[Fe(CN)₆]) | A reversible redox probe used to characterize the cleanliness and electron transfer kinetics of an electrode surface via EIS or CV [17]. |
| Sulfuric Acid (H₂SO₄), 1 M | An electrolyte for electrochemical cleaning cycles, particularly effective for platinum electrodes [6]. |
| Phosphate Buffer (PB) | A common buffer solution used as an electrolyte during electrochemical pretreatment and sensing experiments, with pH controlling the proton-coupled reaction kinetics [17]. |
| Bovine Serum Albumin (BSA) | A model protein used in studies to intentionally induce and investigate biofouling on electrode surfaces [16]. |
| Hexaammineruthenium(III) Chloride ([Ru(NH₃)₆]Cl₃) | An alternative outer-sphere redox probe used to test electrode surfaces with minimal sensitivity to surface functional groups. |
| Nafion Perfluorinated Resin | A ionomer often coated onto electrodes to repel negatively charged proteins and other interferents, thereby improving selectivity and reducing biofouling. |
Methodological Strategies for Preventing and Correcting Distortions
Electrode Selection, Modification, and Characterization for Improved Signals
Frequently Asked Questions (FAQs)
What are the most critical factors in selecting a working electrode? The choice of working electrode is fundamental to signal quality. Key factors include the electrode material's electrochemical window, conductivity, and suitability for your target analyte. Glassy Carbon (GC) electrodes are widely preferred for their wide potential window, chemical inertness in acidic and basic media, and ease of surface modification, which enhances reusability and reproducibility compared to more fragile alternatives like carbon paste electrodes [18].
Why would my voltammogram show a flat, noisy, or zero current? A flat or zero current signal, when some residual noise is present, often indicates that the working electrode is not properly connected to the electrochemical cell or the potentiostat. While the potential may appear to change, no faradaic current is measured. In contrast, a completely disconnected counter electrode typically causes a voltage compliance error, not a flat signal [6]. Another common cause is a current range setting that is too low for the expected signal, effectively "clipping" the output [7].
What causes a sloping or hysteretic baseline? Hysteresis in the baseline is primarily due to the charging current at the electrode-solution interface, which behaves like a capacitor. This can be mitigated by decreasing the scan rate, increasing the analyte concentration, or using a working electrode with a smaller surface area [6]. A persistently non-flat baseline can also indicate underlying issues with the working electrode itself, such as poor internal contacts or seals [6].
My potentiostat reports a voltage or current compliance error. What does this mean? A voltage compliance error means the potentiostat cannot maintain the desired potential between the working and reference electrodes. This can happen if a quasi-reference electrode is touching the working electrode, or if the counter electrode is disconnected or out of solution [6]. A current compliance error typically indicates a short circuit, often because the working and counter electrodes are touching, causing a large, damaging current to flow [6].
Troubleshooting Guide: Common Problems and Solutions
The following table summarizes frequent issues, their potential causes, and recommended solutions.
| Observable Issue | Possible Causes | Recommended Solutions |
|---|---|---|
| Flat or Zero Current | Poor connection to working electrode [6]; Current range set too low [7]. | Check and secure all electrode connections; Increase the current range setting on the potentiostat [7]. |
| Unusual Peaks | Impurities in solvent/electrolyte; Analyte degradation; Edge of potential window [6]. | Run a background scan without analyte; Use high-purity reagents; Identify window edges with a blank solution [6]. |
| Noisy Signal | Loose electrode connections; Electrical pickup on cables [6]; Biofouling on electrode surface [19]. | Check all contacts and cables; Implement shielding; Use fouling-resistant coatings or surface renewal [19]. |
| Large Baseline Hysteresis | High capacitive charging currents [6]; Faulty working electrode [6]. | Reduce scan rate; Increase analyte concentration; Use smaller electrode; Polish/clean electrode [6]. |
| Irreproducible Peaks on Repeated Cycles | Unstable reference electrode; Blocked electrode frit; Air bubbles [6]; Electrode fouling [19]. | Check reference electrode connection/condition; Replace with quasi-reference electrode; Ensure no bubbles are trapped [6]. |
Electrode Modification for Enhanced Performance
Surface modification is a powerful strategy to improve sensitivity, selectivity, and stability. The general workflow involves careful preparation, modification, and characterization.
Experimental Protocol: Modifying a Glassy Carbon Electrode with 2-Amino Nicotinamide (2-AN)
This protocol creates a sensor for detecting hazardous compounds like 2-nitrophenol, demonstrating a generalizable modification approach [18].
- Objective: To electropolymerize 2-AN onto a GC electrode surface to create a highly sensitive and selective modified sensor (2-AN/GC).
- Materials:
- Glassy Carbon (GC) working electrode
- 2-Amino Nicotinamide (2-AN) modifier
- Tetrabutylammonium tetrafluoroborate (TBATFB) supporting electrolyte
- Standard polishing alumina (0.05 µm)
- Procedure:
- Electrode Pretreatment: Polish the GC electrode surface with 0.05 μm alumina slurry on a microcloth to create a fresh, reproducible surface. Rise thoroughly with deionized water [6] [18].
- Modifier Solution Preparation: Prepare a solution containing the 2-AN monomer and a suitable supporting electrolyte (e.g., TBATFB in a non-aqueous solvent) for electropolymerization [18].
- Electropolymerization: Using Cyclic Voltammetry (CV), cycle the potential over a pre-determined range for a set number of cycles (e.g., 5 cycles as optimized in the cited study) to deposit a stable, polymeric film of 2-AN onto the GC surface [18].
- Sensor Characterization: Use techniques like Scanning Electron Microscopy (SEM) and Fourier Transform Infrared Spectroscopy (FTIR) to confirm the successful attachment and morphology of the 2-AN film [18].
- Outcome: The resulting 2-AN/GC sensor provides a larger effective surface area and functional groups that pre-concentrate the target analyte, leading to a significantly lower detection limit [18].
The Scientist's Toolkit: Research Reagent Solutions
| Item | Function & Application |
|---|---|
| Glassy Carbon (GC) Electrode | A versatile working electrode with a wide potential window and chemical inertness; ideal base for modifications in both acidic and basic media [18]. |
| Alumina Polishing Slurry (0.05 µm) | Used for mechanical polishing of solid electrode surfaces to create a fresh, reproducible, and clean surface before modification or use [6]. |
| 2-Amino Nicotinamide (2-AN) | A modifier molecule that can be electropolymerized onto a GC surface to create a film that enhances electron transfer and pre-concentrates analytes [18]. |
| Nafion | A perfluorinated ionomer often used as an electrode coating to repel negatively charged interferents (e.g., ascorbic acid) in biological samples, improving selectivity [20]. |
| Gold Nanoparticles (AuNPs) | Nanomaterials used to modify electrode surfaces; provide high electrocatalytic activity, increase surface area, and improve signal sensitivity [19]. |
| Carbon Nanotubes (CNTs) | Carbon-based nanomaterials used to modify electrodes; significantly enhance electrical conductivity, surface area, and electron transfer kinetics [19] [21]. |
Advanced Characterization and Optimization
Protocol: System Verification with a Test Resistor
Before troubleshooting complex electrochemical issues, verify the potentiostat and cables are functioning correctly [6].
- Objective: To isolate and test the potentiostat and connection cables independently of the electrochemical cell.
- Materials: A 10 kΩ resistor.
- Procedure:
- Disconnect the electrochemical cell.
- Connect the reference and counter electrode cables to one side of the resistor.
- Connect the working electrode cable to the other side of the resistor.
- Run a CV scan over a moderate range (e.g., +0.5 V to -0.5 V).
- Expected Outcome: The result should be a straight, linear current-potential line following Ohm's Law (V = IR). Any deviation indicates a problem with the potentiostat or cables [6].
Optimizing Voltammetric Parameters
For sensitive detection, especially with techniques like Square Wave Voltammetry (SWV), optimizing parameters is crucial. The Response Surface Methodology (RSM) is an efficient statistical technique for this purpose, as it reduces the number of experiments needed [18].
- Key Parameters to Optimize:
- Pulse Amplitude: The height of the potential pulse.
- Frequency: The rate at which pulses are applied.
- Potential Step: The increment of the base potential staircase.
- Workflow: RSM with a Box-Behnken design allows you to vary these parameters simultaneously and fit a multivariate model to the resulting current data, pinpointing the optimal combination for the highest response [18].
Optimizing Electrochemical Cells and Flow Systems to Minimize Dead Volume
Troubleshooting FAQs
What is "dead volume" and why is it problematic in electrochemical experiments?
Dead volume refers to areas within a fluidic system where analytes can become trapped or reside, outside of the main flow path. In the context of electrochemistry and chromatography, this is problematic because it:
- Broadens Peak Shapes: Dead volume causes band broadening, which lowers peak resolution and makes quantifying analytes difficult [22].
- Reduces Sensitivity: Broader peaks result in decreased peak height, challenging the distinction between the analyte signal and the baseline noise [22].
- Causes Compliance Issues: Significant peak broadening or shape distortion can lead to System Suitability Test (SST) failures, potentially invalidating an entire analysis batch [22].
- Hinders Method Transfer: Differences in dead volume between instruments can cause retention time reproducibility issues, complicating the transfer of methods from one system to another [22].
My cyclic voltammogram shows an unusual baseline or unexpected peaks. Could dead volume be the cause?
While dead volume is a more direct concern in flow systems like HPLC, your issue could be related to other equipment problems. An unusual voltammogram often stems from issues with the electrode setup or the potentiostat itself [6].
- Reference Electrode Issues: A blocked frit or air bubbles in the reference electrode can prevent proper electrical contact with the solution, leading to distorted or non-reproducible voltammograms [6].
- Working Electrode Problems: A poorly connected or contaminated working electrode can cause a noisy, small current and a non-flat baseline [6].
- Capacitive Effects: Hysteresis in the baseline on forward and backward scans is often due to charging currents at the electrode-solution interface, which acts like a capacitor [6].
Troubleshooting Step: Try running a background scan without your analyte. If the unusual peak persists, it may be caused by an impurity or by approaching the edge of the system's potential window [6].
How can I diagnose if my potentiostat is functioning correctly?
A general troubleshooting procedure can help isolate problems with the potentiostat, cables, or electrodes [6]. The flow logic is as follows:
What are the best practices for minimizing dead volume in flow systems?
To minimize dead volume and its negative effects, focus on the components that make up the flow path:
- Use Specialized Fittings: Opt for fittings designed to support virtually zero dead volume, such as universal tool-free fingertight fittings [22].
- Select Appropriate Tubing: Use LC-specific tubing that is narrow-bore and cut to the shortest possible length required for your setup [22].
- Consider Novel Connection Technologies: Research new developments like the Macroporous Polyacrylamide Hydrogel Septum (MAPS), a novel elastic connection technology designed as a low-dead-volume, mechanically stable alternative to conventional connectors for capillary liquid chromatography [23].
- Maintain Your Column: Handle columns with care, ensuring they are used within set limits and not allowed to dry out or be physically dropped, as this can introduce voids into the column packing [22].
Essential Materials for Low-Dead-Volume Systems
The following table lists key components crucial for optimizing systems to minimize dead volume.
| Component | Function | Key Consideration |
|---|---|---|
| Zero Dead Volume (ZDV) Fittings [22] [23] | Connects tubing/columns; minimizes trapped volume at junctions. | Mechanical stability and ease of assembly are common limitations [23]. |
| MAPS Connector [23] | Novel elastic connection for capillary LC; complementary to ZDV fittings. | Provides a robust, user-friendly interface with low dead volume [23]. |
| Narrow-Bore LC Tubing [22] | Transports mobile phase and analyte between system components. | Diameter and length should be minimized to reduce extra-column volume [22]. |
| Well-Packed Chromatography Column [22] | Performs the core separation of analytes. | Voids in the column packing create significant dead volume [22]. |
Experimental Protocol: General Potentiostat Troubleshooting
This detailed protocol, based on established procedures [6], helps diagnose the source of erratic electrochemical measurements.
Objective: To systematically identify whether the issue lies with the potentiostat/cables, the reference electrode, or the working electrode.
Materials:
- Potentiostat with connection cables
- Electrochemical cell with analyte
- 10 kΩ resistor
- Ohmmeter (optional)
- 0.05 μm alumina slurry for electrode polishing (optional)
Method:
Potentiostat and Cable Integrity Check
- Disconnect all cables from the electrochemical cell.
- Connect a 10 kΩ resistor between the working electrode terminal and the combined reference/counter electrode terminals.
- Run a linear sweep voltammetry experiment from +0.5 V to -0.5 V.
- Expected Result: The resulting plot should be a straight line, and all measured currents should obey Ohm's law (V = IR). If this is correct, the potentiostat and cables are functioning properly. Proceed to Step 2. If not, the issue is with the potentiostat or cables; try replacing the cables first [6].
Reference Electrode Functionality Check
- Set up the electrochemical cell as normal, with the analyte present.
- Critical Modification: Disconnect the reference electrode cable from the reference electrode. Instead, connect it directly to the counter electrode (along with the counter electrode cable). This bypasses the reference electrode.
- Run a linear sweep experiment.
- Expected Result: You should obtain a standard-looking voltammogram, although it will be shifted in potential and slightly distorted due to the increased uncompensated resistance. If this works, it indicates a problem with the reference electrode. Check for a blocked frit or air bubbles. If a standard voltammogram is not obtained, proceed to Step 3 [6].
Working Electrode Inspection and Cleaning
- A failed test in Step 2 suggests an issue with the working electrode or its connection.
- Polishing: Gently polish the working electrode surface with 0.05 μm alumina slurry and wash it thoroughly to remove any adsorbed contaminants [6].
- Alternative Cleaning (for Pt): A platinum electrode can be electrochemically cleaned by cycling it between potentials where H2 and O2 are evolved in a 1 M H2SO4 solution [6].
- Connection Check: Ensure the working electrode is properly connected and that there are no poor internal contacts or broken seals [6].
Systematic Optimization of SWV Parameters Using Response Surface Methodology
This guide is framed within a broader research thesis focused on diagnosing and resolving distorted voltammograms in electrochemical analysis. While cyclic voltammetry (CV) troubleshooting provides foundational principles for identifying issues like poor electrode connections, blocked frits, or capacitive effects [6], Square-Wave Voltammetry (SWV) introduces a more complex parameter space requiring systematic optimization. SWV's enhanced sensitivity, which enables detection down to femtomolar concentrations in some applications [24], comes with the challenge of optimizing multiple interdependent parameters to avoid distorted signals and ensure accurate kinetic measurement [25] [26].
The following sections establish a technical support framework with specific troubleshooting guides and FAQs to address experimental challenges encountered during SWV parameter optimization using Response Surface Methodology (RSM).
FAQs: Core Principles of Square-Wave Voltammetry
Q1: What fundamental advantages does SWV offer over Cyclic Voltammetry for analytical applications?
SWV provides superior sensitivity for detecting low analyte concentrations by effectively discriminating Faradaic processes from charging currents. This is achieved through its unique potential waveform that enables current sampling at the end of each forward and backward pulse, significantly improving the signal-to-noise ratio compared to CV [26]. This enhanced sensitivity makes SWV capable of detecting metal ions and organic molecules at nanomolar and even picomolar concentrations [24] [26].
Q2: Which SWV parameters most significantly impact voltammogram shape and quality?
The key parameters requiring optimization are square-wave frequency ((f)), square-wave amplitude ((E{sw})), and potential step height ((E{step})). These parameters collectively control the temporal window, driving force, and resolution of the measurement [25] [26]. Frequency directly influences the timescale of electron transfer observation, amplitude affects peak splitting and current response, and step height determines potential resolution between measurement points [26].
Q3: Why is a systematic approach like RSM necessary for SWV parameter optimization?
RSM provides a structured framework for navigating complex interactions between SWV parameters that individually affect voltammetric response but also exhibit significant interdependencies [25] [26]. Traditional one-variable-at-a-time approaches fail to capture these interaction effects, potentially leading to suboptimal parameter combinations that compromise sensitivity, resolution, or measurement accuracy.
Troubleshooting Guides: Common SWV Experimental Challenges
Problem: Irreproducible or Shifting Peaks Between Scans
Issue: Square-wave voltammograms exhibit inconsistent peak potentials or currents when measurements are repeated under presumably identical conditions.
Diagnosis Approach:
- Verify Electrode Stability: Ensure working electrode surface is properly polished and cleaned between measurements. Contaminated electrode surfaces can cause unpredictable performance [6].
- Check Reference Electrode Integrity: Use the test procedure from CV troubleshooting: temporarily use the reference electrode as a quasi-reference electrode. If this resolves the shifting, the original issue likely involves a blocked frit or air bubbles in the reference electrode [6].
- Monitor Temperature and Solution Stability: Ensure experimental conditions remain constant, as small temperature variations or analyte adsorption/desorption processes can cause signal drift.
RSM Optimization Focus: Include electrode preparation method and equilibration time as categorical factors in your experimental design alongside continuous SWV parameters.
Problem: Excessive Baseline Slope or Capacitive Hysteresis
Issue: The voltammetric baseline displays significant slope or hysteresis between forward and backward scans, obscuring Faradaic peaks.
Diagnosis Approach:
- Identify Capacitive Contributions: High capacitive currents often result from excessively large electrode surface area, high scan rates, or improper electrode conditioning [6].
- Optimize Electrode Area: Use a working electrode with appropriate surface area for your analyte concentration [6].
- Adjust SWV Parameters: Decreasing square-wave frequency reduces charging current contributions, as the capacitive current decays more rapidly than Faradaic current [26].
RSM Optimization Focus: Model the interaction between electrode surface area, square-wave frequency, and baseline characteristics. Include baseline slope as a separate response variable in addition to peak characteristics.
Problem: Unexpected Peaks or Signal Artifacts
Issue: Voltammograms contain peaks not attributable to the target analyte.
Diagnosis Approach:
- Run Background Controls: Perform identical SWV scans in supporting electrolyte without analyte to identify peaks originating from impurities, solvent, or electrode materials [6].
- Check Electrolyte Purity: Ensure high-purity electrolytes and solvents are used to minimize impurity signals.
- Verify Potential Window Limits: Ensure your SWV potential range remains within the solvent/electrolyte window to avoid solvent breakdown peaks [6].
RSM Optimization Focus: Include signal-to-background ratio as a critical response variable in your optimization design to maximize analyte-specific response while minimizing artifacts.
Problem: Non-ideal Fitting of Electron Transfer Kinetics
Issue: Extracted kinetic parameters ((k_0), (\alpha)) show high variability or poor fit to theoretical models.
Diagnosis Approach:
- Validate Frequency Range: Ensure SWV measurements span an appropriate frequency range to capture the "quasireversible maximum" where kinetic information is most accessible [25] [26].
- Check Amplitude Appropriateness: Use appropriate square-wave amplitudes (typically 10-50 mV) for kinetic studies, as excessive amplitude can distort peak shapes and kinetic analysis [25].
- Verify Model Assumptions: Confirm whether your system follows diffusional or surface-confined behavior, as the kinetic models differ significantly [26].
RSM Optimization Focus: Design experiments that simultaneously vary frequency and amplitude to capture their interactive effects on kinetic parameter estimation [26].
Quantitative Parameter Optimization Tables
Table 1: Fundamental SWV Parameters and Their Experimental Effects
| Parameter | Symbol | Typical Range | Primary Effect | Optimization Consideration |
|---|---|---|---|---|
| Square-Wave Frequency | (f) | 10-1000 Hz | Controls measurement timescale; higher frequencies enhance sensitivity but may distort kinetics [26] | Optimize for "quasireversible maximum" for kinetic studies [25] |
| Square-Wave Amplitude | (E_{sw}) | 10-100 mV | Affects peak current and separation; larger amplitudes increase signal but may cause peak splitting [26] | Balance between signal enhancement and peak distortion [25] |
| Potential Step | (E_{step}) | 1-10 mV | Determines potential resolution; smaller steps improve resolution but increase experiment duration | Set as fraction of amplitude (typically 1/5 to 1/10 of (E_{sw})) |
| Quiet Time | (t_{quiet}) | 5-30 s | Allows equilibrium establishment; insufficient time causes capacitive dominance | Particularly important for surface-confined species |
Table 2: RSM Response Variables for SWV Optimization
| Response Variable | Symbol | Measurement Approach | Optimization Goal |
|---|---|---|---|
| Peak Current | (i_p) | Height of net voltammogram peak | Maximize for sensitivity [26] |
| Peak Potential | (E_p) | Potential at current maximum | Consistency with known values |
| Half-Peak Width | (W_{1/2}) | Width at half peak height | Minimize for resolution [25] |
| Signal-to-Background Ratio | S/B | Peak current divided by baseline current | Maximize for detection limits [24] |
| Kinetic Parameter Error | (\delta k_0) | Difference from reference value | Minimize for accurate kinetics [26] |
Experimental Protocols for SWV Parameter Optimization
Protocol 1: Initial Parameter Screening Design
Objective: Identify significant factors and interactions affecting SWV responses using a fractional factorial design.
Procedure:
- Select Factor Ranges: Choose practically relevant ranges for frequency (10-500 Hz), amplitude (10-50 mV), and step potential (1-10 mV).
- Design Matrix: Implement a two-level fractional factorial design with center points to assess curvature.
- Randomization: Randomize run order to minimize systematic error.
- Response Measurement: Record peak current, peak potential, and half-peak width for each combination.
- Statistical Analysis: Identify significant main effects and two-factor interactions using ANOVA.
Troubleshooting Note: If voltage compliance errors occur at high frequencies or amplitudes [6], verify electrode connections and ensure no short circuits between working and counter electrodes.
Protocol 2: Central Composite Design for Response Surface Modeling
Objective: Develop a predictive model for SWV responses across the parameter space.
Procedure:
- Design Structure: Create a central composite design with axial points to estimate quadratic effects.
- Center Points: Include 5-6 center point replicates to estimate pure error.
- Model Building: Fit second-order polynomial models to each response variable.
- Model Validation: Use lack-of-fit tests and residual analysis to verify model adequacy.
- Multi-Response Optimization: Apply desirability functions to identify parameter combinations that simultaneously optimize all responses.
Protocol 3: Kinetic Parameter Extraction via SWV
Objective: Determine heterogeneous electron transfer rate constants ((k_0)) and transfer coefficients ((\alpha)) using SWV.
Procedure:
- Frequency Dependence: Collect SWV scans at multiple frequencies (10-1000 Hz) with constant amplitude.
- Amplitude Dependence: Collect SWV scans at multiple amplitudes (10-100 mV) with constant frequency.
- Numerical Simulation: Use Butler-Volmer formalism to simulate SWV responses [26]: [ -DO\nabla CO = -k0 e^{-\alpha nF/RT(E-E^0)} CO(0,x) + k0 e^{(1-\alpha)nF/RT(E-E^0)} CR(0,x) ]
- Parameter Fitting: Iteratively adjust (k_0) and (\alpha) to minimize differences between experimental and simulated voltammograms.
- Validation: Compare results with those obtained from CV or EIS for consistency [25].
Visualization of SWV Optimization Workflow
SWV Parameter Optimization Workflow
Research Reagent Solutions
Table 3: Essential Materials for SWV Experiments
| Material/Reagent | Specification | Function | Troubleshooting Notes |
|---|---|---|---|
| Supporting Electrolyte | High-purity (≥99.9%) salts (KCl, NaClO₄) | Provides ionic conductivity; minimizes ohmic drop | Use highest purity to avoid impurity peaks [6] |
| Redox Probe | 1-5 mM Ferrocenemethanol or K₃[Fe(CN)₆] | Validation of electrode performance and kinetics | Ferrocenemethanol: D = 7.8 × 10⁻⁶ cm²/s [26] |
| Working Electrode | Glassy carbon, gold, or modified electrodes | Primary measurement interface | Polish with 0.05 μm alumina slurry before use [6] |
| Reference Electrode | Ag/AgCl, SCE, or quasi-reference | Stable potential reference | Check for blocked frits if drift occurs [6] |
| Solvent | Deoxygenated, high-purity (H₂O, CH₃CN) | Dissolves analyte and electrolyte | Deoxygenate with inert gas (N₂, Ar) to remove O₂ interference |
| Nanoparticle Modifiers | TA-capped AuNPs for Hg²⁺ detection [24] | Enhanced sensitivity for specific analytes | Optimization required for modification procedure |
The Role of Surfactants and Buffer Composition in Enhancing Signal Quality
A technical support guide for resolving distorted voltammograms
FAQs and Troubleshooting Guides
Q1: Why is my cyclic voltammogram peak current lower than expected, and how can surfactants help?
A lower-than-expected peak current often indicates inhibited electron transfer, frequently caused by unwanted adsorption or fouling on the electrode surface. The composition of your supporting electrolyte, including organic solvents and surfactants, plays a critical role.
- Underlying Cause: The presence of organic solvents like methanol in the supporting electrolyte can adsorb onto the electrode surface, decreasing the reversibility of the electrode process. This is evidenced by a shift in peaks to more negative potentials and a decrease in peak currents [27].
- Surfactant Solution: Introducing a cationic surfactant, such as Cetyltrimethylammonium Bromide (CTAB), can counteract this inhibition. CTAB accelerates the electrode reaction kinetics by forming active complexes with the analyte and modifying the electrode-solution interface. This results in an increase in peak currents and a decrease in peak separation, enhancing signal quality [27].
- Troubleshooting Protocol:
- Confirm Electrode Setup: Ensure your working electrode is well-polished and clean. A contaminated electrode can mimic these symptoms [6].
- Run a Background Scan: Perform a CV scan in your supporting electrolyte without the analyte to establish a baseline.
- Systematic Addition: Add a small, controlled concentration of CTAB (e.g., 1 × 10⁻⁴ mol·dm⁻³) to your experimental solution.
- Compare Results: The accelerated kinetics should manifest as increased peak currents and improved peak definition in your voltammogram [27].
Q2: My voltammetric peaks are poorly defined and broad. Can buffer composition and surfactants sharpen them?
Yes, peak broadening and poor definition are frequently linked to sluggish electron transfer kinetics and uncompensated resistance, both of which are influenced by your electrolyte and the use of surfactants.
- Underlying Cause: The ionic strength and pH of your buffer can affect the charge transfer efficiency and the stability of analytes. Furthermore, non-ionic substances can block the electrode surface, leading to broad, ill-defined peaks [27].
- Surfactant Solution: Surfactants can sharpen peaks by facilitating electron transfer. Research shows that in the presence of cationic surfactants like CTAB, a decrease in the full width at half maximum of voltammetric peaks is observed, indicating a sharper, better-defined signal [27]. The formation of a surfactant layer on the electrode can pre-concentrate the analyte or mediate a more efficient electron transfer pathway.
- Troubleshooting Protocol:
- Optimize Buffer: Ensure your buffer has sufficient ionic strength (e.g., 0.1 M) to minimize solution resistance.
- Evaluate Surfactant Type: Test surfactants with charges opposite to your analyte. For a cationic analyte, an anionic surfactant like Sodium Dodecyl Sulfate (SDS) may be beneficial, and vice versa [28].
- Control Concentration: Use surfactant concentrations around or slightly above the critical micellar concentration (CMC), as the catalytic effect is often most pronounced in this region [29].
Q3: I've added a surfactant, but my signal has decreased. What went wrong?
This is a common issue and typically indicates that the surfactant is acting as an inhibitor rather than a catalyst, often due to an incorrect charge match or excessive concentration.
- Underlying Cause: Surfactants can block the electrode surface if they form a non-electroactive layer. For instance, anionic surfactants have been shown to decrease the peak current for the electroreduction of Bi(III) ions, likely due to repulsive forces or the formation of electroinactive complexes [27]. Similarly, high concentrations of any surfactant can passivate the electrode [29].
- Troubleshooting Protocol:
- Check Surfactant Charge: Verify the charge of your analyte and your surfactant. An anionic surfactant will typically repel anionic analytes, preventing them from reaching the electrode surface.
- Dilute and Re-test: Reduce the concentration of the surfactant significantly. The inhibitory effect is often concentration-dependent [29].
- Switch Surfactant: If signal suppression persists, try a surfactant with a different ionic type (cationic, anionic, or non-ionic). The following table summarizes the dichotomous effects of surfactants.
Table 1: Effects of Surfactant Type on Voltammetric Signals
| Surfactant Type | Example | Effect on Signal | Primary Mechanism |
|---|---|---|---|
| Cationic | CTAB, DDAB | Can increase signal | Electrostatic attraction of anions; catalytic complex formation [27] [28] |
| Anionic | SDS, SDBS, 1OSASS | Can decrease signal | Electrostatic repulsion of anions; formation of electroinactive complexes [27] |
| Non-Ionic | Triton X-100 | Variable (can increase or decrease) | Blocking electrode surface or forming electroactive micellar complexes [29] |
Q4: How does the pH of the buffer solution interact with surfactant modifiers?
The pH of the supporting electrolyte can profoundly influence the charge state of both the analyte and the surfactant's hydrophilic head group, thereby affecting the electrostatic interactions that are central to the modifier's function.
- Underlying Cause: The performance of surfactant-modified carbon paste electrodes (CPEs) is co-determined by the pH, ionic strength, and composition of the supporting electrolyte [28].
- Mechanism: At a pH below its pKa, a weak acid analyte may be neutral, reducing electrostatic repulsion from a cationic surface. Conversely, at a higher pH, it becomes anionic and is strongly attracted. This principle can be used to fine-tune sensor selectivity and sensitivity.
- Troubleshooting Protocol:
- Determine pKa: If possible, identify the pKa of your target analyte.
- Systematic pH Study: Perform experiments across a range of pH values (e.g., pH 4, 7, and 9) using buffers like acetate, phosphate, and ammonia while keeping the surfactant constant [28].
- Optimize: Select the pH that yields the strongest, sharpest signal, indicating optimal electrostatic interaction.
Experimental Protocols
This ex-situ modification method creates a stable layer of surfactant on the electrode surface to pre-concentrate analytes or repel interferences.
- Objective: To modify a CPE surface with a surfactant for use in voltammetric analysis.
- Materials:
- Graphite powder
- Mineral oil (binder)
- Surfactant solution (e.g., 0.1 - 2 mmol·L⁻¹ CTAB, SDS, or DDAB in distilled water)
- Teflon piston-driven electrode holder
- Ceramic mortar and pestle
- Procedure:
- Prepare Native Carbon Paste: Thoroughly mix graphite powder with mineral oil (e.g., 20% w/w) in a mortar until a homogeneous paste is formed.
- Pack the Electrode: Firmly embed the carbon paste into the cavity of the electrode holder.
- Renew the Surface: Before modification, extrude a small portion of the paste and smooth the surface with a wet filter paper to create a fresh, reproducible electrode interface.
- Modify the Surface: Immerse the bare CPE into the surfactant solution, stirring at 400 rpm for a set time (e.g., 2-10 minutes).
- Rinse: After accumulation, rinse the modified CPE with a stream of distilled water to remove loosely adsorbed surfactant.
- The modified electrode is now ready for electrochemical characterization [28].
This protocol outlines a systematic approach to quantify the effect of a cationic surfactant on electrode kinetics.
- Objective: To study the acceleration of the Bi(III) ion electroreduction process by the cationic surfactant CTAB.
- Materials:
- Supporting electrolyte (e.g., 0.1 M NaClO₄ in water-methanol mixture)
- Bi(III) ions (depolarizer)
- CTAB stock solution
- Cyclic Renewable Liquid Silver Amalgam Electrode (R-AgLAFE) or alternative
- Potentiostat with capabilities for SWV, CV, and EIS
- Procedure:
- Baseline Measurement: Record a Square Wave Voltammetry (SWV) or Cyclic Voltammetry (CV) curve for the Bi(III) ions in the supporting electrolyte without surfactant. Note the peak current (Ip) and peak potential (Ep).
- Add CTAB: Introduce CTAB to the solution at a specific concentration (e.g., 1 × 10⁻⁴ mol·dm⁻³).
- Measure Modified Response: Under identical conditions, record a new SWV/CV scan.
- Analyze Kinetics:
- Catalytic Effect: An increase in peak current and a decrease in peak width indicate accelerated kinetics [27].
- CV Diagnosis: In Cyclic Voltammetry, a decrease in the peak potential separation (ΔEp) indicates enhanced reversibility [27].
- EIS Confirmation: A decrease in the activation resistance (Ra) measured by Electrochemical Impedance Spectroscopy (EIS) further confirms the catalytic effect [27].
The following diagram illustrates the logical workflow for diagnosing and resolving common signal quality issues using surfactants and buffer optimization.
The Scientist's Toolkit: Key Research Reagent Solutions
Table 2: Essential Reagents for Surfactant-Modified Voltammetry
| Reagent | Function / Role in Signal Enhancement | Example Use-Case |
|---|---|---|
| CTAB (Cationic) | Accelerates electrode kinetics; increases peak current via catalytic complex formation and electrostatic attraction of anions [27] [28]. | Electroreduction of metal ions like Bi(III) in mixed organic-aqueous electrolytes [27]. |
| SDS (Anionic) | Can suppress signals via electrostatic repulsion or form electroinactive complexes; useful for studying inhibition or repelling anionic interferents [27] [29]. | Study of heavy metal cations (e.g., Pb²⁺, Cd²⁺) where it may form complexes [29]. |
| Triton X-100 (Non-ionic) | Effect is concentration-dependent; can block the electrode or form electroactive micellar complexes, useful for solubilizing organic analytes [29]. | Determination of lead, where peak height can pass through a minimum near the CMC [29]. |
| DDAB (Cationic) | Forms a stable bilayer on electrode surfaces; creates a modified interface for pre-concentrating anionic analytes and repelling cationic interferents [28]. | Modification of Carbon Paste Electrodes for sensing anionic redox couples like hexacyanoferrate [28]. |
| Methanol (Organic Solvent) | Alters solution viscosity, polarity, and ion solvation; can adsorb on the electrode, often decreasing process reversibility—a variable to control [27]. | Used in mixed aqueous-organic supporting electrolytes to study adsorption effects [27]. |
Troubleshooting FAQs: Distorted Voltammograms
1. Why is my voltammogram unusually shaped or changing between repeated cycles? This is frequently caused by issues with the reference electrode. A blocked frit or air bubbles between the frit and the wire can break electrical contact with the solution. The reference electrode then acts like a capacitor, causing leakage currents that unpredictably shift the measured potential and distort the voltammogram. You can diagnose this by temporarily using a bare silver wire as a quasi-reference electrode; if the correct response is obtained, the original reference electrode is likely blocked [6].
2. What does a "Voltage Compliance Error" mean, and how can I fix it? This error occurs when the potentiostat cannot maintain the desired potential between the working and reference electrodes. Common causes include a quasi-reference electrode touching the working electrode, the counter electrode being disconnected from the potentiostat, or the counter electrode being removed from the solution. Check all connections and ensure all electrodes are properly submerged and not touching each other [6].
3. Why is my baseline not flat, and what causes hysteresis? A non-flat baseline can stem from issues with the working electrode itself. Hysteresis—where the baseline differs on the forward and backward scans—is primarily due to the charging current of the electrode-electrolyte interface, which behaves like a capacitor. This effect can be minimized by decreasing the scan rate, increasing the analyte concentration, or using a working electrode with a smaller surface area [6].
4. My signal is very small and noisy, but the potential is changing. What's wrong? This typically indicates that the working electrode is not properly connected to the electrochemical cell. Although the applied potential changes, the current flow between the working and counter electrodes is blocked, so only residual instrument current is measured. Check the connection to the working electrode [6].
5. What should I do if I see an unexpected peak in my voltammogram? First, run a background scan with only the solvent and electrolyte (no analyte) to identify peaks from the system itself. Peaks can also arise from impurities in the chemicals used, from atmospheric contamination, or from component degradation. Another common source is approaching the edge of the solvent's potential window, which often produces intense current flow [6].
Troubleshooting Guide: Systematic Problem Isolation
Follow this general procedure, adapted from A. J. Bard and L. R. Faulkner [6], to systematically identify the source of a problem when your voltammogram is distorted or absent.
Detailed Protocol for Problem Isolation
Step 1: Test the Potentiostat and Cables
- Objective: Verify that the potentiostat and its connection cables are functioning correctly.
- Protocol:
- Disconnect the electrochemical cell.
- Connect a 10 kΩ resistor between the reference/counter electrode connection and the working electrode connection.
- Run a linear sweep voltammetry scan over a small range (e.g., from +0.5 V to -0.5 V).
- Expected Result: The resulting plot should be a straight line, and all measured currents must follow Ohm's law (V = IR). If this is correct, the potentiostat and cables are fine [6].
Step 2: Test the Reference Electrode
- Objective: Determine if the reference electrode is the source of the problem.
- Protocol:
- Set up an electrochemical cell with your analyte as usual.
- Physically connect the reference electrode cable to the counter electrode (in addition to the counter electrode cable). This effectively removes the reference electrode from the circuit.
- Run a standard linear sweep voltammetry experiment.
- Expected Result: You should obtain a voltammogram that is recognizable but shifted in potential and slightly distorted. If you get a standard-looking voltammogram, the issue lies with your original reference electrode setup [6].
Step 3: Inspect and Replace Electrodes
- Objective: Identify and resolve issues with the working or reference electrodes.
- Protocol:
- Polish the Working Electrode: Resurface the working electrode with 0.05 μm alumina slurry, then wash it thoroughly with solvent to remove any absorbed species [6].
- Clean Pt Electrodes: For a platinum working electrode, a common cleaning method is to cycle the potential in a 1 M H₂SO₄ solution between the regions where H₂ and O₂ are evolved [6].
- Check the Reference Electrode: Ensure the salt-bridge or frit is not blocked and that no air bubbles are trapped at the bottom. Replacing it with a simple silver wire quasi-reference electrode can confirm its functionality [6].
- Replace Cables: Swap out the cables connecting to the electrodes to rule out a faulty connection [6].
The table below consolidates key troubleshooting information for quick reference.
| Observable Issue | Primary Suspects | Diagnostic Steps & Corrective Actions |
|---|---|---|
| Unusual shape or changing voltammogram | Reference Electrode | Check for blocked frit/air bubbles; test with a quasi-reference electrode [6]. |
| Voltage Compliance Error | Counter Electrode, Shorts | Ensure CE is connected, submerged, and not touching the RE or WE [6]. |
| Current Compliance Error | Short Circuit | Check if Working and Counter electrodes are touching [6]. |
| Small, noisy current | Working Electrode | Verify WE connection to the cell/potentiostat [6]. |
| Non-flat baseline | Working Electrode | Polish and clean the WE; issues may also be from unknown processes [6]. |
| Hysteresis in baseline | Charging Current | Reduce scan rate; increase analyte concentration; use smaller WE [6]. |
| Unexpected peak | System Impurities, Solvent Window | Run a background scan; check chemical purity; avoid window edges [6]. |
The Scientist's Toolkit: Essential Research Reagents & Materials
For reliable cyclic voltammetry experiments, especially when developing advanced electrode platforms, the quality and preparation of these core materials are critical.
| Item | Function & Importance | Technical Notes |
|---|---|---|
| Solvent | Dissolves the analyte and electrolyte. | Must be inert (not react with electrolyte, analyte, or electrodes within the potential window) and be able to dissolve a high concentration (0.05–0.5 M) of electrolyte [30]. |
| Supporting Electrolyte | Decreases solution resistance, carrying current to prevent ohmic distortion. | Common examples include tetrabutylammonium tetrafluoroborate. It should not interfere with the redox reactions of the analyte [30]. |
| Analyte | The molecule of interest being studied. | Typical concentrations for CV are in the 1–10 mM range [30]. |
| Working Electrode (WE) | Surface where the redox reaction of the analyte occurs. | Common materials are glassy carbon (GCE), platinum, and gold. Requires careful polishing and cleaning before use [6] [30]. |
| Reference Electrode (RE) | Provides a stable, known potential for the circuit. | Examples include Ag/AgCl or saturated calomel electrodes (SCE). Must be checked for blockages [6]. |
| Counter Electrode (CE) | Completes the electrical circuit, allowing current to flow. | Often an inert wire like platinum. Must be submerged and separate from the RE/WE [6] [30]. |
Standard Experimental Protocol for a Reliable CV Measurement
A robust experimental workflow is the first defense against distorted voltammograms. The following diagram and detailed steps outline a comprehensive procedure for a reliable Cyclic Voltammetry experiment.
Step 1: Electrode Preparation
- Polish the Working Electrode: Use a slurry of 0.05 μm alumina on a polishing pad, then rinse thoroughly with purified water and methanol [6] [30].
- Sonicate: Place the polished electrode in a sonication bath for a few minutes to remove any adhered alumina particles [30].
- Wash: Rinse the working and counter electrodes with water and methanol [30].
- Refresh Reference Electrode: If applicable, refresh the reference electrode's internal solution to ensure a stable potential [30].
Step 2: Reference Electrode Soaking Soak the reference electrode in the pure electrolyte solution (if pre-treatment is planned) or directly in the sample solution [30].
Step 3: Electrode Pre-treatment (Optional) Assemble the electrodes in a cell containing only the electrolyte solution. Run several CV cycles to electrochemically clean the electrodes and remove any residual deposits. This is especially useful for activating or cleaning platinum electrodes [6] [30].
Step 4: Sample Solution Assembly Prepare the loading sample solution containing the solvent, electrolyte, and analyte. Add this solution to the electrochemical cell. Assemble the electrode cap with the prepared electrodes onto the reaction vessel [30].
Step 5: Sparging with Inert Gas Sparge the sample solution with an inert gas (e.g., nitrogen or argon) for several minutes to remove dissolved oxygen, which can cause interfering redox peaks [30].
Step 6: Perform CV Measurement Start the CV measurement with the desired parameters (initial potential, switching potential, scan rate, and number of cycles) [30].
Step 7: Internal Standard (Optional) If an internal standard (e.g., ferrocene) is not included in the initial solution, it can be added after the first measurement. A subsequent CV measurement under identical parameters allows for potential calibration and comparison [30].
Step-by-Step Troubleshooting Protocol for Distorted Voltammograms
Cyclic voltammetry is a powerful electrochemical technique, but its apparent simplicity can be deceptive. When faced with a distorted voltammogram, a systematic approach to troubleshooting is essential for accurate data interpretation. This guide provides a structured procedure to isolate and identify problems, moving from the potentiostat and cables to the electrochemical cell and, finally, to the working electrode itself. Adopting this logical workflow can save valuable research time and prevent misinterpretation of experimental data [6].
General Troubleshooting Workflow
A general troubleshooting procedure, as proposed by Bard and Faulkner, helps to systematically identify whether a problem originates from the potentiostat, cables, or electrodes [6]. The following diagram illustrates this logical pathway.
Logical Flow of Voltammetry Troubleshooting. This diagram outlines the systematic procedure for isolating the source of problems in a cyclic voltammetry setup, from the instrument to the working electrode [6].
Step 1: Verify Potentiostat and Cables
Begin by disconnecting the electrochemical cell. This isolates the instrument and its connections for testing [6].
- Method A (Using a Resistor): Connect the reference (RE) and counter (CE) electrode cables to one side of a 10 kΩ resistor and the working electrode (WE) cable to the other side. Run a scan over a small range (e.g., +0.5 V to -0.5 V). A functioning system will produce a straight-line current response that obeys Ohm's law (V = IR) [6].
- Method B (Using a Test Chip): If available, use the manufacturer's test chip (e.g., with an Ossila Potentiostat). Connect the cables to the designated test points and run a scan from 0 to 1 V at 100 mV/s. The expected result is a straight line from 0 to 1 μA, confirming the potentiostat and cables are operational [6].
Interpretation: If this test fails, the issue lies with the potentiostat hardware or the electrode cables. If it passes, the problem is within the electrochemical cell setup [6].
Step 2: Bypass the Reference Electrode
Set up the electrochemical cell as usual, but connect the reference electrode cable directly to the counter electrode, along with the counter electrode cable. This bypasses the reference electrode. Run a linear sweep voltammetry experiment with your analyte present [6].
Interpretation: If a standard voltammogram is obtained (even if it is shifted in potential or slightly distorted due to increased uncompensated resistance), it indicates a problem with the reference electrode. A blocked frit or air bubbles preventing electrical contact with the solution are common causes. If the voltammogram remains significantly distorted or is absent, the issue is likely with the working or counter electrode [6].
Step 3: Replace Electrode Cables
If the previous steps have ruled out the potentiostat and reference electrode, faulty cables can still be a source of noise or poor signal. Replace the cables connecting to all three electrodes one at a time to see if the problem is resolved. Poor contacts can generate unwanted signals and noise [6].
Step 4: Clean and Polish the Working Electrode
The working electrode surface is often the culprit. Contamination from adsorbed species can lead to high resistivity, high capacitance, noise, or sloping baselines [6].
- Polishing: Gently polish the working electrode surface with a fine abrasive like 0.05 μm alumina slurry. Rinse thoroughly with a suitable solvent (e.g., water and methanol) to remove all polishing residues [6] [30].
- Electrochemical Cleaning (for Pt electrodes): A Pt working electrode can be cleaned by cycling it between potentials where H2 and O2 are evolved in a 1 M H2SO4 solution. This helps to desorb contaminants [6].
- Inspection: Also check for internal structural problems with the working electrode, such as poor electrical contacts or broken seals [6].
Common Problems and Direct Diagnosis
While the general procedure is comprehensive, some issues can be diagnosed quickly through direct observation. The table below summarizes common problems, their symptoms, and immediate actions.
| Observable Symptom | Possible Causes | Corrective Actions |
|---|---|---|
| Voltage compliance errors [6] | Quasi-reference electrode touching the WE; CE removed from solution or disconnected. | Ensure all electrodes are properly submerged and spaced; check all connections. |
| Current compliance errors / potentiostat shutdown [6] | Working and counter electrodes are touching, causing a short circuit. | Separate the electrodes and ensure they are not bent or broken. |
| Unusual voltammogram that changes on repeated cycles [6] | Reference electrode not in electrical contact (blocked frit, air bubbles); poor cable contacts. | Check reference electrode frit for blockages; tap to dislodge bubbles; ensure all connections are secure. |
| Very small, noisy, but unchanging current [6] | Working electrode is not properly connected to the potentiostat or cell. | Check connection of working electrode cable; ensure electrode is fully submerged. |
| Non-flat baseline [6] | Problems with the working electrode; unknown processes at the electrode-solution interface. | Clean/polish the working electrode; if persistent, the cause may be difficult to eliminate. |
| Large reproducible hysteresis in the baseline [6] | Charging currents at the electrode-solution interface (behaves like a capacitor). | Reduce scan rate; increase analyte concentration; use a working electrode with a smaller surface area. |
| Unexpected peaks [6] | Impurities (from chemicals, atmosphere, or component degradation); approaching the edge of the potential window. | Run a background scan without analyte; use higher purity chemicals; ensure proper solution deaeration. |
| Attenuated peak currents & increased peak separation [8] | Use of staircase voltammetry (common in digital potentiostats) with large step potentials. | Use smaller potential steps; apply correction factors for quantitative analysis. |
Essential Research Reagent Solutions
A successful cyclic voltammetry experiment relies on the quality and appropriateness of its core components. The following table details key reagents and materials, their functions, and related experimental considerations.
| Item | Function / Purpose | Key Considerations |
|---|---|---|
| Electrolyte Salt (e.g., KCl, TBAPF6) [6] [30] | To decrease the solution's electrical resistance without interfering with the analyte's redox reactions. | High purity is essential to avoid impurity peaks. Typical concentration: 0.05 - 0.5 M [30]. |
| Solvent | Dissolves the analyte and electrolyte. Defines part of the usable potential window. | Must be inert, pure, and able to dissolve electrolytes. Must not react with electrodes in the scanned range [30]. |
| Analyte | The molecule of interest whose redox properties are being probed. | Typical concentration: 1 - 10 mM [30]. |
| Working Electrode (e.g., Glassy Carbon, Pt, Au) | Surface where the redox reaction of the analyte occurs. | Surface history and cleanliness are critical. Requires regular polishing and electrochemical cleaning [6]. |
| Reference Electrode (e.g., Ag/AgCl, QRE) | Provides a stable, known potential against which the WE is measured. | Check for blocked frits. A Quasi-Reference Electrode (QRE, e.g., bare Ag wire) can be used for troubleshooting [6]. |
| Counter Electrode (e.g., Pt wire/coil) | Completes the electrical circuit by facilitating a counter reaction. | Should have a much larger surface area than the WE to not be rate-limiting. |
| Internal Standard (e.g., Ferrocene) [30] | Used to accurately reference potentials, especially when using QREs. | Added directly to the sample solution or after initial measurements for calibration [30]. |
Advanced Considerations for Quantitative Analysis
Impact of Staircase Voltammetry
Many modern digital potentiostats do not apply a true linear potential ramp; instead, they use a staircase waveform where the potential is increased in discrete steps and the current is sampled at a specific point in each step [8]. This can lead to significant discrepancies compared to ideal theoretical predictions:
- Attenuated Peak Currents: Peak currents can be up to 20% smaller for larger step sizes [8].
- Increased Peak Separation: The peak-to-peak separation (ΔEpp) can be increased from the ideal 57 mV to about 70 mV for a reversible system [8].
These discrepancies can lead researchers to mistakenly classify a reversible system as quasi-reversible or to miscalculate diffusion coefficients. For accurate quantitative work, use small step sizes (e.g., 1-2 mV) or apply the appropriate correction factors as detailed in the literature [8].
Data Analysis and Training Sets
In advanced applications like Fast-Scan Cyclic Voltammetry (FSCV) for neurochemistry, multivariate calibration (e.g., Principal Component Regression, PCR) is often used to resolve signals from multiple interfering analytes [31]. The accuracy of this technique depends critically on the "training set"—a collection of voltammograms used to teach the model the current-concentration relationship for each analyte.
- Warning: Using "standard training sets" collected with different electrodes, in different animals, or with different equipment can lead to misassignment of signals and inaccurate quantitation [31].
- Best Practice: For reliable results, training sets should be collected under the same conditions as the experimental data (same electrode, session, and subject) [31].
Diagnosing and Resolving Voltage and Current Compliance Errors
Voltage and current compliance errors indicate that a potentiostat has reached its operational limits and can no longer control the electrochemical cell effectively. The compliance voltage is the maximum voltage that can be applied between the working and counter electrode to maintain the desired potential at the working electrode [32] [33]. When the system resistance or current demand exceeds what the potentiostat can supply, these errors occur, disrupting experiments and potentially yielding invalid data. For researchers investigating electrochemical properties of compounds, particularly in drug development, understanding these errors is crucial for obtaining accurate, reproducible cyclic voltammograms essential for characterizing redox-active molecules.
Troubleshooting Guide: Questions and Answers
What are the visual indicators of a voltage compliance issue in my cyclic voltammogram?
A voltage compliance issue becomes apparent when the applied potential waveform fails to reach the programmed vertex potentials. Instead of the expected curve, the voltammogram shows current that follows a Cottrell equation (current proportional to t⁻¹/²) rather than the expected potential dependence [33].
Key visual indicators include:
- The measured potential flattens and cannot reach the set endpoint [32]
- In the applied potential waveform, the actual potential (red trace) deviates from and fails to reach the programmed potential (orange trace) [32]
- The current shows a sudden drop to zero and remains there during techniques like DPV or SWV [33]
Table: Identifying Voltage Compliance Issues in Cyclic Voltammetry
| Observation | Expected Result | Compliance Error Indicator |
|---|---|---|
| Applied Potential | Reaches programmed vertex potentials [32] | Flattens out before reaching target potential [32] |
| Current Response | Potential-dependent Faradaic response [33] | Time-dependent decay following Cottrell equation [33] |
| Waveform Shape | Programmed and actual waveforms overlap [32] | Actual waveform deviates from programmed waveform [32] |
| Multi-cycle Scans | Reproducible voltammograms across cycles | Progressive distortion or zero current in subsequent cycles [33] |
What causes voltage compliance errors and how can I resolve them?
Voltage compliance errors occur when the potentiostat cannot supply enough voltage between the counter and working electrodes to maintain the desired potential at the working electrode interface [32]. This typically happens due to excessive system resistance or insufficient counter electrode capability.
Primary causes and solutions:
Excessive Solution Resistance: High resistance between reference and working electrodes (RWRK) requires higher voltage to drive current [32].
- Solution: Place reference electrode closer to working electrode; increase electrolyte concentration; remove fritted isolation tubes if possible [32]
Insufficient Counter Electrode Area: A small counter electrode cannot supply sufficient current, forcing the potentiostat to increase voltage [32].
- Solution: Increase counter electrode size; ensure counter electrode is not passivated [32]
Counter Electrode Reaction Limitation: The counter electrode lacks suitable redox reactions to balance the working electrode current [33].
- Solution: Add sacrificial redox molecule to counter electrode compartment that is easily oxidized/reduced [32]
Instrument Limitation: The potentiostat's inherent compliance voltage is insufficient for the experimental conditions [32].
- Solution: Reduce current (smaller electrode, lower concentration) or purchase potentiostat with higher compliance voltage [32]
What causes current compliance errors and how can I resolve them?
Current compliance errors indicate a short circuit condition where the potentiostat detects excessively high current flow, potentially triggering a shutdown to prevent instrument damage [6].
Primary causes and solutions:
Electrode Contact: Physical contact between working and counter electrodes creates a short circuit [6].
- Solution: Ensure proper electrode spacing and insulation; check for bridging by solution droplets [6]
Quasi-Reference Electrode Issues: A quasi-reference electrode touching the working electrode [6].
- Solution: Reposition reference electrode; ensure proper isolation [6]
Counter Electrode Connection: Poor connection or removal from solution [6].
- Solution: Verify counter electrode is fully submerged and properly connected [6]
Why does my voltammogram look unusual or different on repeated cycles?
Unusual or changing voltammograms across cycles often indicate reference electrode problems rather than compliance errors. When the reference electrode is not properly connected to the electrochemical cell, it behaves like a capacitor, with leakage currents unpredictably changing the measured potential [6].
Diagnostic and resolution steps:
- Check Reference Electrode Connection: Ensure the reference electrode frit isn't blocked and no air bubbles are trapped between the frit and wire [6]
- Test with Quasi-Reference Electrode: Temporarily replace with a bare silver wire quasi-reference electrode [6]
- Verify Electrode Placement: Ensure reference electrode isn't touching the counter electrode, which causes measuring counter electrode potential instead of solution potential [6]
How can I systematically troubleshoot general potentiostat issues?
A structured approach helps isolate whether problems originate from the potentiostat, cables, electrodes, or cell setup [6].
General troubleshooting procedure:
- Disconnect Electrochemical Cell: Replace with a 10 kΩ resistor connected between reference/counter and working electrode cables [6]
- Perform Test Scan: Scan over an appropriate range (e.g., +0.5 V to -0.5 V); result should be a straight line following Ohm's law (V = IR) [6]
- Test Chip Method: If using a potentiostat with test capability (e.g., Ossila), connect to test chip and verify proper response [6]
- Reference Electrode Bypass: Connect reference electrode cable to counter electrode and run linear sweep; distorted but recognizable voltammogram suggests reference electrode issues [6]
- Cable and Electrode Check: Replace cables; polish working electrode; clean Pt electrodes by switching between H₂ and O₂ production potentials in H₂SO₄ [6]
Table: Troubleshooting Common Cyclic Voltammetry Problems
| Problem | Possible Causes | Diagnostic Steps | Solutions |
|---|---|---|---|
| Voltage Compliance Error | High solution resistance, small counter electrode, insufficient counter reaction [32] | Check if applied potential reaches target [32] | Increase electrode size, add electrolyte, add sacrificial species [32] |
| Current Compliance Error | Electrodes touching, short circuit [6] | Inspect electrode placement | Ensure proper spacing and insulation [6] |
| Changing Voltammograms | Reference electrode not in electrical contact [6] | Use as quasi-reference electrode | Clear blocked frit, remove bubbles [6] |
| Noisy Baseline/Non-flat Baseline | Poor working electrode connection, electrode processes [6] | Check connections, polish electrode | Improve contacts, clean electrode [6] |
| Unexpected Peaks | Impurities, edge of potential window [6] | Run background scan without analyte | Purify solutions, adjust potential window [6] |
The Scientist's Toolkit: Essential Research Reagents and Materials
Table: Key Materials for Cyclic Voltammetry Experiments
| Material/Component | Function/Purpose | Considerations for Compliance Errors |
|---|---|---|
| Supporting Electrolyte | Carries current, minimizes solution resistance, controls ionic strength [6] | High concentration reduces uncompensated resistance; ensures sufficient conductivity [6] |
| Solvent | Dissolves analyte and electrolyte [6] | Choice affects potential window; must dissolve sufficient electrolyte [6] |
| Working Electrode | Surface where reaction of interest occurs [6] | Smaller area reduces charging currents but may increase current density [6] |
| Counter Electrode | Completes electrical circuit, carries current load [6] | Large surface area prevents current limitations; inert material preferred [6] |
| Reference Electrode | Provides stable, known potential reference [6] | Proper frit function essential; blockage causes erratic potentials [6] |
| Potentiostat | Controls potential, measures current [32] | Compliance voltage specification critical for high-resistance systems [32] |
| Degassing System | Removes dissolved oxygen [34] | Oxygen reduction/oxidation can create unexpected currents [34] |
| Electrode Polishing | Maintains reproducible electrode surface [6] | Alumina polish (0.05 μm) removes adsorbed species causing poor response [6] |
Frequently Asked Questions
1. What are the symptoms of a blocked frit or air bubble in my reference electrode? You may observe a noisy or oscillating current signal, a voltammogram that looks unusual or different on repeated cycles, an inability of the potentiostat to maintain control of the working electrode potential (often triggering a voltage compliance error), or a complete failure to measure any faradaic current [6] [35] [36].
2. Why does a blocked frit or bubble cause these problems? A blockage dramatically increases the impedance of the reference electrode [36]. This high impedance, in combination with the inherent capacitance of the electrode cables, creates a filter that disrupts the potentiostat's critical feedback loop, leading to instability, oscillations, and noise [37] [35] [36]. It can also prevent the potentiostat from accurately sensing the solution potential [6].
3. How can I quickly check if my reference electrode is the source of the problem? A common diagnostic test is to temporarily use a two-electrode setup. Disconnect the reference electrode lead from your reference electrode and connect it to the counter electrode lead (so both are attached to the counter electrode). This uses the counter electrode as a pseudo-reference. If the noise disappears and you obtain a more stable, standard-looking voltammogram (albeit with a shifted and slightly distorted potential), the issue is likely with your original reference electrode [6] [35].
4. How can I prevent my reference electrode frit from blocking? Proper storage is key. For non-aqueous electrodes, always ensure the frit remains in contact with the electrolyte solution and never允许它变干, as crystallized salt will crack and ruin the frit [38]. After experiments, allow the frit to soak in an electrolyte solution to clean off any electrogenerated products [38].
5. My reference electrode has a flat, horizontal frit. Why is that a problem? Flat, horizontal frit surfaces are notorious for trapping air bubbles [36]. A frit with a 45-degree angle allows natural convection to help dislodge and remove any forming bubbles, leading to a more reliable electrical connection [36].
Troubleshooting Guide: Diagnosis and Resolution
Step 1: Recognize the Symptoms
Your data or potentiostat may exhibit these signs:
- Noisy or oscillating current [35].
- Unusual-looking voltammograms that change shape with each cycle [6].
- Voltage compliance errors where the potentiostat cannot apply the desired potential [6].
- A very small, noisy, but otherwise unchanging current, indicating a poor connection to the electrochemical cell [6].
Step 2: Perform a Diagnostic Test
The quasi-reference electrode test is a standard diagnostic tool [6].
- Procedure:
- Disconnect the reference electrode cable from the reference electrode.
- Connect this cable directly to the counter electrode, alongside the counter electrode cable.
- Run a standard linear sweep or cyclic voltammetry experiment.
- Interpretation:
Step 3: Address the Issue
Based on the diagnosis, proceed with the following solutions.
Table 1: Troubleshooting Solutions for Common Issues
| Issue | Recommended Solution |
|---|---|
| Blocked Frit | Gently try to clear the blockage by soaking the frit in a warm electrolyte solution (e.g., saturated KCl for Ag/AgCl electrodes) or by applying gentle suction with a rubber bulb [39]. If blocked beyond cleaning, replace the reference electrode or its frit. |
| Air Bubbles | Gently tap the electrode body to dislodge the bubble. For electrodes in a Luggin capillary, ensure the capillary tip is fully submerged and consider repositioning it [6] [39]. |
| High Impedance | For critical AC measurements like EIS, use a low-impedance reference electrode. A capacitively coupled system, where a platinum wire is placed in parallel with the reference electrode via a small capacitor (e.g., 0.1 µF), can provide a stable high-frequency path [35] [36]. |
| Unstable Potential | For non-aqueous work, ensure you are using an appropriate reference system (e.g., Ag/Ag⁺) and calibrate frequently against an internal standard like ferrocene [38]. Always have a "Lab Master" reference electrode to check the potential of your working electrodes [36]. |
The following workflow summarizes the diagnostic and repair process:
The Scientist's Toolkit: Essential Research Reagents & Materials
Table 2: Key Materials for Reference Electrode Maintenance and Troubleshooting
| Item | Function & Application |
|---|---|
| Potentiostat with Test Mode | Modern potentiostats often include a "dummy cell" or test chip to verify the instrument and cables are functioning correctly before connecting the electrochemical cell [6]. |
| Resistor (e.g., 10 kΩ) | Used to construct a dummy cell for basic potentiostat functionality testing [6]. |
| "Lab Master" Reference Electrode | A carefully treated and never-used reference electrode kept solely as a stable standard to check the potential of your working electrodes. A difference >5 mV suggests the working electrode needs attention [36]. |
| Quasi-Reference Electrode (e.g., Ag wire) | A bare silver wire or other inert metal can serve as a temporary, low-impedance pseudo-reference for diagnostic tests [6] [38]. |
| Internal Standard (e.g., Ferrocene) | Essential for non-aqueous electrochemistry to calibrate the potential of a pseudo-reference electrode, as its redox potential is well-known and reproducible [38]. |
| Electrolyte Solutions | Appropriate solutions (e.g., saturated KCl for Ag/AgCl) for filling and storing reference electrodes to prevent frits from drying out [36] [38]. |
| Rubber Bulb | For applying gentle suction or pressure to clear a mildly blocked frit [39]. |
Proactive Practices for Prevention
The most effective troubleshooting is preventing problems before they start.
- Storage: Always store reference electrodes according to manufacturer guidelines, ensuring the frit remains hydrated in the correct filling solution [39] [38].
- Handling: Avoid introducing bubbles when filling electrodes. Tip the electrode and slowly fill along the side of the compartment.
- Inspection: Visually inspect the frit before each use for cloudiness, crystals, or air bubbles. A simple check of the open-circuit potential against your "Lab Master" can reveal stability issues [36].
- Cleaning: Soak reference electrodes in fresh electrolyte after use in dirty solutions to dissolve any contaminants on the frit [38].
Proper working electrode maintenance is a critical foundation for obtaining reliable and reproducible data in cyclic voltammetry. Contaminated or poorly maintained electrode surfaces are a primary source of distorted voltammograms, anomalous peaks, and unstable baselines in electrochemical research. This guide provides detailed protocols for electrode polishing, cleaning, and surface regeneration to support researchers in troubleshooting and preventing common electrochemical issues.
FAQs on Electrode Maintenance and Troubleshooting
What are the signs that my working electrode needs cleaning or polishing?
Several symptoms in your cyclic voltammograms indicate electrode contamination or surface issues:
- Unexpected peaks appearing that aren't from your analyte of interest [6]
- Non-flat or sloping baselines that deviate from the expected straight line [6]
- Significant hysteresis in the baseline between forward and backward scans [6]
- Diminished peak currents or complete signal loss (flatlining) [6] [7]
- Noisy or unstable signals during repeated cycles [6]
How does proper electrode maintenance prevent distorted voltammograms?
A properly maintained electrode surface ensures:
- Predictable electrochemical behavior with expected peak currents and shapes
- Minimized charging currents that cause baseline hysteresis [6]
- Elimination of contaminant peaks from adsorbed species [6]
- Stable baselines for accurate current measurements [6]
- Reproducible results across multiple experimental runs
What is the complete electrode polishing workflow?
The electrode polishing process involves progressively finer abrasives to achieve a mirror-finish surface. Different contamination levels require different approaches, from routine maintenance to aggressive cleaning for heavily contaminated surfaces [40].
Detailed Electrode Polishing Protocols
Routine Cleaning Procedure
For light maintenance after few uses or between experiments [40] [41]:
- Affix a microfiber polishing cloth to a flat, rigid surface (glass or dedicated polymer block)
- Apply 0.05 μm alumina slurry - approximately 3mm diameter spot
- Polish using figure-8 motion while gently rotating the electrode
- Rinse thoroughly with distilled water to remove all alumina particles
- Optional ultrasonic bath (1-5 minutes in distilled water) to dislodge embedded particles
Periodic Cleaning Procedure
For moderate contamination, performed several times weekly [40]:
- Begin with 0.3 μm alumina on microcloth using figure-8 motion with rotation
- Rinse with distilled water
- Optional ultrasonic bath as described above
- Complete with routine cleaning using 0.05 μm alumina
Aggressive Cleaning Procedure
For heavily contaminated surfaces or visible adsorbed species [40]:
- Start with 5 μm alumina on a Nylon polishing pad (5-10 minutes)
- Rinse with distilled water
- Optional ultrasonic bath
- Continue with periodic cleaning (0.3 μm alumina)
- Finish with routine cleaning (0.05 μm alumina)
Complete Re-polishing
Only for severely damaged electrodes; significantly reduces electrode lifetime [40]:
- Begin with 600 grit silicon carbide paper with deionized water
- Progress through aggressive cleaning protocol (5μm → 0.3μm → 0.05μm alumina)
- Note: This removes 250-500μm of electrode material and shortens usable lifespan
Electrode Cleaning Solutions and Materials
Table 1: Essential Materials for Electrode Maintenance and Polishing
| Material/Solution | Function/Purpose | Application Notes |
|---|---|---|
| Alumina Slurries (5 μm, 0.3 μm, 0.05 μm) | Abrasive polishing for surface regeneration | Use progressively finer grits; 0.05 μm for mirror finish [40] |
| Microfiber Polishing Cloth | Surface for routine polishing | Affix to flat glass/polymer surface [40] |
| Nylon Polishing Pad | Surface for aggressive polishing | Used with coarser alumina grits (5 μm) [40] |
| Silicon Carbide Paper (600 grit) | Initial surfacing for damaged electrodes | Significant material removal; use sparingly [40] |
| Ultrasonication Bath | Remove embedded alumina particles | Use distilled water; 1-5 minutes [40] [41] |
| Distilled/Deionized Water | Rinsing between polishing steps | Prevents recontamination [40] [41] |
| Dilute Acid/Base (0.1M HCl, HNO₃, NaOH) | Remove inorganic contaminants | Follow with thorough water rinsing [41] |
| Organic Solvents (acetone, ethanol) | Remove organic residues | Use in ultrasonic bath for effectiveness [41] |
Troubleshooting Common Electrode Problems
Problem: Unexpected Peaks in Voltammogram
- Possible Cause: Contaminant adsorption on electrode surface [6]
- Solution: Perform aggressive cleaning protocol; ensure thorough rinsing between polishing steps
- Prevention: Clean electrode immediately after experiments; store properly
Problem: Sloping or Non-Flat Baseline
- Possible Cause: Working electrode surface issues or fundamental electrochemical processes [6]
- Solution: Polish with 0.05 μm alumina; use ultrasonic cleaning
- Verification: Run background scan in supporting electrolyte only
Problem: Significant Baseline Hysteresis
- Possible Cause: Excessive charging currents from electrode-solution interface capacitance [6]
- Solution: Reduce scan rate; decrease electrode surface area; ensure proper polishing [6]
Problem: Noisy or Unstable Current Signal
- Possible Cause: Poor electrode connections or contaminated surface [6]
- Solution: Check electrical contacts; repolish electrode surface; ensure proper immersion
Additional Surface Regeneration Techniques
Electrochemical Cleaning
For platinum electrodes, additional electrochemical cleaning can be effective [6]:
- Cycle potentials between hydrogen and oxygen evolution regions in 1 M H₂SO₄ solution
- Removes strongly adsorbed species not eliminated by mechanical polishing
Chemical Cleaning
For specific contaminants [41]:
- Organic residues: Use dilute NaOH or organic solvents
- Inorganic deposits: Use dilute acids (0.1M HCl or HNO₃)
- Always follow with thorough water rinsing
Best Practices for Electrode Storage
- Store polished electrodes in clean, dry environment
- Protect from dust and atmospheric contaminants
- Avoid touching the polished surface with bare hands
- Use protective caps when available
- Clean before storage if electrode has been used
Proper working electrode maintenance through systematic polishing, cleaning, and surface regeneration is essential for obtaining high-quality cyclic voltammetry data free from distortions and artifacts. By implementing these protocols and troubleshooting guides, researchers can eliminate electrode-related issues and focus on interpreting meaningful electrochemical phenomena. Regular electrode maintenance should be considered a fundamental practice in any electrochemical laboratory, particularly in drug development and research applications where data accuracy is critical.
Validating System Performance with Test Chips and Standard Solutions
Why is my cyclic voltammogram distorted or unusual in shape, and how can I validate if my system is functioning correctly?
An unusual or distorted cyclic voltammogram is a common issue often traced to problems with the reference electrode or poor electrical contacts within the system [6]. To validate your system's performance, a general troubleshooting procedure is recommended [6].
General Troubleshooting Procedure:
- Disconnect the Electrochemical Cell: Replace the cell with a 10 kΩ resistor. Connect the reference and counter electrode cables to one side of the resistor and the working electrode cable to the other.
- Run a Test Scan: Scan the potentiostat over a range of +0.5 V to -0.5 V. A correctly functioning potentiostat and cables will produce a straight-line current response that follows Ohm's law (V = IR) [6].
- Use a Dedicated Test Chip (if available): If your potentiostat comes with a test chip (e.g., the Ossila Test Cell Chip), connect it according to the manufacturer's instructions. A scan from 0 to 1 V at 100 mV/s should yield a predictable response, such as a straight line from 0 to 1 μA for a specific channel [6].
- Bypass the Reference Electrode: Set up your electrochemical cell as usual, but connect the reference electrode cable to the counter electrode (in addition to the counter electrode cable). Running a linear sweep with an analyte present should produce a standard, though potential-shifted and slightly distorted, voltammogram. If this works, the problem likely lies with the reference electrode (e.g., a blocked frit or air bubbles) [6].
- Inspect and Clean Electrodes: Check that all electrodes are properly submerged and cables are intact. Polish the working electrode with 0.05 μm alumina slurry and clean it in an ultrasonic bath to remove adsorbed species [6] [42].
My potentiostat is reporting "voltage compliance" or "current compliance" errors. What should I do?
These errors indicate the potentiostat is unable to maintain the desired potential or is detecting excessive current flow [6].
- Voltage Compliance Errors: This occurs when the potentiostat cannot control the potential between the working and reference electrodes. Common causes include a disconnected counter electrode, the counter electrode being removed from the solution, or a quasi-reference electrode touching the working electrode [6].
- Current Compliance Errors: This is typically caused by a short circuit, such as the working and counter electrodes touching each other, which generates a large current and may cause the potentiostat to shut down for self-protection [6].
Validation Protocol: Systematically check all physical connections and ensure no electrodes are touching. Verify that all electrodes are fully immersed in the electrolyte solution.
The baseline of my CV is not flat and shows large, reproducible hysteresis. What is the cause?
A non-flat baseline with significant hysteresis between forward and backward scans is primarily due to charging currents at the electrode-solution interface, which behaves like a capacitor [6]. This is often more pronounced with high scan rates, low analyte concentrations, or large electrode surface areas [6].
Validation Protocol: To confirm this is the cause and not a hardware fault, reduce the scan rate, increase the analyte concentration, or use a working electrode with a smaller surface area. If the hysteresis diminishes, the baseline curvature is a fundamental property of your experimental setup rather than a system malfunction [6].
How can I use standard solutions to confirm my setup is working properly?
A primary test using a known standard solution is an excellent way to validate overall system performance, from the potentiostat to the electrode surface.
Primary Validation Test Protocol (Example):
- Connect the sensor and insert a clean screen-printed electrode (SPE).
- Prepare a Standard Solution: Fill a vial with ~10 mL of a 1.0 mM solution of acetaminophen in contact lens solution [43].
- Assemble the Cell: Guide the electrode into the vial and secure it.
- Run the Experiment: Use default CV parameters (e.g., a relevant voltage window for your standard) and collect data.
- Expected Result: A successful validation will yield a characteristic, reproducible voltammogram (described as "duck-shaped" for this specific test) [43]. The absence or distortion of this shape indicates a problem, often with the electrode surface, requiring cleaning or activation [43].
Experimental Protocols for System Validation
Protocol 1: System Diagnostics with a Test Resistor
This protocol validates the potentiostat and cables independently of the electrochemical cell [6].
| Aspect | Specification |
|---|---|
| Objective | Verify potentiostat and cable functionality. |
| Key Reagent | 10 kΩ resistor [6]. |
| Methodology | Replace the electrochemical cell with the resistor. Connect CE/RE to one end and WE to the other. |
| Experimental Parameters | Run a CV scan from +0.5 V to -0.5 V [6]. |
| Validation Criterion | The resulting voltammogram should be a straight line obeying Ohm's law (V = IR) [6]. |
Protocol 2: Electrode Cleaning and Preparation
Reliable data requires impeccably clean electrodes. This protocol details the cleaning process for platinum and ITO/FTO electrodes [42].
Platinum Disk Electrode:
- Polishing: Rub the platinum disk on a polishing pad with 1 µm alumina slurry for 3 minutes [42].
- Rinsing: Rinse thoroughly with deionized water to remove all alumina residue [42].
- Ultrasonic Cleaning: Place the electrode in an ultrasonic bath (320 W, 37 kHz) with deionized water for 15 minutes [42].
- Solvent Rinsing: Rinse sequentially with isopropanol (3 x 1 mL) and acetone (3 x 1 mL) using a syringe [42].
- Drying: Dry in air for a few minutes [42].
- Alternative Cleaning (for Pt): A Pt electrode can also be cleaned electrochemically by switching potentials where H2 and O2 are produced in a 1 M H2SO4 solution [6].
ITO/FTO Electrodes:
- Ultrasonic Cleaning: Clean in an ultrasonic bath (320 W, 37 kHz) sequentially in acetone for 15 minutes and isopropanol for 15 minutes [42].
Platinum Wires/Coils:
- Thermal Cleaning: Use a high-temperature gas torch (>1000 °C) for 1 minute to burn off organic contaminants [42].
Protocol 3: Running a Standard CV for System Validation
This protocol outlines the steps for a basic CV experiment after system setup and electrode cleaning [42].
| Aspect | Specification |
|---|---|
| Objective | Acquire a stable and characteristic cyclic voltammogram to validate system performance. |
| Key Reagents | Electrolyte (e.g., 0.1 M Bu₄NPF₆ in acetonitrile), analyte of known behavior (e.g., 1.0 mM acetaminophen) [42] [43]. |
| Methodology | Triangular potential waveform applied to WE while measuring current. |
| Experimental Parameters | Start potential: 0.00 V; Scan limits: e.g., -2.5 V to 2.0 V; Scan rate: 0.05 V/s; Cycles: 6 [42]. |
| Validation Criterion | A reproducible voltammogram with stable peak currents and potentials over multiple cycles. |
- Solution Preparation: Prepare the electrolyte and analyte solutions. For oxygen-sensitive processes (e.g., reductions), bubble the solution with argon or nitrogen for at least 5 minutes to deoxygenate, and maintain a slow gas flow above the solution during measurement [42].
- Cell Assembly: Fill the electrochemical cell with ~1.5 mL of the electrolyte solution. Insert the three electrodes (WE, RE, CE), ensuring the WE and RE are placed close together [42].
- Connection: Connect the electrodes to the potentiostat.
- Software Setup: In the potentiostat software, select the CV procedure. Enter the parameters, including the initial, upper vertex, and lower vertex potentials, the scan rate, and the number of cycles [42].
- Data Collection: Start the measurement. The software will record the current versus potential, generating the cyclic voltammogram.
The Scientist's Toolkit: Key Research Reagent Solutions
The table below lists essential materials and their functions for CV experiments focused on system validation.
| Item | Function / Purpose |
|---|---|
| Test Chip (e.g., Ossila) | Provides a controlled, predictable electrical response to validate potentiostat and cable performance without using chemical solutions [6]. |
| Standard Solution (e.g., 1.0 mM Acetaminophen) | A solution with a known, characteristic voltammetric response used to validate the entire experimental setup, including electrodes and chemistry [43]. |
| Alumina Slurry (0.05 - 1 µm) | A polishing agent for abrasive cleaning and resurfacing of working electrodes to ensure a fresh, reproducible surface [6] [42]. |
| Supporting Electrolyte (e.g., Bu₄NPF₆, Bu₄NBF₄) | Dissolved in the solvent at high concentration (e.g., 0.1 M) to conduct current and minimize solution resistance, while being electroinactive in the potential window of interest [42]. |
| Inert Solvents (e.g., Acetonitrile, Dichloromethane) | Dissolve the analyte and electrolyte. The choice depends on the solubility of the test compounds and the required electrochemical window [42]. |
| Quasi-Reference Electrode (e.g., bare Ag wire) | A simple reference electrode used for troubleshooting to determine if a fault lies with the primary reference electrode [6]. |
Validation Techniques and Comparative Analysis for Data Integrity
Experimental Design for Robust Method Validation and Transfer
Fundamentals of Robustness and Ruggedness
What is the critical difference between robustness and ruggedness in method validation?
Robustness is defined as the capacity of an analytical procedure to remain unaffected by small, deliberate variations in method parameters listed in the documentation. It provides an indication of the method's reliability during normal usage. Variations are internal to the method protocol, such as mobile phase pH, flow rate, or column temperature in chromatography [44] [45].
Ruggedness refers to the degree of reproducibility of test results obtained under a variety of normal test conditions, such as different laboratories, analysts, instruments, and reagent lots. It measures the method's performance under external conditions expected from laboratory to laboratory [44].
Table: Key Differences Between Robustness and Ruggedness
| Aspect | Robustness | Ruggedness |
|---|---|---|
| Nature of Variations | Deliberate, controlled parameter changes | Environmental and operational differences |
| Parameter Examples | Mobile phase composition, pH, temperature | Different labs, analysts, equipment, days |
| Scope | Internal method parameters | External laboratory conditions |
| Regulatory Status | Not strictly required by ICH but recommended | Addressed under intermediate precision and reproducibility |
| Testing Phase | Typically during method development | During method validation and transfer |
A simple rule of thumb: if a parameter is written into the method (e.g., "30°C, 1.0 mL/min"), it is a robustness issue. If it is not specified in the method (e.g., which analyst runs the test), it is a ruggedness issue [44].
When should robustness testing be performed in the method lifecycle?
Robustness testing should be performed during method development or at the beginning of the validation procedure. Investigating robustness early in the lifecycle makes sense because parameters affecting the method can be identified easily when manipulated for selectivity or optimization purposes [44] [45].
The ICH guidelines recommend that "one consequence of the evaluation of robustness should be that a series of system suitability parameters (e.g., resolution tests) is established to ensure that the validity of the analytical procedure is maintained whenever used" [45].
Experimental Design for Robustness Testing
What experimental approaches are available for robustness testing?
For years, analysts conducted robustness studies using a univariate approach (changing one variable at a time). However, this approach can be time-consuming, and important interactions between variables often remain undetected [44].
Multivariate approaches allow the effects of multiple variables to be studied simultaneously and are more efficient for robustness testing. The most common screening designs include [44]:
- Full Factorial Designs: All possible combinations of factors are measured. If there are k factors, each at two levels, a full factorial design has 2^k runs.
- Fractional Factorial Designs: A carefully chosen subset of the factor combinations is used to reduce the number of experiments while still obtaining valuable information.
- Plackett-Burman Designs: Very efficient screening designs where only main effects are of interest, useful when investigating many factors.
Table: Comparison of Experimental Designs for Robustness Studies
| Design Type | Number of Runs for 4 Factors | Number of Runs for 9 Factors | Best Use Case |
|---|---|---|---|
| Full Factorial | 16 | 512 | Small number of factors (≤5) |
| Fractional Factorial | 8-12 | 32-64 | Medium number of factors with interactions |
| Plackett-Burman | 12 | 12-16 | Large number of factors, main effects only |
What is the step-by-step process for conducting a robustness test?
The robustness testing process involves these systematic steps [45]:
- Identify factors to test - Select operational and environmental factors from the method description
- Define different levels for factors - Establish high and low values that slightly exceed expected variations
- Select appropriate experimental design - Choose based on number of factors and resources
- Define experimental protocol - Complete experimental setup with randomized runs
- Define responses to measure - Both quantitative results and system suitability parameters
- Execute experiments and determine responses - Perform according to design
- Calculate effects - Use appropriate statistical analysis
- Analyze effects statistically and graphically - Identify significant factors
- Draw chemically relevant conclusions - Establish system suitability limits if needed
What are typical factors and variations for chromatographic methods?
In liquid chromatography, examples of typical variations include [44]:
- Mobile phase composition (number, type, and proportion of organic solvents)
- Buffer composition and concentration
- pH of the mobile phase
- Different column lots
- Temperature
- Flow rate
- Detection wavelength
- Gradient variations
The intervals for variation should slightly exceed the variations that can be expected when a method is transferred between instruments or laboratories [45].
Troubleshooting Cyclic Voltammetry in Method Validation
What are common issues in cyclic voltammetry that affect method validation?
When validating electrochemical methods, several common issues can distort voltammograms and compromise data quality:
- Voltage compliance errors: Occur when the potentiostat cannot control the potential difference between working and reference electrodes, often due to disconnected counter electrodes or quasi-reference electrodes touching the working electrode [6].
- Current compliance errors: Caused by short circuits when working and counter electrodes touch, generating large currents that may trigger instrument shutdown [6].
- Unusual or changing voltammograms: Often result from incorrectly set up reference electrodes, blocked frits, or air bubbles between the frit and wire [6].
- Non-flat baselines: Can indicate problems with the working electrode or unknown processes at electrodes [6].
- Large reproducible hysteresis: Primarily due to charging currents in the electrode, which can be reduced by decreasing scan rate, increasing analyte concentration, or using smaller electrodes [6].
- Unexpected peaks: May occur from impurities, approaching the edge of potential windows, or degradation of components [6].
What general troubleshooting procedure is recommended for cyclic voltammetry?
A general troubleshooting procedure for cyclic voltammetry has been proposed by Bard and Faulkner [6]:
- Disconnect the electrochemical cell and connect the electrode cable to a resistor (e.g., 10 kΩ)
- Scan the potentiostat over an appropriate range (+0.5 V to -0.5 V)
- If the system is working correctly, the result should be a straight line following Ohm's law (V = IR)
- Set up a modified electrochemical cell by connecting the reference electrode cable to the counter electrode (in addition to the counter electrode cable)
- Run a linear sweep experiment with analyte present
- If a standard voltammogram is not obtained, check that electrodes are submerged and cables are intact
- Replace cables to electrodes if issues persist
- Polish the working electrode with 0.05 μm alumina and wash it to remove absorbed species
How can digital simulation address ohmic drop distortion in fast cyclic voltammetry?
Ohmic drop distortion is particularly problematic in fast cyclic voltammetry, where traditional compensation methods may be insufficient. A digital simulation method that integrates double layer charging current can accurately simulate ohmic drop distorted voltammograms without time-consuming iterations [46].
This approach:
- Eliminates successive approximations for calculating real electrode potentials
- Models the total current (sum of faradaic and charging currents) based on equivalent circuit of the electrochemical cell
- Offers high simulation accuracy, simple programming, and short computation time
- Can be modified for various electrochemical mechanisms (EC, CE, ECE, EE)
Method Transfer Strategies and Best Practices
What are the different approaches to method transfer?
Several risk-based transfer approaches can be employed depending on the method complexity and intended use [47]:
- Covalidation: Performed when validation and transfer occur simultaneously between different sites. The primary laboratory performs full validation while receiving laboratories participate in selected activities.
- Comparative Testing: Side-by-side testing between sending and receiving laboratories using predefined acceptance criteria.
- Compendial Verification: For pharmacopeial methods, verification that the method works as expected for the specific product under actual conditions of use.
- Noncompendial Verification: Applied when the receiving laboratory already has similar validated methods established.
- Transfer Waiver: Possible for well-understood, straightforward methods with appropriate risk-based justification.
Table: Method Transfer Approaches and Applications
| Transfer Approach | Description | Best For |
|---|---|---|
| Covalidation | Multiple sites participate in validation study | Early development, tight timelines |
| Comparative Testing | Side-by-side testing at sending and receiving sites | Quantitative impurity methods |
| Compendial Verification | Verification of pharmacopeial methods | Official compendial methods |
| Noncompendial Verification | Leveraging existing platform methods | Similar products, platform assays |
| Transfer Waiver | Documentation without experimental studies | Low-risk, well-understood methods |
What are critical considerations for successful method transfer?
Successful method transfer requires [47]:
- Clear definition of roles and responsibilities between sending and receiving units
- A well-defined transfer protocol with predefined acceptance criteria
- Appropriate sample selection including representative and stability samples
- Adequate documentation of all transfer activities and results
- Proper training of receiving laboratory personnel
- Assessment of laboratory capabilities and equipment qualification
- Risk-based approach to determine appropriate transfer strategy
Selection of the transfer approach should be based on risk and assay performance. If assay performance is reliable, the approach can be simplified or even waived with appropriate documentation [47].
Essential Research Reagent Solutions
Table: Key Research Reagent Solutions for Robust Method Development
| Reagent/Equipment | Function in Method Development | Application Notes |
|---|---|---|
| Ultra-microelectrodes | Minimize ohmic distortion in voltammetry | Essential for fast scan rates [46] |
| Alumina polishing compound (0.05 μm) | Clean working electrodes | Remove absorbed species between experiments [6] |
| Quasi-reference electrodes | Alternative to conventional reference electrodes | Bare silver wire; check for electrical contact issues [6] |
| Test resistors (e.g., 10 kΩ) | Potentiostat and cable verification | Diagnose equipment vs. method problems [6] |
| Plackett-Burman design templates | Efficient robustness screening | Identify critical factors with minimal runs [44] [45] |
| System suitability reference materials | Establish performance benchmarks | Verify method validity before sample analysis [45] |
| Digital simulation software | Model electrochemical behavior | Predict and troubleshoot voltammogram distortions [46] |
Establishing System Suitability from Robustness Data
How can robustness test results define system suitability parameters?
The information gained from robustness testing can be used to define evidence-based system suitability test (SST) limits rather than arbitrary values based on analyst experience [45].
The process involves:
- Identifying factors that significantly affect method responses during robustness testing
- Determining the acceptable ranges for these factors that maintain method performance
- Establishing system suitability parameters that monitor these critical factors
- Setting SST limits based on the experimental data from robustness studies
This approach ensures that system suitability tests truly monitor the method's vulnerable aspects and provide meaningful indication of method performance during routine use [45].
Comparative Performance of Different Electrode Materials and Modifiers
Troubleshooting Guides
Guide 1: Troubleshooting a Flat or Non-Responsive Signal
Problem: The cyclic voltammogram appears flat, shows no faradaic current, or the signal is significantly smaller than expected [7] [6].
| Possible Cause | Diagnostic Checks | Corrective Actions |
|---|---|---|
| Incorrect Current Range [7] | Check if the expected current exceeds the set range. | Increase the current range setting on the potentiostat (e.g., from 100 µA to 1000 µA) [7]. |
| Poor Electrical Connection to Working Electrode [6] | A very small, noisy, but unchanging current is detected. Voltage compliance errors may also occur. | Ensure the working electrode cable is securely connected. Check for broken wires or loose contacts [6]. |
| Blocked Reference Electrode [6] | The voltammogram looks unusual or changes on repeated cycles. | Check the reference electrode's salt-bridge or frit for blockages or air bubbles. Replace if necessary [6]. |
| Working Electrode Surface is Passivated [6] | A non-straight baseline or generally distorted response. | Repolish the working electrode with a fine alumina slurry (e.g., 0.05 µm) and wash it thoroughly [6]. |
Guide 2: Troubleshooting Distorted or Unusual Voltammogram Shapes
Problem: The CV shape is abnormal, shows large hysteresis, unexpected peaks, or a sloping baseline [6].
| Possible Cause | Diagnostic Checks | Corrective Actions |
|---|---|---|
| High Uncompensated Resistance [6] [34] | Peaks are widely separated; the reaction appears quasi-reversible or irreversible. | Place the reference electrode closer to the working electrode. Use a supporting electrolyte at a higher concentration [34]. |
| Charging Current Effects [6] | A large reproducible hysteresis in the baseline on forward and backward scans. | Decrease the scan rate. Use a working electrode with a smaller surface area [6]. |
| Presence of Impurities [6] | Unexplained peaks appear in the voltammogram. | Run a background CV with only the electrolyte and solvent. Purify all solution components. Ensure the system is clean and free from atmospheric contaminants [6]. |
| Electrode Fouling or Adsorption [6] | The voltammogram changes shape significantly over consecutive cycles. | Clean the electrode surface between scans. For a Pt electrode, clean by cycling in 1 M H2SO4 between potentials where H2 and O2 are produced [6]. |
Frequently Asked Questions (FAQs)
Q1: My potentiostat is giving a "voltage compliance" error. What does this mean and how can I fix it? A: This error indicates the potentiostat cannot maintain the desired potential between the working and reference electrodes [6]. Common causes and fixes include:
- Cause: The counter electrode is disconnected or out of the solution.
- Solution: Ensure the counter electrode is properly connected and fully submerged [6].
- Cause: A quasi-reference electrode is touching the working electrode.
- Solution: Ensure all electrodes are properly separated in the solution [6].
Q2: Why is the baseline of my CV not flat, and what can I do about it? A: A non-flat baseline can stem from several issues [6]:
- Working Electrode Problems: Faults in the working electrode, such as poor internal contacts or seals, can cause high resistivity or capacitance. Try polishing the electrode or using a different one [6].
- Fundamental Processes: Unknown processes at the electrode-solution interface can also lead to a non-straight baseline, which may not always be preventable [6].
- Charging Currents: The electrode-solution interface acts as a capacitor. Reduce the scan rate or use a smaller electrode to minimize this effect [6].
Q3: I see an unexpected peak in my voltammogram. How do I identify its source? A: To identify an unknown peak [6]:
- Run a Background Scan: Perform a CV with only the electrolyte and solvent (no analyte). If the peak disappears, it is from your analyte. If it remains, it is an impurity or system artifact.
- Check the Potential Window: Peaks at the very edge of your scanned potential range are often due to solvent breakdown or electrolyte limitation.
- Check for Impurities: Contamination can come from chemicals, the atmosphere, or degradation of cell components. Ensure system cleanliness and use high-purity materials.
Comparative Performance Data
Table 1: Common Electrode Materials and Their Characteristics
| Electrode Material | Typical Modifiers | Key Advantages | Common Applications & Limitations |
|---|---|---|---|
| Glassy Carbon (GCE) [48] [49] | Bismuth oxide nanoparticles, Carbon black, Nafion [49]. | Wide potential window, good mechanical stability, inert surface [48]. | Applications: Trace metal detection, drug analysis [48] [49]. Limitations: Requires frequent surface renewal/polishing. |
| Screen-Printed Electrodes (SPE) [48] | Carbon nanotubes, Copper film [49]. | Disposable, portable, low cost, mass-produced [48]. | Applications: On-site environmental monitoring, clinical diagnostics [48] [49]. Limitations: Lower reproducibility vs. traditional electrodes. |
| Carbon Paste (CPE) [48] [49] | Quinazoline-engineered Prussian blue analogue, various composites [49]. | Easy surface renewal, low cost, easily modified in bulk [49]. | Applications: Sensing of herbicides, environmental pollutants [49]. Limitations: Can be mechanically less stable. |
| Boron-Doped Diamond (BDD) [49] | - | Very wide potential window, low background current, extreme durability [49]. | Applications: Analysis in harsh conditions, detection of high-overpotential species. Limitations: Higher cost, more complex fabrication. |
Table 2: Categories of Electrode Modifiers and Their Functions
| Modifier Category | Example Materials | Primary Function & Impact on Performance |
|---|---|---|
| Nanomaterials [48] | Graphene/GO/rGO, Carbon Nanotubes (SWCNT/MWCNT), Metal Nanoparticles (e.g., Au, Bi) [48] [49]. | Function: Increase effective surface area and enhance electron transfer kinetics [48] [49]. Impact: Lowers detection limit and improves sensitivity [48]. |
| Film-Forming Substances [48] [49] | Nafion, Bismuth films, Copper films [49]. | Function: Selective preconcentration of analyte or replacement of toxic mercury films [48] [49]. Impact: Enhances selectivity and sensitivity for target ions (e.g., in anodic stripping voltammetry) [49]. |
| Polymers & Molecular Frameworks [48] [49] | Conducting polymers (e.g., PEDOT), Metal-Organic Frameworks (MOFs), Chitosan [48] [49]. | Function: Provide a structured matrix for selectivity or stabilize the electrode interface [48]. Impact: Can impart molecular selectivity and improve sensor stability [49]. |
| Environmentally Friendly Modifiers [48] | Biopolymers, Plant extracts [48]. | Function: Provide a "green" and sustainable modification route [48]. Impact: Reduces environmental impact of analysis while maintaining good performance [48]. |
Experimental Protocols
Protocol 1: General Potentiostat and Electrode Functionality Test
This procedure helps isolate whether a problem originates from the potentiostat, cables, or electrodes [6].
- Disconnect the Electrochemical Cell: Remove the cell from the potentiostat.
- Connect a Resistor: Connect a 10 kΩ resistor between the reference/counter electrode cables (one end) and the working electrode cable (the other end).
- Run a Voltage Scan: Set up a linear sweep voltammetry experiment, scanning from +0.5 V to -0.5 V.
- Analyze the Result: The result should be a straight line between two limiting currents. All measured currents must follow Ohm's law (V = IR). If this is true, the potentiostat and cables are functioning correctly, and the issue lies with the electrodes or cell setup [6].
Protocol 2: Testing and Cleaning a Working Electrode
A properly maintained working electrode is critical for reproducible data [6].
Polishing a Solid Electrode (e.g., Glassy Carbon):
- Use a dedicated polishing cloth.
- Use an alumina slurry (e.g., 0.05 µm particle size) on the cloth.
- Polish the electrode surface using a figure-8 pattern for 30-60 seconds.
- Rinse thoroughly with deionized water to remove all alumina residues [6].
Electrochemical Cleaning of a Pt Electrode:
- Place the Pt electrode in a cell containing a clean, degassed 1 M H2SO4 solution.
- Cycle the potential repeatedly between the potentials for hydrogen evolution and oxygen evolution.
- Continue until a stable, characteristic cyclic voltammogram for a clean Pt electrode is obtained [6].
The Scientist's Toolkit: Essential Research Reagents & Materials
| Item | Function & Role in Experimentation |
|---|---|
| Alumina Polishing Slurry (0.05 µm) [6] | Used to resurface and clean solid working electrodes (e.g., Glassy Carbon) to ensure a fresh, reproducible electroactive surface before experiments. |
| Supporting Electrolyte (e.g., KCl, KNO3, TBAPF6) [6] [34] | Carries current through the solution to minimize uncompensated resistance (iR drop). It is inert within the potential window of the experiment. |
| Electrochemical Test Chip [6] | A device that replaces an electrochemical cell to provide controlled conditions for testing the potentiostat and cable functionality. |
| Nafion Polymer [49] | A common film-forming ionomer used to modify electrode surfaces. It can confer selectivity (e.g., for cationic analytes) and improve stability. |
| Bismuth Salt Solutions [49] | Used to form in-situ or ex-situ bismuth films on electrodes as a non-toxic alternative to mercury for sensitive trace metal detection. |
| Quasi-Reference Electrode (e.g., silver wire) [6] | A simple bare metal wire used as a temporary reference electrode to test if a problem lies with the primary reference electrode. |
Frequently Asked Questions (FAQs)
Q1: Why does my cyclic voltammogram look unusual or change shape with repeated cycles? An unusually shaped or unstable voltammogram is most commonly caused by issues with the reference electrode. A blocked frit or air bubbles can prevent proper electrical contact with the solution, causing the electrode to act like a capacitor and leading to leakage currents that unpredictably shift the potential. To troubleshoot, try using the reference electrode as a quasi-reference electrode (a bare silver wire); if this corrects the response, the original reference electrode is likely blocked [6].
Q2: What does a "voltage compliance" error indicate? This error means the potentiostat cannot maintain the desired potential between the working and reference electrodes. Common causes include a quasi-reference electrode touching the working electrode, or the counter electrode being disconnected, removed from the solution, or improperly connected to the potentiostat [6].
Q3: What should I do if I detect only a very small, noisy current? This typically indicates a poor connection at the working electrode. If the working electrode is not properly connected to the electrochemical cell, the potential will still change, but no faradaic current will flow, leaving only the residual current from the potentiostat circuitry to be measured [6].
Q4: Why is the baseline of my voltammogram not flat, or why does it show large hysteresis? A non-flat baseline can stem from unknown processes at the electrodes or from problems with the working electrode itself. Significant hysteresis between the forward and backward scans is primarily due to the charging current at the electrode-solution interface, which behaves like a capacitor. This can be mitigated by reducing the scan rate, increasing the analyte concentration, or using a working electrode with a smaller surface area [6].
Q5: How can I be sure an unexpected peak is from my analyte and not an impurity? Run a background scan of your system without the analyte present. This will reveal peaks originating from the solvent, electrolyte, or other system components. Peaks that appear at the edge of the potential window can often be intuitively assigned, as the current in these regions is typically more intense [6].
Troubleshooting Guide: Common Voltammogram Distortions and Solutions
The table below summarizes common issues, their possible causes, and recommended corrective actions.
Table 1: Troubleshooting Guide for Distorted Voltammograms
| Observed Issue | Potential Causes | Diagnostic & Corrective Actions |
|---|---|---|
| Unusual/Changing Shapes | Blocked reference electrode frit; Air bubbles [6] | Use reference as quasi-reference; Check for bubbles; Replace reference electrode [6]. |
| Voltage Compliance Error | Counter electrode disconnected; Quasi-reference electrode touching WE [6] | Ensure all electrodes are connected and properly submerged in solution [6]. |
| Small/Noisy Current | Poor connection to working electrode [6] | Check and secure the working electrode connection [6]. |
| Non-Flat or Hysteretic Baseline | Electrode charging (capacitive) currents; Working electrode faults [6] | Polish WE; Decrease scan rate; Use smaller WE; Increase analyte concentration [6]. |
| Unexpected Peaks | System impurities; Edge of potential window effects [6] | Perform a background scan without analyte; Identify/remove impurity source [6]. |
| Ohmic Distortion | Significant uncompensated solution resistance (Ru) [50] | Use supported modeling to remove Ohmic losses; Ensure adequate supporting electrolyte [50]. |
Experimental Protocols for System Validation
Protocol 1: General Potentiostat and Cables Check
This procedure helps isolate problems to the potentiostat, cables, or the electrochemical cell setup [6].
- Disconnect the Electrochemical Cell.
- Connect a 10 kΩ resistor between the working electrode terminal and the combined reference/counter electrode terminals.
- Run a CV scan over a non-demanding range (e.g., from +0.5 V to -0.5 V).
- Expected Result: The resulting plot should be a straight line obeying Ohm's law (V = IR). Any deviation indicates a potential issue with the potentiostat or cables [6].
Protocol 2: Reference Electrode Diagnosis
This protocol determines if the reference electrode is functioning correctly [6].
- Set up the electrochemical cell as usual, but connect the reference electrode cable to the counter electrode (along with the counter electrode cable).
- Run a linear sweep voltammetry experiment with your analyte present.
- Expected Result: You should obtain a voltammogram that is recognizable but shifted in potential and slightly distorted due to the high uncompensated resistance. If a standard voltammogram is not obtained, the issue is likely with the working or counter electrodes. If the correct-shaped response is obtained, the problem lies with the original reference electrode setup [6].
Protocol 3: Working Electrode Cleaning and Polishing
A contaminated working electrode is a common source of poor data.
- Polishing: Gently polish the electrode surface with a slurry of 0.05 μm alumina on a micro-cloth pad. Rinse thoroughly with deionized water [6].
- Electrochemical Cleaning (for Pt electrodes): Place the electrode in a 1 M H2SO4 solution. Cycle the potential between the regions where hydrogen and oxygen evolution occur to desorb contaminants from the surface [6].
The Scientist's Toolkit: Essential Research Reagents & Materials
Table 2: Key Materials for Cyclic Voltammetry Experiments
| Item | Function / Explanation |
|---|---|
| Supporting Electrolyte | Minimizes ohmic resistance (iR drop) in the solution and ensures the electroactive analyte migrates to the electrode primarily via diffusion, not migration [51]. |
| Alumina Polish (0.05 μm) | Used for mechanical polishing of solid working electrodes to create a fresh, reproducible, and contaminant-free surface [6]. |
| Quasi-Reference Electrode | A simple wire (e.g., silver) used as a temporary reference for diagnostic tests. It is not stable for long-term quantitative work but is excellent for troubleshooting connection issues [6]. |
| Test Cell Chip | A proprietary device (e.g., from Ossila) that replaces the electrochemical cell with known resistive and capacitive circuits, allowing for direct validation of the potentiostat's performance [6]. |
| Solvent & Analyte | High-purity solvents and analytes are critical to avoid spurious peaks from impurities that can interfere with the interpretation of the voltammogram [6]. |
Data Treatment and Statistical Evaluation in Recovery Studies
Proper data processing is essential for accurate interpretation, especially in quantitative recovery studies. Automated data treatment can significantly impact final results.
Table 3: Key Data Treatment Steps and Their Impact on Analysis
| Data Treatment Step | Purpose & Methodology | Impact on Recovery Studies |
|---|---|---|
| Noise Elimination | Application of digital filters (e.g., Savitzky-Golay, FFT) to reduce high-frequency noise in the primary data set [52]. | Enhances the signal-to-noise ratio, allowing for more precise determination of peak height/area, which directly affects calculated concentrations and recovery rates [52]. |
| Baseline Correction | Subtraction of the background current (e.g., capacitive current) using linear or polynomial baselines [52]. | The choice of baseline (linear vs. polynomial) can highly influence the determined peak height and thus the calculated concentration in standard addition methods [52]. |
| Peak Parameter Determination | Automated or guided determination of peak potential (Ep) and peak current (ip) from the filtered and baseline-corrected data [52]. | Precision in Ep (to 2 mV or less) is critical for identifying species and detecting small shifts, e.g., from complex formation. Accurate ip is vital for quantification [52]. |
| Statistical Validation | Use of statistical tests (e.g., confidence limits, model fitting tests) to validate the chosen model and the obtained parameters [52]. | Provides confidence in the reported recovery percentages and stability constants, ensuring they are not artifacts of the data processing method [52]. |
Diagnostic Workflows
Troubleshooting Logical Workflow
This diagram outlines a systematic approach to diagnosing common problems in cyclic voltammetry.
Data Treatment Workflow for Reliable Analysis
This diagram illustrates the recommended procedure for processing voltammetric data to ensure precise and accurate results in quantitative studies.
Leveraging Machine Learning for High-Speed CV Regression and Analysis
Troubleshooting Guides & FAQs
FAQ: Addressing Common Experimental Issues
Q1: My voltammogram looks unusual or changes shape on repeated cycles. What should I investigate?
This is commonly caused by issues with the reference electrode. The reference electrode might not be in proper electrical contact with the electrochemical cell, often due to a blocked frit or air bubbles trapped between the frit and the wire. An incorrectly set up reference electrode can act like a capacitor, causing leakage currents that unpredictably change the potential [6].
- Diagnosis and Solution: A general troubleshooting procedure suggests connecting your reference electrode cable to the counter electrode (in addition to the counter electrode cable) and running a linear sweep. If a standard, though potentially shifted and slightly distorted, voltammogram is obtained, it confirms a problem with the reference electrode. You can check for blockages or replace the reference electrode with a bare silver wire (a quasi-reference electrode) to see if the correct response is obtained [6].
Q2: Why is the baseline of my voltammogram not flat, and how can I correct it?
A non-flat baseline can originate from problems with the working electrode or from other processes at the electrodes whose origins are not fully understood [6]. Furthermore, the baseline (or background) is a typical low-frequency component of voltammetric signals related to the type of working electrode, sample composition, dissolved oxygen, and the presence of impurities [53].
- Diagnosis and Solution: For working electrode issues, polishing with 0.05 μm alumina or, for a Pt electrode, cleaning by switching between potentials where H2 and O2 are produced in 1 M H2SO4 can help [6]. For the general background signal, numerical baseline correction strategies are essential. An effective automatic method involves iterative fitting of the entire voltammogram with a polynomial without prior peak separation, which has been validated in trace determination tasks [53].
Q3: What does it mean if I observe a large, reproducible hysteresis in the baseline?
Hysteresis in the baseline is primarily due to charging currents at the electrode-solution interface, which behaves like a capacitor [6].
- Diagnosis and Solution: This charging current is dependent on your experimental setup. You can reduce it by:
- Decreasing the scan rate.
- Increasing the concentration of the analyte.
- Using a working electrode with a smaller surface area [6].
Q4: How can I use Machine Learning to improve the analysis of my voltammetric data, especially with noisy signals?
Machine learning models are highly sensitive to the quality of input data. Noisy or distorted signals can introduce artifacts and bias feature extraction. Therefore, leveraging ML-based preprocessing is a critical first step [54].
- Solution: Implement a hierarchy-aware preprocessing framework before regression analysis. This framework should include:
- Localized Artifact Removal: Use methods like Moving Average Filters or Wavelet Transforms to remove cosmic rays or spikes [54].
- Baseline Correction: Apply algorithms like Piecewise Polynomial Fitting or Morphological Operations to suppress low-frequency drift [54].
- Data Validation: Use methods like Statistical Agnostic Regression (SAR) to validate the significance of your ML-based linear regression models. SAR analyzes concentration inequalities of the expected loss to ensure, with high probability, that a linear relationship exists in the population, thus controlling the false positive rate common in standard ML methods [55].
Troubleshooting Flow: Distorted Voltammograms
Diagram 1: Troubleshooting distorted voltammograms.
Experimental Protocol: Integrated ML-CV Workflow for Trace Analysis
Objective: To detail a methodology for applying machine learning regression to cyclic voltammetry data, incorporating robust preprocessing and model validation for the analysis of trace compounds, such as heavy metals.
Materials: Refer to the "Research Reagent Solutions" table for essential items.
Procedure:
- Solution Preparation: Prepare a solution of your compound of interest (e.g., Pb(II) for trace analysis) in a suitable solvent with a supporting electrolyte [6] [53].
- Data Acquisition: Perform cyclic voltammetry measurements across a range of analyte concentrations. Ensure proper electrode conditioning and a stable baseline before recording each voltammogram [6].
- Hierarchical Preprocessing: Before regression analysis, process the raw voltammetric data through the following steps [54]:
- Spike Removal: Apply a Moving Average Filter or Nearest Neighbor Comparison algorithm to remove sharp, non-chemical artifacts like cosmic rays.
- Baseline Correction: Use an automatic iterative polynomial fitting algorithm to estimate and subtract the complex background current.
- Normalization: Scale the data to mitigate systematic errors between runs.
- Model Training & Validation:
- Data Splitting: Split the preprocessed voltammetry data into training and test sets using a method like
train_test_splitto avoid overfitting [56]. - Cross-Validation: Use k-fold cross-validation (e.g., with
cross_val_score) on the training set to tune hyperparameters and evaluate model performance robustly [56]. - Significance Testing: Apply Statistical Agnostic Regression (SAR) to the final model. SAR defines a threshold to ensure evidence of a linear relationship in the population with a high probability (at least (1-\eta)), providing excellent control over false positives [55].
- Data Splitting: Split the preprocessed voltammetry data into training and test sets using a method like
Diagram 2: Integrated ML-CV analysis workflow.
Research Reagent Solutions
Table 1: Essential materials and their functions for ML-enhanced CV experiments.
| Item | Function | Application Note |
|---|---|---|
| Potentiostat | Applies potential waveform and measures current. | Ensure software compatibility for high-speed data export for ML analysis [6]. |
| Working Electrode (e.g., Carbon Fiber, Hg-film Ag) | Surface where redox reaction occurs. | Critical for signal generation; cleanliness is paramount. Small surface area reduces charging currents [6] [53]. |
| Reference Electrode (e.g., Ag/AgCl) | Provides stable, known potential for the working electrode. | A faulty or blocked reference is a common source of distortion [6]. |
| Supporting Electrolyte | Carries current and reduces solution resistance. | A high-purity electrolyte is essential to minimize impurity peaks and background noise [6]. |
| Standard Solutions | Used for calibration of the regression model. | Prepare in a range of concentrations for building a robust ML model [53]. |
Data Presentation: ML Regression Validation Metrics
Table 2: A comparison of regression validation techniques relevant to CV analysis.
| Method | Core Mechanism | Key Advantage for CV | Requirement / Assumption |
|---|---|---|---|
| k-Fold Cross-Validation [56] | Partitions data into 'k' subsets; iteratively uses k-1 for training and 1 for validation. | Reduces overfitting by providing a robust estimate of model generalization error. | Requires a sufficiently large dataset for meaningful folds. |
| Statistical Agnostic Regression (SAR) [55] | Analyzes concentration inequalities of the expected loss (actual risk). | Provides statistical significance for the ML model's linear relationship, controlling false positives. | Non-parametric; does not rely on classical regression assumptions like normality of errors. |
| Permutation Tests | Compares model performance to that achieved on randomly permuted data. | Establishes a baseline for whether the model has learned a real relationship. | Computationally intensive. |
Technical Support Center
Troubleshooting Guides & FAQs
This guide provides practical solutions to common issues encountered in electrochemical sensor development, with a special focus on cyclic voltammetry. The following case studies and procedures are designed to help researchers and scientists diagnose and resolve experimental problems efficiently.
Case Study 1: Flatlining Cyclic Voltammogram
User Report: A user attempting to run Cyclic Voltammetry (CV) on a 501 carbon electrode sensor observed a signal that was essentially flatlining instead of showing the expected oxidation-reduction peaks. The setup included a properly configured potentiostat and a Bluetooth-connected app, yet the CV curve remained nearly flat [7].
Investigation & Solution: The issue was traced to an incorrect current range setting. The user expected a signal of approximately 150 µA, but the potentiostat's current range was set to a maximum of 100 µA. Since the actual current exceeded the selected range, the signal was clipped, resulting in a flat line [7].
Corrective Action: The problem was resolved by simply adjusting the potentiostat settings to a higher current range (e.g., 1000 µA) and re-running the experiment [7].
Preventive Recommendation: Always verify that the configured current range comfortably exceeds the expected peak current to avoid signal clipping.
Case Study 2: Distorted or Unusual Voltammograms
User Report: A user obtained cyclic voltammograms that appeared distorted, looked different on repeated cycles, or had a sloping, non-flat baseline [6].
Investigation & Solution: This problem is frequently linked to a faulty reference electrode connection. If the reference electrode is not in proper electrical contact with the solution—due to a blocked frit or air bubbles—the system fails to measure the potential accurately, leading to distorted voltammograms [6].
Diagnostic Procedure: A general troubleshooting method suggests setting up the electrochemical cell normally but connecting the reference electrode cable to the counter electrode (in addition to the counter electrode cable). If running a linear sweep experiment with an analyte present produces a standard-looking voltammogram (albeit shifted in potential), it confirms a problem with the original reference electrode setup [6].
Corrective Actions:
- Check that the reference electrode is fully submerged.
- Inspect the salt-bridge or frit for blockages and ensure no air bubbles are trapped at the bottom.
- Temporarily replace the reference electrode with a clean silver wire (a quasi-reference electrode) to see if a correct response is obtained.
- Polish the working electrode with a fine alumina slurry (e.g., 0.05 μm) to remove absorbed species [6].
General Troubleshooting Procedure for Cyclic Voltammetry
For persistent or unidentified issues, follow this systematic procedure to isolate the faulty component [6].
Step 1: Test the Potentiostat and Cables
- Action: Disconnect the electrochemical cell. Connect a 10 kΩ resistor between the working electrode terminal and the combined reference/counter electrode terminals.
- Expected Result: Scanning the potentiostat over a small range (e.g., +0.5 V to -0.5 V) should yield a straight-line current response that obeys Ohm's law (V=IR). Any deviation indicates a problem with the potentiostat or cables [6].
Step 2: Test the Entire System with a Known Standard
- Action: If available, use a manufacturer-supplied test cell chip. Alternatively, set up a standard cell with a well-characterized reversible redox couple, such as Hexaammineruthenium(III) chloride [8].
- Expected Result: The voltammogram should match the known standard profile in terms of peak current, shape, and peak separation. Significant discrepancies point to issues with the cell or electrodes [6].
Step 3: Diagnose the Reference Electrode
- Action: Perform the diagnostic procedure described in Case Study 2 by connecting the reference cable to the counter electrode.
- Expected Result: If a standard voltammogram appears (though distorted), the original reference electrode is the culprit [6].
Step 4: Inspect and Clean the Working Electrode
- Action: If other components check out, the working electrode is likely at fault. Poor electrical contacts, surface fouling, or compromised seals can cause noise, high resistivity, or sloping baselines.
- Corrective Action: Polish the electrode surface and clean it thoroughly. For Pt electrodes, an additional cleaning method is to cycle the potential in a 1 M H₂SO₄ solution between the regions where H₂ and O₂ are evolved [6].
Essential Research Reagent Solutions
The table below lists key materials used in the featured experiments and their functions.
| Item | Function / Explanation |
|---|---|
| Alumina Polish (0.05 μm) | Fine abrasive for polishing working electrodes to remove adsorbed contaminants and restore a clean, reproducible surface [6]. |
| Hexaammineruthenium(III) Chloride | A well-characterized, reversible redox couple used as a standard to validate potentiostat and electrode performance [8]. |
| Potassium Chloride (KCl) | Common supporting electrolyte. It carries current in the solution and minimizes the effects of migration, ensuring the electric field is dominated by the analyte's diffusion [8]. |
| Quasi-Reference Electrode (e.g., Ag wire) | A simple bare silver wire used as a temporary reference electrode to test if a faulty commercial reference electrode is causing experimental issues [6]. |
| Test Cell Chip | A manufacturer-supplied device that replaces an electrochemical cell to provide controlled conditions for testing the potentiostat's function with known resistive and capacitive pathways [6]. |
Quantitative Analysis: Staircase Voltammetry Correction
Many modern potentiostats use a staircase potential ramp instead of a true linear ramp. This can lead to misinterpretation of data if not accounted for, as it suppresses peak currents and increases peak-to-peak separations [8].
Experimental Protocol for Quantitative Analysis [8]:
- Chemicals: Prepare a solution of a known reversible redox species (e.g., 1 mM Hexaammineruthenium(III) chloride) in a supporting electrolyte (e.g., 0.1 M KCl).
- Electrodes: Use a polished glassy carbon working electrode (diameter ~3 mm), a Pt counter electrode, and a suitable reference electrode (e.g., Ag/AgCl).
- Measurement: Record CV scans at various step potentials (e.g., 1 mV, 5 mV, 10 mV) while keeping the scan rate constant.
- Analysis: Apply the provided correction factors to the measured peak current for accurate determination of parameters like the diffusion coefficient.
Table: Staircase Voltammetry Impact on a Reversible Redox Couple [8]
| Staircase Step Potential | Observed Peak Current (Ip) vs. True Ip | Observed ΔEpp | Recommended Current Sampling Point |
|---|---|---|---|
| Small (e.g., 1 mV) | Nearly accurate (~1-2% suppression) | ~57-59 mV | End of step (α=1.0) |
| Large (e.g., 10 mV) | Significantly suppressed (up to ~20%) | Up to ~70 mV | 30% into the step (α=0.3) |
Troubleshooting Logic Flowchart
The following diagram outlines a logical workflow for diagnosing common cyclic voltammetry problems based on observed symptoms.
Diagnosing Common CV Issues
Experimental Setup Verification Workflow
This diagram details the step-by-step protocol for verifying the core components of a cyclic voltammetry setup, from the instrument to the electrodes.
Systematic Setup Verification
Conclusion
Successfully troubleshooting distorted cyclic voltammograms requires a multifaceted approach that integrates foundational knowledge, methodological optimization, systematic diagnostics, and rigorous validation. Key takeaways include the critical importance of proper electrode preparation, the value of statistical experimental design for parameter optimization, and the necessity of comprehensive system validation. Emerging methodologies, particularly machine learning for rapid data regression and advanced nanocomposite electrode platforms, present promising future directions. For biomedical research, mastering these troubleshooting techniques is essential for developing reliable electrochemical sensors for drug analysis, disease biomarker detection, and clinical diagnostics, ultimately accelerating translation from basic research to clinical applications.
References
- 1. Cyclic voltammetry [https://en.wikipedia.org/wiki/Cyclic_voltammetry]
- 2. Cyclic Voltammetry Basic Principles, Theory & Setup [https://www.ossila.com/pages/cyclic-voltammetry]
- 3. Cyclic Voltammetry - CV Electrochemical Technique ... [https://www.gamry.com/electrochemistry-applications/cv-cyclic-voltammetry/]
- 4. Cyclic Voltammetry [https://chem.libretexts.org/Bookshelves/Analytical_Chemistry/Supplemental_Modules_(Analytical_Chemistry)/Instrumentation_and_Analysis/Cyclic_Voltammetry]
- 5. Lab 1: Cyclic Voltammetry [https://chem.libretexts.org/Courses/University_of_California_Davis/CHE_115%3A_Instrumental_Analysis_-_Lab_Manual/Lab_1%3A_Cyclic_Voltammetry]
- 6. Troubleshooting Cyclic Voltammetry and Voltammograms [https://www.ossila.com/pages/cyclic-voltammetry-troubleshooting]
- 7. Trouble shooting cyclic voltammetry [https://www.zimmerpeacock.com/2025/06/28/trouble-shooting-cyclic-voltammetry/]
- 8. Correction factors for the analysis of voltammetric peak ... [https://www.sciencedirect.com/science/article/abs/pii/S1572665715301430]
- 9. Cyclic Voltammetry - Data Analysis [https://www.basinc.com/manuals/EC_epsilon/Techniques/CycVolt/cv_analysis]
- 10. Understanding iR Compensation [https://www.gamry.com/application-notes/instrumentation/understanding-ir-compensation/]
- 11. iv) Additional considerations in cyclic voltammetry [https://chem.libretexts.org/Bookshelves/Analytical_Chemistry/Supplemental_Modules_(Analytical_Chemistry)/Analytical_Sciences_Digital_Library/Courseware/Analytical_Electrochemistry%3A_The_Basic_Concepts/04_Voltammetric_Methods/A._Basics_of_Voltammetry/02_Potential_Sweep_Methods/b)_Cyclic_Voltammetry/iv)_Additional_considerations_in_cyclic_voltammetry]
- 12. Effect of uncompensated resistance on the cyclic ... [https://www.sciencedirect.com/science/article/pii/S0022072808002994]
- 13. The difference between Faradaic and non ... [http://ui.adsabs.harvard.edu/abs/2018arXiv180902930B/abstract]
- 14. Beware of cyclic voltammetry! Measurement artefact in ... [https://www.sciencedirect.com/science/article/abs/pii/S0378775322013222]
- 15. What is CV? A comprehensive guide to Cyclic Voltammetry [https://www.biologic.net/topics/what-is-cv-a-comprehensive-guide-to-cyclic-voltammetry/]
- 16. Real-Time Monitoring of Electrode Surface Changes in ... [https://pmc.ncbi.nlm.nih.gov/articles/PMC11755184/]
- 17. Electrochemical pretreatment of a glassy carbon electrode for ... [https://pmc.ncbi.nlm.nih.gov/articles/PMC12121552/]
- 18. Optimization of voltammetric parameters and sensitive ... [https://www.sciencedirect.com/science/article/abs/pii/S2214714425012371]
- 19. Voltammetric sensors modified with nanomaterials [https://link.springer.com/article/10.1007/s44373-025-00027-9]
- 20. 2. A Troubleshoot-Free Flow Cell for FSCV Calibrations [https://pmc.ncbi.nlm.nih.gov/articles/PMC10120031/]
- 21. Carbon microelectrodes for the measurement of ... [https://www.frontiersin.org/journals/bioengineering-and-biotechnology/articles/10.3389/fbioe.2025.1569508/full]
- 22. HPLC Dead Volume Causes (And Easy Fixes) - AnalyteGuru [https://www.thermofisher.com/blog/analyteguru/hplc-dead-volume-causes-and-easy-fixes/]
- 23. MAPS — A Zero Dead Volume Connection for Capillary LC [https://www.chromatographyonline.com/view/maps-a-zero-dead-volume-connection-for-capillary-lc-an-hplc-2025-interview-with-bo-zhang]
- 24. Electrochemical Hg2+ detection at tannic acid-gold nanoparticle... [https://pubs.rsc.org/en/content/articlelanding/2018/an/c8an00508g]
- 25. Square-wave voltammetric evaluation of electrochemical ... [https://www.sciencedirect.com/science/article/abs/pii/S1572665724001103]
- 26. Simulation-Based Approach to Determining Electron ... [https://pmc.ncbi.nlm.nih.gov/articles/PMC5660319/]
- 27. Effect of Ionic Surfactants on Kinetics and Mechanism ... [https://pmc.ncbi.nlm.nih.gov/articles/PMC11547737/]
- 28. Carbon Paste Electrodes Surface-Modified with Surfactants [https://www.mdpi.com/1424-8220/23/24/9891]
- 29. Influence of high-molecular surfactants on the ... [https://www.sciencedirect.com/science/article/abs/pii/S0019452224000499]
- 30. ExperimentCyclicVoltammetry Documentation [https://www.emeraldcloudlab.com/helpfiles/experimentcyclicvoltammetry]
- 31. Failure of Standard Training Sets in the Analysis of Fast- ... [https://pmc.ncbi.nlm.nih.gov/articles/PMC5136453/]
- 32. Compliance Voltage [https://pineresearch.com/support-article/compliance-voltage/]
- 33. Compliance voltage [https://www.palmsens.com/knowledgebase-article/compliance-voltage/]
- 34. Cyclic Voltammetry Uses | How to Read a ... - Ossila [https://www.ossila.com/pages/cyclic-voltammetry-applications]
- 35. General Frequently Asked Questions FAQ | Princeton ... [https://www.ameteksi.com/support-center/documents/princeton-applied-research/faq-general]
- 36. Reference Electrodes [https://www.gamry.com/application-notes/instrumentation/reference-electrodes/]
- 37. Lifting the lid on the potentiostat: a beginner's guide to ... [https://pubs.rsc.org/en/content/articlehtml/2021/cp/d1cp00661d]
- 38. Non-Aqueous Reference Electrode Overview [https://pineresearch.com/support-article/non-aqueous-reference-electrode-overview/]
- 39. Troubleshooting LPR Experiments [https://pineresearch.com/support-article/troubleshooting-lpr-experiments/]
- 40. Electrode Polishing Guide [https://pineresearch.com/support-article/electrode-polishing-guide/]
- 41. Methods for cleaning substrates and glass chambers ... [https://redox.me/blogs/good-measurement-practices/methods-for-cleaning-substrates-and-glass-chambers-for-electrochemical-measurements]
- 42. Using Cyclic Voltammetry, UV-Vis-NIR, and EPR ... - PMC - NIH [https://pmc.ncbi.nlm.nih.gov/articles/PMC6235551/]
- 43. Go Direct Cyclic Voltammetry System Troubleshooting and ... [https://www.vernier.com/til/5835?srsltid=AfmBOorUls9fwWJ1QWgwOdM5YzFS25Gh6f3-PL76mzK6StRYfzPkcMfR]
- 44. Method Validation and Robustness | LCGC International [https://www.chromatographyonline.com/view/method-validation-and-robustness]
- 45. Guidance for robustness/ruggedness tests in method ... [https://www.sciencedirect.com/science/article/abs/pii/S073170850000529X]
- 46. Digital simulation of fast cyclic voltammogram by ... [https://www.sciencedirect.com/science/article/abs/pii/S0022072899000248]
- 47. Points to Consider in Quality Control Method Validation ... [https://www.bioprocessintl.com/qa-qc/points-to-consider-in-quality-control-method-validation-and-transfer]
- 48. Recent advances in the modification of electrodes for trace ... [https://pubs.rsc.org/en/content/articlehtml/2023/an/d3an01252b]
- 49. Advanced Electrode Materials Dedicated for Electroanalysis [https://pmc.ncbi.nlm.nih.gov/articles/PMC11313508/]
- 50. Impact of the Ohmic Losses and Microstructure [https://www.sciencedirect.com/science/article/abs/pii/S0167273821002186]
- 51. Cyclic voltammetry [https://grokipedia.com/page/Cyclic_voltammetry]
- 52. The influence of data treatment on the interpretation ... [https://www.sciencedirect.com/science/article/abs/pii/S0003267099004912]
- 53. Automatic baseline correction in voltammetry [https://www.sciencedirect.com/science/article/abs/pii/S0013468614010627]
- 54. A review on spectral data preprocessing techniques for ... [https://pmc.ncbi.nlm.nih.gov/articles/PMC12221524/]
- 55. A machine learning method to validate regression models [https://www.sciencedirect.com/science/article/pii/S209012322500270X]
- 56. 3.1. Cross-validation: evaluating estimator performance [https://scikit-learn.org/stable/modules/cross_validation.html]