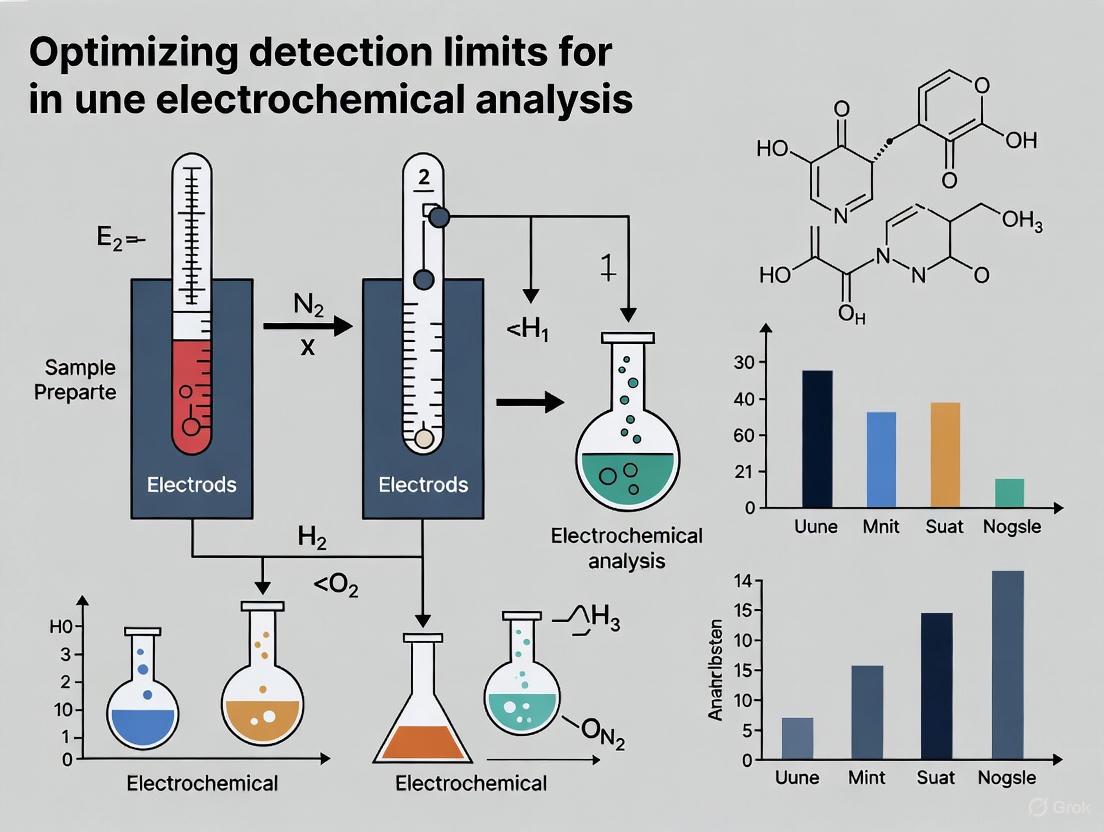
Strategies for Optimizing Detection Limits in Electrochemical Pharmaceutical Analysis
This article provides a comprehensive guide for researchers and pharmaceutical scientists on advancing the sensitivity of electrochemical methods for drug analysis.
Strategies for Optimizing Detection Limits in Electrochemical Pharmaceutical Analysis
Abstract
This article provides a comprehensive guide for researchers and pharmaceutical scientists on advancing the sensitivity of electrochemical methods for drug analysis. It explores the fundamental principles of detection limits (LOD and LOQ), details cutting-edge methodologies involving nanomaterials and advanced voltammetry, and offers practical strategies for troubleshooting and optimization. A critical examination of modern validation protocols, including uncertainty profiles, equips professionals with the knowledge to enhance method reliability, accelerate drug development, and improve quality control in both laboratory and point-of-care settings.
Understanding Detection Limits: The Foundation of Reliable Electroanalysis
Core Definitions: LOD and LOQ
In pharmaceutical analysis, LOD (Limit of Detection) and LOQ (Limit of Quantitation) are fundamental analytical performance characteristics that define the sensitivity of a method, particularly crucial for detecting and quantifying trace-level impurities and degradation products [1] [2].
- LOD (Limit of Detection) is the lowest concentration of an analyte that can be reliably distinguished from a blank sample containing no analyte [3]. It is a detection limit, not a quantification limit, meaning you can confirm the analyte's presence but cannot reliably report its numerical value with acceptable precision and accuracy [4] [2].
- LOQ (Limit of Quantitation) is the lowest concentration of an analyte that can be quantitatively determined with stated, acceptable precision (repeatability) and accuracy under stated experimental conditions [1] [5]. At the LOQ, the method must demonstrate that the analyte response is discrete, identifiable, reproducible, and that the precision and accuracy meet predefined goals [3] [5].
The relationship between these limits and the analytical regions of a method can be visualized as a progressive scale of confidence.
Calculation Methods and Regulatory Standards
The International Council for Harmonisation (ICH) guideline Q2(R2) outlines multiple accepted approaches for determining LOD and LOQ, which are required for regulatory compliance in pharmaceutical method validation [1] [6] [2].
Comparison of Primary Calculation Methods
| Method | Basis | LOD Formula | LOQ Formula | Key Applications & Notes |
|---|---|---|---|---|
| Signal-to-Noise (S/N) [1] [6] | Comparison of analyte signal to background baseline noise | S/N ≈ 3:1 | S/N ≈ 10:1 | Ideal for chromatographic methods (HPLC). Simple and direct. ICH Q2(R2) now specifies 3:1 for LOD [6]. |
| Standard Deviation of Response and Slope [4] [1] | Statistical parameters from calibration curve | 3.3 × σ / S | 10 × σ / S | σ = Standard deviation of response (e.g., standard error of regression). S = Slope of the calibration curve. Considered more scientifically rigorous [4]. |
| Standard Deviation of the Blank [3] [7] | Replicate measurements of a blank sample | Meanblank + 1.645(SDblank)* | LoB + 1.645(SD_low conc. sample)* | *Formulas based on CLSI EP17 guideline. Requires a large number of blank replicates (n=60 to establish, n=20 to verify) [3]. |
The following workflow diagram illustrates the key steps for establishing and verifying LOD and LOQ using the calibration curve method.
Detailed Experimental Protocol: LOD/LOQ via Calibration Curve
This protocol outlines the steps for determining LOD and LOQ based on the standard deviation of the response and the slope of the calibration curve, as per ICH Q2(R2) [4] [8].
- Calibration Curve Preparation: Prepare a minimum of five standard solutions at concentrations spanning the expected low range of the method. The concentrations should be in the region where detection and quantitation limits are expected.
- Sample Analysis: Analyze each standard solution using the complete analytical procedure. It is recommended to use multiple replicates (e.g., n=3) at each concentration level to obtain a reliable estimate of variability.
- Linear Regression Analysis: Plot the instrument response (e.g., peak area, peak height) against the standard concentration. Perform a linear regression analysis to obtain the slope (S) of the calibration curve and the standard error of the regression (or standard deviation of the y-intercepts), which serves as the standard deviation of the response (σ) [4].
- Calculation:
- Experimental Verification: The calculated LOD and LOQ values are estimates and must be verified experimentally [4]. Prepare a minimum of six independent samples at the calculated LOD and LOQ concentrations and analyze them using the validated method.
- LOD Verification: At the LOD concentration, the analyte peak should be detectable and distinguishable from the baseline noise in all replicates.
- LOQ Verification: At the LOQ concentration, the method should demonstrate an acceptable precision (typically ≤20% CV) and accuracy (typically within ±20% of the nominal concentration) [5].
- Documentation: All data, including the calibration curve, regression statistics, calculations, and results of the verification study, must be thoroughly documented in the method validation report.
Troubleshooting Guides and FAQs
Frequently Asked Questions
Q1: Our calculated LOQ does not meet the required precision during verification (CV > 20%). What should we do? This indicates the estimated LOQ is too low. You should re-estimate the LOQ by testing a sample with a slightly higher concentration. Repeat the verification process at this new concentration until the precision (and accuracy) meets the acceptance criteria (e.g., ±20% for the LOQ) [3] [5]. Investigate sources of excessive noise or irreproducibility in the sample preparation or instrumental analysis.
Q2: Can I use the LOD and LOQ values from the instrument manufacturer's method in my validation report? Manufacturer-provided values are a useful guide, but you must verify them in your own laboratory. Regulatory guidelines require that LOD and LOQ are verified for the specific analytical method as implemented in your lab, using your instruments, reagents, and analysts [3] [2]. You are responsible for demonstrating that the method is "fit for purpose" in your environment.
Q3: Why is the signal-to-noise ratio method for LOD sometimes considered less objective? While simple, the S/N method can be subjective because the measurement of baseline noise can vary. Different analysts might select different portions of the chromatogram to measure noise, leading to inconsistent results [4] [5]. The calibration curve method is often preferred because it relies on statistical parameters derived from the entire dataset, making it more objective and reproducible.
Q4: How do complex sample matrices impact LOD and LOQ? Sample matrices can significantly increase background noise or suppress/enhance the analyte signal, thereby worsening (increasing) both the LOD and LOQ [8] [2]. To account for this, it is critical to perform LOD/LOQ studies in the presence of the sample matrix (a "blank matrix") rather than in pure solvent. This ensures the limits are realistic for actual sample analysis.
Troubleshooting Common Problems
| Problem | Potential Causes | Corrective Actions |
|---|---|---|
| High Baseline Noise [6] [2] | Contaminated mobile phase or reagents, dirty detector cell, electronic interference, unstable light source (in UV detectors). | Purge the system; prepare fresh mobile phase; clean the detector cell; ensure proper grounding of instruments; replace aging lamp sources. |
| Irreproducible Signal at Low Concentrations [2] | Inconsistent injection volume, analyte adsorption to surfaces, non-homogeneous samples, poor peak integration. | Use internal standards; use low-adsorption vials and tubing; ensure complete and consistent sample dissolution; optimize integration parameters. |
| Inability to Meet LOQ Precision [3] [5] | The provisional LOQ is set too low, high variability in sample preparation, instrumental drift. | Re-estimate LOQ at a higher concentration; improve and standardize sample preparation techniques (e.g., extraction, derivatization); ensure instrument stability and calibration. |
Essential Research Reagent Solutions
The accuracy of LOD and LOQ determination depends heavily on the quality of materials and reagents used.
| Reagent / Material | Critical Function | Considerations for LOD/LOQ Optimization |
|---|---|---|
| High-Purity Analytical Standards | Provides the reference for accurate calibration and quantification. | Use certified reference materials with high purity and known stability. Accurate weighing and dilution are critical at low concentrations. |
| Appropriate Blank Matrix | Serves as the foundation for establishing the baseline signal and noise. For pharmaceutical analysis, this could be a placebo formulation or biological fluid without the analyte [8]. | The blank must be commutable with real samples and free of the target analyte or any interfering substances that co-elute at the same retention time. |
| Internal Standards (e.g., Nonanoic acid for fatty acid analysis) [9] | Compensates for variability in sample preparation, injection volume, and instrument response, improving precision. | The ideal internal standard is a structurally similar, stable isotope-labeled version of the analyte. If not available, a close structural analog that behaves similarly in the analytical process is used. |
| Chromatography-Grade Solvents | Form the mobile phase and sample diluent. | High-purity solvents minimize baseline noise and ghost peaks, which is essential for achieving low detection limits. Use LC-MS grade for highly sensitive mass spectrometric detection. |
Electrochemical Principles Governing Sensitivity and Detection
For researchers and scientists in pharmaceutical development, achieving a lower detection limit (LDL) is a critical objective in electrochemical method optimization. A lower LDL enables the precise quantification of trace pharmaceutical compounds, impurities, or metabolites, directly impacting drug quality control, therapeutic drug monitoring, and clinical diagnostics. The sensitivity of an electrochemical sensor is governed by fundamental principles that intertwine advanced material science, intricate electrode engineering, and sophisticated signal measurement techniques. This guide addresses the specific experimental challenges encountered in this pursuit, providing troubleshooting advice and detailed protocols to enhance the sensitivity and reliability of your electrochemical assays.
Frequently Asked Questions (FAQs) and Troubleshooting Guide
Q1: Why is my electrochemical sensor for a target pharmaceutical compound suffering from low sensitivity and high background noise?
A1: This common issue often stems from suboptimal electrode modification or inappropriate material selection.
Low sensitivity frequently indicates inefficient electron transfer or an insufficient active surface area on your working electrode. High background noise can be caused by non-specific adsorption or capacitive currents.
Troubleshooting Steps:
- Verify Electrode Modification: Ensure your modification layer (e.g., nanocomposite, polymer) is uniform and stable. Re-evaluate your drop-casting procedure—an uneven layer can create inconsistent active sites. For a stable film, consider using a binder like a 5% Nafion solution, as demonstrated in sensor preparation protocols [10].
- Check Material Conductivity: The core materials must facilitate rapid electron transfer. Incorporating conductive components like ionic liquid-reduced graphene oxide (IL-rGO) or bimetallic Metal-Organic Frameworks (MOFs) can significantly enhance conductivity and electroactive surface area. For instance, IL-rGO modification is proven to enhance the electrode's ability to adsorb analytes and increase its electrochemical active surface area [11]. Similarly, bimetallic MOFs (e.g., FeMg-BDC) exhibit higher conductivity and surface area than their monometallic counterparts, leading to superior sensitivity [12].
- Optimize Incubation and Binding: If using a biorecognition element (aptamer, antibody), ensure the incubation time and buffer conditions are optimized for maximum target binding, which directly influences signal generation.
Q2: How can I improve the selectivity of my sensor when analyzing complex samples like plant extracts or biological fluids?
A2: Selectivity is achieved through specific recognition mechanisms and careful material design.
Interference from structurally similar compounds or matrix components is a major challenge in real-sample analysis.
Troubleshooting Steps:
- Employ a Recognition Layer: Move beyond non-specific adsorption. Utilize materials with molecular specificity. A prominent strategy is the use of metal-peptide assemblies, which can be designed for specific ions. For example, carnosine-metal assemblies have been shown to possess excellent specificity for Zn²⁺ ions, mimicking protein coordination [11].
- Leverage Molecularly Imprinted Polymers (MIPs): MIPs create artificial recognition sites complementary to your target molecule, offering high selectivity in complex matrices [13].
- Use a Protective Membrane: A thin Nafion coating can repel negatively charged interferents (like ascorbic acid and uric acid in biological samples) while allowing your target molecule to reach the electrode surface. This was a key step in ensuring the accurate detection of luteolin in honeysuckle extract and watermelon juice [10].
Q3: My electrode's performance degrades rapidly. How can I enhance its stability and reproducibility for long-term studies?
A3: Durability issues are often related to the mechanical stability of the modification layer or material fouling.
Troubleshooting Steps:
- Improve Layer Adhesion: Physical peeling of the modified layer is a common failure point. Incorporating a protective coating can drastically improve durability. Research on a Pb²⁺ sensor showed that an external reduced graphene oxide (rGO) thin film protected the underlying bimetallic MOF material, ensuring high durability and repeatability [12].
- Prevent Fouling with Robust Materials: Choose materials known for their chemical stability. Zeolitic Imidazolate Frameworks (ZIFs), like ZIF-8 used in the luteolin sensor, and composite materials like NC@ZIF-8 offer good stability in various solvents and pH conditions [10].
- Standardize Regeneration Protocols: Develop a consistent electrode cleaning and regeneration procedure between measurements to restore the active surface without damaging the modification layer.
Experimental Protocols for High-Sensitivity Detection
The following protocols, adapted from recent high-impact research, provide detailed methodologies for constructing highly sensitive electrochemical sensors.
Protocol 1: Fabrication of an IL-rGO Modified Electrode for Ultrasensitive Cation Detection
This protocol is ideal for detecting metal ions or other inorganic targets and focuses on maximizing the electroactive surface area [11].
1. Reagents:
- Graphene Oxide (GO)
- 1-amino-3-methylimidazolium chloride (IL-NH₂)
- Potassium hydroxide (KOH)
- Deionized water
2. Procedure:
- Step 1: Dispersion. Ultrasonically disperse 12.5 mg of GO in 25 mL of deionized water.
- Step 2: Ionic Liquid Addition. Add 4 g of IL-NH₂ powder to the GO dispersion with constant stirring.
- Step 3: Basification. After stirring for 5 minutes, add 25 mg of KOH to the mixture.
- Step 4: Reflux. Heat the resulting mixture to 80 °C and reflux with stirring at 20 rpm for 24 hours.
- Step 5: Product Collection. Centrifuge the product, wash thoroughly with ethanol and deionized water, and dry to obtain the final IL-rGO composite.
- Step 6: Electrode Modification. Disperse the IL-rGO in a suitable solvent (e.g., water/isopropanol/Nafion mixture) and drop-cast a precise volume (e.g., 5 µL) onto a polished glassy carbon electrode (GCE). Allow it to dry under ambient conditions.
The workflow for this sensor fabrication and its signal amplification mechanism is illustrated below.
Protocol 2: Sensor Development Using a Bimetallic MOF/rGO Composite
This protocol is highly effective for the detection of heavy metal ions like Pb²⁺ using stripping voltammetry, leveraging the synergistic effects between materials [12].
1. Reagents:
- FeCl₃·6H₂O, Mg(NO₃)₂·6H₂O
- Terephthalic acid (H₂BDC) ligand
- Dimethylformamide (DMF)
- Pre-synthesized GO
2. Procedure (FeMg-BDC Synthesis):
- Step 1: Metal Solution Preparation. Dissolve 1 mmol of a mixture of FeCl₃·6H₂O and Mg(NO₃)₂·6H₂O (e.g., in a 1:1 molar ratio) in DMF.
- Step 2: Ligand Addition. Add a solution of H₂BDC ligand in DMF to the metal salt solution.
- Step 3: Hydrothermal Reaction. Transfer the mixture to a Teflon-lined autoclave and heat at 120°C for 24 hours.
- Step 4: Product Collection. Cool the autoclave to room temperature. Collect the resulting crystals by centrifugation, wash with DMF and ethanol, and dry.
- Step 5: Electrode Modification. Prepare a homogeneous suspension of FeMg-BDC and rGO. Drop-cast the suspension onto a GCE and allow it to dry, forming the rGO/FeMg-BDC/GCE sensor.
The relationship between the composite's properties and the resulting sensor performance is summarized in the following diagram.
Research Reagent Solutions: Essential Materials for Sensor Optimization
The table below catalogs key reagents and their functions in developing high-sensitivity electrochemical sensors, as featured in the cited research.
Table 1: Key Research Reagents for Electrochemical Sensor Development
| Reagent/Material | Function in Sensor Development | Example Application |
|---|---|---|
| Ionic Liquid-rGO (IL-rGO) | Enhances electroactive surface area; improves hydrophilicity and electron transfer rate; boosts analyte adsorption. | Ultrasensitive Zn²⁺ detection platform [11]. |
| Bimetallic MOFs (e.g., FeMg-BDC) | Provides high surface area and tunable porosity; synergistic metal centers enhance conductivity and analyte adsorption. | Highly sensitive detection of Pb²⁺ ions [12]. |
| ZIF-8 / NC@ZIF-8 Composite | MOF component offers high surface area and selective adsorption; nitrogen-doped carbon enhances electrical conductivity. | Efficient detection of luteolin in complex samples [10]. |
| L-Carnosine (Peptide) | Forms specific metal-peptide assemblies; acts as a biorecognition element for target ions, providing selectivity. | Specific detection of Zn²⁺ ions [11]. |
| Sodium Phosphotungstate (PW₁₂) | Accelerates precipitate formation and reduces solubility; enables detection of metal ions at lower concentrations. | Facilitation of Zn²⁺-carnosine assembly formation [11]. |
| Nafion Perfluorinated Resin | Used as a binder to form stable films on electrodes; can act as a protective anti-fouling membrane to repel interferents. | Sensor preparation for luteolin detection [10]. |
Quantitative Performance Data of Featured Sensors
The ultimate validation of an optimized electrochemical sensor lies in its quantitative performance metrics. The following table compiles the detection capabilities of the sensors described in the protocols, providing a benchmark for what is achievable.
Table 2: Performance Metrics of Advanced Electrochemical Sensors
| Target Analyte | Sensor Platform | Detection Technique | Linear Range | Detection Limit | Application in Real Samples |
|---|---|---|---|---|---|
| Zn²⁺ | IL-rGO / Zn-Car Precipitate | Not Specified | Not Specified | 0.087 nM (0.0874 nM) | Demonstrated excellent stability and reliability [11]. |
| Pb²⁺ | rGO/FeMg-BDC/GCE | Square Wave Anodic Stripping Voltammetry (SWASV) | 0.01 - 0.5 μg L⁻¹ & 0.5 - 50.0 μg L⁻¹ | 9 ng L⁻¹ | Accurate determination in various real water samples [12]. |
| Luteolin | NC@ZIF-8/GCE | Differential Pulse Voltammetry (DPV) | 0.05 - 30 μM | 0.011 μM (11 nM) | Honeysuckle extract and watermelon juice; recovery 95.41-101.20% [10]. |
Electroanalytical techniques are indispensable in modern pharmaceutical research, offering powerful tools for quantifying drugs and metabolites with high sensitivity, selectivity, and cost-effectiveness [14] [15]. This technical resource center focuses on three principal techniques—voltammetry, amperometry, and electrochemical impedance spectroscopy (EIS)—within the critical context of optimizing detection limits for pharmaceutical analysis. The drive for lower detection limits is paramount for accurately measuring trace-level active pharmaceutical ingredients (APIs), metabolites in biological fluids, and environmental pharmaceutical residues, often requiring quantification at nanomolar or picomolar concentrations [16] [15]. This guide provides detailed troubleshooting and methodological support to help researchers overcome common experimental challenges and achieve superior analytical performance.
Technique Fundamentals and Comparison
Electroanalytical techniques operate by applying an electrical signal to an electrochemical cell and measuring the resulting response, which provides information about the analyte's identity and concentration [17] [18]. The core of these methods is the interaction at the electrode-solution interface, where electron-transfer reactions generate measurable signals proportional to the concentration of the target species [17].
The table below summarizes the fundamental principles of these techniques.
| Technique | Controlled Parameter | Measured Signal | Key Principle |
|---|---|---|---|
| Voltammetry [17] [19] | Potential (swept linearly or with pulses) | Current | Measures current resulting from redox reactions as potential is varied. The current is proportional to analyte concentration. |
| Amperometry [20] [21] | Potential (fixed constant) | Current | Measures current from a redox reaction at a fixed potential over time. The steady-state current is proportional to analyte concentration. |
| Impedance Spectroscopy (EIS) [18] | Potential/Current (with AC frequency sweep) | Impedance (Z) | Measures the opposition to current flow (both resistance and capacitance) across a range of frequencies to characterize interface properties. |
Selecting the appropriate technique is crucial for method optimization. The following table provides a comparative overview of their analytical capabilities, particularly for pharmaceutical applications.
| Feature | Voltammetry | Amperometry | Impedance Spectroscopy (EIS) |
|---|---|---|---|
| Primary Analytical Use | Quantitative analysis, reaction mechanism studies [19] | Continuous, real-time monitoring [20] [15] | Label-free detection, interface characterization [15] |
| Typical Detection Limit | Nanomolar (nM) to picomolar (pM) range [14] [15] | Nanomolar (nM) range [20] | Not specified for concentration, but highly sensitive to surface changes |
| Key Advantage for Pharma | High sensitivity and wide dynamic range [14] | Fast response time, ideal for flow systems and biosensors [20] | Excellent for studying biomolecular interactions (e.g., antigen-antibody) [16] |
| Main Disadvantage | Can be less selective in complex matrices [14] | Susceptible to interference from other electroactive species and electrode fouling [20] | Complex data interpretation; provides indirect quantification [19] |
| Optimal Use Case | Trace-level drug and metabolite detection [15] | Process monitoring, enzyme-based biosensors (e.g., glucose) [20] [18] | Confirming surface modification and studying receptor-ligand binding [16] |
The Scientist's Toolkit: Essential Research Reagents and Materials
The performance of electroanalytical methods heavily depends on the careful selection of electrodes and modifiers. Nanostructured materials are particularly valuable for enhancing detection limits.
| Item | Function & Rationale |
|---|---|
| Glassy Carbon Electrode (GCE) [15] | A widely used baseline working electrode; provides a clean, reproducible surface for analysis and modification. |
| Screen-Printed Electrodes (SPEs) [17] [15] | Disposable, integrated three-electrode cells ideal for portable, low-volume analysis and field testing. |
| Carbon Nanotubes (CNTs) & Graphene [16] [15] | Carbon nanomaterials used to modify electrodes; increase surface area and enhance electron transfer, boosting sensitivity. |
| Metal Nanoparticles (e.g., Au, Pt) [16] [15] | Catalytic materials that enhance signal response and can be functionalized with biomolecules for improved selectivity. |
| Bismuth Film [17] | An environmentally friendly alternative to mercury films for anodic stripping voltammetry of heavy metals. |
| Molecularly Imprinted Polymers (MIPs) [16] [15] | Synthetic receptors that create specific cavities for a target molecule, greatly improving sensor selectivity. |
| Ion-Selective Ionophores [16] | Molecules incorporated into electrode membranes that selectively bind to specific ions, enabling potentiometric detection. |
Experimental Protocols for Optimized Detection
Protocol: Ultrasensitive Detection via Differential Pulse Voltammetry (DPV)
Differential Pulse Voltammetry (DPV) is highly effective for trace analysis due to its minimal background current contribution [17] [14]. This protocol is designed for detecting an electroactive drug (e.g., an NSAID) in a biological fluid.
- 1. Electrode Preparation: Polish the glassy carbon working electrode (GCE) with successive grades of alumina slurry (e.g., 1.0, 0.3, and 0.05 µm) on a microcloth. Rinse thoroughly with deionized water between each polish and after the final polish [15].
- 2. Electrode Modification (Nanostructuring): To enhance sensitivity, prepare a dispersion of carbon nanotubes (1 mg/mL) in a suitable solvent. Drop-cast a precise volume (e.g., 5-10 µL) onto the polished GCE surface and allow it to dry under an infrared lamp [16] [15].
- 3. Sample Pre-treatment & Dilution: Dilute the biological sample (e.g., serum or urine) with the supporting electrolyte (e.g., phosphate buffer, pH 7.4) in a 1:10 ratio. This reduces matrix complexity and fouling [14]. Mix via vortex for 30 seconds.
- 4. Instrumental Parameters (DPV): Transfer the diluted sample to the electrochemical cell. Use a three-electrode system: modified GCE (working), Ag/AgCl (reference), and Pt wire (counter). Set DPV parameters: pulse amplitude of 50 mV, pulse width of 50 ms, and a potential step of 5 mV. Scan the potential across the redox window of your target analyte [15].
- 5. Data Analysis & Quantification: Record the voltammogram and measure the peak current. Construct a calibration curve by analyzing standard solutions of known concentration. Use this curve to determine the unknown concentration in the sample [15].
Protocol: Real-Time Monitoring with Chronoamperometry (CA)
Chronoamperometry is ideal for real-time monitoring and hydrodynamic systems [15] [21].
- 1. System Setup: Insert the sensor (e.g., a screen-printed electrode modified with an enzyme) into a flow cell or a stirred solution. Ensure a stable and constant flow rate or stirring speed to maintain consistent convection [20].
- 2. Potential Application: Apply a fixed potential sufficient to drive the oxidation or reduction of the target molecule (e.g., H₂O₂ generated from an enzyme reaction). The applied potential should be determined from a prior voltammetric scan [21].
- 3. Current Measurement: Monitor the current as a function of time. After an initial decay, the current will stabilize to a steady-state value, which is directly proportional to the bulk concentration of the analyte [21].
- 4. Calibration: Relate the steady-state current to analyte concentration using a previously established calibration plot.
Workflow: Label-Free Binding Analysis with EIS
EIS is powerful for characterizing biomolecular interactions without labels [16] [15].
- 1. Baseline Measurement: In a standard EIS experiment, record the impedance spectrum of the modified electrode in a pure electrolyte solution (e.g., PBS) over a wide frequency range (e.g., 100 kHz to 0.1 Hz) with a small AC voltage amplitude (e.g., 10 mV) [15].
- 2. Receptor Immobilization: Functionalize the gold or carbon electrode surface with a receptor molecule (e.g., an antibody or aptamer). This can be achieved via self-assembled monolayers (thiols on gold) or drop-casting.
- 3. Target Incubation: Expose the functionalized electrode to a solution containing the target drug molecule. Allow sufficient time for binding to occur (typically 15-30 minutes).
- 4. Post-Binding Measurement: Wash the electrode gently and record a new impedance spectrum in the clean electrolyte solution.
- 5. Data Interpretation: An increase in the charge-transfer resistance ((R_{ct})), often observed as a larger diameter of the semicircle in the Nyquist plot, indicates that binding of the target molecule has hindered electron transfer at the surface, confirming detection [15].
Troubleshooting Guides and FAQs
Frequently Asked Questions (FAQs)
Q1: Why is achieving a low detection limit crucial in pharmaceutical electroanalysis, and which technique is best for it? A: Low detection limits (sub-nanomolar) are essential for measuring drug metabolites in biological samples, detecting pharmaceutical pollutants in water, and performing therapeutic drug monitoring [16] [15]. For trace-level quantification, pulse voltammetric techniques like Differential Pulse Voltammetry (DPV) or Square-Wave Voltammetry (SWV) are generally superior. Their pulsed potential waveform minimizes the capacitive background current, allowing the faradaic signal from the analyte to be measured with high clarity, thus achieving detection limits up to 100-1000 times lower than other methods [17] [14].
Q2: My sensor signal decreases over time. What is the most likely cause, and how can I prevent it? A: A decaying signal is a classic symptom of electrode fouling [20] [16]. This occurs when proteins, surfactants, or other components in complex samples (like blood or urine) adsorb onto the electrode surface, blocking the active sites and hindering electron transfer.
- Prevention Strategies:
- Sample Dilution: Dilute the biological sample with a clean supporting electrolyte [14].
- Membrane Coating: Apply a protective membrane (e.g., Nafion) that rejects interfering species while allowing the analyte to pass.
- Surface Renewal: Use disposable screen-printed electrodes (SPEs) or implement an electrochemical cleaning procedure between measurements [20] [15].
Q3: How can I improve the selectivity of my electrochemical method for a specific drug in a complex mixture? A: Electrode modification is key to enhancing selectivity.
- Molecularly Imprinted Polymers (MIPs): Integrate a MIP layer that acts as a synthetic antibody, creating shape-specific cavities for your target drug [16] [15].
- Enzyme-Based Sensors: Use an enzyme that reacts specifically with your target to generate an electroactive product (e.g., glucose oxidase) [20].
- Biosensors: Immobilize biological receptors like antibodies or aptamers that bind the target with high specificity, a change which can be measured directly (e.g., with EIS) [16] [15].
Q4: What are the key considerations when moving from a standard glassy carbon electrode to a nanostructured one? A: The primary goal is to increase the electroactive surface area and enhance electron transfer kinetics, which lowers the detection limit and improves sensitivity [16].
- Considerations:
- Reproducibility: The modification process (e.g., drop-casting) must be highly controlled to ensure uniform film formation across experiments.
- Stability: The nanomaterial layer must adhere firmly to the electrode surface and not leach into the solution during measurement.
- Characterization: Always validate the successful modification using techniques like Cyclic Voltammetry (CV) in a standard redox probe (e.g., [Fe(CN)₆]³⁻/⁴⁻) to confirm increased current and improved kinetics [15].
Troubleshooting Common Problems
| Problem | Possible Causes | Solutions |
|---|---|---|
| High Background Noise | 1. Electrical interference2. Unclean electrodes3. Unoptimized instrument parameters | 1. Use a Faraday cage2. Re-polish/clean working electrode3. Adjust pulse parameters (in DPV) or filter settings [17] |
| Non-Reproducible Peaks (CV/DPV) | 1. Inconsistent electrode surface2. Unstable reference electrode3. Drifting temperature | 1. Standardize electrode polishing/renewal protocol2. Check/refill reference electrode3. Use a thermostated cell [14] |
| No Faradaic Signal | 1. Incorrect potential window2. Electrode not connected3. Analyte is not electroactive | 1. Verify analyte's redox potential via literature; widen window2. Check all cell connections3. Consider derivatization or a label-based EIS approach [16] |
| Signal Drift (Amperometry) | 1. Electrode fouling2. Unstable convection | 1. Use a modified electrode with antifouling properties (e.g., PEG)2. Ensure constant stirring speed or flow rate [20] [21] |
| Inconsistent EIS Data | 1. Unstable electrode modification2. Insufficient equilibration | 1. Ensure robust and reproducible immobilization of the receptor layer2. Allow the system to stabilize before measurement [15] |
The Impact of Sample Matrix on Analytical Performance
FAQs: Understanding and Mitigating Sample Matrix Effects
What is a sample matrix and how can it affect my analytical results? The sample matrix is the portion of your sample that is not the analyte—essentially, everything else. In quantitative analysis, components of this matrix can significantly affect your results by influencing the detector's response to your target analyte. This can manifest as either signal suppression or signal enhancement, leading to inaccurate quantitation. The matrix your analyte is detected in includes both the original sample components and the mobile phase, and any of these can alter the analytical signal [22].
What are the common symptoms of matrix effects in my data? You should suspect matrix effects if you observe:
- Inconsistent calibration curve slopes when the sample diluent or mobile phase composition is changed [22].
- Unexplained loss of sensitivity or changes in signal intensity for your analyte [22].
- The presence of ghost peaks or unexpected signals that may be caused by sample matrix components [23].
- Poor reproducibility when analyzing real samples compared to clean standard solutions.
Which detection techniques are most prone to matrix effects? While any detection method can be affected, some are particularly susceptible [22]:
- Mass Spectrometric (MS) Detection: Especially with electrospray ionization, where analytes compete with matrix components for available charge, leading to ionization suppression or enhancement.
- Fluorescence Detection: Matrix components can cause fluorescence quenching.
- UV/Vis Absorbance Detection: The phenomenon of solvatochromism can alter an analyte's absorptivity.
- Evaporative Light Scattering (ELSD) and Charged Aerosol Detection (CAD): Mobile phase additives can interfere with the aerosol formation process.
What is the first step in diagnosing a matrix effect problem? A simple and effective diagnostic is to compare detector responses under different conditions [22]. For example, prepare your calibration standards in a pure solvent and in a matrix-matched solution (e.g., phosphate-buffered saline or a processed blank sample). A significant difference in the slope of the calibration curves indicates a matrix effect. For MS detection, a common test is to infuse the analyte directly into the post-column effluent while injecting a blank sample; a dip or rise in the baseline indicates regions of ionization suppression or enhancement [22].
What is the most effective way to compensate for matrix effects during quantitation? The internal standard method is one of the most potent tools for mitigating matrix effects [22]. This involves adding a known, constant amount of a suitable internal standard (IS) to every sample and standard. Quantitation is then based on the ratio of the analyte signal to the IS signal. A perfect IS will experience the same matrix-induced variations as the analyte, thereby canceling them out. Stable isotope-labeled versions of the analyte are often the best choice for this purpose [22].
Troubleshooting Guide: A Systematic Approach to Matrix-Related Issues
Follow this structured workflow to identify and resolve problems related to the sample matrix in your analytical methods.
Step-by-Step Mitigation Strategies
Enhance Sample Preparation: The most straightforward way to reduce matrix effects is to remove the interfering matrix components. Investigate and optimize your sample clean-up procedures. Techniques like solid-phase extraction (SPE), protein precipitation, or liquid-liquid extraction can selectively isolate your analyte from the complex matrix, reducing the load of interferents entering the analytical system [22].
Optimize Chromatographic Separation: If sample cleanup is insufficient or impractical, improve the separation itself. Adjust the chromatographic method (e.g., mobile phase composition, gradient profile, or column type) to achieve baseline separation of your analyte from co-eluting matrix compounds. This prevents the matrix components from reaching the detector simultaneously with your analyte, which is a primary cause of effects like ionization suppression in LC-MS [23].
Use Matrix-Matched Calibration Standards: When the above strategies cannot fully eliminate the effect, prepare your calibration standards in a solution that closely mimics the sample matrix. This could be a processed blank matrix or an artificial matrix. This ensures that the standards and samples experience the same level of signal suppression or enhancement, improving quantitative accuracy.
Implement a Robust Internal Standard: As highlighted in the FAQs, this is a critical step. The ideal internal standard should have chemical and physical properties very similar to the analyte, so it behaves identically during sample preparation, chromatography, and detection. Its response should be affected by the matrix in the same way and to the same extent as the analyte's response [22].
Experimental Protocol: Using Design of Experiments (DOE) to Systematically Optimize Methods and Minimize Matrix Impact
Instead of the traditional "one factor at a time" (OFAT) approach, which is inefficient and misses interaction effects, a multivariate optimization using Design of Experiments (DOE) is a more scientific and robust strategy [24]. The following protocol is adapted from sensor development research [25] [26] and is highly applicable to electrochemical and chromatographic methods in pharmaceutical analysis.
Objective: To optimize the experimental parameters of an analytical method to maximize sensitivity and minimize matrix effects.
Step 1: Define the Objective and Response Variable Clearly state the goal (e.g., "to maximize the peak current for serotonin detection in plasma"). Identify a quantifiable response variable that reflects analytical performance, such as peak area, signal-to-noise ratio, or recovery percentage [25].
Step 2: Identify and Select Critical Factors Based on prior knowledge, select the input variables (factors) to investigate. For an electrochemical method, this might include pH, scan rate, interaction time, and concentration of a redox indicator [26]. For LC-MS, factors could include mobile phase pH, buffer concentration, and gradient time.
Step 3: Choose an Experimental Design A screening design like a fractional factorial or Plackett-Burman design is used to efficiently identify the most influential factors from a large set [27] [28]. For optimization, a response surface methodology (RSM) design like a Central Composite Design (CCD) or Box-Behnken Design is then employed to model the complex relationships between the critical factors and the response [28]. The table below shows a simplified example of a two-level fractional factorial design for screening.
Table: Example of a 2⁵⁻² Fractional Factorial Screening Design for Five Factors [27]
| Standard Run Order | Binder (A) | Granulation Water (B) | Granulation Time (C) | Spheronization Speed (D) | Spheronization Time (E) | Response: % Yield |
|---|---|---|---|---|---|---|
| 1 | -1 (1.0%) | -1 (30%) | -1 (3 min) | +1 (900 RPM) | +1 (8 min) | 52.4 |
| 2 | +1 (1.5%) | -1 (30%) | -1 (3 min) | -1 (500 RPM) | -1 (4 min) | 81.3 |
| 3 | -1 (1.0%) | +1 (40%) | -1 (3 min) | -1 (500 RPM) | +1 (8 min) | 72.3 |
| 4 | +1 (1.5%) | +1 (40%) | -1 (3 min) | +1 (900 RPM) | -1 (4 min) | 78.4 |
| 5 | -1 (1.0%) | -1 (30%) | +1 (5 min) | +1 (900 RPM) | -1 (4 min) | 63.4 |
| 6 | +1 (1.5%) | -1 (30%) | +1 (5 min) | -1 (500 RPM) | +1 (8 min) | 74.8 |
| 7 | -1 (1.0%) | +1 (40%) | +1 (5 min) | -1 (500 RPM) | -1 (4 min) | 79.2 |
| 8 | +1 (1.5%) | +1 (40%) | +1 (5 min) | +1 (900 RPM) | +1 (8 min) | 72.6 |
Step 4: Run the Experiments and Perform Statistical Analysis Execute the experimental runs in a randomized order to avoid bias. Analyze the results using statistical software to perform Analysis of Variance (ANOVA). This will identify which factors and interactions have a statistically significant effect on your response variable [27].
Step 5: Build a Model and Find the Optimum Based on the significant factors, a mathematical model (e.g., a quadratic polynomial) is developed. This model allows you to predict the response under any combination of factor settings and to identify the optimal conditions that maximize your performance metric [25].
The Scientist's Toolkit: Key Reagents and Materials for Sensor Development and Matrix Mitigation
This table details essential materials used in the development of advanced electrochemical sensors, as featured in the research, which are crucial for enhancing sensitivity and combating matrix effects [25] [26].
Table: Key Research Reagent Solutions for Electrochemical Sensor Development
| Reagent/Material | Function/Explanation | Example from Research |
|---|---|---|
| Carbon Nanotubes (CNTs) | Provide a high surface area and excellent electrical conductivity, enhancing the electrode's sensitivity and electron transfer rate. | Multiwalled carbon nanotubes (MWCNTs) were used to modify an ITO electrode for mercury detection, improving its analytical performance [26]. |
| Gold Nanoparticles (AuNPs) | Offer favorable electrocatalytic properties, improving the sensor's signal and stability. Ligand-free AuNPs can provide more consistent and active surfaces. | Metal vapor synthesis was used to create ligand-free AuNPs for a serotonin sensor, enabling efficient catalysis of serotonin oxidation [25]. |
| Molecularly Imprinted Polymers (MIPs) | Synthetic polymers with cavities complementary to a target molecule. They provide high selectivity and antifouling properties by rejecting non-target matrix components. | A thin MIP layer was added to a serotonin sensor to impart selectivity and protect the electrode from fouling in complex plasma samples [25]. |
| Conductive Polymers (e.g., Polyaniline - PANI) | Form a stable, conductive film on the electrode, facilitating the immobilization of nanomaterials and biomolecules, and enhancing electron transfer. | PANI was electrodeposited to form a nanocomposite with MWCNTs and AuNPs on an ITO electrode, creating a synergistic effect for sensing [26]. |
| Redox Indicators (e.g., Methylene Blue) | Mediate electron transfer in the electrochemical system, often leading to a stronger and more reproducible signal. | Methylene Blue (1 mM) was used as a redox indicator in a Tris-HCl buffer to enable the detection of mercury ions with a modified ITO electrode [26]. |
| Internal Standards | A compound added in a constant amount to all samples and standards to correct for variability in sample preparation and matrix effects during detection. | While not listed in the sensor papers, stable isotope-labeled internal standards are the gold standard in LC-MS for compensating for ionization matrix effects [22]. |
Advanced Materials and Techniques for Enhanced Sensitivity
Troubleshooting Guides
Carbon Nanotube (CNT)-Based Electrodes
Issue 1: Low Signal-to-Noise Ratio in Electrochemical Measurements
- Potential Cause: Agglomeration of CNTs leading to reduced active surface area.
- Solution: Implement ultrasonication for 30-60 minutes in a suitable surfactant (e.g., SDS) before electrode modification. Functionalize CNTs with carboxyl groups to improve dispersion [29].
Issue 2: Electrode Fouling by Pharmaceutical Analytes
- Potential Cause: Non-specific adsorption of drug molecules or matrix components on the hydrophobic CNT surface.
- Solution: Apply a protective Nafion membrane or create a hybrid composite with hydrophilic polymers. For electrochemical detection of anti-inflammatory drugs, use anionic surfactants to minimize fouling [15].
Issue 3: Inconsistent Performance Between Electrode Batches
- Potential Cause: Variations in CNT synthesis conditions (diameter, length, defect density).
- Solution: Standardize the source and characterization of CNTs. Implement rigorous quality control using Raman spectroscopy (assessing D/G band ratio) and TEM before electrode fabrication [30].
Graphene-Based Electrodes
Issue 1: Restacking of Graphene Sheets
- Potential Cause: Strong π-π interactions between layers reduce accessible surface area.
- Solution: Introduce spacer materials (e.g., carbon nanospheres, metal nanoparticles) between graphene layers. Create 3D foam or aerogel structures to prevent restacking [31].
Issue 2: High Background Current in Voltammetric Measurements
- Potential Cause: Presence of oxygen-containing functional groups that undergo redox reactions.
- Solution: Optimize the reduction level of graphene oxide. Use electrochemical pre-treatment (cycling in PBS) to stabilize the electrode surface before pharmaceutical detection experiments [15].
Issue 3: Poor Adhesion to Substrate Electrodes
- Potential Cause: Weak physical adhesion of graphene films to glassy carbon or metal surfaces.
- Solution: Use linker molecules (e.g., pyrene derivatives) that strongly adsorb to both graphene and the electrode surface. Alternatively, employ in-situ electrochemical reduction of graphene oxide directly on the electrode [31].
MXene-Based Electrodes
Issue 1: Rapid Degradation of Electrochemical Performance
- Potential Cause: Oxidation of MXene (particularly Ti₃C₂Tₓ) in aqueous environments or upon air exposure.
- Solution: Store MXene dispersions in argon-filled environments and fabricate electrodes in controlled atmosphere. Create composite structures with CNTs or polymers to shield MXene from oxidative degradation [32] [33].
Issue 2: Limited Stability in Biological Matrices
- Potential Cause: Susceptibility to biofouling and dissolution in complex media.
- Solution: Incorporate MXenes into cross-linked hydrogel networks or apply protective polymer coatings (e.g., chitosan) while maintaining accessibility to target analytes [31].
Issue 3: Viscous Dispersion Hindering Uniform Film Formation
- Potential Cause: High concentration of MXene dispersions leading to gelation.
- Solution: Optimize concentration (typically 1-5 mg/mL) and use vacuum-assisted filtration for uniform films. Add controlled amounts of organic solvents (e.g., ethanol) to improve processability [32].
Frequently Asked Questions (FAQs)
Q1: Which nanomaterial offers the best sensitivity for trace-level pharmaceutical detection? MXenes generally provide superior sensitivity due to their high metallic conductivity and rich surface chemistry, enabling low detection limits for pharmaceuticals and pesticides [32] [29]. However, CNT-graphene hybrids can offer complementary advantages for specific drug molecules.
Q2: How do I select between CNTs, graphene, and MXenes for my specific drug detection application? Consider MXenes for highest sensitivity in aqueous environments, graphene when high surface area and flexibility are needed, and CNTs for mechanical robustness and established functionalization protocols [29]. The choice depends on target analyte, sample matrix, and required detection limit.
Q3: What are the key factors affecting detection limit in nanomaterial-enhanced electrochemical sensors? The detection limit is optimized by maximizing the electroactive surface area, facilitating efficient electron transfer kinetics, ensuring proper functionalization for target recognition, and minimizing non-specific binding [32] [15].
Q4: How can I improve the reproducibility of nanomaterial-modified electrodes? Standardize synthesis protocols, implement rigorous material characterization (Raman, XRD, TEM), use automated deposition systems, and establish quality control metrics for each electrode batch [15] [31].
Performance Comparison Tables
Table 1: Electrochemical Performance for Pharmaceutical Compound Detection
| Nanomaterial | Typical Detection Limit | Linear Range | Target Pharmaceuticals | Modification Strategy |
|---|---|---|---|---|
| MXenes | Sub-nM levels [32] | 0.001-100 µM [32] | Antibiotics, NSAIDs [32] | MXene-polymer composites [32] |
| Carbon Nanotubes | 0.1-10 nM [15] | 0.01-50 µM [15] | NSAIDs, Antibiotics [15] | CNT-nafion composites [15] |
| Graphene | 0.5-5 nM [31] | 0.005-20 µM [31] | Neurotransmitters, Drugs [31] | Metal NP-decorated graphene [31] |
Table 2: Key Properties Comparison for Electrode Applications
| Property | Carbon Nanotubes | Graphene | MXenes |
|---|---|---|---|
| Electrical Conductivity | High (10³-10⁴ S/cm) | High (10³-10⁴ S/cm) | Very High (10⁴-10⁵ S/cm) [32] |
| Specific Surface Area | 200-900 m²/g | 500-1500 m²/g | 100-500 m²/g [29] |
| Mechanical Flexibility | Excellent | Good | Moderate [29] |
| Stability in Aqueous Media | Good with functionalization | Good | Moderate (oxidation issues) [32] |
| Ease of Functionalization | Moderate | Good | Excellent (rich surface chemistry) [32] |
Experimental Protocols
Protocol 1: MXene-CNT Composite Electrode for Sensitive Pharmaceutical Detection
Materials Required:
- Ti₃C₂Tₓ MXene suspension (5 mg/mL in deionized water)
- Carboxylated multi-walled CNTs (1 mg/mL in DI water)
- Screen-printed carbon electrode (SPCE)
- Nafion solution (0.5% in ethanol)
Procedure:
- MXene-CNT Composite Preparation: Mix MXene and CNT suspensions in 3:1 volume ratio. Sonicate for 30 minutes to achieve homogeneous dispersion [33].
- Electrode Modification: Deposit 5 µL of the composite suspension onto SPCE working electrode. Dry at room temperature for 2 hours [33].
- Nafion Coating: Apply 2 µL of 0.5% Nafion solution as protective layer. Air dry for 30 minutes [15].
- Electrochemical Activation: Perform 10 cyclic voltammetry cycles in PBS (pH 7.4) from -0.2V to +0.6V to stabilize the electrode [15].
Optimization Notes:
- MXene:CNT ratio can be adjusted from 2:1 to 5:1 based on target analyte
- Drying time may be extended to 4 hours for more stable film formation
Protocol 2: Graphene-Based Electrode for NSAID Detection
Materials Required:
- Reduced graphene oxide (rGO) dispersion (2 mg/mL)
- Gold nanoparticles (20 nm diameter)
- Phosphate buffer saline (PBS, 0.1 M, pH 7.4)
- Glassy carbon electrode (GCE)
Procedure:
- Electrode Polishing: Polish GCE with 0.05 µm alumina slurry, rinse with DI water [15].
- Graphene Deposition: Drop-cast 8 µL rGO dispersion on GCE, dry at 60°C for 1 hour [15].
- Nanoparticle Decoration: Electrodeposit AuNPs by chronoamperometry at -0.2V for 60s in HAuCl₄ solution [15].
- Characterization: Validate using cyclic voltammetry in 5 mM K₃Fe(CN)₆, expecting increased peak currents [15].
Experimental Workflow Visualization
Research Reagent Solutions
Table 3: Essential Materials for Nanomaterial-Enhanced Electrodes
| Reagent/Material | Function | Application Notes |
|---|---|---|
| Ti₃C₂Tₓ MXene | Primary conductive material | Handle under inert atmosphere to prevent oxidation [32] |
| Carboxylated CNTs | Electron transfer enhancement | Sonication time critical for dispersion quality [29] |
| Reduced Graphene Oxide | High surface area platform | Control reduction level for optimal performance [31] |
| Nafion Perfluorinated Resin | Anti-fouling membrane | Optimize concentration to balance selectivity and sensitivity [15] |
| HAuCl₄·3H₂O | Gold nanoparticle precursor | Electrochemical deposition provides controlled nanoparticle size [15] |
| Screen-Printed Electrodes | Disposable sensor platforms | Enable point-of-care pharmaceutical testing [15] |
Signal Amplification Strategies Using Metal Nanoparticles and Conductive Polymers
Frequently Asked Questions (FAQs)
Q1: Why is the combination of metal nanoparticles and conductive polymers so effective for signal amplification? The combination is effective because it creates a synergistic effect. Conductive polymers, such as polypyrrole or polyaniline, provide a porous, high-surface-area scaffold that facilitates electron transfer. Metal nanoparticles (e.g., gold, platinum) doped into this polymer matrix further enhance electrical conductivity and catalytic activity. This nanocomposite platform increases the number of binding sites for analytes and improves the efficiency of electron transfer during redox events, leading to a significantly amplified electrochemical signal [34] [35].
Q2: My sensor's baseline current is unstable after modifying the electrode with a conductive polymer. What could be the cause? An unstable baseline is often linked to insufficient polymerization or improper washing of the electrode. Incomplete polymerization can lead to the leaching of unreacted monomers, which creates background noise. Furthermore, if the electrode is not thoroughly washed after synthesis, residual reagents or loosely bound polymer fragments can cause signal drift. Ensure a complete and controlled polymerization process and implement rigorous washing steps with an appropriate buffer to stabilize the baseline [34].
Q3: How can I prevent the fouling of my sensor by complex sample matrices, like biological fluids? Sensor fouling can be mitigated by incorporating a protective layer. Using a size-selective membrane, such as Nafion, over the sensing surface can block large interfering molecules (like proteins) while allowing the target analyte to diffuse through. Alternatively, designing the sensor with molecularly imprinted polymers (MIPs) can create highly specific cavities for the target, reducing non-specific binding and fouling from the sample matrix [35].
Q4: What is the advantage of using enzyme-linked signal amplification in conjunction with these nanocomposites? Enzyme-linked strategies, such as using horseradish peroxidase (HRP) or alkaline phosphatase, provide a powerful secondary amplification stage. These enzymes catalyze reactions that generate many detectable molecules (e.g., a colored, fluorescent, or electroactive product) from a single binding event. When these enzymes are conjugated to the nanocomposite sensor, the primary electrochemical signal from the metal nanoparticle/conductive polymer is greatly multiplied, enabling the detection of very low-abundance targets [36] [37].
Q5: I am not achieving the expected low limit of detection (LOD). What parameters should I re-optimize? If the expected LOD is not met, key parameters to re-investigate include:
- Nanoparticle Loading: Excess nanoparticles can agglomerate, reducing the effective surface area. Optimize the concentration for a uniform dispersion.
- Polymer Film Thickness: An overly thick polymer film can increase electron transfer resistance. Optimize polymerization time/cycles to achieve a thin, uniform layer.
- Electrochemical Technique: Switch to a more sensitive technique like Differential Pulse Voltammetry (DPV) or Square Wave Voltammetry (SWV), which minimize background charging current compared to Cyclic Voltammetry (CV) [38] [14].
- LOD Calculation Method: Ensure you are using a statistically sound method, such as based on the standard deviation of the blank signal, to avoid overestimating sensitivity [38].
Troubleshooting Guides
Issue 1: Low Signal-to-Noise Ratio
| Symptom | Potential Cause | Solution |
|---|---|---|
| High background noise, poor peak definition. | Non-specific binding of interfering substances. | Improve the selectivity of the recognition layer (e.g., use MIPs or high-affinity aptamers). Incorporate blocking agents like BSA [36]. |
| Electrical noise from the instrument or environment. | Use a Faraday cage, ensure all connections are secure, and use shorter cables. Employ electrochemical techniques with built-in noise suppression (e.g., SWV, DPV) [14]. | |
| Inhomogeneous or rough electrode surface. | Ensure a clean and polished base electrode before polymer deposition. Optimize synthesis for a smooth, uniform nanocomposite film [34]. |
Issue 2: Poor Reproducibility Between Sensor Batches
| Symptom | Potential Cause | Solution |
|---|---|---|
| High variance in signal amplitude and LOD across different sensor batches. | Inconsistent polymerization of the conductive polymer. | Standardize the polymerization method (e.g., use potentiostatic vs. galvanostatic). Precisely control monomer concentration, time, and applied potential/current [34]. |
| Irregular distribution and size of metal nanoparticles. | Standardize the nanoparticle synthesis or incorporation step. Use a reducing agent and stabilizer to control nanoparticle growth and prevent agglomeration [35] [34]. | |
| Variation in electrode pre-treatment. | Implement a strict and reproducible electrode cleaning and polishing protocol before any modification [38]. |
Issue 3: Sensor Signal Drift Over Time
| Symptom | Potential Cause | Solution |
|---|---|---|
| Signal for the same analyte concentration changes over time or between measurements. | Swelling or degradation of the conductive polymer. | Use a higher degree of cross-linking in the polymer or choose a more stable polymer matrix for your application's pH and potential window [34]. |
| Leaching of metal nanoparticles from the polymer matrix. | Enhance the incorporation of nanoparticles during the polymerization process (e.g., by co-deposition) rather than simple physical adsorption. | |
| Electrode fouling. | Implement a robust regeneration protocol between measurements (e.g., a washing step with a specific buffer) and store the sensor in appropriate conditions [39]. |
Protocol: Fabrication of a Gold Nanoparticle/Polypyrrole (AuNP/PPy) Nanocomposite Electrode
This protocol details the synthesis of a core-shell signal amplification platform.
Materials:
- Working Electrode: Glassy Carbon Electrode (GCE), 3 mm diameter.
- Monomer Solution: 0.1 M Pyrrole in deionized water.
- Gold Nanoparticle Solution: Commercially available colloidal AuNPs (e.g., 10 nm diameter).
- Supporting Electrolyte: 0.1 M Phosphate Buffered Saline (PBS), pH 7.4.
- Polishing Supplies: Alumina slurry (1.0, 0.3, and 0.05 µm) and polishing cloth.
Step-by-Step Method:
- Electrode Pre-treatment: Polish the GCE sequentially with 1.0, 0.3, and 0.05 µm alumina slurry on a microcloth. Ruminate thoroughly with deionized water between each step. Sonicate the electrode in ethanol and then deionized water for 2 minutes each to remove any adhered alumina particles. Dry under a gentle stream of nitrogen gas.
- Nanocomposite Electrodeposition: Place the cleaned GCE into an electrochemical cell containing a mixture of 0.1 M pyrrole and the colloidal AuNP solution in 0.1 M PBS. Using a standard three-electrode setup (GCE as working, Pt wire as counter, Ag/AgCl as reference), perform cyclic voltammetry by scanning the potential between -0.2 V and +0.8 V for 15 cycles at a scan rate of 50 mV/s. This will co-deposit the polypyrrole and entrap the AuNPs, forming a black film on the electrode surface.
- Sensor Washing and Conditioning: Remove the modified electrode and rinse it gently with deionized water to remove any unreacted monomers or loosely bound nanoparticles. Condition the electrode by performing 5-10 cycles of CV in a clean supporting electrolyte (e.g., 0.1 M PBS) until a stable voltammogram is obtained.
- Application: The AuNP/PPy modified GCE is now ready for further functionalization (e.g., with antibodies, aptamers, or MIPs) or for direct electrochemical measurement.
Experimental Workflow for AuNP/PPy Sensor Fabrication
Quantitative Performance of Selected Nanocomposite Sensors
The table below summarizes the enhanced analytical performance achieved by integrating metal nanoparticles and conductive polymers, as reported in recent literature.
Table 1: Performance of Metal Nanoparticle/Conductive Polymer-based Electrochemical Sensors
| MIP-based Sensor Composition | Target Analyte | Detection Technique | Linear Range | Limit of Detection (LOD) | Ref |
|---|---|---|---|---|---|
| Fe₃O₄@Pt NPs/COF-AIECL@MIP | Ciprofloxacin | Electrochemical | 2 × 10⁻¹² – 3 × 10⁻⁹ M | 5.98 × 10⁻¹³ M | [35] |
| PDA@Au NCs-MIPs | Formaldehyde | Electrochemical | 0.2 μM – 0.02 M | 0.1 μM | [35] |
| MIPs/Au-Pt NMs/SPCE | C-reactive protein | Electrochemical | 0.1 nM – 500 nM | 0.1 nM | [35] |
| PPy/CuPcTs/MIPs | Escherichia coli | Electrochemical | 10² – 10⁷ CFU/mL | 21 CFU/mL | [35] |
| Ti₂C doping pEIPs-coated Electrodes | SARS-CoV-2 | Electrochemical | 0.01 – 1000 fg/mL | %1.%2 fg/mL | [35] |
The Scientist's Toolkit: Key Research Reagent Solutions
Table 2: Essential Materials for Sensor Development
| Reagent/Material | Function/Explanation |
|---|---|
| Conductive Polymer Monomers (Pyrrole, Aniline) | The building blocks for creating the conductive polymer scaffold, which provides a high-surface-area, electron-conducting matrix. |
| Metal Nanoparticles (Au, Pt, Ag NPs) | Act as nanoscale signal amplifiers by enhancing electron transfer and providing catalytic activity for signal-generating reactions. |
| Molecularly Imprinted Polymer (MIP) | A synthetic polymer with cavities tailored to a specific target, providing antibody-like selectivity to the sensor. |
| Cross-linking Agents (e.g., glutaraldehyde) | Used to stabilize the polymer network and improve the mechanical and chemical stability of the sensing film. |
| Enzyme Labels (HRP, Alkaline Phosphatase) | Used in secondary amplification strategies, where a single enzyme molecule catalyzes the generation of many reporter molecules. |
| Electrochemical Redox Probes (e.g., [Fe(CN)₆]³⁻/⁴⁻) | A benchmark probe used to characterize the electron transfer properties of the modified electrode surface via EIS or CV. |
Advanced Visualization: Signal Amplification Pathways
Mechanisms of Signal Amplification
Application of Pulse Voltammetry (DPV, SWV) for Trace-Level Drug Detection
Pulse voltammetric techniques, particularly Differential Pulse Voltammetry (DPV) and Square Wave Voltammetry (SWV), are advanced electroanalytical methods specifically designed to achieve superior sensitivity for detecting chemical species at very low concentrations, typically in the range of (10^{-6}) to (10^{-9}) mol·L⁻¹ [40]. These techniques were developed to improve upon traditional voltammetric methods by strategically minimizing the non-faradaic (charging) current and maximizing the faradaic current, which is the current directly produced by the redox reaction of the target analyte [40] [41]. This fundamental advantage makes DPV and SWV indispensable in modern pharmaceutical research for tasks such as detecting active pharmaceutical ingredients (APIs), monitoring drug metabolites, and ensuring product stability, especially when dealing with limited sample volumes and the need for cost-effective, rapid analysis [14].
The core principle that gives pulse techniques their high sensitivity lies in the different decay rates of the faradaic and capacitive currents following a potential pulse. The faradaic current decays proportionally to (1/(time)^{1/2}), whereas the capacitive current decays exponentially [41]. By measuring the current at the end of a potential pulse, after the capacitive current has substantially decayed, the signal-to-noise ratio is significantly enhanced [41]. This allows for the detection of trace-level compounds in complex matrices, a common requirement in drug development, environmental monitoring of pharmaceutical residues, and therapeutic drug monitoring [42] [14].
Differential Pulse Voltammetry (DPV)
In DPV, a series of small-amplitude potential pulses (typically 10 to 100 mV) are superimposed on a linearly increasing base potential [40] [43]. The current is sampled twice for each pulse: immediately before the pulse is applied (Ir) and again at the end of the pulse (If) [40]. The key measured signal is the difference between these two currents, δI = If – Ir [40] [43]. This differential measurement effectively subtracts the background current, leading to a voltammogram that appears as a peak-shaped plot of δI versus the base potential. The height of this peak is directly proportional to the concentration of the analyte [43]. DPV is exceptionally well-suited for analyzing irreversible electrochemical reactions and is a gold standard for trace-level quantification [41].
Square Wave Voltammetry (SWV)
SWV combines a large-amplitude square wave modulation with a staircase waveform. The potential is stepped through a series of forward and reverse pulses [40] [44]. Similar to DPV, the current is sampled twice during each square wave cycle: at the end of the forward pulse (If) and at the end of the reverse pulse (Ir) [44]. The recorded signal can be the forward current, the reverse current, the difference current (If - Ir), or the sum current. The difference current is most commonly used for analytical purposes as it efficiently rejects capacitive background currents [44]. A major advantage of SWV is its speed; the entire scan can be completed very quickly, often on the timescale of a single mercury drop in polarography, and it allows for signal averaging to further improve the signal-to-noise ratio [41]. SWV provides excellent sensitivity and is particularly useful for studying reversible or quasi-reversible electrode reactions [41].
Comparative Analysis
The table below summarizes the key characteristics of DPV and SWV to guide method selection.
Table 1: Comparison of Differential Pulse Voltammetry (DPV) and Square Wave Voltammetry (SWV)
| Feature | Differential Pulse Voltammetry (DPV) | Square Wave Voltammetry (SWV) |
|---|---|---|
| Primary Application | Trace-level quantification of analytes, including those with irreversible reactions [41]. | Fast, sensitive trace-level detection and fundamental studies of reaction kinetics [41]. |
| Waveform | Small pulses (10-100 mV) on a linear baseline [43]. | Large-amplitude square wave superimposed on a staircase [44]. |
| Current Sampling | Two samples per pulse: before (Ir) and at the end (If) of the pulse [40]. | Two samples per cycle: end of forward (If) and end of reverse (Ir) pulse [44]. |
| Output Signal | Difference current (δI = If – Ir) [40]. | Typically the difference current (If - Ir) [44]. |
| Key Advantage | Excellent background suppression, leading to very low detection limits for a wide range of analytes [41]. | Very fast scan speed and high sensitivity; ability to extract kinetic information [41]. |
| Typical Detection Limit | Can reach nanomolar (nM) to picomolar (pM) levels, e.g., LOD of 0.45 μM for 2-nitrophenol [42]. | Can reach nanomolar (nM) levels, e.g., LOD of 2.92 nM for 2-nitrophenol [42]. |
The Scientist's Toolkit: Essential Reagents and Materials
Successful implementation of DPV and SWV for drug detection relies on a set of core materials and reagents.
Table 2: Key Research Reagent Solutions for Pulse Voltammetry
| Item | Function / Explanation |
|---|---|
| Glassy Carbon (GC) Electrode | A widely used solid working electrode. It offers a wide potential window, chemical inertness in acidic and basic media, and a surface that can be easily cleaned or modified for enhanced sensitivity and selectivity [42]. |
| Electrode Modifiers | Substances like 2-amino nicotinamide (2-AN) or polymers that are coated onto the electrode surface. They pre-concentrate the target analyte or facilitate electron transfer, significantly lowering the detection limit and improving selectivity [42] [45]. |
| Supporting Electrolyte | A high-concentration, electroinactive salt (e.g., KCl, phosphate buffer). It carries current to minimize solution resistance (iR drop) and defines the ionic strength and pH of the solution, which can critically affect the redox behavior of the analyte [40] [41]. |
| Surfactants | Amphiphilic molecules (e.g., Sodium Dodecyl Sulfate). They adsorb to the electrode-solution interface, can alter the electrochemical process of the analyte, and in some cases, enhance the electrochemical response and analytical performance [45]. |
Experimental Protocols for Optimized Detection
Protocol: Sensor Modification for Enhanced Sensitivity
A common strategy to achieve lower detection limits is to modify the surface of a glassy carbon electrode. The following protocol, adapted from research on detecting 2-nitrophenol, outlines this process [42]:
- Electrode Pre-treatment: Polish the bare glassy carbon (GC) electrode with 0.05 μm alumina slurry on a microcloth to create a fresh, clean surface. Rinse thoroughly with deionized water and then with ethanol.
- Electropolymerization: Prepare a solution containing the modifier, such as 2-amino nicotinamide (2-AN). Using cyclic voltammetry (CV), cycle the potential of the pre-treated GC electrode in this solution for a predetermined number of cycles (e.g., 5 cycles) to deposit a stable, polymeric film of the modifier onto the electrode surface, creating the 2-AN/GC sensor.
- Characterization: Characterize the modified electrode using techniques like Scanning Electron Microscopy (SEM) and Fourier Transform Infrared Spectroscopy (FTIR) to confirm the successful attachment of the modifier. Electrochemical characterization in a standard redox probe like potassium ferricyanide, K₃[Fe(CN)₆], is also used to verify enhanced electrochemical activity.
Protocol: Optimizing SWV Parameters using Response Surface Methodology (RSM)
Manually optimizing voltammetric parameters is time-consuming. The use of Response Surface Methodology (RSM) is a highly effective statistical approach to find the optimum values with a minimal number of experiments [42] [45].
- Select Critical Parameters: Identify the key SWV parameters to optimize. These are typically Pulse Amplitude, Frequency, and Potential Step [42].
- Design the Experiment: Utilize an experimental design like the Box-Behnken Design (BBD). This design creates a set of experimental runs where the three parameters are varied at different levels simultaneously.
- Execute and Measure: Perform the SWV scans for each experimental condition in the design matrix. Record the peak current response for the analyte of interest (e.g., 2-nitrophenol) in each run.
- Analyze and Model: Input the data into statistical software to fit a multivariate model (e.g., a quadratic polynomial). This model describes the relationship between the SWV parameters and the peak current.
- Determine Optima: Use the generated model to identify the specific combination of pulse amplitude, frequency, and potential step that predicts the maximum peak current. This represents the optimized parameters for the most sensitive detection.
Diagram 1: SWV Parameter Optimization Workflow
Troubleshooting Guides and FAQs
Frequently Asked Questions
Q1: My voltammogram has a very low or no peak current for my target drug, even though it should be electroactive. What could be wrong?
- Electrode Fouling: The electrode surface may be passivated by adsorbed species from the sample matrix. Solution: Clean the electrode according to manufacturer guidelines. For a Glassy Carbon electrode, repolish with 0.05 μm alumina slurry and rinse thoroughly [46].
- Poor Electrical Connection: A faulty connection to the working electrode can result in only residual current being measured. Solution: Check all cables and connectors. Ensure the working electrode is properly inserted and secured [46].
- Incorrect Solvent/Electrolyte System: The drug may not be sufficiently soluble, or the electrolyte may not support the redox reaction. Solution: Ensure the drug is dissolved and the supporting electrolyte is compatible with your potential window and analyte.
Q2: I am getting a high and noisy background current, which is obscuring my signal. How can I reduce this?
- Charging Current Dominance: This is common if the experimental parameters are not optimized for the system. Solution: For pulse techniques, ensure you are using the correct pulse width and sampling time to allow the capacitive current to decay. Using a smaller electrode can also reduce overall capacitance [41] [46].
- Reference Electrode Issues: A blocked frit or air bubbles in the reference electrode can cause unstable potentials and noisy baselines. Solution: Check the reference electrode for blockages and ensure it is properly filled with electrolyte [46].
- Solution Contamination: Impurities in the solvent or electrolyte can cause high background. Solution: Use high-purity reagents and run a blank measurement to identify the source of contamination.
Q3: The potentiostat reports a "Voltage Compliance" error during my experiment. What does this mean and how do I fix it?
- High Cell Resistance: The potentiostat cannot maintain the desired potential between the working and reference electrodes, often due to high solution resistance or a disconnected electrode. Solution: Check that all electrodes (Working, Counter, Reference) are fully immersed and properly connected. Ensure your solution contains a sufficient concentration of supporting electrolyte to carry current. If using a quasi-reference electrode, ensure it is not touching the working electrode [46].
Q4: When I repeat my DPV/SWV scan, the peak current and potential shift significantly. How can I improve reproducibility?
- Unstable Reference Electrode: This is a common cause of potential drift. Solution: Use a high-quality, stable reference electrode (e.g., Ag/AgCl) and confirm it is functioning correctly. A blocked frit is a typical culprit [46].
- Unclean or Changing Electrode Surface: The electrode surface may not be regenerated consistently between scans. Solution: Implement a standardized and rigorous electrode cleaning and pretreatment protocol before each measurement. For modified electrodes, ensure the modification process is highly reproducible [42] [46].
Q5: How do I choose between DPV and SWV for my specific drug analysis?
- Choose DPV when: Your primary goal is achieving the lowest possible detection limit for quantitative analysis, especially if the electrochemical reaction of your drug is irreversible [41].
- Choose SWV when: You need to perform very fast scans, want to gather kinetic information about the redox reaction, or are analyzing a reversible system. SWV also allows for efficient signal averaging due to its speed [41].
Diagram 2: Troubleshooting Logic Flowchart
Performance Benchmarks: Reported Sub-Micromolar LODs
The following table summarizes recent case studies where electrochemical sensors successfully achieved sub-micromolar (sub-µM) limits of detection for various NSAIDs and antibiotics, highlighting the key materials and techniques employed.
Table 1: Experimental Performance of Sensors for NSAIDs and Antibiotics
| Target Analyte | Sensor Platform / Modification | Electrochemical Technique | Reported LOD | Linear Range | Sample Matrix |
|---|---|---|---|---|---|
| Paracetamol (NSAID) | EuZrO3-modified Carbon Paste Electrode (EZO-ME1) [47] | Not Specified (Voltammetry) | 0.096 µM | 0.1 - 1.0 µM | Commercial tablets |
| Ciprofloxacin (Antibiotic) | Nanomaterial-modified electrodes [48] | Voltammetry | Sub-µM levels (Specific value not given) | Not Specified | Water / Biological |
| Retinoic Acid | MoS2-modified SPCE with Gelatin Gel Electrolyte [49] | Differential Pulse Voltammetry (DPV) | 9.77 µM | 50.0 µM – 1.00 mM | Pharmaceutical formulations |
| Serotonin (in complex biofluids) | MWCNT/AuNP/Molecularly Imprinted Polymer [25] | Differential Pulse Voltammetry (DPV) | 1.0 µM | Not Specified | Plasma |
| Various NSAIDs & Antibiotics | Hybrid nanomaterial-modified electrodes [15] | DPV, SWV, CV | Consistently sub-µM | Not Specified | Biological & Environmental |
Detailed Experimental Protocols
Protocol: Fabrication of a Rare-Earth Perovskite-Modified Sensor for Paracetamol
This protocol is adapted from the development of a EuZrO3-modified carbon paste electrode for ultrasensitive paracetamol detection [47].
1. Synthesis of Europium Zirconate (EuZrO₃) Nanomaterial:
- Method: Use a high-temperature solid-state synthesis route.
- Atmosphere: Perform the synthesis under a reducing atmosphere to achieve the desired crystallographic phase and electrochemical properties.
- Characterization: Confirm the formation of a phase-pure orthorhombic perovskite structure using X-ray Diffraction (XRD). Estimate the average crystallite size via the Scherrer equation (e.g., ~23 nm).
2. Fabrication of the Modified Carbon Paste Electrode (EZO-ME1):
- Preparation of Modified Paste: Thoroughly mix a precise ratio of graphite powder, synthesized EuZrO₃ nanoparticles, and a suitable binder (e.g., mineral oil or paraffin) in an agate mortar to form a homogeneous, stiff paste.
- Packing the Electrode: Pack the resulting composite paste firmly into the cavity of a commercial electrode body (e.g., a Teflon sleeve with an electrical contact).
- Surface Renewal: Prior to each measurement, smooth the electrode surface on a clean sheet of weighing paper or against a glass slide to obtain a fresh, reproducible electroactive surface.
3. Electrochemical Detection and Optimization:
- Technique: Use a voltammetric technique (e.g., Differential Pulse Voltammetry or Square-Wave Voltammetry) for quantitative analysis due to its high sensitivity and low background current [15].
- Optimal Conditions: Perform detection in a phosphate buffer solution at physiological pH (7.0) to maximize the sensor's performance and mimic biological conditions.
- Calibration: Record the electrochemical signal (e.g., oxidation peak current) for a series of standard paracetamol solutions. Plot the current versus concentration to establish a calibration curve for determining unknown samples.
Protocol: General Approach for Nanomaterial-Enhanced Detection of Antibiotics
This generalized protocol is based on common strategies reviewed for detecting antibiotics like ciprofloxacin and various NSAIDs [15] [50] [48].
1. Electrode Substrate Selection:
- Common Choices: Select a suitable base electrode. Common choices include:
- Glassy Carbon Electrodes (GCE)
- Screen-Printed Carbon Electrodes (SPCE) for portability
- Carbon Paste Electrodes (CPE)
2. Electrode Surface Modification:
- Objective: Enhance electrocatalytic activity, increase surface area, and improve electron transfer kinetics.
- Material Choices:
- Carbon Nanomaterials: Graphene oxide (GO), reduced GO (rGO), Multi-Walled Carbon Nanotubes (MWCNTs) [25] [50] [48].
- Metal Nanoparticles: Gold (Au), Silver (Ag), or their oxides for catalytic signal amplification [25] [51].
- Polymers: Conductive polymers or Molecularly Imprinted Polymers (MIPs) to impart selectivity and antifouling properties [25].
- Modification Method: Apply the modifier(s) to the electrode surface using drop-casting, electrodeposition, or other coating techniques.
3. Detection and Analysis in Complex Matrices:
- Technique Selection:
- Matrix Effects Management:
- Use a Molecularly Imprinted Polymer (MIP) layer to selectively pre-concentrate the target analyte and exclude interfering substances from complex samples like plasma [25].
- Employ a standard addition method or extensive sample dilution to minimize matrix effects during quantification in biological or environmental samples.
Experimental Workflow and Material Functions
Sensor Development and Detection Workflow
The following diagram illustrates the standard workflow for developing and using a nanomaterial-modified electrochemical sensor.
How a Modified Electrode Enhances Signal
This diagram visualizes the signal amplification mechanism at the nanomaterial-modified electrode surface.
The Scientist's Toolkit: Key Research Reagent Solutions
Table 2: Essential Materials and Reagents for Sensor Development
| Item / Reagent | Function / Application in Research |
|---|---|
| Screen-Printed Electrodes (SPCEs) | Disposable, portable, and cost-effective transducer platforms ideal for field-deployable and point-of-care sensor designs [15] [49]. |
| Carbon Nanotubes (CNTs) & Graphene | Enhance electron transfer kinetics and provide a high surface area for analyte immobilization, significantly boosting sensitivity [15] [25] [50]. |
| Metal Nanoparticles (Au, Ag) | Act as electrocatalysts to lower oxidation/reduction overpotentials and serve as excellent platforms for immobilizing biorecognition elements [25] [51]. |
| Molecularly Imprinted Polymers (MIPs) | Synthetic receptors that create specific cavities for a target molecule, imparting high selectivity and robust antifouling properties in complex matrices [25]. |
| Differential Pulse Voltammetry (DPV) | An electrochemical technique that minimizes charging (capacitive) current, allowing for highly sensitive measurement of Faradaic current and trace-level quantification [15] [49] [25]. |
Troubleshooting Guide & FAQs
Q1: My sensor's baseline current is unstable and shows high noise, especially in biological samples. What could be the cause? A: This is a classic symptom of electrode fouling. Bio-macromolecules (e.g., proteins) in the sample can non-specifically adsorb to the electrode surface, blocking active sites and impairing electron transfer.
- Solution: Incorporate an antifouling layer on your sensor. A thin layer of a permeable membrane (like a Molecularly Imprinted Polymer) can selectively allow the target analyte to reach the electrode while excluding larger interferents [25].
Q2: I am working with a water-insoluble pharmaceutical compound. How can I adapt my electrochemical assay? A: Using organic solvents in conventional liquid electrolytes is problematic due to low conductivity and safety concerns.
- Solution: Employ a specialized gel electrolyte system. Recent studies have developed gelatin-based gels cross-linked with boric acid and plasticized with lactic acid, which show excellent compatibility with organic solvents and can dramatically enhance sensitivity for hydrophobic analytes like retinoic acid [49].
Q3: The reproducibility between my individually fabricated sensors is poor. How can I improve this? A: Poor reproducibility often stems from inconsistent manual modification of electrode surfaces.
- Solution:
- Standardize Modification Protocols: Precisely control parameters like modifier concentration, volume dropped, and drying conditions (time, temperature).
- Utilize Screen-Printed Electrodes: SPCEs offer high batch-to-batch consistency compared to lab-made electrodes [49].
- Apply Statistical Design of Experiments (DoE): Use DoE to systematically identify and optimize critical fabrication factors that influence sensor-to-sensor variability [25].
Q4: What is the most critical factor in achieving a sub-micromolar Limit of Detection (LOD)? A: While multiple factors contribute, the choice of electrode modifier and signal amplification strategy is paramount. The integration of advanced nanomaterials (e.g., MXenes, perovskite oxides, metal-organic frameworks) is consistently reported as the key driver for achieving sub-µM and even nanomolar LODs. These materials provide a high density of electrocatalytic sites and facilitate efficient electron transfer, which directly amplifies the analytical signal relative to the background [15] [50] [47].
Overcoming Common Challenges and Fine-Tuning Analytical Performance
Mitigating Electrode Fouling and Matrix Effects in Complex Samples
Troubleshooting Guides
Guide to Resolving pH/ORP Electrode Performance Issues
Problem: Electrode is difficult to calibrate, sluggish, or erratic
| Observed Symptom | Likely Cause | Immediate Action | Cleaning Procedure |
|---|---|---|---|
| Difficulty achieving stable reading or "Bad Cal" message | Environmental noise or handling interference | Place instrument flat on table; press ENTER quickly when Cal LED flashes without handling the unit. Ensure solution is stirred during measurement. [52] | Not applicable |
| Noisy, erratic, or sluggish readings; calibration difficulty | Clogged reference junction (most common) | Soak electrode in hot water (~60°C) for 5-10 minutes. Cool, then place in pH 4.01 reference solution for 5 minutes. Attempt recalibration. [52] | If simple hot water fails, proceed with:• Soak in warm (60°C) storage solution (3M KCl), cool, then pH 4 solution. [52]• Soak in 0.1M HCl or HNO₃ for 1 hour. [53] [52]• Soak in 1:10 dilution of bleach with 0.1% detergent in hot water for 15 mins. [52] |
| Poor pH sensitivity and response | Fouled glass membrane | Cycle electrode tip between 0.1M HCl (15 sec) and 0.1M NaOH (15 sec), rinsing with DI water between cycles. Check performance in pH 4.00 and 7.00 buffers. [52] | This chemical cycling cleans the glass membrane without abrasive damage. [52] |
Verification Step (Meter Test):
- Put instrument in pH mode.
- Remove electrode and short-circuit the BNC connector's center pin to its outer metal sheath.
- Reading should be pH 7.00 ±0.5. If outside this range, the meter is likely faulty. [52]
Guide to Diagnosing LC-MS Matrix Effects
Problem: Diminished, augmented, or irreproducible analyte response in LC-MS
| Diagnostic Step | Observation | Indicated Problem | Recommended Solution |
|---|---|---|---|
| Inspect sample preparation technique | Significant ion suppression with Protein Precipitation (PPT) | High levels of residual phospholipids and matrix components co-extracting with analytes. [54] [55] | Switch to mixed-mode SPE or LLE. [54] Implement targeted phospholipid depletion (e.g., HybridSPE-Phospholipid). [55] |
| Analyze order of sample analysis | Matrix effect variability changes between interleaved vs. block sample analysis schemes | Sample carry-over or progressive source fouling affecting reproducibility. [56] | Use an interleaved sample analysis order for more sensitive detection of matrix effect variability. Report the sample order used. [56] |
| Evaluate sample type | Strong matrix effects with lipemic or hemolyzed plasma | Different composition of matrix lots, especially lipemic plasma, causes variable interference. [56] | Evaluate method with more than one source of lipemic and hemolyzed plasma during validation. [56] |
| Check chromatographic conditions | Phospholipids co-elute with analytes | Phospholipid-induced ionization suppression decreases sensitivity and precision. [55] | Optimize mobile phase pH to alter retention of basic compounds vs. phospholipids. Use UPLC for reduced matrix effects. [54] |
Frequently Asked Questions (FAQs)
Q1: What is the most effective sample preparation technique to minimize matrix effects in LC-MS bioanalysis? A systematic comparison reveals that polymeric mixed-mode solid-phase extraction (combining reversed-phase and ion exchange mechanisms) produces the cleanest extracts by dramatically reducing residual matrix components like phospholipids, leading to significant reduction in matrix effects. Protein precipitation is the least effective method, while liquid-liquid extraction provides clean extracts but may suffer from poor recovery of polar analytes. [54]
Q2: How does sample analysis order influence the matrix effect, and what is the best practice? The order of sample analysis (interleaved vs. block schemes) significantly impacts the measured matrix effect variability. An interleaved scheme, where pure solutions and post-extraction samples are analyzed in alternating order, is generally more sensitive in detecting the matrix effect than a block scheme. For ensuring repeatable experiments, it is crucial to report the order of samples used during analysis. [56]
Q3: My electrochemical sensor's performance degrades in complex biofluids. What strategies can prevent fouling? Incorporating a robust antifouling coating is a key strategy. Research shows that a 3D porous cross-linked matrix of Bovine Serum Albumin (BSA) with 2D g-C₃N4, supported by conductive bismuth tungstate (Bi₂WO₆), effectively prevents nonspecific interactions. This composite can maintain 90% of the signal after one month in untreated human plasma and serum, providing a stable platform for sensitive detection. [57]
Q4: What are the specific cleaning recommendations for electrodes fouled by different substances? The cleaning method must match the fouling material:
- Proteins: Submerge the electrode in 0.4% HCl with 5 g/L pepsin for several hours. [53]
- Fats and Oils: Gently wipe the electrode tip with a clean cloth soaked in isopropyl alcohol, detergent, or acetone. [53]
- Acidic Process Coatings: Use a strong base like 4% NaOH. Soak for 5-10 minutes. [53]
- Basic Process Coatings: Use a strong acid like 4% HCl. Soak for 5-10 minutes. [53] Always rinse with water and rehydrate in storage solution for 10 minutes before use. [53]
Q5: Why are phospholipids particularly problematic in LC-MS analysis of plasma/serum? Phospholipids are major components of cell membranes and are notorious for causing matrix-induced ionization suppression and source fouling. They co-extract with analytes during simple sample prep (like protein precipitation), often co-elute with analytes during chromatography, and compete for charge in the electrospray ionization source. This leads to diminished and irreproducible analyte response, increased quantitation limits, and reduced column lifetime. [55]
Experimental Protocols
Protocol: Preparation of an Antifouling Bismuth-Composite Electrode
This protocol details the creation of a robust, antifouling coating for electrochemical sensors, enabling reliable operation in complex matrices like plasma and serum. [57]
Workflow Overview:
Materials and Reagents:
- Bovine Serum Albumin (BSA)
- g-C₃N4 (two-dimensional conductive nanomaterial)
- Flower-like Bismuth Tungstate (Bi₂WO₆)
- Glutaraldehyde (GA, cross-linker)
Step-by-Step Procedure:
- Formulate Pre-polymerization Solution: In a vial, combine BSA and g-C₃N4 as the main functional monomers.
- Add Cross-linker and Anchor: Introduce glutaraldehyde as the cross-linker and flower-like bismuth tungstate as a heavy metal co-deposition anchor to the solution.
- Disperse the Mixture: Subject the pre-polymerization solution to mixing and ultrasonic treatment to achieve a uniform dispersion.
- Apply the Coating: Immediately drop-coat the dispersed solution onto the surface of the target electrode.
- Form Polymer Matrix: Allow the coating to form a 3D porous, cross-linked polymer matrix on the electrode surface. The glutaraldehyde cross-links the BSA and g-C₃N4, creating a stable, porous structure embedded with the bismuth-based composite.
- Performance Validation: Evaluate the prepared sensor using Cyclic Voltammetry (CV) in a standard potassium ferrocyanide/ferricyanide redox system. Analyze the peak potential difference (ΔEp) and current density to assess electron transfer kinetics and antifouling properties.
Protocol: Reducing LC-MS Matrix Effects via Mixed-Mode SPE
This protocol outlines a systematic strategy for sample preparation to minimize matrix effects, particularly from phospholipids in plasma samples. [54]
Materials and Reagents:
- Polymeric mixed-mode SPE sorbents (e.g., containing both reversed-phase and ion exchange functionalities)
- Plasma or serum samples
- Appropriate solvents for conditioning, washing, and elution
Step-by-Step Procedure:
- Select SPE Sorbent: Choose a polymeric mixed-mode SPE sorbent that incorporates both reversed-phase and ion exchange retention mechanisms over simpler alternatives like pure cation exchange or reversed-phase SPE.
- Sample Preparation: Process the biological sample (e.g., plasma) according to the optimized protocol for the selected mixed-mode SPE cartridge. This typically involves conditioning, sample loading, washing, and elution steps.
- Chromatography Optimization: Couple the sample preparation with optimized chromatography:
- Mobile Phase pH: Manipulate the pH of the mobile phase to alter the retention time of basic analytes relative to phospholipids, whose retention is largely pH-independent. This helps to temporally separate analytes from matrix interferences.
- UPLC Technology: Utilize Ultra-Performance Liquid Chromatography (UPLC) instead of traditional HPLC. A paired t-test has demonstrated a statistically significant improvement in reducing matrix effects with UPLC, in addition to its benefits in resolution, speed, and sensitivity. [54]
- Evaluation: Measure the reduction in matrix effects by comparing the signal of analytes in post-extraction spiked samples to that in pure solutions.
The Scientist's Toolkit: Essential Research Reagents & Materials
| Reagent / Material | Function / Application | Key Benefit / Rationale |
|---|---|---|
| Mixed-Mode SPE Sorbents | Sample clean-up for LC-MS; combines reversed-phase & ion exchange. [54] | Most effective for removing phospholipids & matrix components, significantly reducing matrix effects vs. PPT. [54] |
| HybridSPE-Phospholipid | Targeted depletion of phospholipids from plasma/serum. [55] | Zirconia-silica particles selectively bind phospholipids via Lewis acid/base interaction. [55] |
| Biocompatible SPME (bioSPME) | Micro-extraction and clean-up of analytes from biological fluids. [55] | Concentrates analytes without co-extraction of large matrix biomolecules (e.g., proteins). [55] |
| BSA/g-C₃N₄/Bi₂WO₆ Composite | Antifouling coating for electrochemical sensors. [57] | 3D porous cross-linked matrix prevents nonspecific binding, maintains ~90% signal in biofluids for a month. [57] |
| Pepsin in 0.4% HCl | Cleaning solution for protein-fouled electrodes. [53] | Enzymatically breaks down and dissolves protein coatings on pH-sensitive glass. [53] |
| 0.1M HCl / 0.1M NaOH | Cyclic cleaning for fouled glass membranes. [52] | Chemical cycling effectively cleans the glass membrane without abrasive damage. [52] |
Optimizing Electrode Modification and Electrolyte Conditions
Troubleshooting Guides and FAQs
Electrode Modification Issues
FAQ: My electrode shows unstable signals and high background noise after surface modification. What could be the cause?
This is often caused by inhomogeneous coating or agglomeration of the modifying material on the electrode surface. Agglomeration creates uneven active sites and can trap impurities, leading to noisy and irreproducible signals [58].
Troubleshooting Guide:
| Problem | Possible Causes | Solutions |
|---|---|---|
| Unstable signals & high noise [58] | Agglomeration of modifier; Inhomogeneous coating; Electrode surface contamination [59]. | - Use electrochemical deposition for more uniform films [58].- Implement electrowetting or use highly hydrophobic surfaces during drop-casting to prevent the "coffee-ring" effect [60].- Clean electrode thoroughly before modification (e.g., CV in ferrocyanide) [59]. |
| Poor reproducibility | Non-reproducible modification; Strong anisotropy of the modifying phase; Uncontrolled film thickness [60]. | - Prefer electrochemical methods (potentiostatic/potentiodynamic) for better control [60] [58].- Standardize modification parameters (time, concentration, potential) [58].- Use spin coating for uniform thin films [60]. |
| No change in signal after functionalization | Surface contamination blocking modification; Incorrect modification procedure; Lack of a necessary foundational layer [59]. | - Verify a clean, active surface with a redox probe like ferrocyanide before modification [59].- Ensure all prerequisite layers are applied (e.g., a Self-Assembled Monolayer for EDC/NHS coupling) [59].- Characterize the surface after each modification step [59]. |
| Unexpected redox peaks in voltammogram | Contamination from reference electrode (e.g., silver); Impurities in electrolyte or modifier solution [59]. | - Test a fresh, unused electrode to check for manufacturing defects [59].- Avoid harsh electrolytes that can dissolve reference electrode components [59].- Use high-purity reagents and ensure proper storage of electrodes [59]. |
FAQ: Why is my electrode's sensitivity lower than expected after applying a graphene oxide (GO) coating?
The coating method significantly impacts the performance. Drop casting can lead to large agglomerations that block active sites and create slow mass transport, while dip coating may provide insufficient coverage [58]. Electrodeposition is often the most reproducible and effective method, resulting in a stable coating that enhances sensitivity [58].
Experimental Protocol: Optimizing Graphene Oxide Coating on Carbon-Fiber Microelectrodes (CFMEs) [58]
- Objective: To achieve a uniform and sensitive GO-modified CFME for dopamine detection.
- Materials: Commercial GO powder, CFME, ultrasonic homogenizer, potentiostat, standard three-electrode cell.
- GO Solution Preparation: Dissolve GO powder in DI water with 0.1 M NaCl and 0.001 M sodium dodecyl sulfate (SDS) to a concentration of 0.2 mg/mL. Homogenize using an ultrasonic tissue homogenizer for 1 hour before use.
- Coating Methods Compared:
- Dip Coating: Dip the CFME in the GO solution for 5-10 minutes. This method often results in minimal coating [58].
- Drop Casting: Apply 20 μL of GO solution to cover the CFME tip on a glass slide on a 65°C hot plate. This can cause agglomerations and noisy signals [58].
- Electrodeposition (Recommended): Place the CFME in an electrochemical cell with the GO dispersion. Apply a cyclic voltammetry waveform scanned from -1.2 V to 1.5 V at 100 mV/s for 5 cycles [58].
- Validation: The optimized GO/CFME showed a two-fold enhancement in the dopamine oxidation current compared to a bare CFME, with a limit of detection of 11 nM [58].
Electrolyte and Electrochemical Cell Issues
FAQ: I observe a large, distorted reduction wave at very negative potentials. What is happening?
This is likely due to oxygen reduction, compounded by instrument limitations. The distortion and flattening of the wave can indicate a "compliance voltage issue," where your potentiostat cannot deliver enough current to maintain the desired potential, often due to a small counter electrode on screen-printed electrodes or a low-power potentiostat [59].
Troubleshooting Guide:
| Problem | Possible Causes | Solutions |
|---|---|---|
| Distorted waveform at extreme potentials [59] | Potentiostat compliance voltage issue; Limiting current density of the electrolyte [61]. | - Use a potentiostat with a higher compliance voltage [59].- Limit the potential scan range to avoid extreme values [59].- Increase electrolyte conductivity (e.g., higher salt concentration) [61]. |
| High ohmic overpotential & slow reactions | Low conductivity electrolyte; Large distance between electrodes [61]. | - Choose an electrolyte with high specific conductivity (e.g., NaCl-saturated brine) [61].- Optimize cell geometry to minimize electrode spacing (d) [61]. |
| Unexpected reaction products / low efficiency | Unwanted side reactions at the electrodes; Poor electrode selectivity [61]. | - Use a divided cell with a diaphragm or ion-selective membrane to separate anode and cathode compartments [61].- Select specialized electrode materials (e.g., oxygen-selective anodes) to suppress competing reactions [61]. |
Experimental Protocol: Evaluating Electrolyte and Cell Conditions [61]
- Objective: To minimize resistive losses and maximize current efficiency in an electrochemical cell.
- Key Parameters:
- Ohmic Overpotential (ηohmic): Calculate using ηohmic = (i * d) / k, where
iis current density,dis electrode spacing, andkis electrolyte conductivity. Use high-conductivity electrolytes to reduce this value [61]. - Limiting Current Density (i_lim): This is the maximum current before mass transport is overwhelmed. It is influenced by ion concentration, diffusion coefficient, and boundary layer thickness [61].
- Ohmic Overpotential (ηohmic): Calculate using ηohmic = (i * d) / k, where
- Optimization Strategy:
- Electrolyte Choice: Prioritize electrolytes with high conductivity. For example, NaCl-based brines offer lower ohmic overpotential and higher limiting current densities compared to electrolytes saturated with less soluble minerals [61].
- Cell Design: Use a divided cell with an ion-permeable membrane to increase reaction selectivity and product purity [61].
- Electrode Material: Select electrode materials (electrocatalysts) with high exchange current densities for the desired reaction to improve efficiency [61].
The Scientist's Toolkit: Key Research Reagent Solutions
The following materials are essential for developing high-performance electrochemical sensors for pharmaceutical analysis [62] [60] [58].
| Material | Function in Experiment | Key Consideration |
|---|---|---|
| Gold Electrodes (e.g., screen-printed) | Common substrate for biosensor development due to its excellent conductivity and ease of functionalization [62] [59]. | Requires pristine cleaning before modification. Contamination (e.g., silver migration) can block active sites [59]. |
| Sulfuric Acid (H₂SO₄) | Used for electrochemical activation and cleaning of gold electrodes, creating a fresh, reproducible surface [62]. | A specific treatment protocol was shown to yield electrodes with superior detection limits for dopamine [62]. |
| Self-Assembled Monolayer (SAM) Thiols | Form well-ordered, stable monolayers on gold, providing a platform for further biomolecule attachment (e.g., via EDC/NHS chemistry) [62] [59]. | A foundational SAM is often required before using coupling agents like EDC/NHS [59]. |
| Graphene Oxide (GO) | A carbon nanomaterial that enhances electrode sensitivity by providing more adsorption sites via its oxygen functional groups [58]. | The coating method is critical. Electrodeposition is more reproducible and effective than drop-casting or dip-coating [58]. |
| Potassium Ferrocyanide ([Fe(CN)₆]⁴⁻) | A standard redox probe used to characterize electrode cleanliness, active surface area, and electron transfer kinetics after modification [59]. | A clean, active electrode shows a reversible, well-defined peak. A blocked or contaminated surface shows a degraded signal [59]. |
| EDC/NHS Coupling Reagents | Crosslinking agents used to activate carboxyl groups, enabling covalent immobilization of biomolecules (e.g., enzymes, antibodies) onto the electrode surface [59]. | Effective only if the surface or SAM already contains carboxyl groups [59]. |
The ultimate goal of these optimizations is to improve sensor performance, particularly the detection limit. The table below summarizes quantitative results from studies on dopamine detection, a key neurotransmitter in pharmaceutical research.
| Electrode Modification | Analytic | Key Performance Metrics | Reference |
|---|---|---|---|
| Sulfuric Acid-treated Au Electrode (with AuNPs & Laccase) | Dopamine | LOD: 13.4 nMSensitivity: 3.7 μA·mM⁻¹·cm⁻²Linear Range: 0.1 – 200 μM [62] | [62] |
| Graphene Oxide/CFME (via Electrodeposition) | Dopamine | LOD: 11 nMSensitivity: 41 ± 2 nA/μMLinear Range: 25 nM – 1 μM [58] | [58] |
The Role of Data Processing and AI in Noise Reduction and Signal Enhancement
Technical Support Center
This support center provides troubleshooting guides and FAQs for researchers using data processing and Artificial Intelligence (AI) to optimize the detection limit of electrochemical methods in pharmaceutical research.
Troubleshooting Guides
Issue 1: Poor Signal-to-Noise Ratio (SNR) in Electrochemical Data A low SNR can obscure weak signals from trace-level analytes, directly impacting your detection limit.
Potential Cause & Solution: Inadequate Sensor Surface or Material.
- Explanation: The physicochemical properties of your electrode material (e.g., conductivity, surface area) are fundamental to signal strength and stability. Inconsistent manual preparation can lead to high batch-to-batch variation and poor reproducibility [63].
- Actionable Protocol:
- Consider modifying your electrode with nanomaterials to enhance its active surface area and electron transfer kinetics. Promising materials include:
- Utilize AI-driven material screening to identify optimal nanocomposites or functionalization strategies for your specific pharmaceutical analyte, moving beyond empirical optimization [63].
Potential Cause & Solution: Suboptimal Data Processing.
- Explanation: Relying solely on raw data without advanced filtering fails to isolate the signal from complex background noise.
- Actionable Protocol:
- Preprocessing: Apply techniques like normalization or smoothing to condition your data [65].
- AI-Enhanced Filtering: Implement a machine learning model, such as a Denoising Autoencoder, to learn the noise profile of your system and reconstruct a clean signal. Train the model on a dataset containing both noisy measurements and corresponding "clean" signals (or established baselines) from your specific experimental setup [65] [63].
Issue 2: Model Overfitting in AI-Enhanced Signal Processing The model performs well on training data but fails to generalize to new experimental data, leading to unreliable predictions.
- Potential Cause & Solution: Model Complexity and Data Quality.
- Explanation: An overly complex model may learn the noise and specific artifacts of the training set instead of the underlying signal pattern. This is often exacerbated by limited or poor-quality training data [66].
- Actionable Protocol:
- Data Quality: Ensure your training dataset is large, accurately labeled, and encompasses the full range of experimental variability (e.g., different pH, ionic strength, interferents) you expect to encounter [63].
- Techniques to Prevent Overfitting:
- Cross-validation: Use k-fold cross-validation to robustly assess model performance.
- Regularization: Apply L1 (Lasso) or L2 (Ridge) regularization to penalize model complexity.
- Simplify the Model: Reduce the number of model parameters or layers [66].
Issue 3: Inconsistent Performance in Complex Sample Matrices The sensor or AI model works well in buffer solutions but performance degrades in real pharmaceutical samples like blood, plasma, or tissue homogenates.
- Potential Cause & Solution: Matrix Effects and Environmental Interference.
- Explanation: Complex sample matrices introduce confounding factors such as fouling agents, variable pH, and ionic strength, which can suppress the signal or generate interfering responses [39] [63].
- Actionable Protocol:
- Sample Preparation: Optimize sample cleanup procedures (e.g., protein precipitation, solid-phase extraction) to reduce interferent load.
- AI-Driven Adaptive Correction: Develop machine learning models that can learn and correct for specific matrix effects. Train your model using data collected from the target matrix (e.g., spiked plasma samples) so it can learn to distinguish the target signal from background interference [63]. Techniques like electrochemical impedance spectroscopy (EIS) can be particularly useful for characterizing interface changes due to fouling [39].
Frequently Asked Questions (FAQs)
Q1: What are the most effective AI techniques for enhancing electrochemical signals? The optimal technique depends on your specific goal. Machine Learning (ML) and Deep Learning (DL) are highly effective. Key approaches include:
- For Signal Denoising: Denoising Autoencoders and other deep neural networks can remove background noise while preserving the critical faradaic signal [65] [63].
- For Multicomponent Analysis: Graph Neural Networks (GNNs) and other multivariate models can deconvolute overlapping signals from multiple analytes, a common challenge in complex pharmaceutical samples [63].
- For Predictive Modeling: ML models can predict optimal electrochemical parameters (e.g., pulse amplitude, deposition potential) to maximize the signal for a given analyte [63].
Q2: How can I obtain high-quality data to train my AI models? High-quality, annotated data is the foundation of a robust AI model. Key strategies include:
- Internal Data Generation: Design rigorous experiments that systematically vary key parameters (analyte concentration, pH, temperature, interferents) to build a comprehensive dataset.
- Leverage Specialized Platforms: For large-scale projects, consider using specialized data annotation platforms. These platforms provide access to a global workforce of expert labelers who can accurately annotate complex data, ensuring high-quality training sets. They often feature multi-stage quality assurance and scalable solutions [65].
Q3: What key metrics should I use to validate the performance of my noise reduction strategy? Validation should include both objective metrics and, where possible, subjective expert review.
- Objective Metrics:
- Signal-to-Distortion Ratio (SDR): Measures the level of distortion introduced by the processing [65].
- Peak Signal-to-Noise Ratio (PSNR): A common metric for evaluating the quality of reconstructed signals or images [65].
- Calibration Curve Improvement: The primary measure of success is an improved calibration curve (e.g., higher R² value, lower error bars) and a calculated lower Limit of Detection (LOD) and Limit of Quantification (LOQ) post-processing.
- Subjective Validation: Incorporate feedback from domain experts to perceptually validate the quality and reliability of the processed data [65].
Q4: Our lab lacks in-house AI expertise. What is the best way to get started? You have several viable paths to adoption:
- Reskilling Existing Staff: Invest in training for chemists, biologists, and lab technicians in data science fundamentals. This is often a cost-effective strategy that boosts retention and embeds AI knowledge directly within R&D teams [67].
- Hiring "AI Translators": Look for professionals who bridge the gap between data science and pharmaceutical domain knowledge. These individuals can translate a scientific problem into an AI-solvable task and interpret the results [67].
- Strategic Partnerships: Collaborate with AI tech companies, startups, or academic labs to access specialized expertise and accelerate project timelines without the immediate need for full internal hiring [67].
Experimental Protocol: AI-Assisted Signal Denoising for Voltammetric Data
This protocol details a methodology for applying a Denoising Autoencoder to enhance the signal quality from square wave voltammetry (SWV), a common technique in electrochemical pharmaceutical analysis.
1. Hypothesis: A deep learning-based denoising autoencoder can effectively isolate the faradaic signal of a target pharmaceutical compound from complex background noise in SWV, thereby lowering the method's detection limit.
2. Materials and Reagents
- Electrochemical Workstation: Capable of performing SWV and EIS.
- Working Electrode: e.g., Glassy Carbon Electrode (GCE).
- Electrode Modification Materials: (As required) e.g., multi-walled carbon nanotubes (MWCNTs), graphene oxide, or specific metal nanoparticles [39].
- Buffer Solution: A suitable electrolyte and pH buffer for your analyte.
- Pharmaceutical Analyte Standard: High-purity reference standard.
- Software: Python with libraries including TensorFlow/Keras or PyTorch for model building, and SciPy for data preprocessing.
3. Step-by-Step Procedure
Phase 1: Data Acquisition and Preprocessing
- Step 1.1: Acquire a large set of SWV measurements across a wide range of analyte concentrations, from well above the expected LOD to trace levels near the noise floor. For each concentration, collect multiple replicates.
- Step 1.2: Intentionally introduce common noise sources into your dataset. This can be done by collecting data under suboptimal conditions (e.g., slightly fouled electrodes, variable temperature, presence of known interferents) to teach the model to be robust.
- Step 1.3: Preprocess the data. This includes:
- Normalization: Scale all voltammograms to a standard range (e.g., 0 to 1).
- Alignment: Ensure all current peaks are aligned to the same potential axis.
- Labeling: For supervised learning, you need a "clean" signal target. This can be established by using the average of many high-concentration, high-SNR measurements or from meticulously controlled buffer baseline scans.
Phase 2: Model Building and Training
- Step 2.1: Design a denoising autoencoder architecture. A simple example:
- Input Layer: Takes the flattened current values from the voltammogram.
- Encoder: A series of dense or 1D convolutional layers that compress the input into a lower-dimensional "latent space" representation. This forces the network to learn the essential features of the signal.
- Decoder: A series of layers that reconstruct the clean voltammogram from the latent representation.
- Step 2.2: Train the model. The objective is to minimize the difference (loss) between the model's output and the corresponding "clean" target signal, despite the noisy input.
Phase 3: Validation and Application
- Step 3.1: Validate the model on a completely separate test dataset that it has never seen during training. Critically assess the output using the metrics listed in the FAQs.
- Step 3.2: Apply the trained model to new, noisy experimental data from trace analyte levels. Compare the calibration curves (peak current vs. concentration) generated from raw data and from AI-denoised data to quantitatively demonstrate the improvement in LOD.
Research Reagent Solutions
The following table details key materials used in advanced electrochemical sensing research for signal enhancement.
| Research Reagent / Material | Function in Signal Enhancement |
|---|---|
| Carbon Nanotubes (CNTs) [39] | Increase electrode surface area and improve electron transfer kinetics, leading to higher current responses. |
| Metal-Organic Frameworks (MOFs) [39] [64] | Provide ultra-high surface area and tunable pores for pre-concentrating analyte molecules, physically amplifying the signal. |
| Denoising Autoencoders (AI Model) [65] [63] | A deep learning architecture trained to remove stochastic noise from electrochemical data, revealing the underlying analytical signal. |
| Boron-Doped Diamond (BDD) Electrode [64] | Offers a wide potential window, low background current, and high resistance to fouling, providing a superior baseline for sensitive detection. |
| Aptamers [63] | Single-stranded DNA or RNA molecules that serve as synthetic recognition elements. They can be selected for high affinity to specific pharmaceutical targets, providing excellent selectivity. |
Workflow and Signaling Pathway Diagrams
The following diagram illustrates the integrated experimental and computational workflow for AI-enhanced electrochemical detection.
AI-Enhanced Electrochemical Detection Workflow
This diagram visualizes the core signaling pathway of an AI-enhanced electrochemical sensor, from molecular recognition to intelligent signal output.
AI Sensor Signaling Pathway
Strategies for Improving Sensor Stability and Reproducibility
FAQs on Core Concepts
What is the difference between sensor stability and reproducibility in electrochemical research?
Stability refers to a sensor's ability to produce a repeatable and consistent response performance over an extended period, ideally for 2–3 years in a good sensor [68]. Key challenges to stability include the degradation of the sensor's biological elements (like aptamers or enzymes), biofouling, and changes in the sensor-tissue interface [68] [69]. Reproducibility, however, concerns the ability to obtain consistent results when an experiment is repeated. This can be assessed by asking: "If someone else tries to repeat my study as exactly as possible, will they draw a similar conclusion?" [70]. A lack of methodological transparency is a major barrier to reproducibility [71].
Why is sensor stability a particular challenge for in vivo or implantable applications?
Implantable sensors face a uniquely harsh environment. Stability is compromised by the body's immune response, which can lead to biofouling (the accumulation of proteins and cells on the sensor surface), mechanical disturbance from patient movement, and changes in local physiology such as oxygen, pH, and blood flow [68]. Furthermore, the mechanical mismatch between rigid traditional sensors and soft biological tissues can cause inflammation and signal drift, limiting long-term stability [72].
How can nanomaterial integration improve sensor performance?
The integration of functional nanomaterials like gold nanoparticles (AuNPs), graphene oxide (GO), and carbon nanotubes (CNTs) can significantly enhance sensor performance. These materials improve electron transfer, provide a large surface area for bioreceptor immobilization, and enable signal amplification, often leading to detection limits in the femtomolar (fM) range [69]. However, a key challenge is that nanomaterials can be prone to aggregation over time, which may compromise long-term stability [68].
What are common sources of false positives and negatives, and how can they be reduced?
False results can arise from interfering substances in complex sample matrices (like serum), non-specific binding, or degradation of the sensing element [69]. The integration of Artificial Intelligence (AI) for data optimization has been shown to significantly reduce false positives and negatives, from a typical range of 15-20% down to 5-10% [73]. Proper validation of key biological reagents and detailed reporting of experimental protocols are also critical for identifying and mitigating these issues [74].
Troubleshooting Guides
Issue: Significant Signal Drift in Harsh Environments
Problem: Sensor output is unstable under conditions of high temperature, pressure, or in corrosive media [75].
Solutions:
- Material Selection: Use core-shell nanostructures or cap nanomaterials with stabilizing agents (e.g., sol-gel materials, ceramics) to prevent aggregation and degradation [68].
- Device Design: For implantable applications, select materials with mechanical properties (like soft, stretchable substrates) that match the target tissue to minimize inflammatory responses and motion artifacts [72].
- Sensor Pretreatment: Subject the sensor to an initial pretreatment or conditioning step before calibration. This can stabilize the electrode surface and reduce the largest drift, which often occurs during initial exposure [68].
Issue: Inability to Reproduce Published Sensor Performance
Problem: Your laboratory cannot replicate the sensitivity or detection limits reported in a peer-reviewed study.
Solutions:
- Enhance Reporting Transparency: Before starting, ensure the original study clearly reports critical parameters. These include the exact algorithms for defining cohort entry dates, exposure durations, and clinical codes for outcomes [71]. If these are missing, you may need to make documented assumptions.
- Implement Detailed Data Management: Maintain an auditable record from raw data to final analysis. This involves keeping the original raw data files, final analysis files, and all data management programs. Replace manual "point-and-click" data cleaning in programs like Excel with scripted, version-controlled code to ensure every change is documented [70].
- Validate Key Reagents: Use authenticated biological reagents and reference materials. Cell line misidentification, for example, is a known cause of irreproducibility. Source materials from certified suppliers that provide a certificate of analysis [74].
Issue: Poor Long-Term Stability and Short Sensor Lifespan
Problem: Sensor sensitivity degrades rapidly over days or weeks, making it unsuitable for long-term monitoring.
Solutions:
- Aptamer Stabilization: To protect against nuclease degradation in physiological conditions, chemically modify aptamers using locked nucleic acids (LNAs) or through conjugation with polyethylene glycol (PEG) [69].
- Encapsulation Strategies: Encapsulate sensitive biological elements, such as enzymes, within metal-organic frameworks (MOFs). This has been demonstrated to improve the temperature and pH stability of the encapsulated molecule [68].
- Monitor Key Parameters: Regularly test sensor stability by storing it in a relevant buffer (e.g., PBS with a target analyte) and performing daily calibrations to track changes in sensitivity and linearity [68].
Experimental Protocols for Validation
Protocol 1: In-Vitro Stability and Calibration Testing
Objective: To systematically evaluate the operational and storage stability of an electrochemical aptasensor.
Methodology:
- Storage Conditions: Store the fabricated sensors in phosphate-buffered saline (PBS) with a physiologically relevant concentration of the target analyte (e.g., 5.5 mM glucose) for a minimum of 7 days [68].
- Daily Calibration: Each day, perform a full calibration of the sensor.
- Data Analysis:
- Calculate the sensitivity (slope of the calibration curve), linearity (R² value), and lower detection limit for each day.
- Plot these parameters over the 7-day period to visualize any degradation in performance.
- A stable sensor will show minimal change in sensitivity and a low margin of error in calibration (<2%) [73].
Protocol 2: Reproducibility Assessment for a Novel Sensor
Objective: To determine the intra- and inter-assay reproducibility of a newly developed sensor.
Methodology:
- Intra-Assay (Repeatability):
- Using a single sensor, measure the response to an identical sample concentration (e.g., a mid-range value from the calibration curve) at least five times in a single session.
- Calculate the coefficient of variation (CV) for these measurements.
- Inter-Assay (Reproducibility):
- Fabricate a batch of at least five different sensors using the same protocol.
- Have a second researcher in your lab independently fabricate another batch using the same written protocol.
- Measure all sensors' responses to the same standardized sample.
- Calculate the CV across all sensors from both batches.
- Acceptance Criteria: AI-optimized sensors have demonstrated reproducibility improvements that reduce false positives/negatives to 5-10% and significantly improve calibration accuracy [73]. Aim for a CV of less than 5-10% for both tests, depending on the application's required precision.
Table 1: Performance Metrics of AI-Optimized Electrochemical Aptasensors vs. Ordinary Sensors [73]
| Performance Metric | Ordinary Aptasensors | AI-Optimized Aptasensors |
|---|---|---|
| Sensitivity | 60 - 75% | 85 - 95% |
| Specificity | 70 - 80% | 90 - 98% |
| False Positive/Negative Rate | 15 - 20% | 5 - 10% |
| Response Time | 10 - 15 seconds | 2 - 3 seconds |
| Data Processing Speed | 10 - 20 min per sample | 2 - 5 min per sample |
| Calibration Error Margin | 5 - 10% | < 2% |
Table 2: Detection Limits for Key Biomarkers Using Different Electrochemical Techniques [73]
| Biomarker | Electrochemical Technique | Achievable Detection Limit |
|---|---|---|
| Carcinoembryonic Antigen (CEA) | Electrochemical Impedance Spectroscopy (EIS) | 10 fM |
| Mucin-1 (MUC1) | Electrochemical Impedance Spectroscopy (EIS) | 20 fM |
| Prostate-Specific Antigen (PSA) | Differential Pulse Voltammetry (DPV) | 1 pM |
| Alpha-fetoprotein (AFP) | Square Wave Voltammetry (SWV) | 5 fM |
| Epithelial Cell Adhesion Molecule (EpCAM) | Potentiometric | 100 fM |
Visual Workflows and Diagrams
The Scientist's Toolkit: Essential Research Reagent Solutions
Table 3: Key Materials for Enhancing Sensor Stability and Reproducibility
| Item | Function & Rationale |
|---|---|
| Locked Nucleic Acids (LNAs) | Chemical modification for aptamers that enhances their resistance to nuclease degradation in biological fluids, improving in vivo stability [69]. |
| Metal-Organic Frameworks (MOFs) | Porous structures used to encapsulate and protect enzymes or other sensitive recognition elements, significantly improving their operational stability against temperature and pH changes [68]. |
| Gold Nanoparticles (AuNPs) | A noble metal nanomaterial that facilitates electron transfer in electrochemical sensors, acts as a robust scaffold for aptamer immobilization, and contributes to signal amplification [69]. |
| Carbon Nanotubes (CNTs) | Carbon-based nanomaterials used to modify working electrodes. They provide a high surface area, excellent conductivity, and can enhance the loading of bioreceptors [76] [69]. |
| Parylene-C | A biocompatible polymer used as an ultrathin substrate or conformal coating for implantable sensors. It provides excellent insulation, moisture protection, and mechanical flexibility for stable tissue interfaces [72]. |
| Authenticated Cell Lines | Biologically derived reagents that have been verified (e.g., via STR profiling) to ensure their identity and purity. Using authenticated materials is fundamental to achieving reproducible experimental outcomes [74]. |
Ensuring Accuracy: Method Validation and Comparison of Protocols
For researchers in electrochemical pharmaceutical analysis, demonstrating that a new method is "fit-for-purpose" is a critical step in the validation process. Two powerful, statistics-based approaches have emerged for this: the Accuracy Profile and the Measurement Uncertainty approach. Both provide a holistic view of a method's performance, moving beyond the traditional practice of validating individual parameters (like precision or accuracy) in isolation. The fundamental goal of each is to quantify the total error of your analytical method, allowing you to make reliable statements about the true value of your measured pharmaceutical analyte, such as a drug in a complex biological matrix [77] [78].
Choosing between these approaches, or using them in tandem, is essential for optimizing the detection limit and ensuring the reliability of electrochemical methods in drug development.
Direct Comparison: Uncertainty Profile vs. Accuracy Profile
The table below summarizes the core characteristics of the two validation approaches for easy comparison.
| Feature | Accuracy Profile | Uncertainty Profile |
|---|---|---|
| Core Philosophy | Fitness-for-purpose based on predefined acceptability limits (λ) [77]. |
Quantifies the "doubt" or dispersion of values attributable to a measurand [78]. |
| Graphical Output | A plot showing the β-expectation tolerance interval (e.g., 95%) across concentration levels, overlaid with an acceptability limit [77]. | An uncertainty budget, often resulting in a stated value (e.g., Result ± U), where U is the expanded uncertainty [78]. |
| Decision Rule | The method is valid if the tolerance interval at each concentration level falls entirely within the acceptability limits [77]. | Results are interpreted with their uncertainty; conformity to specifications may require setting "guard bands" to account for doubt [78]. |
| Primary Output | A visual, decision-making tool that directly shows the method's validity over its working range [77]. | A single numerical parameter (the expanded uncertainty) characterizing the dispersion of possible values [78]. |
| Regulatory Emphasis | Prominently featured in pharmaceutical guidance (e.g., SFSTP) [77]. | Required by ISO/IEC 17025 and emphasized in ICH Q2(R1), Q14, and FDA expectations [78]. |
| Key Advantage | Intuitive visual proof of performance and suitability for the intended purpose. | A universally applicable metrological concept that supports risk-based decision-making. |
The following diagram illustrates the logical relationship between the core concepts of accuracy and measurement uncertainty, and how they are synthesized into the respective profiles.
Detailed Methodologies
How to Construct an Accuracy Profile
The Accuracy Profile is built from validation data collected under reproducibility or intermediate precision conditions. The following workflow outlines the key steps.
Experimental Protocol for Accuracy Profile:
- Define the Range and Acceptability: Establish the concentration range of interest for your pharmaceutical analyte (e.g., 1-100 μM for an electrochemical sensor). Set the acceptability limit (
λ) based on the required analytical performance [77]. - Prepare Validation Standards: Independently prepare stock solutions and calibration standards for your target drug. For an electrochemical sensor, this involves spiking the drug into an appropriate buffer or a simulated biological matrix at various concentration levels covering the range (e.g., low, medium, high) [77].
- Execute the Measurement Plan: Analyze each concentration level over multiple series (e.g., different days, by different analysts, or using different potentiostats) to capture intermediate precision. A typical design might involve 3 concentration levels analyzed in duplicate over 3 separate days [77].
- Data Calculation: For each concentration level, calculate the relative bias (for trueness) and the relative standard deviation (for precision). Combine these to construct the β-expectation tolerance interval. The formula can be represented as: Tolerance Interval = Bias ± k * Standard Deviation, where k is a factor covering the desired confidence level [77].
- Graphical Construction and Decision: Plot the tolerance intervals for each concentration level on a graph. The method is considered valid if the entire tolerance interval at each level remains within the pre-defined acceptability limits.
How to Quantify Measurement Uncertainty
The process of quantifying Measurement Uncertainty involves identifying and combining all significant sources of error. A step-by-step approach is recommended.
Step-by-Step Calculation Guide:
- Specify the Measurand: Clearly define what you are measuring (e.g., "the concentration of atenolol in phosphate buffer at pH 7.4, measured via DPV with a SPION-AC/GCE sensor") [78].
- Identify Uncertainty Sources: List all factors that could influence the result. For an electrochemical drug sensor, key sources often include:
- Standard Preparation: Purity of the reference drug standard, volumetric accuracy during dilution [78].
- Instrument Calibration: Accuracy of the potentiostat's applied voltage and measured current. (As per [79], a current accuracy of "0.1% of range, 1 nA max" contributes to uncertainty).
- Method Precision: Random variations observed during repeatability and reproducibility experiments [77] [78].
- Matrix Effects: Impact of complex biological matrices (e.g., plasma, urine) on sensor response, potentially causing signal suppression or enhancement [25] [16].
- Temperature Variation: Fluctuations in laboratory temperature that can affect reaction kinetics and sensor response [78].
- Quantify the Components:
- Type A Evaluation: Quantify uncertainty using statistical analysis of a series of observations. For example, the standard deviation of repeated measurements of the same sample provides a direct measure of random uncertainty [78].
- Type B Evaluation: Quantify uncertainty using means other than statistics, such as manufacturer's specifications (e.g., potentiostat accuracy from its datasheet [79]), calibration certificates, or data from previous studies.
- Calculate Combined Uncertainty: Convert all uncertainty components into standard uncertainties and combine them using the root sum of squares method according to the rules of uncertainty propagation [78].
- Determine Expanded Uncertainty: Multiply the combined standard uncertainty by a coverage factor (typically
k=2), which provides an interval (e.g.,Result ± U) that encompasses the true value with approximately 95% confidence [78].
Troubleshooting Guides & FAQs
Frequently Asked Questions (FAQs)
Q1: My electrochemical sensor works perfectly in buffer, but the accuracy profile fails in plasma samples. What is the most likely cause? A1: This is a classic symptom of matrix effects or electrode fouling. Biological fluids like plasma are rich in proteins and other macromolecules that can non-specifically adsorb to your electrode surface, blocking active sites and altering the electrochemical response. This introduces a significant bias and increases variability, causing your tolerance intervals to widen beyond acceptable limits [25] [16]. To mitigate this, consider modifying your sensor with antifouling membranes (like a thin layer of molecularly imprinted polymer) or using an adsorptive stripping technique to selectively pre-concentrate your target analyte while washing away interferents [25].
Q2: When validating my potentiostat's accuracy, should I trust the manufacturer's specifications, or do I need to verify them? A2: You should always verify critical performance specifications for your application. Manufacturer specifications give you a baseline expectation, but real-world performance can be affected by your specific setup, cables, and software configuration [79]. A simple validation method involves using a high-precision multimeter to measure the voltage or current output by the potentiostat and comparing it to the value reported by the software. For example, if your potentiostat applies 1.000 V, but the multimeter reads 0.998 V, you have quantified a systematic bias that should be accounted for in your uncertainty budget [79].
Q3: How do I set a meaningful acceptability limit (λ) for my accuracy profile? A3: The acceptability limit should be based on the pharmacological or analytical requirements of your method. There is no universal value. For quantifying a drug with a narrow therapeutic window, you may need a tight limit (e.g., ±10%). For other applications, ±15% or ±20% might be acceptable. This decision should be driven by how the results will be used—for instance, to ensure patient safety in therapeutic drug monitoring or to meet regulatory guidelines for quality control [77].
Troubleshooting Guide
| Problem | Potential Causes | Recommended Solutions |
|---|---|---|
| Widening of tolerance intervals at low concentrations | High background noise, insufficient sensor sensitivity, or non-specific binding in complex matrices [25] [16]. | Optimize sensor design with high-surface-area nanomaterials (e.g., CNTs, Au NPs) [25] [80]. Use pulsed voltammetric techniques like DPV to minimize capacitive current [14] [15]. Implement a pre-concentration step (e.g., adsorptive stripping) [25]. |
| Consistent bias across all concentration levels | Systematic error from incorrect standard concentration, potentiostat calibration drift, or unaccounted matrix effect [79] [78]. | Re-calibrate or verify potentiostat accuracy with a precision multimeter [79]. Use a certified reference material to check standard preparation. Re-assess sample preparation and recovery. |
| Poor reproducibility (low precision) between experiment runs | Uncontrolled environmental conditions (temperature), electrode fouling, or variations in sensor surface regeneration [16] [78]. | Strictly control laboratory temperature. Use a robust electrode cleaning/regeneration protocol between measurements. Employ a internal standard if possible. Ensure consistent biomolecule/recognition element immobilization on the sensor surface [24]. |
| Method fails uncertainty requirements due to too many error sources | Overly complex measurement procedure with many difficult-to-control steps [78]. | Simplify the sample preparation workflow. Use an automated liquid handler to reduce volumetric errors. Focus uncertainty reduction efforts on the 1-2 largest contributors identified in your uncertainty budget. |
The Scientist's Toolkit: Research Reagent Solutions
The following table lists key materials and their functions in developing and validating modern electrochemical sensors for pharmaceutical analysis, as highlighted in recent research.
| Material / Reagent | Function in Sensor Development & Validation |
|---|---|
| Carbon Nanotubes (CNTs) | Provide a high-surface-area scaffold that enhances electron transfer kinetics; often used as a base nanomaterial in composite electrodes [25] [16] [15]. |
| Gold Nanoparticles (Au NPs) | Act as electrocatalysts, improving the sensitivity and lowering the overpotential for the oxidation/reduction of target drug molecules [25]. |
| Molecularly Imprinted Polymers (MIPs) | Synthetic receptors that provide high selectivity by creating cavities complementary to the target drug; also impart antifouling properties in biological samples [25]. |
| Screen-Printed Electrodes (SPEs) | Offer a disposable, miniaturized, and portable platform ideal for point-of-care testing; can be mass-produced, enhancing method reproducibility [16] [15]. |
| Nafion | A perfluorosulfonated ionomer used as a binding agent and protective membrane; helps prevent fouling by repelling negatively charged interferents in biological samples [80]. |
| Britton-Robinson (BR) Buffer | A universal buffer used to study the electrochemical behavior of analytes across a wide pH range, which is crucial for method optimization [80]. |
| Certified Reference Material | A substance with one or more property values that are certified by a technically valid procedure, used for calibrating equipment and assessing method trueness/bias [78]. |
| High-Precision Multimeter | An essential tool for the independent verification of the voltage and current outputs of a potentiostat, a key step in validating instrument performance [79]. |
Comparative Analysis of LOD/LOQ Calculation Methods (ICH, SFSTP)
In the field of pharmaceutical analysis, particularly when developing methods for detecting trace-level impurities like nitrosamines or quantifying drugs in biological matrices, the Limit of Detection (LOD) and Limit of Quantification (LOQ) serve as fundamental method validation parameters. These metrics define the operational boundaries of your analytical method, determining the lowest concentrations of an analyte that can be reliably detected and quantified [81] [82]. Establishing correct LOD and LOQ values is not merely an academic exercise—it carries significant regulatory implications, as these parameters directly impact your ability to demonstrate method suitability for its intended purpose, whether for clinical trials, bioequivalence studies, or routine quality control [83].
The International Council for Harmonisation (ICH) and the French Society of Pharmaceutical Sciences and Techniques (SFSTP) have both developed frameworks for determining these critical limits, though their approaches reflect different philosophical and practical considerations [83] [84]. While ICH guidelines provide general principles accepted across regulatory jurisdictions, the SFSTP guide offers a more detailed experimental strategy, particularly for chromatographic methods in bioanalysis [83]. This comparative analysis examines both frameworks within the context of optimizing detection limits for electrochemical pharmaceutical methods, providing practical guidance for researchers navigating the complexities of method validation.
Theoretical Foundations: Understanding LOD and LOQ
Fundamental Definitions and Statistical Principles
The Limit of Detection (LOD) represents the lowest concentration of an analyte that can be reliably distinguished from background noise or a blank sample, but not necessarily quantified with exact precision [81] [82]. Statistically, this represents the point at which you can minimize both false positives (Type I error, α) and false negatives (Type II error, β) in your detection decision [84]. Modern definitions, such as those from ISO and IUPAC, incorporate these probabilistic considerations, defining LOD as the true net concentration that will lead to the conclusion that the component is present with a probability of (1-β) [84].
The Limit of Quantification (LOQ), in contrast, represents the lowest concentration at which the analyte can not only be detected but also quantified with acceptable precision and accuracy under stated experimental conditions [81] [82]. At this level, the method must demonstrate predefined goals for bias and imprecision, making it suitable for reporting quantitative results [3].
The relationship between these parameters is hierarchical: the LOQ is always greater than or equal to the LOD, as quantification imposes stricter requirements than mere detection [3].
Statistical Concepts Underlying LOD/LOQ Determination
The mathematical foundation for LOD and LOQ calculations rests on understanding the statistical behavior of analytical signals at low concentrations. When multiple blank samples (containing no analyte) are measured, the results typically follow a normal distribution around zero concentration with a standard deviation σ₀ [84]. The critical level (LC) represents the decision threshold above which an response is considered to indicate the presence of the analyte, calculated to limit false positives to a specified probability α (typically 5%) [84].
However, using LC alone as the detection limit would result in an unacceptably high rate of false negatives (β error). To protect against both Type I and Type II errors, the LOD must be set higher than LC, incorporating both α and β risks [84]. When both error rates are set at 5% and the standard deviation is assumed constant, this leads to the familiar multiplication factors of 3.3 and 10 for LOD and LOQ respectively when using the standard deviation and slope method [81] [84] [82].
Comparative Analysis of ICH and SFSTP Approaches
ICH Q2(R1) Guideline Framework
The ICH Q2(R1) guideline, "Validation of Analytical Procedures: Text and Methodology," provides internationally recognized recommendations for analytical method validation. For LOD and LOQ determination, ICH describes three primary approaches without prescribing a single mandatory method [82] [8]:
- Visual Inspection: Direct assessment of detection or quantification capability by analyzing samples with known low concentrations of the analyte.
- Signal-to-Noise Ratio: Applying specified signal-to-noise ratios (typically 3:1 for LOD and 10:1 for LOQ) in techniques exhibiting baseline noise such as HPLC.
- Standard Deviation of Response and Slope: Using the standard deviation of blank responses or calibration curve residuals combined with the method's sensitivity (slope).
The ICH approach is characterized by its flexibility, allowing analysts to select the most appropriate method based on the analytical technique and intended application [82]. This flexibility, however, can lead to inconsistencies in implementation and interpretation across different laboratories.
SFSTP Guide Methodology
The SFSTP guide, developed specifically for validating chromatographic methods in bioanalysis, proposes a more structured, two-phase validation strategy consisting of pre-validation and formal validation [83]. This framework emphasizes:
- Experimental design focusing on obtaining maximum information from minimum experiments
- Statistical reliability through appropriate replication and matrix considerations
- Calibration model selection based on thorough assessment of the response function
- Determination of quantitation limits and calibration range through systematic evaluation
Unlike the ICH guideline, the SFSTP approach provides more specific recommendations for experimental design, including the preparation of calibration standards from different stock solutions and using different sources of biological matrix to account for real-world variability [83]. For chromatographic methods, SFSTP recommends a specific procedure for determining LOD based on baseline noise assessment: LOD = (3 × hnoise)/R, where hnoise is half the maximum amplitude of baseline noise measured over a interval equivalent to 20 times the width at half height of the peak, and R is the response factor [84].
Direct Comparison of Key Aspects
Table 1: Comparison of ICH Q2(R1) and SFSTP Approaches to LOD/LOQ Determination
| Aspect | ICH Q2(R1) | SFSTP Guide |
|---|---|---|
| Primary Scope | General analytical procedures | Chromatographic bioanalytical methods |
| Validation Strategy | Single-phase validation | Two-phase: pre-validation and validation |
| Experimental Design | Flexible, analyst-determined | Structured, with specific recommendations |
| Statistical Foundation | General concepts | Detailed statistical approaches |
| LOD/LOQ Methods | Visual, S/N, SD/slope | S/N, SD/slope, with specific formulas for chromatography |
| Matrix Considerations | Limited guidance | Specific recommendations for biological matrices |
| Calibration Model | Not specified | Emphasizes proper model selection |
| Regulatory Adoption | International acceptance | Primarily European pharmaceutical industry |
Practical Implementation and Calculation Methods
Signal-to-Noise Ratio Approach
The signal-to-noise ratio method is one of the most widely used approaches, particularly for chromatographic and electrochemical techniques that exhibit measurable baseline noise [84] [82]. This method involves comparing measured signals from samples containing low concentrations of analyte with those of blank samples:
- LOD: Typically defined as a concentration yielding a signal-to-noise ratio of 3:1 [81] [82]
- LOQ: Typically defined as a concentration yielding a signal-to-noise ratio of 10:1 [81] [82]
In practice, this is implemented by analyzing samples with decreasing concentrations until the peak height is approximately three times (for LOD) or ten times (for LOQ) the maximum height of the baseline noise measured adjacent to the analyte peak [84]. For techniques where peak areas are used instead of heights, alternative approaches may be necessary.
Standard Deviation and Slope Method
This approach uses statistical parameters derived from blank measurements or calibration curves to calculate LOD and LOQ:
Where σ is the standard deviation of the response and S is the slope of the calibration curve.
The standard deviation can be determined in several ways:
- From blank measurements: Calculating the standard deviation of responses from multiple blank samples
- From calibration curve: Using the residual standard deviation or the standard deviation of y-intercepts of regression lines [82]
The factor 3.3 (approximately 1.645 + 1.645) derives from setting both α and β errors at 5% for a one-sided test, assuming normal distribution of signals [84].
Alternative and Emerging Approaches
Beyond the classical methods, several advanced approaches have been developed:
- Uncertainty Profile: A graphical validation approach based on tolerance intervals and measurement uncertainty that provides a precise estimate of measurement uncertainty while assessing LOD and LOQ [85]
- Accuracy Profile: A graphical tool that combines tolerance intervals with acceptability limits to define the validity domain of a method [85]
- Machine Learning Enhancement: Using multivariate regression algorithms to improve detection capabilities by mitigating noise from electrode batches, experimental conditions, and operational techniques [86]
Recent comparative studies suggest that graphical strategies like uncertainty and accuracy profiles provide more realistic assessments of LOD and LOQ compared to classical statistical approaches, which may underestimate these limits [85].
Troubleshooting Guide: Common Issues and Solutions
Table 2: Troubleshooting Common LOD/LOQ Determination Issues
| Problem | Potential Causes | Solutions |
|---|---|---|
| High variability in blank measurements | Matrix effects, contamination, instrumental instability | - Use different sources of blank matrix- Implement rigorous cleaning procedures- Ensure instrumental stability before measurements |
| Inconsistent LOD/LOQ values across experiments | Changes in experimental conditions, insufficient replication | - Standardize preparation procedures- Increase number of replicates (≥10 recommended)- Control environmental factors |
| LOD/LOQ too high for intended application | Insufficient method sensitivity, high background noise | - Optimize sample preparation- Consider alternative detection techniques- Implement noise reduction strategies |
| Discrepancies between calculation methods | Different statistical assumptions, matrix effects | - Apply multiple approaches for comparison- Use matrix-matched standards- Verify with low-concentration samples |
| Poor precision at concentrations near LOQ | Inadequate method robustness, insufficient sensitivity | - Verify calibration model appropriateness- Increase number of calibration standards near expected LOQ- Use internal standards |
Matrix Effects and Their Impact
Matrix effects represent one of the most significant challenges in determining accurate LOD and LOQ values, particularly in biological and pharmaceutical samples [8]. These effects can either suppress or enhance analyte signals, leading to inaccurate estimates of detection and quantification capabilities. To address this:
- Use matrix-matched calibration standards whenever possible
- Implement effective sample cleanup procedures to reduce matrix interference
- Apply standard addition methods in cases of significant matrix effects
- Use stable isotope-labeled internal standards to compensate for matrix effects
Method Transferability Issues
When transferring methods between laboratories or instruments, LOD and LOQ values may vary significantly due to differences in equipment sensitivity, operator technique, or environmental conditions. To ensure consistency:
- Establish detailed standard operating procedures for method implementation
- Conduct interlaboratory studies to determine reproducibility of LOD/LOQ
- Include system suitability tests that verify sensitivity requirements
- Document complete calculation methodologies rather than just final values
Experimental Protocols and Workflows
Comprehensive Workflow for LOD/LOQ Determination
SFSTP Two-Phase Validation Protocol
The SFSTP guide recommends a structured two-phase validation approach [83]:
Phase 1: Pre-validation
- Assess the response function through thorough evaluation of the relationship between response and concentration
- Select the most appropriate calibration model based on statistical evaluation
- Determine the preliminary working range based on intended method application
- Establish preliminary LOD and LOQ values through limited experiments
Phase 2: Formal Validation
- Execute full validation experiments according to the designed protocol
- Prepare calibration standards from different stock solutions using different matrix sources
- Analyze a minimum of three calibration curves with triplicate measurements at each concentration level
- Calculate definitive LOD and LOQ values using the selected methodology
- Verify calculated values with actual samples at concentrations near the determined limits
Protocol for SD/Slope Method
For the standard deviation and slope method, follow this specific protocol:
- Prepare a minimum of 10 replicates of a blank sample (contains all matrix components except analyte)
- Analyze all replicates following the complete analytical procedure under specified precision conditions
- Convert responses to concentration units by subtracting blank signal and dividing by slope of analytical calibration curve
- Calculate standard deviation (σ) from the concentration data
- Compute LOD and LOQ using the formulas:
- LOD = 3.3 × σ / S
- LOQ = 10 × σ / S Where S is the slope of the calibration curve
Research Reagent Solutions and Essential Materials
Table 3: Essential Materials for LOD/LOQ Determination Experiments
| Material/Reagent | Specification | Function in Experiment |
|---|---|---|
| Analyte Reference Standard | High purity (>95%), well-characterized | Primary standard for preparing calibration solutions |
| Blank Matrix | Analyte-free, commutable with test samples | Establishing baseline response and matrix effects |
| Internal Standard | Structurally similar, stable isotopically labeled | Compensation for matrix effects and variability |
| Chemical Modifiers | HPLC, MS, or electrochemical grade | Enhancing detection sensitivity and specificity |
| Solvent Systems | High purity, appropriate for technique | Sample preparation, dilution, and mobile phases |
| Quality Control Materials | Low-concentration, well-characterized | Verification of LOD/LOQ values |
Frequently Asked Questions (FAQs)
Q1: Why are there different approaches to calculating LOD and LOQ, and which one should I choose? Different approaches exist because various analytical techniques and applications have distinct requirements. The ICH guideline offers flexibility for broad applicability, while the SFSTP guide provides more specific guidance for chromatographic bioanalysis [83] [82]. Selection should be based on your specific technique, matrix, and regulatory requirements. For pharmaceutical applications regulated by ICH regions, starting with ICH methods is advisable, while SFSTP provides valuable supplementary guidance for complex matrices.
Q2: How many replicates are necessary for reliable LOD/LOQ determination? Most guidelines recommend a minimum of 10 replicates for robust statistical estimation [84]. The SFSTP guide specifically recommends triplicate measurements at each concentration level across multiple calibration curves [83]. For formal validation, larger numbers (20-60) may be used, especially when verifying manufacturer claims [3].
Q3: Why do I get different LOD/LOQ values with different calculation methods? Different methods incorporate different statistical assumptions and sources of variability. The signal-to-noise approach focuses on instrument performance, while the SD/slope method incorporates both sample preparation and measurement variability [8]. Recent studies confirm that different approaches can yield significantly different results [85] [8]. Using multiple approaches and verifying with actual samples provides the most reliable assessment.
Q4: How should I handle matrix effects when determining LOD/LOQ? Matrix effects should be incorporated into your LOD/LOQ determination by using matrix-matched blanks and standards rather than pure solvent-based solutions [8]. For complex matrices, the SFSTP recommendation to use different sources of biological matrix helps account for this variability [83]. For severe matrix effects, standard addition methods or effective sample cleanup may be necessary.
Q5: What acceptance criteria should I use for LOQ verification? At the LOQ, the method should demonstrate precision (RSD ≤ 20%) and accuracy (80-120% of true value) according to most guidelines [83] [85]. However, specific acceptance criteria should be based on intended method use. The uncertainty profile approach suggests that the β-content tolerance interval should fall completely within the acceptability limits at the LOQ [85].
Q6: How often should LOD and LOQ be revalidated? Revalidation is recommended when there are changes in methodology, instrumentation, or sample matrix that could affect method performance [83]. Additionally, ongoing quality control monitoring may indicate need for revalidation if method performance drifts over time. For critical applications, periodic verification (e.g., annually) is advisable.
The comparative analysis of ICH and SFSTP approaches to LOD/LOQ determination reveals complementary strengths that can be leveraged for robust method validation. While the ICH framework provides regulatory flexibility across diverse analytical techniques, the SFSTP guide offers valuable detailed experimental strategy for complex pharmaceutical applications, particularly in bioanalysis.
Emerging approaches, including uncertainty profiles and machine learning-enhanced methods, show promise for more realistic assessment of detection and quantification capabilities [85] [86]. These advanced statistical approaches may eventually supplement or replace classical methods as regulatory science evolves.
For researchers optimizing detection limits in electrochemical pharmaceutical methods, a hybrid approach that incorporates ICH flexibility with SFSTP's structured experimental design and statistical rigor provides the most comprehensive framework. Regardless of the specific methodology chosen, transparent documentation of the calculation method and experimental verification with actual samples remain essential for defensible LOD and LOQ determinations in regulatory submissions.
Benchmarking Electrochemical Sensors Against LC-MS and Spectroscopic Methods
For researchers in pharmaceutical development, selecting the appropriate analytical technique is crucial for obtaining reliable data. This guide provides a direct comparison between electrochemical sensors and traditional methods like LC-MS and spectroscopy, focusing on performance benchmarking, common experimental challenges, and optimized protocols to help you achieve the lowest possible detection limits in your research.
► Method Comparison & Performance Benchmarking
The table below summarizes the core characteristics of each analytical technique, highlighting their respective advantages and limitations for pharmaceutical analysis.
Table 1: Comparison of Analytical Techniques for Drug Detection
| Feature | Electrochemical Sensors | LC-MS / GC-MS | Spectroscopic Methods (e.g., UV-Vis) |
|---|---|---|---|
| Typical Detection Limit | Micromolar to femtomolar [16]; Sub-micromolar with nanomaterials [87] | Picogram/milliliter to low femtogram/milliliter (MS) [16] | Micromolar to millimolar [16] |
| Sensitivity | Very High to Ultra-High [88] | Ultra-High [16] | Moderate [16] |
| Analysis Speed | Seconds to minutes [16] [87] | Longer run times, often >10 min/sample | Moderate to Fast |
| Cost & Operational Complexity | Low cost, simple operation, portable options [87] | Very high cost, complex operation, requires dedicated lab space [89] [87] | Moderate cost, relatively simple operation |
| Sample Preparation | Minimal, compatible with complex matrices [16] | Extensive and complex [89] [87] | Variable, can be simple |
| Primary Advantage | Rapid, cost-effective, suitable for point-of-care and decentralized testing [16] [87] | High sensitivity and specificity, gold standard for identification and confirmation [16] | Simplicity and wide availability |
Table 2: Exemplary Performance of Modern Electrochemical Sensors for Drug Detection
| Electrode Description | Analyte | Detection Method | Linear Dynamic Range | Limit of Detection (LOD) |
|---|---|---|---|---|
| poly(EBT)/CPE [89] | Methdilazine Hydrochloride | Square-Wave Voltammetry (SWV) | 0.1-50 μmol L⁻¹ | 0.0257 μmol L⁻¹ |
| Ce-BTC MOF/IL/CPE [89] | Ketoconazole | Differential Pulse Voltammetry (DPV) | 0.1-110.0 μmol L⁻¹ | 0.04 μmol L⁻¹ |
| [10%FG/5%MW] CPE [89] | Ofloxacin | SW-AdAS | 0.60 to 15.0 nM | 0.18 nM |
| MIP/CP ECL Sensor [89] | Azithromycin | Electrochemiluminescence (ECL) | 0.10-400 nM | 0.023 nM |
| AgNPs@CPE [89] | Metronidazole | Not Specified | 1-1000 μmol L⁻¹ | 0.206 μmol L⁻¹ |
Frequently Asked Questions (FAQs)
1. When should I choose an electrochemical sensor over LC-MS for drug analysis? Choose electrochemical sensors when your priority is rapid, cost-effective analysis at the point-of-care, for real-time monitoring, or when working with a high sample volume and limited budget. LC-MS remains the preferred choice when ultimate sensitivity and unambiguous identification of unknown compounds are required, such as in final confirmatory testing [16] [87].
2. What is the biggest challenge in using electrochemical sensors for biological samples? The primary challenge is selectivity. Biological fluids like blood, urine, and serum contain numerous compounds that can oxidize or reduce at similar potentials, causing interference. Signal drift, sensor fouling by matrix components, and the need for frequent calibration are also significant concerns [16].
3. How can I improve the detection limit of my electrochemical sensor? Modifying the electrode surface is the most effective strategy. Using nanomaterials like multi-walled carbon nanotubes (MWCNTs), graphene, metal nanoparticles (e.g., Ag, Au), or metal-organic frameworks (MOFs) increases the electroactive surface area and enhances electron transfer, significantly boosting sensitivity and lowering the LOD [16] [89] [87].
4. How long do electrochemical sensors typically last? Sensor lifespan is highly dependent on the application and operating environment. A typical operating life can range from 1 to 3 years. Factors like extreme temperatures, high or low humidity, and continuous exposure to high target analyte concentrations can significantly shorten this lifespan [90].
5. Why is my sensor's signal unstable or drifting? Signal drift can be caused by several factors:
- Temperature Fluctuations: Electrochemical reactions and reference electrode potentials are temperature-sensitive [91].
- Unstable Baseline: The sensor may need a longer warm-up time to stabilize after installation or periods of disuse [90].
- Fouling: The electrode surface can become blocked by proteins or other components in the sample matrix [16].
- Air Bubbles: Bubbles on the sensing surface or in the Haber-Luggin capillary can cause erratic readings [92].
Troubleshooting Guide
| Problem | Potential Causes | Solutions & Verification Steps |
|---|---|---|
| Low Sensitivity / High LOD | 1. Fouled electrode surface.2. Inappropriate electrode material for the analyte.3. Incorrect electrochemical technique parameters. | 1. Clean or polish the electrode according to manufacturer guidelines [92].2. Modify the electrode with nanomaterials (e.g., CNTs, graphene) to enhance signal [89] [87].3. Optimize parameters like scan rate, pulse amplitude, and potential window. |
| Poor Selectivity / Interference | 1. Other electroactive species in the sample.2. Lack of a selective recognition element. | 1. Use a selective technique like DPV which minimizes capacitive current [87].2. Incorporate a selective layer like a Molecularly Imprinted Polymer (MIP) or an enzyme on the electrode surface [87]. |
| Noisy Signal / Instability | 1. Electrical interference or poor connections.2. Air bubbles on the sensor.3. Sensor not properly warmed up. | 1. Check all cables and connections for damage or corrosion [92]. Ensure proper grounding.2. Gently tap the cell or reposition the sensor to dislodge bubbles [92].3. Allow sufficient warm-up time (minutes to hours) for the baseline to stabilize [90]. |
| Irreproducible Results | 1. Inconsistent electrode surface renewal.2. Variations in sample preparation or pH.3. Incorrect reference electrode positioning. | 1. Establish a strict protocol for cleaning and surface renewal between measurements.2. Control sample matrix and pH using buffers.3. Ensure the reference electrode's Haber-Luggin capillary is correctly positioned near the working electrode to minimize ohmic drop [92]. |
| Sensor Failure / No Response | 1. Sensor has reached end of life.2. Electrolyte depletion in gas sensors.3. Electrical short or open circuit. | 1. Perform a "bump test" by exposing the sensor to a known concentration of the target analyte. If it doesn't respond, replace the sensor [90].2. Check for physical damage and verify sensor lifespan. |
Detailed Experimental Protocols
Protocol 1: Electrode Modification with Carbon Nanomaterials for Enhanced Sensitivity
This protocol outlines the modification of a Glassy Carbon Electrode (GCE) with a multi-walled carbon nanotube (MWCNT) dispersion to create a high-sensitivity surface.
Research Reagent Solutions & Materials:
- Glassy Carbon Electrode (GCE): A polished and clean bare electrode.
- Functionalized MWCNTs: Acid-treated to introduce carboxyl groups for better dispersion and binding [89].
- Nafion Solution: A perfluorosulfonate ionomer used as a binding agent to form a stable film on the electrode surface.
- Distilled Water & Ethanol: For cleaning and preparing dispersions.
- Ultrasonic Bath: To achieve a homogeneous dispersion of nanomaterials.
Procedure:
- Electrode Pre-treatment: Polish the bare GCE with alumina slurry (e.g., 0.05 μm) on a microcloth pad. Rinse thoroughly with distilled water and then ethanol. Dry at room temperature.
- Dispersion Preparation: Weigh 1 mg of functionalized MWCNTs and disperse it in 1 mL of distilled water using at least 30 minutes of ultrasonication to create a homogeneous black dispersion.
- Modification: Pipette a specific volume (e.g., 5-10 μL) of the MWCNT dispersion onto the clean, dry surface of the GCE.
- Drying: Allow the electrode to dry in a clean environment at room temperature, forming a uniform film.
- Nafion Coating (Optional but Recommended): To improve mechanical stability and repel interfering anions, pipette a thin layer of diluted Nafion solution (e.g., 0.5% in alcohol) over the MWCNT film and let it dry completely.
- Conditioning: Before the first use, condition the modified electrode by performing cyclic voltammetry (e.g., 10 cycles) in a suitable buffer solution (e.g., 0.1 M phosphate buffer, pH 7.0) within a predetermined potential window to stabilize the surface.
Protocol 2: Standard Addition Method for Complex Matrices
This method is used to account for matrix effects (e.g., from urine or serum) that can influence the electrochemical signal, ensuring accurate quantification.
Procedure:
- Prepare Sample Solution: Spike a known volume of the biological sample (e.g., diluted urine) with an unknown concentration of the target drug analyte.
- Record Initial Signal: Perform the chosen electrochemical technique (e.g., DPV) and record the peak current signal.
- Standard Additions: Add at least three successive, known small volumes of a standard solution of the drug analyte to the same electrochemical cell. Mix thoroughly after each addition.
- Measure Subsequent Signals: Record the DPV peak current after each standard addition.
- Data Analysis: Plot the peak current (y-axis) against the concentration of the added standard (x-axis). Extrapolate the linear plot to the x-axis. The absolute value of the x-intercept gives the concentration of the unknown drug in the original sample solution.
Experimental Workflow for Sensor Benchmarking
Signaling Pathway in Electrochemical Detection
Meeting Regulatory Standards for Pharmaceutical Quality Control
In the pharmaceutical industry, Quality Control (QC) is a set of activities and techniques designed to monitor and control the quality of manufacturing processes and final products, ensuring they are safe, effective, and reliable for patients [93]. Quality Assurance (QA), in contrast, is a proactive, systematic approach involving systems and processes—such as Good Manufacturing Practices (GMP) and Quality Management Systems—to ensure products consistently meet established quality standards and regulatory requirements [93] [94].
Electrochemical methods are increasingly vital in modern pharmaceutical QC. They offer a powerful means to optimize the detection limit for analyzing active pharmaceutical ingredients (APIs), impurities, and contaminants. These techniques are characterized by their simplicity, portability, cost-effectiveness, and suitability for real-time monitoring, making them attractive for in-process controls [39]. The integration of advanced nanomaterials has significantly improved the sensitivity and selectivity of these sensors, pushing the boundaries of detection to meet stringent regulatory demands for product quality and patient safety [39] [95].
Troubleshooting Guides
General Electrochemical System Troubleshooting
A systematic approach is crucial when an electrochemical setup fails to produce a proper response. The following workflow, adapted from general electrochemistry handbooks, helps isolate the problem [96].
Detailed Actions from Workflow:
- Dummy Cell Test: With the potentiostat off, disconnect the electrochemical cell and replace it with a 10 kΩ resistor. Connect the reference (RE) and counter (CE) electrode leads to one side and the working electrode (WE) lead to the other. Perform a Cyclic Voltammetry (CV) scan from +0.5 V to -0.5 V at 100 mV/s. The result should be a straight line intersecting the origin, with currents adhering to Ohm's Law (V=IR), confirming the instrument and leads are functional [96] [46].
- Testing the Cell in a 2-Electrode Configuration: Reconnect the cell, but connect both the RE and CE leads to the counter electrode. Run a CV scan. If a standard voltammogram is obtained (though shifted in potential), the problem lies with the reference electrode [96].
- Reference Electrode Check: Inspect the reference electrode for a clogged frit, air bubbles blocking solution access, or improper immersion. Ensure the internal pin is making proper contact. If issues are found, replace the reference electrode [96] [46].
- Working Electrode Checkup: The problem may be a contaminated or degraded working electrode surface. Solid electrodes can often be reconditioned by polishing with alumina slurry, chemical treatment, or electrochemical cleaning (e.g., cycling a Pt electrode in H₂SO₄). For thin film electrodes, check for detachment from the current collector or dissolution [96].
Common Electrochemical Problems and Solutions
The table below outlines specific symptoms, their common causes, and corrective actions.
Table 1: Common Electrochemical Issues and Troubleshooting
| Observed Problem | Potential Causes | Corrective Actions |
|---|---|---|
| Voltage Compliance Error [46] | Quasi-reference electrode touching WE; CE removed from solution or disconnected. | Ensure all electrodes are properly immersed and separated; check all connections. |
| Current Compliance Error / Potentiostat Shutdown [46] | Working and counter electrodes touching, causing a short circuit. | Separate the working and counter electrodes. |
| Unusual Voltammogram or Changing Response on Repeated Cycles [96] [46] | Reference electrode not in electrical contact (blocked frit, air bubbles). | Check and clean reference electrode frit; ensure no air bubbles are trapped. Use reference electrode as a quasi-reference to test. |
| Very Small, Noisy, Unchanging Current [46] | Working electrode not properly connected to the cell. | Check connection to the working electrode. |
| Large Reproducible Hysteresis in Baseline [46] | High charging currents from electrode-solution interface capacitance. | Decrease scan rate, increase analyte concentration, or use a smaller working electrode. |
| Unexpected Peaks [46] | Impurities in solvents/electrolyte; system contamination; analyte degradation. | Run a background scan without analyte; use high-purity reagents; clean the cell. |
| Excessive Noise [96] | Poor electrical contacts (rust, tarnish); lack of Faraday cage. | Polish lead contacts or replace them; place the cell inside a Faraday cage. |
Troubleshooting in Pharmaceutical Manufacturing
When a quality defect like particulate contamination is discovered in a pharmaceutical product, a rigorous root cause analysis must be initiated to comply with GMP and prevent future incidents [97]. The analytical strategy often involves a combination of techniques to quickly identify the contaminant.
Key Analytical Techniques:
- Initial, Non-Destructive Physical Methods: Techniques like Scanning Electron Microscopy with Energy Dispersive X-ray spectroscopy (SEM-EDX) can identify inorganic compounds (e.g., metallic abrasion, rust) and analyze surface topography. Raman spectroscopy is excellent for non-destructive identification of organic particles by comparing spectra to databases [97].
- Follow-up Chemical Analysis: If physical methods are insufficient, chemical structure elucidation is used. This involves purifying the particles, performing solubility tests, and using powerful techniques like Liquid Chromatography coupled with High-Resolution Mass Spectrometry (LC-HRMS) or Nuclear Magnetic Resonance (NMR) to identify the molecular structure of the contaminant [97].
Frequently Asked Questions (FAQs)
Q1: What is the difference between Quality Assurance (QA) and Quality Control (QC) in pharmaceuticals? A: Quality Assurance (QA) is a proactive and systematic process-oriented approach that focuses on preventing defects by establishing robust systems, processes, and procedures (like GMP and Quality Management Systems). Quality Control (QC) is a reactive product-oriented set of activities that involves the testing and monitoring of raw materials, in-process materials, and finished products to ensure they meet specified quality standards [93] [94].
Q2: How can we improve the sensitivity and detection limit of an electrochemical sensor for trace metal analysis? A: Sensitivity can be significantly enhanced by modifying the working electrode with nanomaterials. For example, modifying a gold electrode with gold nanoclusters (GNPs-Au) can create a 7.2-fold increase in surface area, providing more reaction sites [95]. Other materials like carbon nanotubes (SWCNTs, MWCNTs), metal-organic frameworks (MOFs), and metal nanoparticles also improve sensitivity, selectivity, and stability [39]. Furthermore, optimizing detection parameters such as pH, enrichment potential, and enrichment time is critical [95].
Q3: What should I do if my electrochemical assay has no signal or a very small assay window? A: First, verify your instrument setup is correct, as this is the most common reason for a complete lack of signal. Ensure you are using the exact emission filters recommended for your instrument in TR-FRET assays [98]. For general electrochemistry, perform the "Dummy Cell Test" to isolate the problem to the instrument or the cell itself [96] [46]. Also, test your reagents and development reaction conditions to rule out chemical issues [98].
Q4: What are the key regulatory requirements for pharmaceutical quality control? A: Pharmaceutical manufacturing and QC must adhere to:
- Good Manufacturing Practices (GMP) as outlined in guidelines like the EU GMP Guideline and others from the International Council for Harmonisation (ICH) [97].
- Standards from pharmacopeias such as the United States Pharmacopeia (USP), which set public quality standards for drug substances and products [99].
- Regulations from health authorities like the FDA and EMA, which require validated manufacturing and control procedures, qualified equipment, and trained personnel [94] [97].
Q5: What is Process Analytical Technology (PAT) and how does it support quality control? A: PAT is a system for real-time monitoring and control of pharmaceutical manufacturing processes. It uses analytical tools to track Critical Quality Attributes (CQAs) during production, rather than relying only on end-product testing. This allows for immediate adjustments, reduces waste, supports continuous manufacturing, and leads to faster product release, ensuring consistent product quality [94].
The Scientist's Toolkit: Research Reagent Solutions
Table 2: Essential Materials for Electrochemical Sensor Development
| Material / Reagent | Function in Electrochemical Detection |
|---|---|
| Gold Nanoclusters (GNPs) [95] | Electrode modifier that dramatically increases surface area and provides abundant electrochemical reaction sites, significantly boosting sensitivity for trace analyte detection. |
| Carbon Nanotubes (SWCNTs, MWCNTs) [39] | Enhance electron transfer and increase the electroactive surface area of electrodes, improving sensor sensitivity and stability. |
| Metal-Organic Frameworks (MOFs) [39] [95] | Porous materials that provide a large surface area and selective binding sites for target analytes, enhancing sensitivity and selectivity. |
| Metal Nanoparticles (e.g., Au, Bi) [39] [95] | Offer high electrocatalytic activity and conductivity. Bismuth is particularly popular as an environmentally friendly alternative to mercury for heavy metal detection. |
| Electrolyte (e.g., KCl, Phosphate Buffer) [46] | Provides the necessary ionic conductivity in the solution, carries current between electrodes, and controls the pH of the electrochemical environment. |
Conclusion
Optimizing detection limits is paramount for unlocking the full potential of electrochemical sensors in the pharmaceutical industry. By integrating advanced nanomaterials, selecting appropriate pulse techniques, and employing robust validation strategies like the uncertainty profile, researchers can achieve the sensitivity and reliability required for modern applications. Future progress hinges on the convergence of electroanalysis with AI-driven data interpretation and the development of miniaturized, portable platforms. These advancements will not only streamline drug development and quality control but also pave the way for widespread point-of-care therapeutic monitoring, ultimately contributing to more personalized and effective patient care.
References
- 1. Understanding LOD and LOQ in Pharmaceutical Analysis [https://www.linkedin.com/posts/b-s-chandrashekar_analyticaldevelopment-methodvalidation-activity-7349269194573557760-e-BQ]
- 2. What Are LOD and LOQ in HPLC Methods? [https://altabrisagroup.com/lodloq-in-hplc-methods/]
- 3. Limit of Blank, Limit of Detection and Limit of Quantitation [https://pmc.ncbi.nlm.nih.gov/articles/PMC2556583/]
- 4. Determining LOD and LOQ Based on the Calibration Curve [https://www.sepscience.com/hplc-solutions-126-chromatographic-measurements-part-5-determining-lod-and-loq-based-on-the-calibration-curve-6959]
- 5. Limit of Quantitation - an overview [https://www.sciencedirect.com/topics/nursing-and-health-professions/limit-of-quantitation]
- 6. Why Signal-to-Noise Ratio Determines Limit of Detection [https://www.thermofisher.com/blog/analyteguru/hplc-troubleshooting-tips-why-signal-to-noise-ratio-determines/]
- 7. LOD, LOQ, MDL, and PQL: The Driving Force of the Next ... [https://advancedplatingtech.com/technical-library/plating-topics/lod-loq-mdl-and-pql-the-driving-force-of-the-next-generation-of-regulations/]
- 8. A tutorial for computing limits of detection and ... [https://www.sciencedirect.com/science/article/abs/pii/S0003267021011685]
- 9. Internal Standards and LOD - Chemistry LibreTexts [https://chem.libretexts.org/Ancillary_Materials/Worksheets/Worksheets%3A_Analytical_Chemistry_II/Internal_Standards_and_LOD]
- 10. Electrochemical sensor for luteolin detection [https://www.nature.com/articles/s41427-025-00615-6]
- 11. A novel electrochemical sensing platform for the specific ... [https://www.sciencedirect.com/science/article/abs/pii/S0026265X25002735]
- 12. A highly sensitive electrochemical sensor for the detection of ... [https://pubs.rsc.org/en/content/articlehtml/2025/ra/d4ra08952a?page=search]
- 13. Advances in electrochemical methods for the determination ... [https://www.sciencedirect.com/science/article/pii/S1452398124004474]
- 14. Electroanalysis Advances in Pharmaceutical Sciences [https://www.mdpi.com/2673-4532/6/2/12]
- 15. Recent Advances in Electrochemical Sensors for the ... [https://pmc.ncbi.nlm.nih.gov/articles/PMC12563010/]
- 16. Modern designs of electrochemical sensor for accurate ... [https://www.sciencedirect.com/science/article/abs/pii/S0254058425002342]
- 17. Electroanalytical Method - an overview [https://www.sciencedirect.com/topics/materials-science/electroanalytical-method]
- 18. Instrumental Techniques in Electroanalysis | Solubility of Things [https://www.solubilityofthings.com/instrumental-techniques-electroanalysis]
- 19. Voltammetric techniques of analysis: the essentials [https://link.springer.com/article/10.1007/s40828-015-0016-y]
- 20. Amperometric Methods and Applications | Electrochemistry... | Fiveable [https://fiveable.me/electrochemistry/unit-6/amperometric-methods-applications/study-guide/671lA3CEABP2rHEy]
- 21. to see more at the interphase Amperometry [https://www.biolinscientific.com/blog/amperometry-to-see-more-at-the-interphase]
- 22. Matrix Effects on Quantitation in Liquid Chromatography [https://www.chromatographyonline.com/view/matrix-effects-on-quantitation-in-liquid-chromatography-sources-and-solutions]
- 23. LC Troubleshooting Essentials: A Guide to Common ... [https://www.chromatographyonline.com/view/lc-troubleshooting-essentials-a-guide-to-common-problems-and-solutions-for-peak-tailing-ghost-peaks-and-pressure-spikes]
- 24. Multivariate Optimization of Electrochemical Biosensors for the ... [https://pmc.ncbi.nlm.nih.gov/articles/PMC10377565/]
- 25. Design and optimization of an electrochemical sensor ... [https://www.sciencedirect.com/science/article/pii/S0008622324007693]
- 26. Optimization and Analytical Behavior of Electrochemical ... [https://www.mdpi.com/1424-8220/20/22/6502]
- 27. Design of Experiments in Pharmaceutical Development [https://www.spcforexcel.com/knowledge/experimental-design-techniques/design-experiments-pharmaceutical-development/]
- 28. A design to improve pharmaceutical research - PubMed Central [https://pmc.ncbi.nlm.nih.gov/articles/PMC10026327/]
- 29. Holistic insights into carbon nanotubes and MXenes as a ... [https://pubs.rsc.org/en/content/articlehtml/2024/nr/d4nr03008g]
- 30. Defect engineering in nanomaterials: Impact, challenges, ... [https://www.sciencedirect.com/science/article/pii/S2772810224000096]
- 31. Functional Nanomaterials for Advanced Bioelectrode ... [https://www.mdpi.com/1424-8220/25/14/4412]
- 32. MXenes and their composites for high-performance ... [https://www.sciencedirect.com/science/article/pii/S1359836825004226]
- 33. MXene-Carbon Nanotube Composites: Properties and ... [https://pmc.ncbi.nlm.nih.gov/articles/PMC9867311/]
- 34. Nanomaterial-doped conducting polymers for ... [https://pubs.rsc.org/en/content/articlelanding/2018/tb/c8tb00817e]
- 35. Signal amplification in molecular sensing by imprinted polymers [https://pmc.ncbi.nlm.nih.gov/articles/PMC11374865/]
- 36. Introduction to Signal Amplification—Section 6.1 [https://www.thermofisher.com/us/en/home/references/molecular-probes-the-handbook/ultrasensitive-detection-technology/introduction-to-detection-methods.html]
- 37. Recent Advances in Signal Amplification to Improve ... [https://pmc.ncbi.nlm.nih.gov/articles/PMC9234564/]
- 38. Strategies for Assessing the Limit of Detection in ... [https://pmc.ncbi.nlm.nih.gov/articles/PMC11300140/]
- 39. Recent Trends in Electrochemical Methods for Real-Time ... [https://www.sciencedirect.com/science/article/abs/pii/S2451910325001085]
- 40. SWV, DPV & NPV Electroanalysis & Electrochemistry Sensor [https://www.biologic.net/documents/sensor-pulsed-techniques-swv-dpv-npv-electroanalysis-electrochemistry-sensor-application-note-67/]
- 41. Perspective—Advances in Voltammetric Methods for the ... [https://pmc.ncbi.nlm.nih.gov/articles/PMC11024638/]
- 42. Optimization of voltammetric parameters and sensitive ... [https://www.sciencedirect.com/science/article/abs/pii/S2214714425012371]
- 43. Differential Pulse Voltammetry (DPV) [https://pineresearch.com/support-article/differential-pulse-voltammetry-dpv/]
- 44. Square Wave Voltammetry (SWV) [https://pineresearch.com/support-article/square-wave-voltammetry/]
- 45. Optimization of voltammetric parameters for sensitive and ... [https://www.sciencedirect.com/science/article/abs/pii/S0308814623023701]
- 46. Troubleshooting Cyclic Voltammetry and Voltammograms [https://www.ossila.com/pages/cyclic-voltammetry-troubleshooting]
- 47. Rapid and sensitive electrochemical detection of ... [https://www.nature.com/articles/s41598-025-28851-4]
- 48. Recent advances in electrochemical sensing and ... [https://link.springer.com/article/10.1007/s11356-024-35852-9]
- 49. Ready-to-deploy electrochemical sensor for enhanced ... [https://www.sciencedirect.com/science/article/abs/pii/S0003267025009109]
- 50. Advances in the Electrochemical Detection of Antibiotics [https://www.mdpi.com/1424-8220/25/17/5541]
- 51. Development and Optimization of a Cost-Effective ... [https://www.mdpi.com/2079-6374/15/2/67]
- 52. What should I do if my pH electrode is difficult to calibrate ... [https://vinmetrica.com/faq/what-should-i-do-if-my-ph-electrode-is-difficult-to-calibrate-or-is-acting-sluggish-erratic/]
- 53. pH and ORP Electrode Cleaning | Knowledge Center [https://www.hamiltoncompany.com/knowledge-base/article/ph-and-orp-electrode-cleaning?srsltid=AfmBOooMhLSgrNEdkfnRU0FwpR7ZX8qcrmsnpOp3_BLHKf4hV4MiacQJ]
- 54. Systematic and comprehensive strategy for reducing in... matrix effects [https://pubmed.ncbi.nlm.nih.gov/17236825/]
- 55. Two Distinct Sample Prep Approaches to Overcome Matrix in... Effect [https://www.sigmaaldrich.com/US/en/technical-documents/technical-article/analytical-chemistry/solid-phase-extraction/sample-prep-overcome-matrix-effect]
- 56. How does the order of sample analysis influence the matrix ... [https://pubmed.ncbi.nlm.nih.gov/37473600/]
- 57. Antifouling bismuth composite for robust electrochemical ... [https://www.nature.com/articles/s43246-025-00990-1]
- 58. Optimization of graphene oxide-modified carbon-fiber ... [https://pmc.ncbi.nlm.nih.gov/articles/PMC7331934/]
- 59. Troubleshooting the functionalization of gold screen printed ... [https://www.zimmerpeacock.com/2025/07/13/troubleshooting-the-functionalization-of-gold-screen-printed-electrodes/]
- 60. A brief review on methods and materials for electrode ... [https://link.springer.com/article/10.1007/s44373-024-00012-8]
- 61. Electrochemical Engineering Approaches - NCBI - NIH [https://www.ncbi.nlm.nih.gov/books/NBK580053/]
- 62. Optimizing gold electrode surface treatments for enhanced ... [https://www.sciencedirect.com/science/article/pii/S0927775725007769]
- 63. AI-Enhanced Electrochemical Sensing Systems [https://www.mdpi.com/2079-6374/15/9/565]
- 64. A perspective of emerging trends in integrated PFAS detection ... [https://pubs.rsc.org/en/content/articlehtml/2025/sc/d5sc01624j]
- 65. 7 Proven Strategies to Denoise Your Audio-Visual Data [https://www.sapien.io/blog/7-proven-strategies-to-denoise-your-audio-visual-data]
- 66. Noise to Signal Ratio: AI Tools and Enhanced Analysis [https://noisetosignal.io/noise-to-signal-ratio-ai-tools-and-enhanced-analysis/]
- 67. Pharma's AI Skills Gap: A 2025 Data-Driven Analysis [https://intuitionlabs.ai/articles/pharma-ai-skills-gap]
- 68. Sensor Stability - an overview [https://www.sciencedirect.com/topics/engineering/sensor-stability]
- 69. Advances in aptamer-based electrochemical biosensors for ... [https://pubs.rsc.org/en/content/articlehtml/2025/nh/d5nh00368g]
- 70. A Guide to Reproducibility in Preclinical Research - PMC [https://pmc.ncbi.nlm.nih.gov/articles/PMC6314499/]
- 71. Reproducibility of real-world evidence studies using ... [https://www.nature.com/articles/s41467-022-32310-3]
- 72. Materials strategy and device fabrication for stable closed ... [https://www.nature.com/articles/s44328-025-00045-y]
- 73. AI-optimized electrochemical aptasensors for stable, ... [https://www.sciencedirect.com/science/article/pii/S2405844024173690]
- 74. Reproducibility in pre-clinical life science research [https://www.culturecollections.org.uk/culture-collection-news/reproducibility-in-pre-clinical-life-science-research/]
- 75. A Review of the Research Progress of Sensor Monitoring ... [https://www.mdpi.com/1424-8220/25/20/6308]
- 76. Marketing Strategies in Nanomaterials for Sensor Applications [https://pmc.ncbi.nlm.nih.gov/articles/PMC12065100/]
- 77. Validation of analytical methods based on accuracy profiles [https://www.sciencedirect.com/science/article/abs/pii/S0021967307002804]
- 78. What Is Measurement Uncertainty in Validation and Why It ... [https://altabrisagroup.com/measurement-uncertainty-in-validation/]
- 79. Understanding and Validating Potentiostat DC Accuracy [https://www.electrochem.org/ecsnews/understanding-and-validating-potentiostat-dc-accuracy]
- 80. Advanced electrochemical detection and profiling of the ... [https://pubs.rsc.org/en/content/articlehtml/2025/na/d5na00314h]
- 81. What Is LOD and LOQ Determination in Analytical ... [https://altabrisagroup.com/lod-and-loq-determination/]
- 82. What is meant by the limit of detection and quantification (LOD ... [https://mpl.loesungsfabrik.de/en/english-blog/method-validation/limit-of-detection-quantifcation]
- 83. The SFSTP guide on the validation of chromatographic ... [https://www.sciencedirect.com/science/article/abs/pii/S0003267099001063]
- 84. The Limit of Detection | LCGC International [https://www.chromatographyonline.com/view/limit-detection]
- 85. Comparison of approaches for assessing detection and ... [https://www.nature.com/articles/s41598-024-83474-5]
- 86. Artificial intelligence enhanced electrochemical ... [https://www.nature.com/articles/s41598-025-03930-8]
- 87. Recent Advances in Electrochemical Sensors for the ... [https://www.mdpi.com/2079-6374/15/10/676]
- 88. Comparison of colorimetric, spectroscopic and ... [https://pmc.ncbi.nlm.nih.gov/articles/PMC10910492/]
- 89. Recent advances in electrochemical sensors and biosensors ... [https://pmc.ncbi.nlm.nih.gov/articles/PMC10262219/]
- 90. FAQs of Electrochemical Gas Sensors [https://www.semeatech.com/m/list.php?tid=74]
- 91. Guide to Ion Selective | Troubleshooting | Support [https://www.turtletoughsensors.com/support/troubleshooting/guide-to-ise]
- 92. Frequently Asked Questions and Problems [https://gaskatel.com/service-and-support/frequently-asked-questions-and-problems/]
- 93. QA and QC Standards in Pharma Industry (Updated for 2025) [https://www.compliancequest.com/bloglet/quality-assurance-in-pharmaceutical-industry/]
- 94. Pharmaceutical Quality Control: 2025 Playbook [https://www.pharmanow.live/pharma-manufacturing/quality-control-in-pharmaceutical-manufacturing]
- 95. Ultrasensitive simultaneous detection of lead and cadmium in ... [https://pubs.rsc.org/en/content/articlehtml/2025/ra/d5ra02612a]
- 96. Troubleshooting Electrochemical Cell [https://redox.me/blogs/good-measurement-practices/troubleshooting-electrochemical-cell]
- 97. Troubleshooting in pharmaceutical manufacturing processes [https://www.hwi-group.de/en/blog/details/troubleshooting-in-pharmaceutical-manufacturing-processes-root-cause-analysis-of-quality-defects]
- 98. Drug Discovery Assays Support—Troubleshooting [https://www.thermofisher.com/us/en/home/technical-resources/technical-reference-library/drug-discovery-development-support-center/drug-discovery-assays-support/drug-discovery-assays-support-troubleshooting.html]
- 99. Quality and Regulatory Predictability: Shaping USP ... [https://www.fda.gov/drugs/news-events-human-drugs/quality-and-regulatory-predictability-shaping-usp-standards-12112025]