Potentiometric Titration for Acid-Base Analysis: A Comprehensive Guide for Pharmaceutical Professionals
This comprehensive article explores potentiometric titration for acid-base analysis, addressing the critical needs of researchers, scientists, and drug development professionals.
Potentiometric Titration for Acid-Base Analysis: A Comprehensive Guide for Pharmaceutical Professionals
Abstract
This comprehensive article explores potentiometric titration for acid-base analysis, addressing the critical needs of researchers, scientists, and drug development professionals. Covering foundational principles to advanced applications, it details methodological approaches for Active Pharmaceutical Ingredients (APIs) and excipients, aligned with USP-NF monographs and Quality by Design initiatives. The content provides practical troubleshooting guidance for common electrode and method errors, validation protocols following ICH guidelines, and explores innovative adaptations like microtitration for material-limited early development. With the potentiometric titrators market projected to grow at 7.0% CAGR through 2035, this resource offers essential knowledge for implementing robust, accurate analytical methods in pharmaceutical quality control and research.
Principles and Pharmaceutical Relevance of Potentiometric Acid-Base Titration
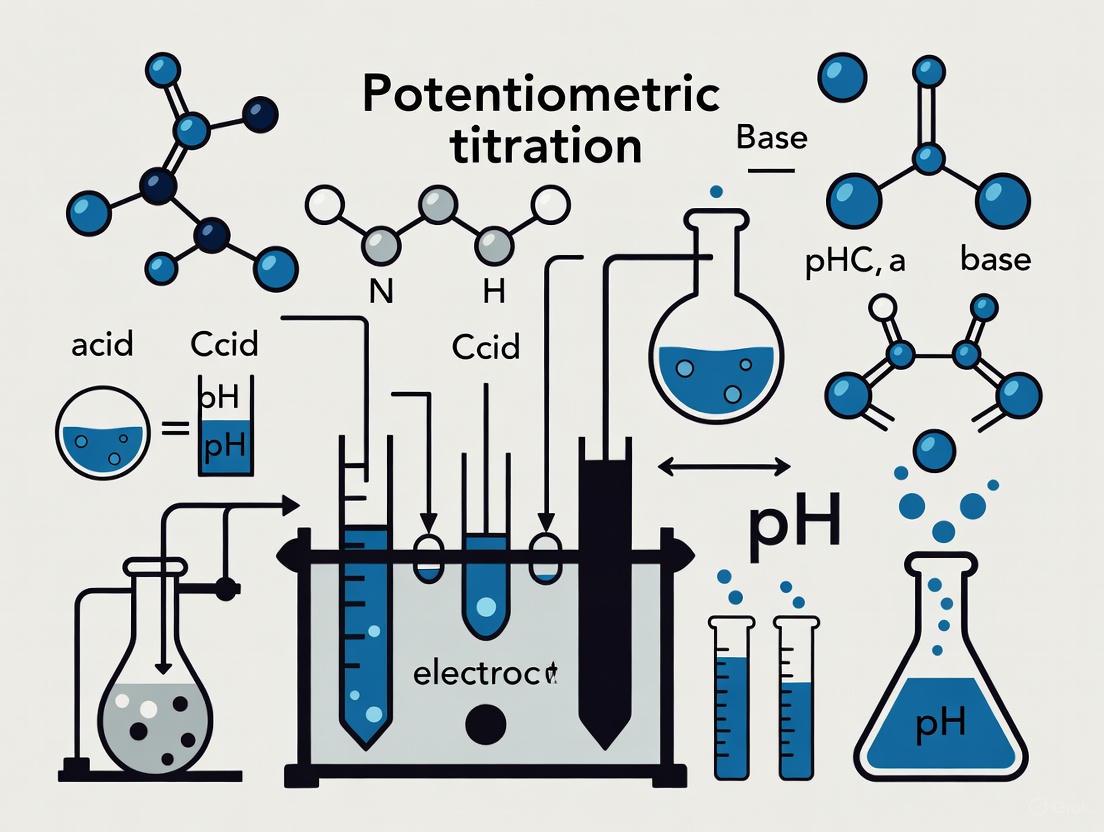
Potentiometric titration is an electroanalytical technique used to determine the concentration of an analyte by measuring the electric potential across an electrochemical cell as a titrant is added. Unlike direct titration methods that rely on visual indicators, potentiometric titration uses an indicator electrode and a reference electrode to monitor the change in potential, which corresponds to the progress of the chemical reaction [1]. This method is particularly valuable for analyzing colored, turbid, or complex samples where visual endpoint detection is impractical or unreliable [2] [3].
The fundamental principle is based on the Nernst equation, which relates the electrode potential to the concentration (activity) of ions in solution. For a half-reaction of the form: [ \ce{M^{n+} + n e^{-} -> M} ] the Nernst equation is expressed as: [ E = E^⦵ - \frac{RT}{nF} \ln \frac{1}{[M^{n+}]} ] where E is the electrode potential, E⦵ is the standard electrode potential, R is the gas constant, T is the temperature, n is the number of electrons transferred, F is the Faraday constant, and [Mⁿ⁺] is the concentration of the ion of interest [4] [1]. The overall cell potential is calculated as: [ E{\rm{cell}} = E{\rm{ind}} - E{\rm{ref}} + E{\rm{sol}} ] where ( E{\rm{ind}} ) is the potential of the indicator electrode, ( E{\rm{ref}} ) is the potential of the reference electrode, and ( E_{\rm{sol}} ) is the potential drop over the test solution [1].
Electrode Systems and Potential Measurement
Electrode Configuration and Function
A potentiometric titration cell consists of two primary electrodes, each serving a distinct function in measuring the potential difference.
- Indicator Electrode: This electrode responds selectively to the activity (concentration) of the specific ion involved in the titration reaction. Its potential changes as the concentration of the target ion changes during the titration. Common types include:
- Metal Electrodes: Used for redox titrations (e.g., platinum electrode) [1].
- Glass Membrane Electrodes: Standard for pH measurement in acid-base titrations [2].
- Metal/Metal Oxide Electrodes (MMO): Such as RuO₂, IrO₂, or stainless steel electrodes, which can also provide a Nernstian response to pH and are advantageous for their mechanical robustness and lower cost [3].
- Reference Electrode: This electrode provides a stable, fixed potential against which the change in the indicator electrode's potential is measured. It is designed to maintain a constant ionic composition. Common reference systems include:
- Combined Electrodes: For convenience, combined sensors that integrate both the measuring and reference electrode into a single body are often used in automated systems [2].
The Electrochemical Cell and Potential Measurement
The core of the measurement is the electrochemical cell formed by the indicator and reference electrodes immersed in the analyte solution. The potential difference (( E_{\rm{cell}} )) is monitored continuously as the titrant is added. A high-impedance voltmeter is used to ensure minimal current draw, preventing electrolysis and ensuring the measurement reflects the equilibrium potential [4] [1]. The setup and the flow of information in this system can be visualized as follows:
Endpoint Detection Methodologies
The endpoint of a potentiometric titration is not a single volume reading but is derived from the characteristic shape of the titration curve—a plot of the measured cell potential (E or pH) versus the volume of titrant added. The endpoint is marked by a sharp change in potential occurring at the equivalence point [4] [1]. In automated systems, the titrator can detect this change and slow down the titrant addition to improve accuracy [2].
Primary Detection Methods
Several analytical methods are used to precisely determine the endpoint from the acquired data.
- First Derivative Method: This method plots the rate of change of potential with respect to volume (ΔE/ΔV) against the volume of titrant. The endpoint is identified as the volume at which this derivative curve reaches a maximum, corresponding to the steepest point of the titration curve [5].
- Second Derivative Method: This method plots the rate of change of the first derivative (Δ²E/ΔV²) against volume. The endpoint is the volume where the second derivative crosses zero, precisely locating the inflection point of the original titration curve [5].
- Gran Plot Analysis: This is a linearization method used particularly for titrations with a small potential jump. It plots an antilog function of the potential against volume, resulting in a straight line that sharply deviates at the endpoint. This method is useful for determining endpoints in weak acid-base systems or for very dilute solutions [5].
Comparison of Endpoint Detection Techniques
While potentiometry is a common endpoint detection method, other physical property changes can be utilized, each with distinct advantages and applications as summarized in the table below.
Table 1: Comparison of Endpoint Detection Techniques in Titration
| Determination Principle | Description | Key Applications & Advantages |
|---|---|---|
| Potentiometric | Measures the concentration-dependent potential (mV) against a reference potential [2]. | Versatile for acid-base, redox, precipitation, and complexometric titrations; robust and widely applicable [2] [6]. |
| Photometric | Measures the change in intensity of a light beam at a specific wavelength as the solution's color changes [2]. | Ideal for titrations using color indicators; objective replacement for subjective visual determination [2]. |
| Conductometric | Measures the change in the electrical conductivity of the solution during titration [2]. | Useful for acid-base titrations in dilute solutions or when no suitable indicator is available. |
| Thermometric | Records the temperature change (ΔT) resulting from the molar heat of reaction (ΔHr) [2]. | Applicable to any reaction with a significant enthalpy change, does not require specific chemical properties. |
| Amperometric | Measures the concentration-dependent current (μA) at a constant applied voltage [2]. | Used for titrations involving electroactive species. |
Experimental Protocol: Acid-Base Potentiometric Titration
This protocol details the steps for a general acid-base titration using a potentiometric endpoint, adaptable for various electrode types.
Research Reagent Solutions and Essential Materials
Table 2: Essential Materials and Reagents for Potentiometric Titration
| Item | Function/Description |
|---|---|
| Burette | Precision dispenser for the titrant solution. |
| Indicator Electrode | e.g., Glass pH electrode, metal/metal oxide (MMO) electrode. Sensitive to H⁺ ion activity [2] [3]. |
| Reference Electrode | e.g., Ag/AgCl electrode. Provides a stable, fixed reference potential [4] [2]. |
| pH/mV Meter | High-impedance instrument for accurate potential difference measurement. |
| Magnetic Stirrer & Stir Bar | Provides homogeneous mixing of the solution during titrant addition. |
| Titrant Solution | Standardized solution of known concentration (e.g., NaOH for acid titration). |
| Analyte Solution | The solution containing the unknown concentration of acid or base. |
| Buffer Solutions | Used for the calibration of the electrode system prior to titration. |
| Redox Mediators | Used in redox titrations to facilitate equilibrium and a stable potential reading [6]. |
Step-by-Step Procedure
- Electrode Setup and Calibration: Connect the indicator and reference electrodes (or a combined electrode) to the pH/mV meter. Calibrate the system using standard buffer solutions (e.g., pH 4.01, 7.00, and 10.01) to ensure accurate potential/pH measurement [3].
- Sample Preparation: Pipette a known, precise volume of the analyte solution (e.g., HCl) into a clean titration beaker. Add a magnetic stir bar.
- Titration Assembly: Place the beaker on the magnetic stirrer and immerse the electrodes into the solution, ensuring they are sufficiently submerged and not interfered with by the stir bar. Position the burette tip above the solution.
- Initial Measurement: Record the initial potential (or pH) and volume reading on the burette (V₀).
- Titrant Addition and Data Collection:
- Begin stirring the solution.
- Add the titrant (e.g., NaOH) in small, incremental volumes. Initially, additions can be larger (e.g., 1.0 mL) when the potential is changing slowly.
- After each addition, allow the potential to stabilize and record both the volume added and the corresponding potential.
- As the potential begins to change more rapidly (approaching the endpoint), decrease the volume increments (e.g., to 0.1 mL or smaller) to capture the inflection point accurately [2].
- Post-Endpoint Data Collection: Continue adding titrant for several milliliters after the major potential jump, resuming larger increments once the potential change stabilizes again. This ensures a well-defined titration curve.
- Data Analysis: Plot the measured potential (E) versus the volume of titrant added. Determine the equivalence point volume using the first or second derivative method as described in Section 3.1.
The following workflow summarizes the key experimental stages:
Advanced Applications and Considerations
Potentiometric titration is a robust technique that extends beyond simple acid-base analysis. It is widely used in redox titrations, such as determining the concentration of Fe²⁺ by titration with permanganate (MnO₄⁻) [4], and in complexometric titrations like the determination of metal ions with EDTA [2] [1]. Furthermore, it is a critical tool in biochemical research for determining the reduction potentials of redox-active cofactors in metalloproteins, providing insights into electron transfer processes in respiration and photosynthesis [6].
A key consideration in potentiometric measurements is that the Nernst equation is written in terms of ion activity, not concentration. Activity accounts for non-ideal behavior in electrolyte solutions and is influenced by the ionic strength of the medium [4]. For precise thermodynamic studies, this distinction is critical. A limitation to consider, especially in biochemical contexts, is that EPR-based potentiometric titrations can typically only detect steady-state radicals and may not capture fleeting paramagnetic intermediates formed during enzyme catalysis [6].
The United States Pharmacopeia-National Formulary (USP-NF) monographs and the Food and Drug Administration (FDA) Quality by Design (QbD) requirements represent two complementary pillars of the modern pharmaceutical quality framework. USP-NF provides legally enforceable standards for drug products, ingredients, and dosage forms, while QbD embodies a systematic, science-based, and risk-informed approach to pharmaceutical development and manufacturing [7] [8]. The integration of robust analytical methodologies, such as potentiometric titration for acid-base analysis, within this converged framework enables the generation of high-quality data essential for demonstrating compliance and ensuring product quality throughout the lifecycle.
USP is transitioning to a new bimonthly publication model effective July 2025, consolidating official publications from 15 to six issues per year to provide a more regular distribution cadence and expedited publishing timelines [9]. Furthermore, USP has implemented updated procedures for monograph modernization, where redesign-only revisions are now published with a "To Be Official" status and become official six months after posting [10]. These updates reflect a dynamic regulatory environment aimed at enhancing efficiency while maintaining quality standards.
Fundamental Principles: QbD and Compendial Standards
Core Elements of Quality by Design
QbD, as defined by ICH Q8(R2), is "a systematic approach to development that begins with predefined objectives and emphasizes product and process understanding and process control, based on sound science and quality risk management" [7]. This represents a paradigm shift from traditional quality control methods that primarily relied on end-product testing toward proactively building quality into pharmaceutical products from the design phase [8].
The core principles of QbD include [7] [8]:
- Quality Target Product Profile (QTPP): A prospective summary of the quality characteristics of a drug product that ideally will be achieved to ensure the desired quality, considering safety and efficacy.
- Critical Quality Attributes (CQAs): Physical, chemical, biological, or microbiological properties or characteristics that should be within an appropriate limit, range, or distribution to ensure the desired product quality.
- Critical Process Parameters (CPPs): Process parameters whose variability impacts CQAs and therefore should be monitored or controlled to ensure the process produces the desired quality.
- Design Space: The multidimensional combination and interaction of input variables (e.g., material attributes) and process parameters that have been demonstrated to provide assurance of quality.
- Control Strategy: A planned set of controls, derived from current product and process understanding, that ensures process performance and product quality.
Table 1: QbD Implementation Stages and Outputs
| Stage | Description | Key Outputs | Applications/Notes |
|---|---|---|---|
| Define QTPP | Establish prospectively defined summary of quality characteristics | QTPP document listing target attributes | Foundation for all subsequent QbD steps (ICH Q8) |
| Identify CQAs | Link product quality attributes to safety/efficacy using risk assessment | Prioritized CQAs list | CQAs vary by product type (biologics vs. small molecules) |
| Risk Assessment | Systematic evaluation of material attributes and process parameters | Risk assessment report, CPPs/CMAs identification | Tools: Ishikawa diagrams, FMEA |
| Design of Experiments | Statistically optimize process parameters through multivariate studies | Predictive models, optimized CPP/CMA ranges | Identifies interactions between variables |
| Establish Design Space | Define multidimensional combination of input variables ensuring quality | Validated design space model with Proven Acceptable Ranges | Regulatory flexibility: Changes within design space don't require re-approval |
| Develop Control Strategy | Implement monitoring and control systems | Control strategy document | Combines procedural controls and analytical tools |
| Continuous Improvement | Monitor process performance and update strategies using lifecycle data | Updated design space, refined control plans | Tools: Statistical process control, Six Sigma |
Studies indicate that QbD implementation can reduce development time by up to 40% by optimizing formulation parameters before full-scale manufacturing and reduce material wastage by up to 50% through fewer batch failures [8]. The FDA's initiative on Pharmaceutical Quality for the 21st Century and ICH guidelines (Q8-Q12) position QbD as a foundational standard for modern pharmaceutical development [11].
Role and Structure of USP-NF Monographs
USP-NF monographs provide legally recognized standards for the identity, strength, quality, and purity of drug substances, excipients, and finished drug products. These standards are enforceable under the Federal Food, Drug, and Cosmetic Act and are utilized by regulators, manufacturers, and researchers to ensure consistent product quality [9] [10].
Each monograph typically includes [10]:
- Definition: Description of the substance or product, including packaging and storage requirements.
- Identification: Specific tests to confirm identity.
- Assay: Procedures to quantify the active ingredient.
- Impurity Tests: Limits and methods for detecting and quantifying impurities.
- Performance Tests: For dosage forms, tests demonstrating proper drug release or delivery.
The recent update to USP's publication model, effective with the first issue of USP-NF 2026 in July 2025, transitions from 15 to six official publications annually, published bimonthly on the last Friday of each month [9]. This consolidation aims to streamline the standardization process while maintaining timely updates to compendial standards.
Analytical Methodology: Potentiometric Titration in Pharmaceutical Analysis
Principles and Applications of Potentiometric Titration
Potentiometric titration is an analytical technique that measures the potential difference between a reference electrode and an indicator electrode during a titration to determine the endpoint. This method provides significant advantages for pharmaceutical analysis, including high accuracy, applicability to colored or turbid solutions, minimal sample preparation, and the ability to automate [12].
In pharmaceutical development and quality control, potentiometric titration serves multiple critical functions [13] [12]:
- Acid-base characterization of active pharmaceutical ingredients (APIs) and excipients
- Quantification of ionic components in drug formulations
- Determination of protonation constants (pKa values) essential for predicting API behavior
- Quality control testing for compendial methods referenced in USP monographs
The technique is particularly valuable for determining acid dissociation constants (pKa), which profoundly influence a drug's pharmacokinetic properties, including absorption and bioavailability [12]. As noted in recent research, "pH/potentiometric titration remains the gold standard method for determining acid/base constants" for soluble and stable compounds in aqueous media [12].
Comparative Analytical Techniques
While potentiometric titration serves as the reference method for acid-base characterization, orthogonal techniques provide complementary approaches for challenging analytical scenarios:
Table 2: Comparison of Analytical Methods for Acid-Base Characterization
| Parameter | Potentiometry | NMR/pH Titration | Spectrophotometric Titration |
|---|---|---|---|
| Principle | Measurement of electrode potential | Measurement of chemical shifts with pH | Measurement of absorbance changes with pH |
| Accuracy | High, especially with clear ion selectivity | High, particularly for complex molecules | Medium to high, depending on chromophores |
| Sample Requirements | Pure (>95%), sufficient concentration (0.1-10 mmol/L) | Sufficient concentration (>1 mmol/L) for NMR detection | Requires UV-active moieties |
| Throughput | Medium to high with automation | Low to medium | Medium to high |
| Cost | Low to moderate | High (instrumentation and maintenance) | Moderate |
| Multiprotic Molecules | Characterizes molecule as a whole | Provides site-specific protonation information | May resolve multiple protonation sites |
| Key Applications | pKa determination (pH 2-12), quantification | pKa determination, structural information, site-specific data | pKa determination for UV-active compounds |
Recent meta-analyses demonstrate excellent agreement between potentiometric and NMR-based pKa determinations, validating both methods for reliable acid-base characterization in drug development [12].
Integrated Application: QbD-Driven Analytical Method Development
QbD Principles in Analytical Methodology
The application of QbD principles to analytical method development, known as Analytical Quality by Design (AQbD), ensures that methods are robust, reproducible, and fit-for-purpose throughout the product lifecycle. AQbD aligns with ICH Q14 guidelines and establishes a Method Operable Design Region (MODR) to define the parameter space within which method performance remains acceptable [8].
Key stages in implementing AQbD for potentiometric titration methods include [7] [8]:
- Define Analytical Target Profile (ATP): Specify requirements for the method, including accuracy, precision, and robustness.
- Identify Critical Method Attributes (CMAs): Determine measurable characteristics critical to method performance.
- Risk Assessment: Systematically evaluate factors that could impact method performance using tools like Failure Mode Effects Analysis (FMEA).
- Method Development and Design of Experiments: Statistically optimize method parameters through multivariate studies.
- Establish MODR: Define the combination of input variable ranges where method performance is guaranteed.
- Control Strategy: Implement procedures to ensure method performance over time.
Experimental Protocol: Potentiometric Titration for Acid-Base Analysis
Materials and Equipment:
- Potentiometer with high-impedance input
- Combined pH glass electrode or separate reference and indicator electrodes
- Magnetic stirrer with temperature control
- Burette (automated or manual) for titrant delivery
- Thermostated titration vessel
- Standardized titrant solution (e.g., 0.1 M NaOH or HCl)
- Ionic strength adjuster (e.g., 0.1 M NaCl or KNO₃)
- Standard buffer solutions (pH 4.01, 7.00, 10.01) for electrode calibration
Sample Preparation:
- Accurately weigh the sample and transfer to the titration vessel.
- Dissolve in appropriate solvent (typically water or water-cosolvent mixtures).
- Add ionic strength adjuster to maintain constant ionic strength (typically 0.1-0.15 M).
- Purge with inert gas (e.g., nitrogen) if dissolved oxygen interference is anticipated.
- Thermostate to desired temperature (typically 25.0 ± 0.1°C).
Titration Procedure:
- Calibrate electrodes using standard buffer solutions.
- Immerse electrodes in sample solution, ensuring complete immersion of sensing elements.
- Begin stirring at constant rate to ensure homogeneity without vortex formation.
- Record initial potential/pH reading.
- Add titrant in increments, allowing stabilization between additions (typically 30-60 seconds).
- Reduce increment size in regions of rapid potential change near endpoints.
- Continue titration until sufficient data beyond all equivalence points is collected.
- Perform replicate determinations (typically n=3) to establish precision.
Data Analysis:
- Plot potential (E) versus titrant volume (V).
- Identify equivalence points using first (ΔE/ΔV) or second derivatives (Δ²E/ΔV²).
- For pKa determination, apply the Henderson-Hasselbalch equation or nonlinear regression.
- Calculate analyte concentration using stoichiometric relationships at equivalence points.
- Determine method precision, accuracy, and detection limits through statistical analysis.
Method Validation Parameters:
- Accuracy through standard addition or comparison with reference materials
- Precision (repeatability and intermediate precision)
- Linearity and range
- Robustness to deliberate variations in method parameters
- Specificity in presence of potential interferents
Integrated Regulatory Strategy: Connecting QbD and Compendial Standards
Strategic Implementation Framework
Successfully navigating the integrated landscape of QbD and compendial standards requires a systematic approach that connects development activities with regulatory expectations. The following framework visualizes this integrated strategy:
Diagram 1: QbD-USP Integration Framework (79 characters)
This framework demonstrates how QbD principles and USP-NF requirements intersect throughout the product lifecycle. Compendial standards inform CQA identification, method validation approaches support control strategy development, and ongoing monograph updates necessitate proactive lifecycle management.
The Scientist's Toolkit: Essential Research Reagents and Materials
Table 3: Essential Research Reagents and Materials for Potentiometric Analysis
| Item | Function | Application Notes |
|---|---|---|
| Standard Buffer Solutions | Electrode calibration and performance verification | pH 4.01, 7.00, 10.01 at specified temperature; traceable to NIST standards |
| Ionic Strength Adjusters | Maintain constant ionic medium | NaCl, KNO₃ (0.1-0.15 M); minimizes activity coefficient variations |
| Standardized Titrants | Quantitative reagent delivery | NaOH, HCl (0.01-0.1 M); standardized against primary standards |
| Primary Standards | Titrant standardization and method validation | Potassium hydrogen phthalate (KHP), sodium carbonate; high purity (>99.95%) |
| Reference Electrodes | Stable potential reference | Ag/AgCl, calomel; regular inspection and maintenance required |
| Indicator Electrodes | pH/potential response | Glass membrane, hydrogen, quinhydrone; selection based on application |
| Inert Gases | Oxygen exclusion in redox systems | Nitrogen, argon; degassing solutions when oxygen interference anticipated |
The strategic integration of USP-NF monograph requirements with QbD principles represents the contemporary paradigm for pharmaceutical quality assurance. This converged framework enables manufacturers to develop robust processes and analytical methods that consistently produce products meeting their quality attributes while maintaining compliance with compendial standards. Potentiometric titration, as a gold standard for acid-base characterization, provides critical data supporting both QbD implementation and monograph compliance.
As regulatory landscapes evolve with initiatives like the USP's new bimonthly publication model and updated monograph implementation procedures, pharmaceutical scientists must maintain vigilance regarding compendial updates [9] [10]. Similarly, the ongoing adoption of QbD principles across development and manufacturing operations continues to demonstrate significant benefits in efficiency, quality, and regulatory flexibility [7] [8]. Through the thoughtful application of this integrated framework and robust analytical methodologies, pharmaceutical professionals can advance product quality while ensuring regulatory compliance throughout the product lifecycle.
Within pharmaceutical and chemical research, quantitative acid-base analysis is fundamental to drug development and quality control. Titration serves as a cornerstone technique, with traditional visual methods historically employed for endpoint detection. However, the subjective nature of visual indicator interpretation introduces significant variability, potentially compromising data integrity. This application note delineates the definitive advantages of potentiometric titration over visual methods, with a specific focus on its enhanced objectivity, superior accuracy, and seamless automation compatibility, thereby supporting the broader thesis of its superiority for rigorous acid-base analysis research [14] [15].
Comparative Analysis: Potentiometric vs. Visual Titration
Potentiometric titration eliminates the reliance on human vision to detect a color change, instead utilizing an electrode pair to measure the potential difference across the analyte solution. This fundamental difference in endpoint detection translates into several key performance advantages, quantitatively summarized in Table 1.
Table 1: Quantitative Comparison of Visual and Potentiometric Titration Methods [14] [16]
| Factor | Visual Titration | Potentiometric Titration |
|---|---|---|
| Endpoint Detection | Subjective color change | Objective potential (mV) measurement |
| Accuracy | Lower in colored/turbid samples | High, even in complex matrices |
| Precision (RSD) | Subject to higher variability (< 1% possible with automation) [15] | Consistently high (< 1% RSD achievable) [15] |
| Data Objectivity | Low (analyst-dependent) | High (instrument-generated) |
| Automation Potential | Low, manual intensive | High, easily integrated |
| Sample Versatility | Limited to clear, colorless solutions | High; suitable for colored, turbid, and viscous samples [14] |
| Labor Requirement | High | Minimal post-setup |
| Regulatory Compliance | Challenging for data integrity | Simplified with full data traceability [15] |
Core Advantages in Research and Development
Objectivity in Endpoint Detection
Potentiometry replaces the subjective interpretation of a color change with an objective, instrument-based measurement of a voltage shift at the equivalence point [14]. This removes analyst-to-analyst variability, a significant source of error in visual methods, especially when the endpoint is subtle or ambiguous. In practice, the endpoint is determined from a sharp inflection in a potential-versus-volume curve, which is precisely defined by the instrument's software, ensuring consistent and unbiased results across all analyses [15].
Enhanced Accuracy and Precision
The accuracy of potentiometric titration is superior, particularly for non-ideal samples. Colored, turbid, or suspensions that would obscure a visual indicator's color change pose no challenge to an electrode [14]. Furthermore, the method provides a full titration curve, allowing for the analysis of mixtures with multiple buffering components or the identification of weak acid/base pairs that a single visual endpoint would fail to reveal [14]. The precision, expressed as Relative Standard Deviation (RSD), is significantly improved, often achieving values below 1% with automated systems [15] [17].
Automation Compatibility
Potentiometric systems are inherently suited for automation. Automatic burets deliver titrant with high precision, while the electrode continuously monitors the reaction. This is governed by software that controls the entire process—from titrant addition and stirring to endpoint recognition and data calculation—minimizing human intervention and error [14] [15]. Automated systems can operate 24/7, dramatically increasing laboratory throughput and efficiency, and ensuring strict adherence to ALCOA+ (Attributable, Legible, Contemporaneous, Original, and Accurate) principles for data integrity, a critical requirement in regulated environments like pharmaceutical QC [15].
Experimental Protocol: Automated Potentiometric Titration of an Active Pharmaceutical Ingredient (API)
Scope
This protocol describes the general procedure for determining the acid or base value of a soluble API using an automated potentiometric titration system, compliant with principles outlined in USP general chapters <541> and <1225> [15] [17].
The Scientist's Toolkit: Research Reagent Solutions
Table 2: Essential Materials and Reagents [15] [17]
| Item | Function | Specification/Note |
|---|---|---|
| Automated Titrator | Precision delivery of titrant and data acquisition. | Must be qualified (IQ/OQ). |
| Combined pH Electrode | Indicator electrode; detects H+ ion activity. | e.g., Glass electrode with 3 mol/L KCl reference electrolyte. |
| Titrant (e.g., HClO₄ or NaOH) | Reacts stoichiometrically with the analyte. | Concentration precisely determined by standardization. |
| Primary Standard | Used for exact titrant concentration determination. | High purity, stable, low hygroscopicity (e.g., Potassium Hydrogen Phthalate). |
| Solvent System | Dissolves the sample and provides medium for reaction. | Chosen based on sample solubility (e.g., water, glacial acetic acid). |
| Software | Controls instrument, acquires data, calculates results. | 21 CFR Part 11 compliant for regulated environments [15]. |
Method Workflow
The following diagram illustrates the automated workflow for a potentiometric titration.
Step-by-Step Procedure
System Setup and Calibration:
- Install the appropriate combined pH electrode (e.g., a Solvotrode for non-aqueous titration) [15].
- Calibrate the electrode using at least two standard buffer solutions traceable to national standards. Verify calibration success per instrument specifications.
Titrant Standardization:
- Precisely weigh an appropriate primary standard (e.g., Potassium Hydrogen Phthalate for base titrants) into the titration vessel [17].
- Dissolve in the prescribed solvent and titrate using the automated method.
- Perform in triplicate. The software will calculate the exact titrant concentration (titer) based on the consumed volume. The Relative Standard Deviation (RSD) for the determined concentration must be within predefined limits (e.g., < 0.5%) [17].
Sample Analysis:
- Accurately weigh the test sample (API) and transfer to the titration vessel.
- Add the required solvent and ensure complete dissolution.
- Initiate the pre-defined automated titration method. The system will add titrant, record the potential, and identify the endpoint from the first or second derivative of the titration curve.
Data Analysis and Reporting:
- The software automatically calculates the result (e.g., acid value, content) based on the titrant consumption and sample weight.
- The full titration curve, all raw data, and calculated results are stored with a time-stamped audit trail for complete traceability [15].
Method Validation
For results to be acceptable in a pharmaceutical context, the method must be validated. Key parameters for titration are summarized below [17].
Table 3: Key Validation Parameters for Potentiometric Titration [17]
| Validation Parameter | Target | Protocol |
|---|---|---|
| Accuracy | Recovery of 98-102% | Compare results from spiked samples with known added standard. |
| Precision (Repeatability) | RSD < 1.0% | Perform at least six independent determinations of a homogeneous sample. |
| Linearity | R² ≥ 0.999 | Titrate at least five different sample masses across the range of 80-120% of the target concentration. |
| Specificity | No interference | Demonstrate that excipients or potential impurities do not interfere with the analyte's endpoint. |
Potentiometric titration definitively surpasses visual titration for acid-base analysis in research and quality control. By providing objective, instrument-driven endpoint detection, it delivers superior accuracy and precision, particularly for challenging sample matrices. Its inherent compatibility with automation streamlines workflows, enhances throughput, and ensures robust data integrity compliant with stringent regulatory standards. For these reasons, potentiometric titration represents the modern, reliable choice for scientists engaged in drug development and analytical research.
Current Market Landscape and Growth Projections in Pharmaceutical Analysis
The global pharmaceutical industry is navigating a period of profound transformation as it approaches 2025. Characterized by unprecedented scientific innovation alongside significant economic and regulatory pressures, the sector faces a pivotal moment where traditional business models are being fundamentally questioned. Industry leaders recognize that bold reinvention is no longer optional but essential for future survival and growth. With many CEOs doubting their current business models can survive another decade, pharmaceutical companies are placing strategic bets on new technologies and approaches to create value in an increasingly complex landscape [18]. This analysis examines the current market dynamics, growth projections, and strategic priorities shaping the industry, with particular focus on the role of advanced analytical techniques like potentiometric titration in ensuring quality and efficacy amid these transformative changes.
Current Market Dynamics and Performance Metrics
The pharmaceutical sector has demonstrated resilience in growth projections while facing significant challenges in delivering shareholder value relative to the broader market. Recent performance data reveals a complex picture of innovation alongside financial headwinds.
Financial Performance and Market Valuation
Recent analysis reveals the pharmaceutical sector has delivered lagging shareholder returns compared to the broader market. From 2018 through November 2024, a PwC equal-weight index of 50 pharma companies returned 7.6% to shareholders, compared with more than 15% for the S&P 500. This performance gap became even more pronounced over the most recent year, with the pharma index returning 13.9% compared to 28.7% for the S&P through November 2024 [18].
Compounding this challenge, value growth within the sector has become increasingly concentrated. Since 2018, just two companies accounted for nearly 60% of the increase in value growth among the 50 pharma companies analyzed by PwC, indicating significant performance disparity within the industry [18]. This dynamic has led to declining market valuations, with the median enterprise-value-to-EBITDA multiple for pharma companies falling from 13.6X in 2018 to 11.5X in 2024, during a period of multiple expansion for the broader S&P index [18].
Global Sales Projections and Growth Areas
Despite these challenges, the industry demonstrates robust growth potential in specific therapeutic areas and technologies. The pharmaceutical industry is on track to surpass $1.75 trillion in prescription drug sales by the end of the decade, with several key segments driving this expansion [19].
Table 1: Pharmaceutical Market Growth Projections and Key Therapeutic Areas
| Category | Projection / Current Impact | Timeframe | Key Drivers/Examples |
|---|---|---|---|
| Global Prescription Drug Sales | > $1.75 trillion | By 2030 | Overall market expansion, innovative therapies [19] |
| GLP-1 Receptor Agonists | ~9% of global drug sales | By 2030 | Effectiveness in obesity, multiple conditions being evaluated [19] |
| AI-Driven Drug Discovery | 30% of new drugs discovered using AI | By 2025 | Reduced timelines/costs (25-50% in preclinical) [20] |
| Patent Expirations | > $300 billion sales at risk | Through 2030 | Loss of exclusivity for high-revenue products [19] |
| Chinese Biotech Assets | ~40% of global licensing deals | 2025 | Increasing innovation and global partnerships [19] |
The growth in GLP-1 receptor agonists is particularly noteworthy, with these medications projected to account for nearly 9% of global drug sales by 2030. Their application has expanded beyond diabetes to obesity treatment, with ongoing evaluations for conditions including sleep apnea, addiction, Alzheimer's disease, and nonalcoholic fatty liver disease [19]. This represents a significant shift toward addressing general medicines and common conditions after decades of focus on specialty and rare diseases.
Key Strategic Priorities for Pharmaceutical Companies
Evolving R&D and Portfolio Strategies
Research and development transformation represents a cornerstone of pharmaceutical strategy in 2025. Companies are fundamentally rethinking their approaches to R&D in response to declining productivity and high failure rates that can reach 90% for new drug candidates [21]. Several key trends are shaping R&D evolution:
- Novel Modalities and Mechanisms: Pharmaceutical companies are increasingly adopting new modalities including fusion proteins, oligonucleotide therapies, multispecific antibodies, antibody drug conjugates, radioligand therapies, and oncolytic viruses to redefine standards of care [22].
- Therapy Area Shifts: While oncology and immunology remain priorities, about half of the ten largest pharma companies are focusing on therapy areas beyond these core domains, including cardiovascular, renal and metabolic diseases [22].
- AI and Digital Integration: Eighty-five percent of biopharma executives plan to invest in data, digital and AI in R&D for 2025, with one top-10 pharma company expecting to save approximately $1 billion in drug development costs over five years through these technologies [22].
Digital Transformation and AI Adoption
Artificial intelligence has transitioned from experimental pilot projects to core strategic capability across the pharmaceutical value chain. Nearly 60% of executives plan to increase generative AI investments across their organizations, suggesting companies are beginning to realize substantial value from adopting these technologies at scale [21].
AI implementation is delivering measurable benefits in specific operational areas. Amgen has doubled its clinical trial enrollment speed using a multimodal, data-driven machine learning tool, while Sanofi is collaborating with OpenAI and Formation Bio to develop an AI tool that reduces patient recruitment timelines "from months to minutes" [22]. Beyond R&D, AI investments could generate up to 11% in value relative to revenue across functional areas for biopharma companies over the next five years, with some medtech companies potentially achieving cost savings of up to 12% of total revenue within two to three years [21].
Strategic Partnerships and M&A Activity
Mergers, acquisitions, and strategic partnerships continue to play a crucial role in pharmaceutical innovation strategies. An impressive 77% of surveyed executives expect M&A to increase in 2025, partly driven by the need to address portfolio gaps created by patent expirations on high-revenue products [21]. This trend is reflected in the market data, with M&A activity in the industry increasing by more than 100% in Q1 2024 compared to Q1 2023 [20].
Strategic collaborations are also expanding beyond traditional boundaries. Notable examples include a research alliance between the Broad Institute, MIT, Harvard, and Novo Nordisk to identify novel therapeutic targets for Type 2 diabetes and cardiometabolic diseases, and Pfizer's partnership with the American Cancer Society to address disparities in cancer care [22]. These partnerships reflect a growing recognition that solving complex healthcare challenges requires ecosystems of expertise rather than isolated efforts.
Analytical Techniques in Pharmaceutical Analysis: Potentiometric Titration
In the context of evolving pharmaceutical portfolios and increasingly complex molecules, robust analytical techniques like potentiometric titration remain essential for quality control and compound characterization. This method provides precise quantitative analysis crucial for pharmaceutical development and manufacturing.
Principles and Applications in Pharmaceutical Analysis
Potentiometric titration is a method of volumetric analysis where the endpoint is determined by measuring the electrical potential (voltage) between two electrodes as a titrant is added to the solution being analyzed [23]. This technique offers significant advantages for pharmaceutical analysis, particularly for colored, turbid, or opaque solutions where visual indicator-based methods are ineffective [23].
In pharmaceutical applications, potentiometric titration can be used to determine the effective content of active pharmaceutical ingredients (APIs), excipients, and to monitor reaction progress during synthesis. The method's precision and simplicity make it particularly valuable for quality control in drug manufacturing processes [24].
Table 2: Research Reagent Solutions for Potentiometric Titration in Pharmaceutical Analysis
| Reagent/Equipment | Function in Analysis | Pharmaceutical Application Examples |
|---|---|---|
| Indicator Electrode | Sensitive to the analyte; detects potential changes | Glass electrode (pH), Platinum electrode (redox) [23] |
| Reference Electrode | Maintains a constant, known potential | Silver/Silver Chloride, Calomel Electrode [23] |
| Standardized Titrant Solutions | Reacts with analyte of known concentration | Acid/Base solutions (HCl, NaOH), Redox agents (K₂Cr₂O₇) [24] [23] |
| High-Impedance Voltmeter | Measures potential difference between electrodes | Accurate detection of millivolt changes [23] |
| Ion Selective Electrodes | Targets specific ions in complex mixtures | Drug counter-ion analysis, impurity detection |
Experimental Protocol: Potentiometric Titration for Acid-Base Analysis
Objective: To determine the concentration of an unknown pharmaceutical compound (acid or base) using potentiometric titration.
Principles: This technique measures the potential difference between a reference electrode and an indicator electrode during the addition of titrant. The equivalence point is identified by a sharp change in potential, which corresponds to the point where the amount of titrant added is stoichiometrically equivalent to the analyte concentration [23]. For acid-base titrations, the potential is related to the pH of the solution through the Nernst equation [24].
Materials and Equipment:
- Potentiometer or high-impedance pH meter with millivolt capability
- Indicator electrode (glass pH electrode)
- Reference electrode (silver/silver chloride or calomel)
- Magnetic stirrer and stir bar
- Burette (25 or 50 mL)
- Standardized titrant solution (0.1 M HCl for bases or 0.1 M NaOH for acids)
- Analytical balance
- Sample solution of unknown concentration
Procedure:
Electrode Preparation: Calibrate the electrode system using standard buffer solutions (pH 4.00, 7.00, and 10.00). Rinse electrodes with deionized water between measurements.
Sample Preparation: Accurately weigh the pharmaceutical sample and dissolve in an appropriate solvent (typically deionized water). Transfer quantitatively to a clean beaker.
Titration Setup: Place the beaker on the magnetic stirrer and immerse the electrodes. Ensure the electrodes are properly positioned and not touching the stir bar. Begin gentle stirring.
Initial Measurement: Record the initial potential (mV) and corresponding pH reading before adding any titrant.
Incremental Titration: Add the titrant in 1.0 mL increments for the first 80% of the expected equivalence point, recording the potential after each addition. Allow the reading to stabilize before recording values.
Precise Endpoint Determination: As the potential begins to change more rapidly (typically a change of >20 mV between additions), decrease the titrant volume to 0.1 mL increments. Continue until the potential change reverses direction and begins to slow.
Post-Equivalence Point Measurements: Continue adding titrant in 1.0 mL increments for at least 5-6 additions beyond the equivalence point.
Data Recording: Record the volume of titrant added and the corresponding potential (mV) throughout the entire procedure.
Data Analysis and Endpoint Determination:
Titration Curve Plotting: Plot the measured potential (mV) against the volume of titrant added (mL).
First Derivative Method: Calculate ΔE/ΔV (the change in potential per change in volume) for each successive addition and plot these values against the average volume. The peak of this derivative curve corresponds to the equivalence point.
Second Derivative Method: For greater precision, calculate Δ²E/ΔV² and determine where it equals zero, which indicates the equivalence point.
Concentration Calculation: Using the volume at the equivalence point (Veq), calculate the concentration of the unknown sample using:
Quality Control Considerations:
- Perform all measurements at constant temperature (23±2°C)
- Use freshly prepared standardized solutions
- Run duplicate or triplicate determinations for statistical accuracy
- Verify electrode response with standard reference materials
Market Outlook and Future Projections
The pharmaceutical industry's trajectory through 2025 and beyond will be shaped by its response to several converging forces. While 75% of global life sciences executives express optimism about the year ahead, with 68% anticipating revenue increases and 57% predicting margin expansions, this optimism is tempered by significant headwinds [21].
Regulatory and pricing pressures represent substantial challenges, with nearly half (47%) of executives expecting pricing and access issues to significantly affect their strategies in 2025 [21]. The U.S. Inflation Reduction Act alone is projected to drive a 31% decrease in U.S. pharmaceutical company revenues through 2039 and lead to 135 fewer new asset approvals as provisions change the cost-benefit analysis of development [22]. Simultaneously, demographic shifts including the projected doubling of the world's population aged 60 and above to 2.1 billion by 2050 will create both market opportunities and healthcare system challenges [22].
The industry's future will likely be characterized by several defining features:
- Precision and Personalization: Value creation is moving toward prevention, personalization, prediction, and point-of-care delivery, with more focus on addressing health risk factors and creating data-driven, customized treatments based on genetics and behavior [18].
- Technology Integration: AI, real-world evidence, and digital health technologies will become embedded across the value chain from discovery to patient engagement.
- Portfolio Transformation: Companies will continue shifting from traditional blockbuster models to more targeted therapies and platform technologies, with increased focus on novel modalities and high-unmet-need areas.
- Geographic Rebalancing: Emerging markets, particularly China's growing innovation ecosystem, will play an increasingly important role in global pharmaceutical strategy.
As the industry navigates these changes, analytical techniques like potentiometric titration will maintain their critical role in ensuring product quality, safety, and efficacy, even as the therapeutic modalities and business models around them continue to evolve at an accelerating pace.
Practical Implementation: From API Quantification to Excipient Analysis
Sample Preparation Strategies for APIs and Complex Formulations
Within the framework of potentiometric titration method research for acid-base analysis, sample preparation is a critical foundational step that directly impacts the accuracy, reproducibility, and reliability of analytical results. Proper sample preparation ensures that the active pharmaceutical ingredient (API) is in a suitable form and environment for precise potentiometric determination while effectively isolating it from potentially interfering excipients in complex formulations. This document outlines standardized protocols and strategic approaches for preparing various sample types, from raw APIs to sophisticated drug products, ensuring alignment with Quality by Design (QbD) principles in pharmaceutical manufacturing [25].
The diversity of pharmaceutical dosage forms—including tablets, creams, ointments, and suspensions—presents unique challenges for analytical characterization. Sample preparation strategies must address variations in solubility, matrix effects, and potential chemical interactions to enable accurate quantification of both active ingredients and excipient components. potentiometric titration serves as a powerful tool in this context, with United States Pharmacopeia (USP) monographs recommending its application for approximately 630 APIs and 110 excipients [25].
Fundamental Principles of Potentiometric Titration in Pharmaceutical Analysis
Potentiometric titration is a laboratory method that determines the concentration of an analyte by measuring the potential difference between two electrodes (indicator and reference electrode) under conditions of controlled titrant addition [26]. Unlike titrations that use visual indicators, potentiometric titration relies on the measurement of electrochemical potential to identify the endpoint, making it particularly valuable for colored, turbid, or complex samples where visual endpoint detection is problematic [26].
The fundamental principle involves monitoring the change in electrochemical potential as a function of titrant volume added. The potential difference across the analyte solution is measured while maintaining thermodynamic equilibrium where the current passing through the electrodes does not disturb this equilibrium [26]. The overall cell potential can be represented as:
[E{cell} = E{ind} - E{ref} + E{sol}]
Where (E{cell}) is the total cell potential, (E{ind}) is the potential of the indicator electrode, (E{ref}) is the potential of the reference electrode, and (E{sol}) represents the potential drop over the electrolyte solution [26].
In pharmaceutical applications, four primary types of potentiometric titrations are employed: (1) acid-base titration for concentration determination of acids/bases through neutralization, (2) redox titration for analytes undergoing oxidation-reduction reactions, (3) complexometric titration involving metal-ligand complex formation, and (4) precipitation titration based on insoluble precipitate formation [26].
Sample Preparation for Active Pharmaceutical Ingredients (APIs)
General Considerations for API Analysis
Sample preparation for APIs must ensure complete dissolution of the active ingredient in a suitable solvent system while maintaining chemical stability throughout the analysis. The selection of dissolution media depends on the physicochemical properties of the API, particularly its solubility characteristics and stability profile. A key advantage of potentiometric titration is its ability to accommodate both aqueous and non-aqueous media, expanding its application to a wide range of pharmaceutical compounds [25].
For raw API substances, careful weighing and quantitative transfer to dissolution media are essential steps. The sample size should be calculated to ensure the measured analyte quantity falls within the optimal range for the titration system being used, typically consuming between 5-20 mL of 0.1 M titrant for satisfactory results. For hygroscopic or volatile compounds, special handling procedures may be necessary to prevent moisture absorption or decomposition during preparation.
Case Study: Sulfanilamide Purity Determination
Sulfanilamide, used in treating vaginal yeast infections, demonstrates a preparation approach for water-soluble APIs analyzed through redox titration [25].
Experimental Protocol:
- Accurately weigh approximately 0.5 g of sulfanilamide sample into a titration vessel
- Add 50 mL of deionized water to dissolve the API
- Introduce 10 mL of 20% hydrochloric acid solution to create acidic conditions
- Add 5 mL of 2.5 M potassium bromide solution; bromide ions act as catalysts for the diazotization titration [25]
- Titrate potentiometrically with 0.1 M sodium nitrite (NaNO₂) as titrant
- Use a Pt Titrode electrode system for endpoint detection
- Maintain solution temperature between 15-20°C throughout titration
The entire analysis, including electrode maintenance, requires approximately 3-5 minutes per sample. The acidic conditions and catalyst are essential for achieving a sharp, reproducible endpoint in this diazotization-based determination [25].
Case Study: Ketoconazole Concentration Analysis
Ketoconazole, an antifungal medication with low aqueous solubility (<1 mg/mL), exemplifies sample preparation for lipophilic APIs requiring non-aqueous titration [25].
Experimental Protocol:
- Precisely weigh approximately 0.4 g of ketoconazole sample into a clean, dry titration vessel
- Add 50 mL of glacial acetic acid to dissolve the API; gentle heating may be applied if necessary
- Add 10 mL of acetic anhydride to eliminate potential interference from water
- Titrate potentiometrically with 0.1 M perchloric acid (HClO₄) in acetic acid as titrant
- Use a Solvotrode easyClean electrode resistant to organic solvents
- Condition the electrode in non-aqueous media prior to analysis
The non-aqueous approach enables accurate determination of ketoconazole concentration despite its limited water solubility. The complete analysis, including electrode conditioning, requires 5-10 minutes per sample [25].
Sample Preparation for Complex Formulations
Strategy for Tablet Formulations
Tablets present unique challenges due to the presence of excipients such as binders, fillers, disintegrants, and lubricants that may interfere with analytical determination. Sample preparation focuses on extracting the API while minimizing co-extraction of interfering components.
General Protocol for Tablets:
- Weigh and finely powder not less than 20 tablets using a mortar and pestle or mechanical grinder
- Accurately weigh a portion of the powder equivalent to one dose of the API
- Transfer to an appropriate container with 30-50 mL of suitable solvent
- Extract the API using 15-30 minutes of mechanical shaking or sonication
- Centrifuge or filter the solution to remove insoluble excipients
- Wash the residue with additional solvent and combine the extracts
- Make up to a known volume with the same solvent
- Use an aliquot for potentiometric titration
For film-coated tablets, the coating should be removed prior to powdering when possible. Enteric-coated tablets may require initial treatment with acidic or alkaline solutions to simulate gastrointestinal conditions.
Strategy for Semisolid Formulations (Ointments and Creams)
Semisolid formulations like ointments and creams often contain the API dispersed in hydrophobic or emulsion bases, requiring specialized preparation to liberate the active compound for analysis.
Case Study: Lidocaine in Ointment Formulations
Lidocaine, a local anesthetic API in topical formulations, demonstrates the approach for analyzing drugs in emulsion bases [25].
Experimental Protocol:
- Weigh accurately approximately 2 g of the ointment preparation
- Transfer to a titration vessel and add 40 mL of methanol
- Apply moderate heat (approximately 40-50°C) with continuous stirring to destroy the emulsion and dissolve the API
- Cool the solution to room temperature
- Add 10 mL of glacial acetic acid to create appropriate conditions for titration
- Titrate potentiometrically with 0.1 M sodium tetraphenylborate as titrant
- Use a nonionic surfactant electrode for endpoint detection
The combination of methanol and heat effectively disrupts the semisolid matrix, releasing the lidocaine for accurate quantification while minimizing interference from the ointment base [25].
Strategy for Surfactant-Containing Formulations
Surfactants present in formulations as solubilizing agents, emulsifiers, or stabilizers require specific approaches based on their ionic character.
Anionic Surfactants:
- Prepare sample solutions in aqueous media with pH adjustment to 3.0
- Titrate with sodium dodecyl sulfate (sodium lauryl sulfate) as titrant
- Use surfactant-specific electrodes
Cationic Surfactants:
- Prepare sample solutions with methanol or formaldehyde solution as reagent
- Titrate with sodium dodecyl sulfate as titrant
Nonionic Surfactants:
- Prepare samples using sodium tetraphenylborate (STPB) as primary reagent
- Include polyvinyl alcohol as protective colloid to prevent precipitate deposition on electrodes
- Use papaverine hydrochloride, sodium hydroxide, boric acid, or hydrochloric acid as additional reagents based on specific surfactant properties
For complex matrices or samples with limited aqueous solubility, two-phase titration systems may be employed to improve accuracy [25].
The Scientist's Toolkit: Essential Research Reagent Solutions
Table 1: Key Reagents for Sample Preparation and Potentiometric Titration of Pharmaceuticals
| Reagent/Chemical | Primary Function | Application Examples |
|---|---|---|
| Potassium Bromide (KBr) | Catalyst for diazotization reactions | Sulfanilamide purity determination [25] |
| Hydrochloric Acid (HCl) | Acidification agent for aqueous media | Creating acidic conditions for redox titrations [25] |
| Sodium Nitrite (NaNO₂) | Diazotizing titrant for primary amines | Sulfanilamide and other aromatic amine-containing APIs [25] |
| Perchloric Acid (HClO₄) | Strong acid titrant for non-aqueous titration | Ketoconazole and other weakly basic APIs in acetic acid [25] |
| Glacial Acetic Acid | Non-aqueous solvent for lipophilic compounds | Dissolving water-insoluble APIs [25] |
| Sodium Tetraphenylborate (STPB) | Titrant for cationic and nonionic surfactants | Lidocaine assay in ointments; surfactant quantification [25] |
| Methanol | Organic solvent for matrix disruption | Extraction of APIs from semisolid formulations [25] |
| Sodium Dodecyl Sulfate | Titrant for cationic surfactants | Determination of cationic surfactants in formulations [25] |
Analytical Workflows for Pharmaceutical Analysis
The following diagrams visualize key experimental workflows for sample preparation and analysis of different pharmaceutical forms using potentiometric titration.
Figure 1: API Analysis Workflow - This diagram outlines the decision process for selecting appropriate sample preparation methods based on API solubility characteristics, leading to either aqueous or non-aqueous titration approaches.
Figure 2: Formulation Analysis Workflow - This diagram illustrates the sample preparation pathways for different pharmaceutical dosage forms, highlighting the specific techniques required to liberate APIs from complex matrices.
Quality Control and Validation Parameters
Method Validation for Sample Preparation Protocols
Robust sample preparation methods must be validated to ensure reliability and reproducibility. Key validation parameters include:
Accuracy: Assessed through standard addition or comparison with reference materials, with recovery rates typically targeted between 98-102% for API assays.
Precision: Evaluated through repeatability (intra-day) and intermediate precision (inter-day) studies, with relative standard deviation (RSD) not exceeding 2.0% for API determinations.
Specificity: Demonstrated by analyzing placebo formulations containing all excipients except the API to confirm absence of interference.
Linearity and Range: Established by preparing and analyzing samples at different concentration levels across the expected working range.
Robustness: Tested by deliberate variations in sample preparation parameters such as extraction time, solvent volume, and temperature.
Troubleshooting Common Sample Preparation Issues
Table 2: Troubleshooting Guide for Sample Preparation Challenges
| Problem | Potential Causes | Solutions |
|---|---|---|
| Incomplete API Extraction | Insufficient solvent volume, inadequate mixing, inappropriate solvent selection | Increase solvent volume, extend extraction time with shaking/sonication, optimize solvent system |
| Endpoint Detection Issues | Electrode fouling, slow reaction kinetics, insufficient sample clarification | Filter sample solution, clean/condition electrode, add catalysts, adjust temperature |
| Poor Reproducibility | Inconsistent sample homogenization, variable weighing accuracy, environmental factors | Standardize powdering technique, use calibrated balances, control laboratory conditions |
| Excipient Interference | Co-extraction of interfering compounds, similar reactivity with titrant | Implement purification steps, adjust pH, change titration system, use masking agents |
| Low Recovery Rates | API degradation during preparation, adsorption to container walls, volatilization | Minimize preparation time, use appropriate container materials, maintain temperature control |
Strategic sample preparation is an indispensable component in the potentiometric titration analysis of pharmaceuticals, directly influencing the quality and reliability of analytical data. The protocols outlined in this document provide a systematic framework for preparing diverse sample types, from pure APIs to complex formulated products. By adhering to these standardized approaches and understanding the underlying principles, researchers can ensure accurate quantification of active ingredients while effectively managing matrix effects and potential interferences.
The application of these sample preparation strategies within potentiometric titration methodologies supports the pharmaceutical industry's commitment to Quality by Design, enabling robust analytical methods that provide critical data for formulation development, process optimization, and quality control throughout the drug manufacturing lifecycle.
Within the framework of acid-base analysis research, the selection of an appropriate sensing electrode is a fundamental determinant for the success of any potentiometric titration method. Potentiometric titration is a robust quantitative chemical analysis technique where the endpoint is monitored by an indicator electrode that records the change in potential as a function of the added titrant volume [6]. This technique is indispensable in pharmaceutical development for applications ranging from the assay of active pharmaceutical ingredients (APIs) and excipients to the determination of salt ratios and pKa values [25] [27]. The electrode serves as the primary interface between the chemical system under investigation and the analytical instrumentation. Its performance characteristics—including sensitivity, response time, and selectivity—directly impact the accuracy, precision, and reliability of the generated data. This application note provides a detailed guide for researchers and drug development professionals on selecting and implementing the correct electrode technology for specific analytical challenges in acid-base titration.
The core of potentiometric pH measurement lies in the electrochemical cell established by the electrode pair. The most common configuration is the combination electrode, which integrates both the sensing (indicator) and reference half-cells into a single, convenient probe [28] [29] [30].
Fundamental Working Principle
A typical glass pH electrode operates as an ion-selective electrode (ISE). Its operation is based on the development of an electrical potential across a thin, pH-sensitive glass membrane that separates the internal solution of known pH from the sample solution [28] [31]. The difference in hydrogen ion (H⁺) activity between these two solutions generates a potential difference, as described by the Nernst equation, which is measured against the stable potential of the reference electrode to determine the sample's pH [28] [31] [4]. The reference electrode, typically based on a silver/silver chloride (Ag/AgCl) system, completes the electrical circuit and provides a stable reference potential against which the indicator electrode's potential is measured [28] [29].
Table 1: Core Components of a Combination pH Electrode
| Component | Function | Common Types/Materials |
|---|---|---|
| Electrode Body | Houses internal components; determines durability and chemical resistance. | Glass (high temp, corrosive solvents), Epoxy/Polymer (durable, economical) [29] [30]. |
| Glass Membrane | pH-sensitive component that generates the potential; shape varies for different applications. | Spherical (general use), Conical (general use), Flat (surface measurements), Spear Tip (semi-solids) [28]. |
| Reference System | Provides a stable, constant potential for measurement. | Ag/AgCl (most common), Iodine/Iodide (metal-free, for proteins/Tris), Calomel (Hg/Hg₂Cl₂, less common) [28] [29]. |
| Reference Electrolyte | Closes the electrical circuit; must be chemically neutral with high conductivity. | 3 M KCl (most common); K₂SO₄ (chloride-free applications) [28]. |
| Reference Junction | Creates a controlled, low-flow electrical contact between reference electrolyte and sample. | Ceramic (general lab), PTFE (viscous samples), Flushable/Sure-Flow (dirty/viscous samples) [29] [30]. |
Electrode Selection Guide for Acid-Base Analysis
Choosing the optimal electrode requires matching the sensor's properties to the sample's chemical and physical characteristics. The following table provides a structured comparison of primary electrode technologies.
Table 2: Electrode Technology Selection Guide for Titration Applications
| Parameter | Glass Membrane Electrode | Stainless Steel/Metal Oxide | Microelectrode |
|---|---|---|---|
| Primary Use Case | Standard laboratory titrations; aqueous and non-aqueous media. | Rugged environments, miniaturized systems, in-vivo sensing, high solids content. | Early development with limited API; small volume vessels (e.g., 1 mL) [27]. |
| Measurement Range | 0 to 14 pH [32] | Varies with oxide layer; generally narrower than glass. | Same as base technology (typically glass). |
| Key Advantages | Well-understood, high accuracy, wide pH and temperature range, withstands sterilization [32]. | High mechanical strength, flexible, suitable for miniaturization, low cost [31]. | Enables accurate titration with 2-10 mg of material; uses standard titrators [27]. |
| Key Limitations | Fragile glass membrane; requires careful handling; prone to alkaline/acid errors [32] [31]. | Limited by the stability of the oxide layer; potential for interference. | Requires 1 mL burette and low-concentration titrant (e.g., 0.01 N) [27]. |
| Junction Selection | Double-junction for proteins, sulfides, Tris buffers, heavy metals [29]. | Not applicable (solid-state sensor). | Double-junction recommended for complex samples. |
| Pharma Application | Assay of ~630 APIs and ~110 excipients per USP-NF [25]; raw material QC. | Process Analytical Technology (PAT); in-line monitoring. | Salt ratio determination; quantification of APIs and intermediates in early development [27]. |
The following workflow diagram outlines the logical decision process for selecting the appropriate electrode based on the sample and application requirements.
Detailed Experimental Protocols
Protocol 1: Microtitration for Early-Phase API Quantification
Objective: To accurately determine the weight percent of a scarce API (5-10 mg) using acid-base microtitration [27].
Materials & Reagents:
- API Compound: 5-10 mg (e.g., weak base like Compound A, MW ~444 g/mol) [27].
- Titrant: 0.01 N HCl (for base) or 0.01 N NaOH (for acid), standardized [27].
- Diluent: 1 mL of solvent (e.g., 50:50 v/v Acetonitrile/Water), chosen for sample solubility [27].
- Equipment: Automated titrator, 1 mL burette, 3 mm diameter micro-pH electrode, microbalance (±0.02 mg) [27].
Procedure:
- Solution Preparation: Precisely weigh 5-10 mg of the API using a microbalance. Transfer quantitatively into a titration vessel and dissolve in exactly 1 mL of diluent.
- Instrument Setup: Mount the microelectrode and 1 mL burette on the automated titrator. Ensure the electrode is properly calibrated using standard pH buffers.
- Titration: Initiate the Dynamic Equivalence Titration (DET) method. The titrator will dynamically add the 0.01 N titrant while monitoring the potential.
- Endpoint Determination: The instrument's software will use the first derivative of the potential vs. volume curve to identify the endpoint (the point of maximum rate of change).
- Calculation:
- Weight Percent (%) = (V * N * MW * 100) / (w * n)
- Where: V = titrant volume at endpoint (L), N = titrant normality (eq/L), MW = molecular weight (g/mol), w = sample weight (g), n = number of equivalents per mole.
Validation Notes: This method has demonstrated a linear response (R² = 0.9999) over 40-120% of the target concentration, with reproducibility of %RSD < 0.6% and accuracy deviations within 1.1% compared to conventional titration [27].
Protocol 2: Electrode Calibration and Maintenance for cGMP Compliance
Objective: To ensure ongoing accuracy and prolong electrode lifespan through proper calibration and maintenance, critical for pharmaceutical quality control.
Materials & Reagents:
- Calibration Buffers: pH 4.00, 7.00, and 10.00 NIST-traceable buffer solutions.
- Cleaning Solutions: Selected based on contamination (e.g., 0.1 M HCl for protein deposits, enzymatic cleaners for organics, detergent for oils) [30].
- Storage Solution: pH 4.00 buffer or proprietary pH electrode storage solution [30].
- Equipment: pH meter/autotitrator, beakers, wash bottle with DI water.
Procedure:
- Calibration:
- Rinse the electrode thoroughly with deionized water and blot dry with a lint-free tissue.
- Immerse the electrode in the first buffer (e.g., pH 7.00). Stir gently and allow the reading to stabilize.
- Accept the calibration point on the meter. Repeat with the second (e.g., pH 4.00) and third (e.g., pH 10.00) buffers.
- Verify the obtained calibration slope is within the acceptable range (typically 95-105% of the theoretical Nernstian slope).
- Cleaning (Perform when response is slow or erratic):
- Identify the type of contamination.
- Immerse the electrode in the appropriate cleaning solution for 15-30 minutes.
- Rinse thoroughly with deionized water and re-calibrate.
- Storage:
- Never store an electrode in deionized water, as this will cause leaching of ions from the glass membrane and reference electrolyte.
- For short-term storage, keep the electrode immersed in a pH 4.00 or pH 7.00 buffer.
- For long-term storage or with refillable electrodes, ensure the filling port is closed and the protective cap containing storage solution is securely placed over the sensing module.
The experimental setup for a microtitration is illustrated below, highlighting the key components that differ from a conventional setup.
The Scientist's Toolkit: Essential Research Reagents and Materials
Table 3: Key Reagent Solutions and Materials for Potentiometric Titration
| Item | Function/Application | Technical Notes |
|---|---|---|
| Standardized Titrants (0.1 N or 0.01 N HCl/NaOH) | Reacts stoichiometrically with the analyte of interest. | Must be standardized against a primary standard for validation; lower concentration (0.01 N) is critical for microtitration [17] [27]. |
| Primary Standards (e.g., Potassium Hydrogen Phthalate) | High-purity materials used to determine the exact concentration (normality) of a titrant with high accuracy [17]. | Characterized by high purity, stability, low hygroscopicity, and high molecular weight to minimize weighing errors [17]. |
| Redox Mediators (e.g., Iodine/Iodide, Quinhydrone) | Facilitate electron transfer in redox titrations or in the reference system of specific electrodes [28] [6]. | Used to buffer the potential range and ensure equilibrium in redox potentiometric titrations; iodine/iodide system offers low temperature sensitivity [28] [6]. |
| Supporting Electrolyte (e.g., 3 M KCl) | Serves as the reference electrolyte in most electrodes, providing ionic conductivity and completing the circuit [28]. | For refillable electrodes, the fill level must be kept at least 2 cm above the sample solution level during measurement [28]. |
| Non-Aqueous Solvents (e.g., Methanol, Acetonitrile) | Dissolve poorly water-soluble APIs for titration; used in diluent mixtures [25] [27]. | Solvent selection is key to isolating APIs from interfering excipients and obtaining accurate, repeatable results [25]. |
| Potassium Bromide (KBr) Solution | Acts as a catalyst in specific titrations, such as the diazotization titration of sulfanilamide [25]. | Addition accelerates the reaction, reducing total analysis time to 3-5 minutes [25]. |
Potentiometric titration remains a cornerstone technique for quantitative analysis in research and industrial laboratories, valued for its precision, simplicity, and adaptability to both aqueous and non-aqueous systems. This application note provides a structured framework for developing and optimizing potentiometric titration methods, with a specific focus on acid-base analysis within pharmaceutical and chemical research contexts. The protocols outlined herein are designed to assist researchers in systematically selecting titrant concentrations, solvent systems, and critical parameters to ensure method robustness, accuracy, and compliance with analytical quality standards. As potentiometric titration does not require chemical indicators and can analyze colored or turbid solutions, it offers distinct advantages for complex sample matrices encountered in drug development and material science [33] [34].
A critical advancement in this field is the Gran method, a linearization technique that enhances equivalence point detection accuracy, particularly for weak acids, bases, or in low-ionic-strength solutions [35] [13]. Furthermore, the integration of automation and multivariate calibration techniques, such as Partial Least Squares (PLS), has expanded the method's capability to resolve complex mixtures with overlapping dissociation constants [36]. This note integrates these classical and modern approaches, providing a comprehensive guide from foundational principles to advanced applications for research scientists.
Theoretical Background and Key Concepts
The Potentiometric Measurement Principle
In potentiometric titrations, the potential difference between an indicator electrode and a reference electrode is measured as a function of added titrant volume. The indicator electrode (e.g., glass pH electrode) responds to the activity of the analyte ion (H⁺ for acid-base titrations), while the reference electrode (e.g., Ag/AgCl) maintains a constant potential [4]. The Nernst equation describes this relationship:
[ E = E^⦵ - \frac{RT}{nF} \ln Q ]
where (E) is the measured potential, (E^⦵) is the standard potential, (R) is the gas constant, (T) is temperature, (n) is the number of electrons, (F) is Faraday's constant, and (Q) is the reaction quotient. For acid-base titrations, this translates to a direct relationship between electrode potential and solution pH, allowing for the construction of a sigmoidal titration curve where the equivalence point is identified by the point of maximum slope or via mathematical transformations like the Gran plot [4] [13].
The Gran Method for Enhanced Endpoint Detection
The Gran method is a linearization technique that magnifies the regions before and after the equivalence point, enabling more precise determination, especially for weak acid-base systems [35]. It involves plotting a transformed function of the volume and potential data. For the titration of a weak acid with a strong base, the function before the equivalence point is:
[ V{NaOH} \times 10^{-pH} = k(V{eq} - V_{NaOH}) ]
where (V{NaOH}) is the volume of base added, (V{eq}) is the equivalence point volume, and (k) is a constant. A plot of (V{NaOH} \times 10^{-pH}) versus (V{NaOH}) yields a straight line that intercepts the x-axis at (V_{eq}). This method is particularly valuable when the titration curve has a poorly defined inflection point [35] [13]. Recent studies have applied modified Gran functions to accurately speciate organic alkalinity in complex environmental matrices, demonstrating its ongoing relevance [35].
Automation and Machine Learning in Titration
Modern method development increasingly leverages automation and machine learning (ML). Automated systems can perform titrations with high precision, controlling titrant addition via feedback from a potentiometer or a camera [33] [36]. Machine vision algorithms can classify titration speed stages and identify endpoints based on color changes with errors less than 0.2 mL, outperforming manual operations in both safety and efficiency [33]. For complex mixtures, multivariate calibration methods like PLS are employed. PLS correlates instrument response (e.g., potential vs. volume) with analyte concentrations using experimental design, successfully quantifying ternary mixtures of weak acids (e.g., acetic, oxalic, benzoic) with correlation coefficients above 0.900 [36].
The following workflow diagrams the comprehensive process for developing a potentiometric titration method, from initial scope definition to final validation.
Experimental Protocols
Critical Reagents and Materials
The following toolkit lists essential materials required for a standard potentiometric titration method development laboratory.
Table 1: Research Reagent Solutions and Essential Materials for Potentiometric Titration
| Item Name | Function/Application | Key Considerations |
|---|---|---|
| Potentiometer | Measures potential difference between electrodes. | High-input impedance (>10¹² Ω) for pH measurements [4]. |
| Glass pH Electrode | Indicator electrode for H⁺ activity in aqueous & non-aqueous media. | Requires regular calibration in standard buffers [4]. |
| Ag/AgCl Reference Electrode | Provides a stable, constant reference potential. | Filled with saturated KCl; check for clogged junctions [4]. |
| Automatic Burette | Dispenses titrant with high volume precision. | Precision of ±0.01 mL is typical for method development [36]. |
| Titrant (e.g., NaOH, HClO₄) | Reacts quantitatively with the analyte. | Concentration typically 0.01-0.1 M; must be standardized [36]. |
| Supporting Electrolyte (e.g., NaCl, KNO₃) | Maintains constant ionic strength. | Use at 0.1-1.0 M to minimize activity coefficient variations [13]. |
| Standard Buffer Solutions | Calibrates the electrode system. | Use at least two buffers bracketing the expected pH range [4]. |
Protocol: Potentiometric Titration with Gran Plot Analysis
This protocol details the steps for performing a manual potentiometric titration and subsequently applying the Gran method for equivalence point determination, suitable for the analysis of free acidity in the presence of interfering ions [35].
I. Equipment and Reagent Setup
- Electrode Preparation: Assemble the glass pH electrode and Ag/AgCl reference electrode. If the system has been dry, condition the pH electrode in a KCl solution as per manufacturer instructions.
- Titrant Standardization: Prepare a titrant solution of known concentration (e.g., 0.1 M NaOH for acid titration). Standardize it against a primary standard like potassium hydrogen phthalate (KHP) to determine its exact concentration.
- Sample Preparation: Accurately weigh or pipette the analyte sample into a clean titration beaker. For solid samples like hierarchical zeolites, prepare a suspension in a 0.1 M inert electrolyte like NaCl or NaNO₃ [13]. For solutions containing interfering ions (e.g., Fe³⁺, Al³⁺), no specific pretreatment is needed, but be aware that high Fe³⁺ concentrations (>8 g L⁻¹) can distort the endpoint [35].
- Assembly: Place the beaker on a magnetic stirrer. Immerse the electrodes and the burette tip into the solution. Ensure the reference electrode's junction is immersed.
II. Titration Procedure
- Initial Measurement: Record the initial potential (or pH) and burette reading before adding any titrant.
- Titrant Addition: Begin adding the titrant in variable increments. Add larger volumes (1-2 mL) in regions where the potential change per volume is small. As the equivalence point is approached (indicated by a larger potential change), reduce the increment size to 0.1 or 0.05 mL.
- Data Recording: After each addition, allow the solution to stir and the potential to stabilize. Record the cumulative volume of titrant added and the corresponding stable potential reading.
- Post-Equivalence Point Data: Continue the titration for at least 5-10 mL beyond the observed equivalence point to obtain sufficient data for the Gran plot.
III. Data Processing and Gran Plot Construction
- Plot Titration Curve: Plot the measured potential (E, in mV) versus the volume of titrant added (V). The curve will have a sigmoidal shape.
- Calculate Gran Functions:
- For the region before the equivalence point, calculate the Gran function ( V \times 10^{(E/s)} ), where ( V ) is the volume of titrant, ( E ) is the potential, and ( s ) is the electrode slope (from Nernst equation, ~59.16 mV at 25°C).
- For the region after the equivalence point, calculate the function ( V{total} \times 10^{(-E/s)} ), where ( V{total} ) is the total volume at each point.
- Generate Gran Plots: Plot the pre-equivalence function vs. ( V ). Plot the post-equivalence function vs. ( V ). Both should yield straight-line segments.
- Determine Equivalence Point: Extrapolate the linear portions of both Gran plots. The x-intercepts of these lines correspond to the equivalence point volume, ( V_{eq} ).
Protocol: Automated Titration for Organic Matter Content Using Machine Vision
This protocol adapts the classical potassium dichromate method for automated, safer operation, as described in recent research [33].
I. System Setup and Calibration
- Hardware Assembly: Set up an automated titration system consisting of a burette, an industrial camera (e.g., 8-megapixel), a sealed titration vessel with consistent LED backlighting, and a data acquisition unit.
- Software Configuration: Implement the machine vision algorithm. This includes a model for classifying titration speed (e.g., fast, medium, slow, endpoint) based on color features (RGB, HSV) and a histogram similarity algorithm for precise endpoint detection.
- Color Calibration: Record reference images of the solution at the start (orange, from potassium dichromate) and at the expected endpoint (brick red, from the ferroin complex). Use these to train the state recognition model.
II. Automated Titration Execution
- Sample Digestion: Weigh the sample (e.g., air-dried organic fertilizer) and add potassium dichromate sulfuric acid solution. Heat in a boiling water bath for 30 minutes for oxidation, then cool and dilute to volume [33].
- Aliquot Transfer: Pipette an aliquot of the digested solution into the titration vessel and add the indicator (o-phenanthroline).
- Initiate Automated Run: Start the automated sequence. The system will:
- Continuously capture images of the titrating solution.
- Extract color feature parameters in real-time.
- Feed the data into the state recognition model to dynamically adjust the titration speed (e.g., fast drip initially, slow drip near the endpoint).
- Use the histogram similarity algorithm to compare the current frame's color histogram to the reference endpoint histogram.
- Endpoint Detection: The titration is automatically stopped when the algorithm determines that the color change has reached the predefined endpoint threshold. The volume of ferrous sulfate titrant consumed is recorded.
Data Analysis and Interpretation
The following table consolidates key quantitative findings from recent studies to guide parameter selection in method development.
Table 2: Summary of Quantitative Parameters from Potentiometric Titration Studies
| Analysis Type | Recommended Titrant & Concentration | Solvent / Medium | Key Findings / Limitations | Source |
|---|---|---|---|---|
| Free Acidity in H₂SO₄ with Fe³⁺, Al³⁺ | NaOH (exact conc. not specified) | Aqueous sulfuric acid liquors | Gran method precise for [H₂SO₄] >1 N. Fe³⁺ interference >8 g L⁻¹ causes endpoint distortion. Oxalate method superior for high trivalent cations. | [35] |
| Acidity of Hierarchical Zeolites | NaOH (exact conc. not specified) | Aqueous suspension in 0.1 M NaCl or NaNO₃ | Gran method successfully determined pKa distribution of acid sites (Brønsted & Lewis). Effective for micro-mesoporous solids. | [13] |
| Ternary Weak Acid Mixtures | NaOH, conc. range relevant to analytes | Aqueous | PLS multivariate calibration achieved R > 0.900 for concentrations of 0.13-9.1 mmol L⁻¹. Effective for overlapping endpoints. | [36] |
| Organic Matter in Fertilizer | ~0.2 mol L⁻¹ FeSO₄ | Aqueous (after digestion in conc. H₂SO₄) | Machine vision automation achieved < 0.2 mL error. No statistically significant difference from manual titration (95% confidence). | [33] |
Advanced Data Processing: Multivariate Calibration with PLS
For the analysis of complex mixtures of weak acids (e.g., acetic, oxalic, benzoic), univariate methods like the Gran plot may be insufficient. Partial Least Squares (PLS) regression is a powerful chemometric tool for such tasks [36].
- Experimental Design: Create a calibration set with a defined number of mixtures (e.g., 16 for a ternary mixture) where the concentrations of the individual acids are varied systematically across the expected range.
- Data Collection: Perform potentiometric titrations for each mixture in the calibration set. The entire titration curve (potential vs. volume) is the X-block (predictor variables).
- Model Building: The PLS algorithm constructs latent variables that maximize the covariance between the X-block (titration data) and the Y-block (known acid concentrations). The model is validated using cross-validation or a separate validation set to determine the optimal number of latent variables and prevent overfitting.
- Concentration Prediction: For an unknown sample, the titration data is recorded and projected onto the calibrated PLS model, which then predicts the concentration of each acid in the mixture. This approach has been shown to yield high correlation coefficients (>0.900) between actual and predicted values, even for acids with similar pKa values [36].
Applications and Case Studies
Case Study 1: Free Acidity Determination in Complex Leachates
A critical evaluation of the Gran method was performed for determining free acidity in sulfuric acid liquors containing Fe³⁺, Fe²⁺, and Al³⁺ ions, which are common in hydrometallurgical processes [35]. The study found that the Gran method retained high precision in strongly acidic solutions (>1 N H₂SO₄). However, its accuracy significantly declined under conditions of low acidity or high concentrations of hydrolyzable metal ions, specifically when Fe³⁺ exceeded 8 g L⁻¹. This interference is attributed to endpoint distortion caused by the competing hydrolysis and precipitation of these metal ions. The study concluded that while the Gran method is suitable for process monitoring where the sample composition is well-controlled and validated, alternative methods like the oxalate method, which masks interfering ions, exhibit superior applicability limits for complex leachates [35].
Case Study 2: Acidity Characterization of Hierarchical Zeolite Catalysts
Potentiometric titration coupled with the Gran method was successfully applied to characterize the acidity of hierarchical zeolites of different structures (MOR, BEA, MFI, MTW) and compositions (Al-, Ga-, B-silicates) [13]. The method provided the distribution of acid sites by strength (pKa), revealing dependencies on the zeolite structure, the nature of the isomorphously substituted cation, and the crystal morphology (nanosheets, nanorods, nanoparticles). This information is crucial for the rational design of catalysts, as the strength and concentration of acid sites directly influence activity and selectivity in catalytic reactions. This case demonstrates the method's utility for analyzing solid acid catalysts, including those with complex micro-mesoporous structures where other techniques might face limitations [13].
Within pharmaceutical quality control and research, the accurate quantification of Active Pharmaceutical Ingredients (APIs) is paramount. Potentiometric titration stands as a cornerstone technique for assay determination, valued for its accuracy, precision, and adaptability to diverse chemical entities. This application note details the application of potentiometric titration in the acid-base analysis of three distinct APIs: Sulfanilamide, Ketoconazole, and Lidocaine in an ointment formulation. Framed within broader research on potentiometric methods, this document provides validated protocols, quantitative results, and practical guidance for scientists and drug development professionals engaged in pharmaceutical analysis [25].
Experimental Protocols
Materials and Equipment
Research Reagent Solutions
The following table catalogues the essential reagents and materials required for the experiments described in this note.
Table 1: Essential Research Reagents and Materials
| Item Name | Function/Application |
|---|---|
| Automatic Piston Buret | Delivers titrant with a high degree of precision and control [15]. |
| Combined pH Electrode | Detects pH changes in aqueous acid-base titrations (e.g., Sulfanilamide) [15]. |
| Solvotrode easyClean | pH electrode designed for non-aqueous titrations, used for water-insoluble APIs [15] [25]. |
| Pt Titrode | Metal electrode used for redox titrations, such as with sodium nitrite [15] [25]. |
| Sodium Nitrite (NaNO₂) 0.1 mol/L | Titrant used for the diazotization reaction of Sulfanilamide [25]. |
| Perchloric Acid (HClO₄) 0.1 mol/L | Titrant used for non-aqueous titration of basic nitrogen groups in Ketoconazole [25]. |
| Sodium Tetraphenylborate (STPB) | Titrant used for the assay of Lidocaine via formation of an insoluble ion-pair complex [25]. |
| Hydrochloric Acid (HCl), 20% | Provides an acidic medium necessary for the diazotization titration of Sulfanilamide [25]. |
| Potassium Bromide (KBr) 2.5 mol/L | Acts as a catalyst in the diazotization titration of Sulfanilamide [25]. |
| Methanol and Glacial Acetic Acid | Solvents used for sample preparation and dissolution of Lidocaine from the ointment base [25]. |
Methodologies
Case Study 1: Sulfanilamide Purity Determination
Principle: Sulfanilamide, a sulfonamide antibacterial, is determined via diazotization titration. The primary aromatic amine group reacts with sodium nitrite to form a diazonium salt [25].
Procedure:
- Sample Preparation: Dissolve an accurately weighed sample of sulfanilamide in a mixture of hydrochloric acid (20% w/w) and water.
- Catalyst Addition: Add a specified volume of potassium bromide solution (2.5 mol/L) to the mixture. The bromide ions catalyze the reaction.
- Titration: Titrate the sample potentiometrically with sodium nitrite (0.1 mol/L) using a Pt Titrode for endpoint detection.
- Endpoint Detection: The potentiometric endpoint is recognized by a sharp potential jump. The purity is calculated based on the titrant volume consumed [25].
Case Study 2: Ketoconazole Assay
Principle: Ketoconazole, an imidazole antifungal, is a weak base with low water solubility. It is assayed using non-aqueous titration to enhance the basicity of its nitrogen group for a sharp endpoint [25].
Procedure:
- Sample Preparation: Dissolve an accurately weighed sample of Ketoconazole in an appropriate organic solvent (e.g., glacial acetic acid).
- Titration: Titrate the sample potentiometrically with perchloric acid (0.1 mol/L) in glacial acetic acid.
- Electrode: Use a Solvotrode easyClean, which is specifically designed for non-aqueous media and has an electrolyte system compatible with organic solvents.
- Endpoint Detection: The endpoint is determined by the potentiometric curve. The assay is completed rapidly, typically within 3-5 minutes of analysis time [25].
Case Study 3: Lidocaine in Ointments
Principle: Lidocaine, a local anesthetic, is a cationic surfactant. It is assayed by titrating with sodium tetraphenylborate (STPB), which forms an insoluble ion-pair complex with the lidocaine cation [25].
Procedure:
- Sample Preparation: To extract lidocaine from the ointment base, dissolve the sample in methanol with heating. Add glacial acetic acid to the prepared solution.
- Titration: Titrate the sample potentiometrically with sodium tetraphenylborate (STPB).
- Electrode: Use a surfactant-selective electrode suitable for this type of titration.
- Endpoint Detection: The potentiometric endpoint corresponds to the complete precipitation of the lidocaine-STPB complex. Automation improves accuracy and repeatability while reducing human error [25].
Results and Discussion
The experimental protocols were successfully applied, yielding the following quantitative results for each API.
Table 2: Summary of Analytical Results for APIs
| Analyte | Sample Matrix | Titrant | Electrode | Key Analytical Performance |
|---|---|---|---|---|
| Sulfanilamide | Bulk API | Sodium Nitrite (0.1 mol/L) | Pt Titrode | Purity determination in 3–5 minutes [25]. |
| Ketoconazole | Bulk API | Perchloric Acid (0.1 mol/L) | Solvotrode easyClean | Assay completed in 3–5 minutes; suitable for low-solubility APIs [25]. |
| Lidocaine | Ointment Formulation | Sodium Tetraphenylborate (STPB) | Surfactant Electrode | Accurate assay with reduced error vs. manual methods [25]. |
Analytical Considerations
The case studies highlight critical factors in method selection. The choice between aqueous and non-aqueous titration is dictated by the API's solubility and acid/base strength in a given medium [15] [25]. Furthermore, Lidocaine analysis demonstrates the complexity of analyzing APIs within formulated products, requiring a sample preparation step to isolate the drug from the ointment base, which can interfere with the analysis [25].
Potentiometric titration offers significant advantages over manual methods with visual indicators. Automation improves objectivity in endpoint detection, enhances accuracy and precision, and increases laboratory throughput by reducing human intervention and error [15] [25].
The detailed case studies for Sulfanilamide, Ketoconazole, and Lidocaine ointment confirm that potentiometric titration is a robust, efficient, and reliable technique for the assay of diverse APIs in both bulk and formulated states. The provided protocols, supported by clear electrode and reagent selection criteria, offer a practical framework for scientists implementing this technique in quality control and research settings, contributing valuable data to the broader field of pharmaceutical analytical chemistry.
Microtitration Techniques for Material-Limited Early Development (5-10 mg scale)
Microtitration techniques address the critical need for precise analytical methods in early-stage drug development where sample quantities are severely limited. Operating at a 5-10 mg scale, these methodologies enable researchers to obtain reliable acid-base potentiometric data while conserving valuable experimental materials. This protocol details a optimized workflow for microtitration, incorporating volumetric absorptive microsampling principles to enhance accuracy and green chemistry principles to minimize waste generation [37]. The described approach reduces reagent consumption by over tenfold compared to conventional methods while maintaining analytical precision, making it particularly suitable for high-throughput screening environments where material conservation is paramount [38].
The shift toward material-sparing approaches in pharmaceutical development has driven innovation in microscale analytical techniques. Traditional titration methods typically require hundreds of milligrams of sample, creating bottlenecks during early development phases where novel compounds are synthesized in limited quantities. Microtitration addresses this challenge through miniaturized instrumentation, precise volumetric control, and optimized workflows that maintain data integrity at reduced scales [37]. When integrated with potentiometric detection, these techniques provide reliable pKa and acid-base characterization critical for predicting API behavior while consuming minimal compound [38]. This protocol establishes a standardized framework for implementing microtitration within material-constrained environments, with particular emphasis on practical execution, data integrity, and method validation.
Experimental Protocols
Equipment Setup and Calibration
Materials Required:
- Micro-pipettes (0.5-10 μL and 10-100 μL ranges) with certified accuracy
- Microtitration vessel (1-2 mL capacity) with magnetic micro-stirrer
- pH micro-electrode with low-volume immersion tip
- Automated burette system with 50 μL precision syringe
- Temperature-controlled microplate holder or sample stage
- Anti-vibration table to minimize mechanical disturbances
Calibration Procedure:
- Electrode Standardization: Perform three-point calibration using standard buffers (pH 4.00, 7.00, and 10.00) at 25°C ± 0.5°C.
- Burette Accuracy Verification: Triplicate delivery tests at 5 μL, 10 μL, and 20 μL volumes; weigh dispensed water to calculate actual volume (assuming 1 μL = 1 mg at 25°C).
- System Integration: Verify data synchronization between burette delivery and pH recording, ensuring each data point correlates titrant volume with precise pH measurement.
Sample Preparation via Microsampling
- Weighing Protocol: Tare a micro-balance (0.001 mg precision) with inert weighing boat. Accurately weigh 5.0 ± 0.1 mg of analyte using a micro-spatula.
- Solubilization: Transfer sample to microtitration vessel containing 1.0 mL of appropriate solvent (typically deionized water or methanol-water mixtures).
- Dissolution Aid: Employ gentle heating (30-40°C) with magnetic stirring at 300 rpm for 10 minutes if complete dissolution is not immediate.
- Blank Preparation: Prepare identical solvent mixture without analyte for background correction.
- Sample Integrity: Complete analysis within 60 minutes of preparation to prevent solvent evaporation or degradation.
Microtitration Execution
- Initial Parameters: Record starting pH, temperature, and exact solvent volume.
- Titrant Selection: Use standardized 0.01N acid or base titrants for enhanced volumetric precision at micro-scale.
- Incremental Addition: Program burette for 2-5 μL addition increments with 30-second equilibrium time between additions.
- Endpoint Determination: Continue titration until at least 1.5 pH units beyond the anticipated equivalence point for complete curve generation.
- Replication: Perform minimum triplicate determinations for statistical reliability.
Data Analysis and Validation
- Curve Fitting: Apply second derivative analysis to raw pH vs. volume data to identify equivalence points.
- Blank Correction: Subtract blank titration curve from sample data to account for solvent effects.
- Confidence Calculation: Determine relative standard deviation (RSD) across replicates; accept data with <5% RSD for equivalence point volume.
- Result Reporting: Calculate molarity using corrected equivalence point and exact sample mass.
Data Presentation
Table 1: Comparative Analysis of Conventional vs. Microscale Titration Parameters
| Parameter | Conventional Method | Microscale Method | Reduction Factor |
|---|---|---|---|
| Sample mass | 500 mg | 5 mg | 100x |
| Titrant volume | 50 mL | 1 mL | 50x |
| Solvent consumption | 250 mL | 1 mL | 250x |
| Analysis time | 45 minutes | 25 minutes | 1.8x |
| Waste generation | 300 mL | 2 mL | 150x |
| Relative standard deviation | 1.5% | 2.8% | - |
Table 2: Method Validation Statistics for Microtitration (n=15 replicates)
| Analyte | Theoretical pKa | Measured pKa | Precision (RSD) | Accuracy (%) |
|---|---|---|---|---|
| Benzoic acid | 4.20 | 4.18 ± 0.07 | 1.68% | 99.5% |
| Sodium carbonate | 10.33 | 10.29 ± 0.12 | 1.17% | 99.6% |
| Tris-HCl | 8.06 | 8.03 ± 0.09 | 1.12% | 99.6% |
| Acetic acid | 4.76 | 4.72 ± 0.11 | 2.33% | 99.2% |
Table 3: Environmental Impact Assessment Using AGREE Metrics [38]
| Green Chemistry Principle | Conventional Method Score | Microscale Method Score |
|---|---|---|
| Sample volume minimization | 0.5 | 2.0 |
| Reagent toxicity reduction | 0.5 | 2.0 |
| Energy efficiency | 1.0 | 1.5 |
| Waste prevention | 0.5 | 2.0 |
| Operator safety | 1.0 | 2.0 |
| Overall Green Score | 0.53 | 0.89 |
Workflow Visualization
Microtitration Workflow
Resource Comparison
The Scientist's Toolkit: Essential Research Reagents and Materials
Table 4: Critical Reagents and Materials for Microtitration Protocols
| Item | Specification | Function | Usage Notes |
|---|---|---|---|
| Micro-pipettes | 0.5-10 μL, 10-100 μL, 100-1000 μL ranges | Precise liquid handling | Calibrate monthly; use positive displacement for viscous solutions |
| pH micro-electrode | Low-volume immersion design with Ag/AgCl reference | pH measurement | Store in pH 7.00 buffer; condition in sample solution before use |
| Certified buffer solutions | pH 4.00, 7.00, 10.00 at 25°C | Electrode calibration | Replace monthly; use at same temperature as analysis |
| Microtitration vessel | 1-2 mL capacity with magnetic stir bar | Reaction container | Chemically inert materials (glass, PTFE) only |
| Precision burette | 50 μL syringe with 0.1 μL resolution | Titrant delivery | Purge air bubbles before use; verify calibration weekly |
| Analytical balance | 0.001 mg readability | Sample weighing | Use anti-static equipment; calibrate before each use |
| Standard reference materials | USP-grade acids/bases of known purity | Method validation | Benzoic acid (pKa 4.20) recommended for system suitability |
| Inert weighing boats | Aluminum or polymer | Sample transfer | Pre-weigh to determine transfer efficiency |
| Temperature control unit | ±0.5°C stability | Environmental control | Maintain at 25°C throughout analysis |
Troubleshooting and Optimization
Common Challenges and Solutions:
Insufficient Sample Solubility: For poorly soluble compounds, employ co-solvent approaches with minimal water-miscible organic solvents (acetonitrile, methanol) not exceeding 20% v/v. Pre-test solvent compatibility with electrode.
Electrode Response Lag: At micro-scale, electrode response time critically impacts data quality. Implement extended equilibrium times (up to 60 seconds) near anticipated equivalence point where pH changes rapidly.
Evaporation Effects: Apply sealing films to micro-vessels or maintain inert atmosphere (nitrogen blanket) to prevent concentration changes during extended analyses.
Static Electricity Effects: Employ anti-static equipment and ionizing bars when handling sub-10 mg samples to prevent weighing errors and sample loss.
Background Correction Imperatives: Always perform blank titrations as solvent impurities disproportionately affect results at low analyte concentrations.
Method Optimization Guidelines:
- Incremental Volume Adjustment: Reduce addition increments to 1-2 μL near equivalence point for enhanced resolution.
- Stirring Rate Optimization: Balance between adequate mixing (preventing stratification) and vortex formation (that introduces air bubbles).
- Data Density Strategy: Increase data collection frequency during rapid pH transition regions while maintaining broader intervals in buffer regions.
Identifying and Resolving Common Potentiometric Titration Errors
In the rigorous context of drug development and analytical research, the potentiometric titration method is valued for its accuracy in determining endpoint potentials without relying on subjective color indicators [14]. However, the precision of this technique is critically dependent on the control of systematic errors. For researchers in pharmaceutical and fine chemical synthesis, where catalysts such as hierarchical zeolites are characterized by their acid-site strength, uncontrolled variables can compromise data integrity and lead to flawed interpretations of catalytic behavior [13]. This application note details protocols to identify, quantify, and mitigate three principal systematic error sources: temperature fluctuations, titrant standardization inconsistencies, and inappropriate buret selection. The procedures outlined herein are designed to be integrated into a quality control framework, ensuring that potentiometric titration data is both reliable and reproducible for critical research applications.
Temperature Effects
Principles: Temperature instability introduces systematic error primarily through the thermal expansion of solutions, directly affecting the volume of titrant dispensed and consequently the calculated analyte concentration [39]. The volume of a solution at a given temperature is described by: V = V₀ ∙ (1 + γ ∙ ΔT) where V is the volume at the measured temperature, V₀ is the nominal volume, γ is the solution's coefficient of thermal expansion (in 10⁻³K⁻¹), and ΔT is the temperature difference from the nominal condition [39]. As an example, n-hexane (γ = 1.35) experiences a 0.7% volume increase when temperature shifts from 20 °C to 25 °C, an error magnitude significant in pharmaceutical assays [39].
Table 1: Coefficients of Thermal Expansion for Common Solvents
| Solvent | Coefficient of Thermal Expansion (γ, 10⁻³K⁻¹) |
|---|---|
| n-Hexane | 1.35 |
| Water | 0.21 |
| Ethanol | 1.10 |
Control Protocol:
- Environmental Control: Conduct all titrations in a temperature-controlled laboratory environment. Maintain a stable ambient temperature, ideally at the nominal temperature stated for the titrant's concentration (commonly 20 °C).
- Equipment Equilibration: Allow all solutions (titrant, analyte, and solvents) to equilibrate to the laboratory temperature before commencing analysis.
- Instrumentation: For automated potentiometric titration systems, utilize an integrated temperature sensor. The instrument can then automatically apply temperature compensation to the measured volumes [39].
Standardization (Titer Determination)
Principles: Reliance on the nominal concentration of a titrant, rather than its empirically determined titer, is a common source of error [17] [39]. Titrants, particularly bases like sodium hydroxide, degrade over time by absorbing carbon dioxide from the atmosphere, which reduces their effective concentration [39]. Regular standardization against a high-purity primary standard is therefore essential to ascertain the true concentration.
Control Protocol for Standardization:
- Primary Standard Selection: Select a primary standard characterized by high purity, stability, low hygroscopicity, and a high molecular weight to minimize weighing errors [17]. For acid-base titrations, common standards include potassium hydrogen phthalate (for base titrants) and sodium carbonate (for acid titrants).
- Standardization Procedure:
- Accurately weigh the primary standard and dissolve it in the appropriate solvent.
- Titrate potentiometrically using the titrant in question.
- Record the volume of titrant consumed to reach the equivalence point.
- Frequency of Standardization: Establish a standardization schedule based on titrant stability [39]. Stable acids and bases may require weekly titer determination, while less stable titrants (e.g., iodine, dichlorophenolindophenol) are prone to degradation from UV light or oxygen and should be standardized daily [39].
Buret Selection
Principles: Using a buret of inappropriate size for the expected titration volume introduces significant error due to the fixed tolerance of the glassware [39]. The absolute tolerance of a buret is constant; thus, its relative impact on the total volume is magnified when a small volume is dispensed from a large buret.
Table 2: Buret Tolerance and Associated Error
| Buret Volume | Tolerance | Error for a 5 mL Titration | Error for a 25 mL Titration |
|---|---|---|---|
| 10 mL | ±0.02 mL | ±0.4% | N/A |
| 50 mL | ±0.05 mL | ±1.0% | ±0.2% |
Control Protocol:
- Buret Sizing: Select a buret whose total capacity is close to, but still above, the expected titrant consumption volume. For automated titrators, this involves selecting the appropriate dosing unit size.
- Volume Optimization: During method development, adjust the sample weight or concentration so that the titrant consumption falls within the optimal range (typically 40-80%) of the buret's capacity. This minimizes the relative impact of the buret's tolerance [39].
Integrated Experimental Workflow for Error Mitigation
The following diagram illustrates a logical workflow integrating the control measures for the three systematic errors discussed, providing a visual protocol for researchers.
The Scientist's Toolkit: Essential Research Reagent Solutions
The following table lists key materials and reagents essential for executing the protocols described in this note, with an emphasis on their specific function in mitigating systematic error.
Table 3: Essential Materials and Reagents for Error-Mitigated Titration
| Item | Function/Justification |
|---|---|
| Primary Standards (e.g., Potassium Hydrogen Phthalate) | High-purity reference materials for accurate titrant standardization, ensuring concentration accuracy [17]. |
| Appropriately Sized Burets (e.g., 10 mL, 25 mL, 50 mL) | Glassware selected to match expected titrant use, minimizing the relative impact of volumetric tolerance [39]. |
| Temperature Sensor | Monitors ambient and/or solution temperature for manual compensation or integration with an autotitrator [39]. |
| Absorption Tube (Guard Tube) | Packed with material (e.g., soda lime for CO₂) and attached to titrant reservoirs to prevent atmospheric degradation [39]. |
| Potentiometric Autotitrator | Automates titrant dosing and endpoint detection, eliminating parallax and visual perception errors while offering high dosing resolution [39] [14]. |
Within the framework of research on potentiometric titration methods for acid-base analysis, the integrity of electrode response is paramount. The performance of indicator and reference electrodes directly influences the accuracy, precision, and reliability of endpoint detection, particularly in complex matrices such as pharmaceutical active pharmaceutical ingredients (APIs) [15]. This application note provides detailed protocols for the critical maintenance procedures—membrane conditioning, diaphragm cleaning, and storage—essential for ensuring data integrity in research and drug development.
Electrode Selection and Core Principles
The initial step in any robust analytical method is the selection of the correct sensor. For acid-base titrations in pharmaceutical analysis, the electrode choice depends on the reaction type, sample matrix, and titrant [15].
- Aqueous Acid-Base Titrations: Use a combined pH electrode with a reference electrolyte of 3 mol/L KCl (e.g., Ecotrode Plus) [15].
- Nonaqueous Acid-Base Titrations: A combined pH electrode with an alcoholic reference electrolyte (e.g., LiCl in ethanol) is required to prevent precipitation and junction blockage (e.g., Solvotrode easyClean) [15].
Proper maintenance is a key factor for obtaining reliable results, as the quality of the electrode directly influences the quality of the titration data. Consistent maintenance routines can significantly increase the electrode's lifetime and performance stability [40].
Detailed Maintenance Protocols
Membrane Conditioning and Rehydration
The glass membrane of a pH electrode requires a hydrated layer for proper function. Drying out can lead to sluggish response, drift, and calibration failure.
Table 1: Protocols for Membrane Conditioning and Rehydration
| Condition | Recommended Protocol | Duration | Objective |
|---|---|---|---|
| Initial Hydration | Soak a new or completely dry electrode in pH 4.01 buffer. | >1 hour | To establish the critical hydration layer on the glass membrane [41]. |
| Routine Storage | Store in a dedicated storage solution or pH 4.01 buffer with a small amount of saturated KCl. | Between measurements | To maintain the hydration layer and ensure ready-to-use performance [41]. |
| Reconditioning | Soak the electrode in pH 4.01 buffer or storage solution. | At least 30 minutes | To revive older electrodes or those that have been stored dry [41]. |
Diaphragm and Junction Cleaning
A clogged reference junction causes unstable potential readings, drift, and prolonged titration times due to increased impedance. The cleaning method must be selected based on the contaminant [40].
Table 2: Targeted Cleaning Protocols for Electrode Contaminants
| Contaminant | Cleaning Agent & Procedure | Follow-up Steps |
|---|---|---|
| General / Unknown | Soak in a 1:10 dilution of household bleach in a 0.1-0.5% hot detergent solution with vigorous stirring [41]. | Rinse junction under warm running tap water for 15 seconds. Drain, refill the reference chamber, and soak in storage solution for 10 minutes [41]. |
| Proteins | Immerse in a 1% pepsin solution in 0.1 M HCl [40] [41] or an enzymatic contact lens cleaner [41]. | Rinse thoroughly with distilled water. Soak in storage solution before use. |
| Salt Deposits | Cycle between soaking in 0.1 M HCl and 0.1 M NaOH, for 5 minutes each [41]. | Rinse thoroughly with distilled water. |
| Oil/Grease Films | Wash the bulb with a mild detergent or methanol [41]. | Rinse thoroughly with distilled water. |
| Clogged Junction | Place the reference portion in a diluted KCl solution heated to 60-80°C for ~10 minutes [41]. | Allow the electrode to cool while immersed in unheated KCl solution. Refill with fresh electrolyte. |
Experimental Protocol for Cleaning:
- Identify Contaminant: Review the sample matrix to select the appropriate cleaning agent from Table 2.
- Prepare Solution: Wear appropriate personal protective equipment and prepare the cleaning solution.
- Immerse Electrode: Place the electrode tip in the solution for the recommended time.
- Rinse: Thoroughly rinse the electrode with deionized or distilled water.
- Re-condition: Soak the electrode in storage solution for at least 10 minutes before the next use or calibration [41].
Reference System Maintenance
The reference electrode requires regular attention to its internal electrolyte and junction.
- Daily Check: Verify the electrolyte level and top up with the correct, uncontaminated electrolyte to the filler opening to ensure proper outflow and reduced contamination [40].
- Monthly Replacement: Completely replace the reference electrolyte at least monthly to guarantee a clean solution with the correct concentration, as evaporation can alter concentration [40].
Storage
Incorrect storage is a primary factor that reduces electrode lifetime and performance.
Table 3: Optimal Electrode Storage Conditions
| Electrode Type | Short-Term Storage (Between Measurements) | Long-Term Storage | Critical Notes |
|---|---|---|---|
| Combined pH Electrode | Special pH storage solution or reference electrolyte (3 mol/L KCl) [40]. | Special pH storage solution [40]. | Never store in distilled or deionized water, as this depletes the essential hydration layer and ions from the junction [41]. |
| Metal Electrodes (e.g., Pt, Au) | Dry storage or in reference electrolyte [40]. | Dry storage [40]. | Consult manufacturer guidelines. |
| Titrodes | Deionized water [40]. | Deionized water [40]. | These electrodes contain a pH glass membrane that must be kept hydrated. |
Performance Verification and Troubleshooting
A simple way to monitor electrode performance is to conduct a standardized titration (e.g., a weekly titer determination) and track parameters like titration duration and potential jump at the equivalence point [40]. A gradual increase in titration time or a decrease in the potential jump indicates a decline in electrode performance.
For a more direct check, a test procedure for a silver electrode, for instance, involves a threefold determination titrating HCl with AgNO₃ and evaluating the equivalence point volume, the time to reach it, and the potential jump. Failure to meet specifications after cleaning indicates the sensor needs replacement [40].
Common symptoms and their interpretations:
- Sluggish response, drifting signal: Often caused by a clogged junction, contaminated electrolyte, or a dried-out glass membrane. Requires cleaning and/or electrolyte replacement [40].
- Longer titration duration, smaller potential jumps: Indicates a loss of sensitivity, potentially from a contaminated or aged membrane surface [40].
- Incorrect calibration or reading: Can result from a degraded membrane, contaminated electrolyte, or insufficient hydration.
The Scientist's Toolkit: Essential Research Reagents and Materials
Table 4: Key Reagent Solutions for Electrode Maintenance
| Reagent / Material | Function / Application | Example Use Case |
|---|---|---|
| Storage Solution | Maintains hydration of pH glass membrane and prevents junction clogging. | Short- and long-term storage of combined pH electrodes [40] [41]. |
| 3 mol/L KCl | Standard reference electrolyte; used for topping up and filling reference chambers. | Daily maintenance of reference electrode electrolyte level [40]. |
| HCl (0.1 M - 0.4 M) | Acidic cleaning solution for removing salt deposits and general reconditioning. | Soaking to dissolve inorganic precipitates [41]. |
| Pepsin in 0.1 M HCl (1%) | Enzymatic cleaning solution for digesting and removing proteinaceous contaminants. | Soaking electrodes used in biological samples or protein-rich matrices [40] [41]. |
| Diluted Bleach & Detergent | Oxidizing and surfactant-based cleaner for general decontamination. | General cleaning for unknown or stubborn contaminants [41]. |
| pH 4.01 Buffer | Used for calibration, membrane rehydration, and electrode reconditioning. | Soaking dry electrodes to re-establish the hydration layer [41]. |
Rigorous and consistent electrode maintenance is not merely a preparatory step but a foundational component of high-quality potentiometric analysis in pharmaceutical research. By systematically implementing the conditioning, cleaning, and storage protocols outlined in this document, scientists can ensure the integrity of their titration data, improve method robustness, and maximize the return on investment in analytical instrumentation.
In the rigorous context of pharmaceutical acid-base analysis using potentiometric titration, the reliability of data is paramount. While systematic errors can often be identified and corrected through calibration, random errors present a more insidious challenge, as they occur unpredictably and can be difficult to trace [39]. These errors directly compromise the accuracy, precision, and reproducibility of titration results, which are critical for drug development, quality control, and regulatory compliance [17]. This application note focuses on three prevalent sources of random error—contamination, air bubbles, and gas absorption—providing researchers with detailed protocols to identify, prevent, and correct these issues to ensure data of the highest integrity.
Understanding Key Random Errors
Random errors in potentiometric titration are characterized by their unpredictability and variability between consecutive analyses. The following table summarizes the primary random errors addressed in this document.
Table 1: Key Random Errors in Potentiometric Titration
| Error Source | Nature of the Error | Impact on Potentiometric Analysis |
|---|---|---|
| Contamination [39] [42] | Introduction of foreign substances from improperly cleaned glassware or handling. | Alters the ionic strength or composition of the sample, leading to shifted equivalence points and inaccurate concentration calculations. |
| Air Bubbles [39] [42] | Bubbles trapped in the burette, especially at the outlet, displace the titrant. | Causes inaccurate volume delivery, resulting in an incorrect recorded titrant consumption at the endpoint. |
| Gas Absorption [39] | Certain titrants (e.g., NaOH) react with atmospheric gases (e.g., CO₂). | Changes the actual concentration of the titrant over time, introducing a systematic bias that manifests as random error if not managed. |
Experimental Protocols for Error Prevention
Protocol: Prevention and Correction of Contamination
Principle: To ensure that all components of the titration system are free from impurities that could interfere with the acid-base reaction or the potentiometric signal [42].
Materials:
- Cleaned beakers or Erlenmeyer flasks
- High-purity water (e.g., ASTM Type I)
- Appropriate solvent (e.g., ethanol for organic residues)
- Titrant and analyte solutions
Methodology:
- Cleaning Procedure: Clean all glassware (beakers, flasks, stirring bars) immediately after use. Wash with a suitable laboratory detergent, rinse thoroughly with tap water, and perform three successive rinses with high-purity water [42].
- Drying and Storage: Allow glassware to air-dry in a dust-free environment or in a dedicated drying cabinet. Store inverted in a clean, closed cabinet to prevent accumulation of dust or contaminants.
- Pre-Titration Verification: Before analyzing actual samples, perform a blank titration using the same solvents and procedures to establish a baseline and confirm a clean system.
Protocol: Elimination of Air Bubbles
Principle: To ensure the complete removal of air from the burette and tubing to guarantee accurate and precise titrant delivery [39].
Materials:
- Burette or automated dosing unit
- Titrant solution
Methodology:
- Burette Priming: During filling, open the valve several times to flush titrant through the burette's outlet, dislodging any air trapped in the glass tube or valve mechanism [39].
- Visual Inspection: Carefully inspect the entire liquid path, particularly the tip of the burette, for the presence of air bubbles. Gently tap the side of the burette to encourage bubbles to rise to the surface [42].
- Automated Systems: For autotitrators, utilize the instrument's integrated "purge" or "preparation" function, which is designed to automatically flush the tubing and dispense unit to eliminate bubbles before analysis commences [39].
Protocol: Mitigation of Gas Absorption
Principle: To prevent the chemical degradation of titrants by atmospheric gases, thereby maintaining their concentration and analytical validity [39].
Materials:
- Titrant solution (e.g., 0.1 M Sodium Hydroxide)
- Soda lime or molecular sieve
- Absorption tube or guard tube
Methodology:
- Titrant Stabilization: For alkaline titrants that absorb CO₂, pack an absorption tube with a protective material such as soda lime and attach it to the air inlet of the titrant reservoir. This scrubs carbon dioxide from the air before it enters the headspace [39].
- Regular Standardization: Establish a strict schedule for titrant re-standardization. For stable acids and bases, this may be weekly, but for susceptible titrants like those used in redox titrations, more frequent (even daily) standardization may be necessary [39].
- Proper Storage: Store titrant solutions in sealed, dark bottles away from direct UV radiation, which can accelerate decomposition reactions [39].
The Scientist's Toolkit: Essential Research Reagents and Materials
The following materials are critical for executing the protocols above and ensuring the overall integrity of potentiometric titration analyses.
Table 2: Essential Research Reagents and Materials
| Item | Function / Purpose |
|---|---|
| Primary Standards (e.g., Potassium Hydrogen Phthalate) [17] | High-purity reference materials used for the accurate standardization of titrant solutions. |
| Soda Lime [39] | A CO₂-absorbing material packed in guard tubes to prevent carbonation of alkaline titrants. |
| Molecular Sieve [39] | A desiccant used to protect solutions and reagents from atmospheric moisture. |
| High-Purity Water (ASTM Type I) [42] | The solvent of choice for preparing solutions and rinsing glassware to minimize ionic contamination. |
| Potentiometric Sensor (e.g., Combined pH Electrode) [23] | The indicator electrode that measures the potential change related to the analyte's ion activity during titration. |
Integrated Workflow for Random Error Prevention
The following diagram illustrates a logical workflow that integrates the protocols for contamination, bubble, and gas absorption prevention into a standard potentiometric titration procedure.
Within the framework of research on the potentiometric titration method for acid-base analysis, achieving precise and reproducible endpoint detection is paramount. This technique, which measures the potential difference between an indicator and a reference electrode, is a cornerstone of quantitative analysis in pharmaceutical and chemical laboratories [43] [1]. However, researchers frequently encounter analytical challenges such as shallow titration curves, the apparent absence of an endpoint, and significant result variability [44] [45]. These issues can compromise data integrity, leading to inaccurate concentration determinations of active pharmaceutical ingredients or critical analytes. This application note delineates the primary sources of these problems and provides detailed, actionable protocols to mitigate them, thereby ensuring the reliability of analytical data in drug development.
The widespread adoption of automated potentiometric titrators underscores the technique's importance. The global market for these instruments, valued at USD 479 million in 2024, is projected to grow steadily, driven by stringent regulatory requirements for quality control in pharmaceuticals and the need for high-precision analysis [43].
Table 1: Global Automatic Potentiometric Titrator Market Outlook
| Feature | Detail |
|---|---|
| Market Value in 2024 | USD 479 Million [43] |
| Projected Market Value by 2032 | USD 546 Million [43] |
| Compound Annual Growth Rate (CAGR) | 1.9% [43] |
| Primary Drivers | Stringent quality control regulations; demand for high-precision analysis; laboratory automation [43] |
Root Causes and Troubleshooting of Endpoint Issues
Endpoint detection problems often stem from a confluence of equipment, chemical, and procedural factors. The table below summarizes the primary causes and their corresponding solutions.
Table 2: Troubleshooting Endpoint Detection Issues
| Issue | Root Cause | Solution |
|---|---|---|
| Shallow Titration Curves | • Unfavorable analyte-to-titrant concentration ratio [45]• Slow electrode response or poisoning [33] [6]• Incomplete chemical reaction [33] | • Optimize sample weight and titrant concentration [45]• Perform electrode maintenance/calibration [45] |
| No Clear Endpoint | • Coarse titration increment settings [46]• Unsuitable solvent system for the analyte [47]• Presence of interfering ions [33] | • Use dynamic or finer titrant addition near the endpoint [46]• Employ non-aqueous titration with appropriate solvents [47] |
| Poor Reproducibility | • CO₂ absorption in alkaline titrants [45]• Incorrect weighing balance selection [45]• Inconsistent electrode positioning or stirring [45] | • Use soda lime traps for NaOH titrants [45]• Use analytical balances for small samples [45]• Standardize electrode placement and stirring speed [45] |
Detailed Experimental Protocol for Robust Acid-Base Titration
This protocol provides a step-by-step guide for determining the acidity of a sample using hydrochloric acid (HCl) as an analyte and sodium hydroxide (NaOH) as a titrant, incorporating critical steps to avoid common pitfalls [45].
The Scientist's Toolkit: Research Reagent Solutions
Table 3: Essential Materials and Reagents
| Item | Function/Justification |
|---|---|
| NaOH, 0.1 mol/L | Titrant for acid determination [45]. |
| Potassium Hydrogen Phthalate (KHP) | Primary standard for alkalimetry; dry at 105°C for 2 hours before use [45]. |
| CO₂ Absorbent (Soda Lime) | Protects alkaline titrants from atmospheric CO₂, preventing carbonate formation and titer change [45]. |
| Analytical Balance (0.1 mg resolution) | Essential for accurate weighing of small amounts (<0.3 g) of volumetric standards to keep weighing error below 0.3% [45]. |
| Combined pH Electrode | Indicator electrode for potential measurement. Requires proper maintenance [45] [1]. |
| Certified Volumetric Standards | Traceable secondary standards (e.g., KHP, TRIS) for verifying titration system accuracy [45]. |
Step-by-Step Procedure
Titer Determination (System Verification):
- Weighing: Accurately weigh 0.2 - 0.3 g of dried potassium hydrogen phthalate (KHP) into a 150 mL beaker using an analytical balance [45].
- Dissolution: Dissolve the KHP in 60-80 mL of deionized, CO₂-free water [45].
- Titration: Load the standard titer determination method for NaOH on the titrator. Immerse the electrode and titration tip as described in the setup diagram and begin the titration. Perform a minimum of three determinations [45].
- Acceptance Criteria: The relative standard deviation (RSD) of the triple determination should be within laboratory-defined limits (e.g., <0.5%).
Sample Titration:
- Preparation: Weigh approximately 1 g of the sample (e.g., HCl solution) into a 150 mL beaker and add 60-80 mL of deionized water [45].
- Execution: Using the newly determined and saved titer value, initiate the "pH strong acid" titration method. Ensure the electrode and tip are correctly positioned.
- Endpoint Analysis: The titration curve will be evaluated by the instrument's software. A clean curve with a single, sharp inflection point indicates a successful titration (e.g., Figure 4). A curve with multiple inflections suggests titrant degradation (e.g., carbonate formation, see Figure 5) [45].
Critical Setup and Workflow
The physical setup of the titration system is critical for obtaining high-quality data. The following workflow and diagram illustrate the key steps and optimal configuration.
Advanced and Alternative Endpoint Detection Methods
When traditional potentiometry faces limitations, advanced methods offer powerful alternatives.
Machine Vision for Colorimetric Titrations: For reactions with a color change, a machine learning-based algorithm can classify titration speed and identify endpoints via histogram similarity analysis of video footage. This method has demonstrated a titration error of less than 0.2 mL and no statistically significant difference from manual titration at a 95% confidence level, proving particularly useful in harsh chemical environments that can poison electrodes [33].
Intelligent Data Processing: Traditional analysis methods that plot voltage vs. log(oxidized/reduced) are only valid for single, isolated components. For complex mixtures like cytochromes in mitochondria, more sophisticated collection and analysis methods are required, and conclusions should be confirmed in several ways [44].
Non-Aqueous Titration: For substances insoluble or unstable in water, non-aqueous titration is the preferred method. The careful selection of solvents, electrodes, and titrants is critical for success and is detailed in specialized monographs [47].
Resolving endpoint detection issues in potentiometric titration requires a systematic approach that addresses instrumental setup, chemical purity, and procedural rigor. By adhering to the detailed protocols outlined herein—particularly the critical steps of titer determination, proper electrode configuration, and protection of titrants—researchers and drug development professionals can significantly enhance the accuracy, reproducibility, and reliability of their analytical results. The integration of emerging technologies like machine vision further extends the capabilities of this foundational analytical technique.
In the field of acid-base analysis, potentiometric titration is a well-established quantitative method. The incorporation of automation into this technique has fundamentally enhanced data quality and operational efficiency for researchers and drug development professionals. Automated systems deliver consistent, objective performance at every stage, from sample preparation to endpoint determination, directly addressing the critical needs of reproducibility and minimal human intervention in pharmaceutical production and analytical research [25]. This document details the specific advantages of automation, supported by quantitative data, and provides standardized protocols for its implementation in a research setting.
Quantified Advantages of Automated Potentiometric Titration
The transition from manual to automated potentiometric titration brings measurable improvements in key performance indicators. The following table summarizes the core benefits that directly impact research and quality control outcomes.
Table 1: Key Advantages of Automated over Manual Potentiometric Titration
| Advantage | Impact on Research and Development | Quantitative/Contextual Evidence |
|---|---|---|
| Enhanced Repeatability | Improves batch-to-batch reproducibility and reliability of experimental data. | Automated systems provide more consistent and objective operations, directly enhancing the repeatability of results [25]. |
| Reduction of Human Error | Minimizes procedural inconsistencies and subjective endpoint detection. | Automation reduces waste of time and materials caused by human error [25]. It also removes the subjectivity associated with interpreting visual color changes in manual titration [14]. |
| Increased Analysis Throughput | Accelerates formulation development and quality control screening. | Automated titration increases the throughput of the analytical lab [25]. Potentiometry, in general, is simpler and faster, requiring minimal sample preparation [14]. |
| Improved Accuracy | Ensures high data fidelity for critical decisions, such as API assay. | The method improves the accuracy of results, which is crucial for informing formulation decisions and ensuring final material quality [25]. |
Experimental Protocols
Protocol 1: Automated Potentiometric Titration of an Active Pharmaceutical Ingredient (API) – Sulfanilamide
This protocol outlines the procedure for determining the purity of sulfanilamide using an automated potentiometric titration system in an aqueous medium [25].
1. Research Reagent Solutions & Materials Table 2: Essential Materials for Sulfanilamide Purity Determination
| Item | Function/Specification |
|---|---|
| Automated Titrator | e.g., Titrando system (905 or 907), for precise titrant delivery and endpoint detection. |
| Potentiometric Electrode | Pt Titrode, for monitoring the potential change during the diazotization reaction. |
| Sodium Nitrite (NaNO₂) Titrant | 0.1 mol/L, primary titrant for the diazotization reaction. |
| Hydrochloric Acid (HCl) | 20% solution, provides the strongly acidic medium required for the reaction. |
| Potassium Bromide (KBr) Solution | 2.5 mol/L, acts as a catalyst for the diazotization titration. |
| Sulfanilamide Standard | High-purity reference material for system qualification. |
2. Workflow Diagram
3. Step-by-Step Procedure
- Sample Preparation: Accurately weigh a specified amount of the sulfanilamide sample and transfer it to the titration vessel. Add a prescribed volume of 20% hydrochloric acid (HCl) to the vessel. Finally, add potassium bromide (KBr) solution to act as a catalyst [25].
- Instrument Setup: Mount the Pt Titrode electrode and ensure it is properly conditioned. Prime the buret of the automated titrator with standardized sodium nitrite (NaNO₂) titrant, concentration 0.1 mol/L [25].
- Automated Titration: Initiate the titration method on the automated system. The instrument will gradually add the titrant while continuously monitoring the potential across the Pt Titrode.
- Endpoint Detection & Reporting: The system's software will automatically identify the titration endpoint based on a predefined potential jump. The purity of the sulfanilamide sample is then calculated and reported by the software. The entire process, including electrode conditioning, is typically completed in 3 to 5 minutes [25].
Protocol 2: Titration of Excipients – Surfactants via Two-Phase Titration
This protocol is suitable for analyzing surfactants (anionic, cationic, nonionic) with complex matrices or low aqueous solubility, using an automated two-phase potentiometric titration [25].
1. Research Reagent Solutions & Materials Table 3: Essential Materials for Surfactant Titration
| Item | Function/Specification |
|---|---|
| Automated Titrator | System capable of potentiometric measurement and stirring. |
| Ion-Selective Electrode | Surfactant-specific electrode (e.g., nonionic surfactant electrode). |
| Sodium Dodecyl Sulfate (SDS) | Titrant for cationic surfactants. |
| Sodium Tetraphenylborate (STPB) | Titrant for nonionic surfactants. |
| Solvent (e.g., Methanol, Chloroform) | To dissolve or create a two-phase system for non-aqueous samples. |
| Glacial Acetic Acid | Used for pH adjustment in specific sample preparations. |
2. Workflow Diagram
3. Step-by-Step Procedure
- Sample Identification & Preparation:
- Identify the type of surfactant (anionic, cationic, or nonionic).
- For samples with simple matrices, dissolve the raw substance in an aqueous solution.
- For complex matrices (e.g., ointments, creams) or samples not easily soluble in water, use heat and an organic solvent like methanol to dissolve or break the emulsion. For a two-phase titration, add an immiscible organic solvent (e.g., chloroform) and adjust the pH with glacial acetic acid if required [25].
- Titration Setup:
- Select and mount the appropriate surfactant-selective electrode. Electrodes resistant to organic solvents are recommended for two-phase titrations.
- Load the corresponding titrant into the buret. For cationic surfactants, use sodium dodecyl sulfate (SDS). For nonionic surfactants, sodium tetraphenylborate (STPB) is commonly used. Note: Surfactant titrants may require wetting the buret components one day prior to use [25].
- Automated Titration & Analysis:
- Initiate the automated titration. The system will add the titrant while stirring to maintain the two-phase system (if applicable) and monitor the potential.
- The instrument detects the endpoint and calculates the surfactant concentration based on the titrant volume consumed, improving accuracy and repeatability while reducing human error associated with manual two-phase methods [25].
The Scientist's Toolkit: Key Research Reagent Solutions
The following table catalogs essential reagents and materials used in automated potentiometric titration for acid-base analysis, as featured in the protocols and literature.
Table 4: Essential Reagents and Materials for Potentiometric Titration Research
| Reagent/Material | Function in Research | Application Example |
|---|---|---|
| Perchloric Acid (HClO₄) | Non-aqueous titrant for weak bases. | Determination of ketoconazole concentration in non-aqueous media due to its low solubility [25]. |
| Sodium Tetraphenylborate (STPB) | Titrant for nonionic surfactants and certain pharmaceutical compounds. | Assay of lidocaine in ointment formulations via titration with a nonionic surfactant electrode [25]. |
| Potassium Bromide (KBr) | Catalyst to accelerate chemical reactions. | Used as a catalyst in the diazotization titration of sulfanilamide with sodium nitrite [25]. |
| Pt Titrode | Combination electrode for monitoring redox reactions. | Used as the indicator electrode in the potentiometric titration of sulfanilamide [25]. |
| Solvotrode easyClean | pH electrode designed for non-aqueous and harsh solvents. | Used in the non-aqueous titration of ketoconazole with perchloric acid, simplifying cleaning [25]. |
| Surfactant-Selective Electrodes | Ion-selective electrodes for detecting specific surfactant classes. | Designed for the direct assay of anionic, cationic, and nonionic surfactants, replacing classic manual methods [25]. |
Method Validation, Comparison with Alternative Techniques, and Regulatory Compliance
Within the framework of research on potentiometric titration methods for acid-base analysis, the validation of the analytical procedure is a critical step to ensure the generation of reliable and defensible data. This is particularly crucial in regulated environments such as pharmaceutical development, where manufacturing products of the highest quality is a necessity [17]. Method validation provides objective evidence that a titration method is fit for its intended purpose, demonstrating that it can accurately and consistently measure the analyte of interest in the presence of other sample components. This document outlines detailed application notes and protocols for assessing four key validation parameters—Selectivity, Linearity, Precision, and Accuracy—within the context of potentiometric acid-base titration.
Core Validation Parameters and Experimental Protocols
The following sections detail the definition, experimental approach, and acceptance criteria for each validation parameter. The protocols are designed to be implemented using a potentiometric titration setup, typically consisting of an autotitrator or a pH meter equipped with a combination pH electrode, a burette for titrant delivery, and a stirrer for solution mixing [3] [4].
Selectivity
- Definition and Purpose: Selectivity is the ability of the analytical procedure to assess the analyte unequivocally in the presence of components that may be expected to be present, such as impurities, degradation products, excipients, or matrix components [17]. A selective method can distinguish the analyte from these interferences.
- Experimental Protocol:
- Prepare Solutions: Prepare a standard solution of the pure analyte (e.g., an acid). Separately, prepare a sample solution that contains the analyte spiked with known potential interferents at expected concentration levels (e.g., an impurity like potassium carbonate in a potassium bicarbonate sample) [17].
- Perform Titrations: Titrate both the pure standard and the spiked sample solution using the identical potentiometric method. Use a standardized titrant (e.g., HCl for a base, or NaOH for an acid) and record the full titration curve (potential or pH vs. titrant volume) [48].
- Data Analysis: Overlay the titration curves and examine them for any shifts in the equivalence point (EP) corresponding to the main analyte. Selectivity is demonstrated if the EP for the analyte remains unchanged in terms of volume consumed. Alternatively, if an interferent is titrated, a separate, distinct EP may appear, which does not affect the quantification of the main analyte [17].
- Achieving Selectivity: Selectivity can often be enhanced by choosing a suitable non-aqueous solvent instead of water for the titration or by adjusting the pH of the titration medium to suppress the ionization or reaction of interfering species [17].
Linearity
- Definition and Purpose: Linearity is the ability of the method to obtain results that are directly proportional to the concentration of the analyte in a given range. For titration, which is an absolute method, this is often confirmed by varying the sample size [17].
- Experimental Protocol:
- Sample Preparation: Accurately weigh at least five different sample masses of the analyte, spanning the recommended concentration range of 80% to 120% of the intended typical sample weight [17].
- Perform Titrations: Dissolve each sample in the appropriate solvent and perform the potentiometric titration.
- Data Analysis: For each titration, record the volume of titrant consumed to reach the equivalence point. Plot a linear regression of the titrant volume consumed (y-axis) against the corresponding sample mass or analyte amount (x-axis). Calculate the coefficient of determination (R²) [17].
- Acceptance Criteria: The method is considered linear if the R² value is typically ≥ 0.995, indicating a strong linear relationship.
Precision
- Definition and Purpose: Precision expresses the closeness of agreement between a series of measurements obtained from multiple sampling of the same homogeneous sample under the prescribed conditions. It is usually expressed as the standard deviation (SD) or relative standard deviation (RSD) [17].
- Levels of Precision:
- Repeatability: Precision under the same operating conditions over a short interval of time (intra-assay precision).
- Intermediate Precision: Precision within the same laboratory, incorporating variations like different days, different analysts, or different equipment [17].
- Experimental Protocol for Repeatability:
- Prepare a Homogeneous Sample: Prepare a single, homogeneous sample of the analyte at 100% of the test concentration.
- Multiple Determinations: Independently perform a minimum of six complete determinations of this sample [17]. This includes all sample preparation steps.
- Data Analysis: Calculate the mean, standard deviation (SD), and relative standard deviation (RSD) of the results (e.g., calculated concentration or titrant volume).
- Acceptance Criteria: The RSD should typically be less than 2% for a well-controlled titration method, though the acceptable limit depends on the specific application [48].
Accuracy
- Definition and Purpose: Accuracy is the closeness of agreement between the value found and the value accepted as a conventional true value or an accepted reference value. It provides information about the bias of a method [17].
- Experimental Protocol:
- Recovery Study: Accuracy is best determined by a recovery study. Prepare a sample of the placebo or matrix without the analyte. Spike it with known amounts of the analyte at a minimum of three concentration levels (e.g., 80%, 100%, and 120%), with three replicates per level (total of nine determinations) [17].
- Analysis: Analyze each spiked sample using the validated potentiometric titration method.
- Data Analysis: Calculate the recovery (%) for each determination using the formula:
Recovery (%) = (Measured Amount / Added Amount) * 100. Report the mean recovery and RSD for each concentration level.
- Acceptance Criteria: Mean recovery should typically be between 98.0% and 102.0%, with precision (RSD) meeting pre-defined criteria [17] [48].
The following table summarizes the experimental designs and acceptance criteria for these key validation parameters.
Table 1: Summary of Validation Parameters for Potentiometric Titration
| Parameter | Experimental Design | Key Data to Record | Acceptance Criteria (Example) |
|---|---|---|---|
| Selectivity | Compare titration of pure analyte vs. analyte with added impurities. | Overlaid titration curves; equivalence point volumes. | No shift in the main EP; resolution of interferent EP. |
| Linearity | ≥5 different sample masses across 80-120% of target. | Titrant volume vs. sample mass. | R² ≥ 0.995 [17]. |
| Precision (Repeatability) | ≥6 determinations of a homogeneous sample at 100%. | Individual results (e.g., concentration). | RSD < 2.0% [48]. |
| Accuracy | Analysis of spiked samples at 80%, 100%, 120% with n=3 per level. | Recovery (%) for each determination. | Mean Recovery: 98-102% (per level). |
Experimental Workflow and Material Requirements
Graphical Workflow for Method Validation
The following diagram illustrates the logical sequence and decision points in a comprehensive validation workflow for a potentiometric titration method.
Valiation Workflow
The Scientist's Toolkit: Essential Research Reagents and Materials
A successful validation study requires high-quality materials and instrumentation. The following table lists key reagents and their functions in the context of acid-base potentiometric titration.
Table 2: Essential Research Reagents and Materials for Potentiometric Titration
| Item | Function / Purpose | Example / Specification |
|---|---|---|
| Primary Standards | Used for accurate standardization of titrant solutions due to high purity, stability, and low hygroscopicity [17]. | Potassium hydrogen phthalate (for base), Sodium carbonate (for acid) [48]. |
| Standardized Titrant | The solution of known concentration used to react with the analyte. | Hydrochloric acid (HCl) or Sodium hydroxide (NaOH) [3] [48]. |
| Indicator Electrode | Senses the change in potential (or pH) in the solution during titration. | Glass pH electrode, stainless steel electrode [3] [46]. |
| Reference Electrode | Provides a stable and constant potential against which the indicator electrode's potential is measured [4]. | Ag/AgCl saturated KCl electrode [3] [49]. |
| pH Meter / Autotitrator | Measures the potential difference between the electrodes and may automate titrant addition and data recording. | Instrument with millivolt and pH measurement capabilities [17] [48]. |
| Appropriate Solvent | Dissolves the sample and provides a suitable medium for the acid-base reaction. | Water, ethanol, or mixed solvents like ethanol:water (1:1) [48]. |
The rigorous validation of a potentiometric titration method, through the systematic assessment of selectivity, linearity, precision, and accuracy, is fundamental to establishing its reliability for acid-base analysis in research and quality control. The protocols outlined herein, supported by structured data evaluation and clear acceptance criteria, provide a framework for generating high-quality validation data. Employing automated potentiometric titration not only increases the accuracy and reliability of results but also supports compliance with critical data integrity requirements in regulated industries [17]. A well-validated method ensures that the analytical data generated for drug development and other scientific pursuits is accurate, reproducible, and fit for purpose.
Within pharmaceutical development and analytical chemistry, demonstrating that an analytical method remains unaffected by small, deliberate variations in method parameters is crucial for validation. This property, known as robustness, confirms the reliability of a method during routine use. For techniques like potentiometric titration—a mainstay for quantitative analysis in drug development—establishing robustness is a key prerequisite for regulatory compliance. This Application Note details the application of Youden-Steiner experimental designs as a robust and efficient statistical approach for assessing the robustness of potentiometric titration methods.
Potentiometric titration offers significant advantages over manual, visual-endpoint titration, including reduced subjectivity, automated data capture, and enhanced precision in endpoint detection [50]. These attributes make it particularly suitable for the stringent requirements of modern pharmaceutical quality control. The Youden-Steiner approach provides a structured framework to evaluate these method parameters effectively, ensuring that the analytical procedure is transferable and reproducible across different laboratories and instruments.
Theoretical Foundation of the Youden-Steiner Design
The Youden-Steiner experimental design is a fractional factorial approach specifically tailored for robustness testing. Its primary strength lies in its ability to evaluate the influence of multiple variables with a minimal number of experimental runs, making it both resource-efficient and statistically sound.
Core Principles of the Design
This design is classified as a seven-variable, eight-experiment scheme. It functions by systematically varying seven different method parameters across eight distinct experimental trials. Each variable is set at two possible levels—typically a "high" level (denoted as +1) representing a slight increase from the nominal value, and a "low" level (denoted as -1) representing a slight decrease. The specific arrangement of high and low levels for each variable across the experiments is pre-defined to allow for the independent estimation of each variable's main effect. The fundamental output is the identification of which variables exert a critical influence on the method's results, thereby requiring tight control, and which are non-critical, allowing for greater operational flexibility [51].
Experimental Protocol: Application to Potentiometric Titration
This protocol outlines the steps for applying a Youden-Steiner robustness test to a potentiometric acid-base titration method.
Research Reagent Solutions and Essential Materials
Table 1: Key Materials and Reagents for Robustness Testing
| Item | Function in the Experiment |
|---|---|
| Potentiometric Auto-Titrator | An instrument that automatically adds titrant and records the potential (or pH) versus volume. It eliminates subjectivity and provides high-precision data [50]. |
| pH Electrode | An indicator electrode that measures the change in hydrogen ion activity (pH) during an acid-base titration. It must be properly calibrated. |
| Standardized Titrant Solution | A solution of known concentration (e.g., sodium hydroxide for acid titration). The stability and concentration of this solution are critical. |
| Analyte Sample | The substance being analyzed (e.g., a drug substance with acidic/basic functional groups). Should be of high and known purity for method validation. |
| Background Electrolyte | A solution of inert ions (e.g., KCl) used to maintain a constant ionic strength, ensuring stable and reproducible electrode potentials. |
| Redox Mediators | Chemical species used in redox titrations to facilitate electron transfer and ensure a quick equilibrium at the electrode surface [6]. |
Step-by-Step Procedure
Variable Selection: Identify seven critical method parameters for potentiometric titration. These typically include:
V_stir: Stirring speedV_rate: Titrant addition rateT_temp: Temperature of the analyte solutionpH_start: Initial pH of the sample solutionC_elect: Concentration of the background electrolyteW_sample: Sample weightT_eq: Equilibration time before titration
Define Nominal and Test Levels: For each of the seven variables, establish a nominal value (the standard operating condition) and two minor deviation levels (high and low). The deviations should reflect realistic, small variations that might occur in a laboratory setting.
Execute the Experimental Design: Perform the eight experiments as dictated by the Youden-Steiner matrix. Each run is a complete titration, and all analyses should be performed, at a minimum, in duplicate to assess repeatability [52].
Data Recording: For each titration, use the auto-titrator to record the precise endpoint volume (or the calculated analyte concentration). The primary analytical response (
Y) is the result of the titration (e.g., concentration, assay value).
Workflow Visualization
The following diagram illustrates the logical workflow for planning and executing a robustness study using the Youden-Steiner design.
Data Analysis and Interpretation
Calculation of Variable Effects
After completing the experiments, the effect of each variable on the analytical response must be calculated. The effect (E) of a variable is the difference between the average response when the variable is at its high level and the average response when it is at its low level.
Table 2: Youden-Steiner Experimental Design Matrix and Hypothetical Results
| Experiment | V_stir |
V_rate |
T_temp |
pH_start |
C_elect |
W_sample |
T_eq |
Response, Y (mg/mL) |
|---|---|---|---|---|---|---|---|---|
| 1 | +1 | +1 | +1 | -1 | +1 | -1 | -1 | 10.2 |
| 2 | -1 | +1 | +1 | +1 | -1 | +1 | -1 | 10.1 |
| 3 | +1 | -1 | +1 | +1 | +1 | -1 | +1 | 10.0 |
| 4 | -1 | +1 | -1 | +1 | +1 | +1 | -1 | 9.8 |
| 5 | +1 | -1 | +1 | -1 | -1 | +1 | +1 | 10.3 |
| 6 | +1 | +1 | -1 | +1 | -1 | -1 | +1 | 9.9 |
| 7 | -1 | -1 | -1 | -1 | +1 | +1 | +1 | 10.1 |
| 8 | -1 | -1 | -1 | -1 | -1 | -1 | -1 | 10.0 |
To calculate the effect for V_stir:
- Average
YwhenV_stir = +1: (10.2 + 10.0 + 10.3 + 9.9) / 4 = 10.1 - Average
YwhenV_stir = -1: (10.1 + 9.8 + 10.1 + 10.0) / 4 = 10.0 - Effect of
V_stir= 10.1 - 10.0 = 0.1 mg/mL
This calculation is repeated for each of the seven variables.
Statistical Significance and Decision Making
The calculated effects must be compared to a measure of the method's inherent variability to determine if they are statistically significant. A common approach is to compare the effects against the standard deviation of the analytical method under repeatability conditions.
Table 3: Interpretation of Variable Effects
| Variable | Calculated Effect (mg/mL) | Assessment | Conclusion & Action |
|---|---|---|---|
Stirring Speed (V_stir) |
0.10 | Effect < 2s | Non-Critical: No special control needed. |
Titrant Rate (V_rate) |
0.15 | Effect < 2s | Non-Critical: No special control needed. |
Temperature (T_temp) |
0.08 | Effect < 2s | Non-Critical: No special control needed. |
Initial pH (pH_start) |
0.45 | Effect > 2s | Critical: Must be tightly controlled in method. |
Electrolyte Conc. (C_elect) |
0.05 | Effect < 2s | Non-Critical: No special control needed. |
Sample Weight (W_sample) |
0.50 | Effect > 2s | Critical: Must be tightly controlled in method. |
Equilibration Time (T_eq) |
0.12 | Effect < 2s | Non-Critical: No special control needed. |
The decision-making process for classifying variables based on their calculated effects is summarized below.
Case Study and Concluding Remarks
A published study on the development of a Flame Atomic Absorption Spectroscopy (FAAS) method for quantifying zinc oxide (ZnO) in cosmetics successfully utilized a five-variable Youden–Steiner model to evaluate robustness [51]. The assessed variables included parameters associated with the extraction step, such as ethanol volume, bath temperature, and extraction time. The study concluded that the final concentration was a critical variable for most matrices, and the extraction-related variables were particularly critical for complex matrices like liquid foundations and cream emulsions [51]. This real-world example underscores the utility of the Youden-Steiner design in pinpointing factors that must be rigorously controlled to ensure method reliability across different sample types.
In conclusion, integrating Youden-Steiner experimental designs into the validation of potentiometric titration methods provides a scientifically rigorous and highly efficient framework for robustness testing. This approach empowers researchers and drug development professionals to make data-driven decisions about method parameters, ultimately ensuring the generation of reliable, reproducible, and high-quality analytical data that meets regulatory standards. By systematically identifying critical variables, it enhances method transferability and strengthens the overall quality control pipeline in pharmaceutical development.
Within pharmaceutical research and drug development, robust and reliable analytical techniques are paramount. While modern instrumental methods like High-Performance Liquid Chromatography (HPLC) are widely adopted, classical titration methods, particularly potentiometric and complexometric titration, remain indispensable for specific applications, including acid-base analysis. This article provides a comparative analysis of these three techniques, framing them within the context of academic research, such as a thesis on potentiometric titration methods. The comparison focuses on their fundamental principles, applications, performance metrics, and provides detailed protocols to guide researchers in selecting and implementing the appropriate method for their analytical needs.
The following table summarizes the core characteristics, advantages, and limitations of potentiometric titration, complexometric titration, and HPLC.
Table 1: Core Characteristics of Potentiometric Titration, Complexometric Titration, and HPLC
| Feature | Potentiometric Titration | Complexometric Titration | High-Performance Liquid Chromatography (HPLC) |
|---|---|---|---|
| Principle | Measurement of potential change across an analyte solution using ion-selective or reference electrodes to detect the endpoint [53]. | Formation of colored metal-chelate complexes; visual or colorimetric detection of the endpoint using metal-ion indicators [54] [55]. | Separation of components in a mixture based on differential partitioning between a mobile and stationary phase, followed by detection (e.g., UV, MS) [56] [57]. |
| Primary Applications | Acid-base, redox, precipitation, and complexometric titrations; widely used in food & beverage, pharmaceuticals, and wastewater treatment [53]. | Quantitative determination of metal ions (e.g., Ca²⁺, Mg²⁺) [54] [55]. | Assay and impurity profiling of APIs, separation of complex mixtures, biomolecule analysis (peptides, oligonucleotides) [56] [58] [57]. |
| Key Advantages | Applicable to colored/turbid solutions; high precision and automation; provides objective endpoint detection [53] [55]. | Simple, cost-effective; does not require expensive equipment [55]. | High selectivity, sensitivity, and resolution; capable of multi-component analysis simultaneously [58] [57]. |
| Key Limitations | Requires specific electrodes; potential for electrode drift or contamination. | Susceptible to subjective error in visual endpoint detection; can lack specificity without masking agents [54] [55]. | High instrument cost; complex operation; requires skilled personnel and method development [55]. |
Table 2: Quantitative Performance and Market Context (2025)
| Aspect | Potentiometric Titration | Complexometric Titration | HPLC |
|---|---|---|---|
| Typical Precision (RSD) | High (often <1\%), automated systems minimize human error [53]. | 0.3\% - 2.9\% (with semi-automatic detection) [55]. | High (e.g., Autosampler precision <0.15\% RSD) [57]. |
| Market Value (2025) | USD 372.4 billion (est. for potentiometric titrators) [53]. | Not specifically quantified | Not specifically quantified |
| Growing End-Use Sector | Food & Beverage (25\% market share) [53]. | N/A | Biopharmaceutical QC; oligonucleotide analysis [56] [57]. |
| Automation & Trends | Integration with digital interfaces and LIMS; redox titration is leading application segment (30\%) [53]. | Adaptation of semi-automatic systems using RGB detectors (e.g., webcams) for endpoint detection [55]. | Development of bio-inert, metal-free systems; increased pressure and temperature stability; 2D-LC [56] [57]. |
Detailed Experimental Protocols
Protocol: Potentiometric Titration for Acid-Base Analysis
This protocol outlines the general procedure for conducting an acid-base titration using a potentiometric titrator, suitable for a thesis investigating method accuracy and automation.
3.1.1 Research Reagent Solutions
Table 3: Essential Materials for Potentiometric Acid-Base Titration
| Item | Function/Explanation |
|---|---|
| Potentiometric Titrator | Automated system (e.g., from Metrohm, Mettler Toledo) that controls titrant addition and records potential (mV) versus volume [53]. |
| pH Electrode | Ion-selective electrode (combined glass electrode) that senses changes in hydrogen ion activity, serving as the indicator electrode. |
| Reference Electrode | Provides a stable, known potential against which the indicator electrode's potential is measured (e.g., Ag/AgCl) [53]. |
| Titrant | Standardized solution of known concentration (e.g., NaOH for acid titration, HCl for base titration). |
| Buffer Solutions (pH 4, 7, 10) | Used for the calibration and standardization of the pH electrode system to ensure measurement accuracy. |
3.1.2 Procedure
- Calibration: Calibrate the pH electrode using standard buffer solutions (e.g., pH 4, 7, and 10) according to the manufacturer's instructions.
- Sample Preparation: Accurately pipette a known volume of the analyte solution (e.g., an acid) into the titration vessel.
- Titration Setup: Immerse the calibrated electrodes into the sample solution. Start the titration method on the automated system. The parameters typically include titrant concentration, equilibrium mode (signal drift), and endpoint detection criteria.
- Titration Execution: Initiate the titration. The instrument will automatically add the titrant (e.g., sodium hydroxide) in controlled increments. After each addition, it measures and records the potential (mV or pH) once the signal is stable.
- Endpoint Determination & Data Analysis: The instrument software will plot the titration curve (pH vs. titrant volume) and identify the endpoint from the maximum in the first derivative (ΔpH/ΔV) or the inflection point. The analyte concentration is calculated from the endpoint volume and the known titrant concentration.
Diagram 1: Potentiometric Titration Workflow.
Protocol: Semi-Automatic Complexometric Titration for Calcium Determination
This protocol, adapted from recent research, describes the determination of calcium in a sample using EDTA and a webcam-based colorimetric detector, ideal for demonstrating innovation in a classical method [55].
3.2.1 Research Reagent Solutions
Table 4: Essential Materials for Semi-Automatic Complexometric Titration
| Item | Function/Explanation |
|---|---|
| EDTA (Na₂H₂Y·2H₂O) | Primary complexometric titrant; forms stable 1:1 complexes with most metal ions [54]. |
| Calcein Indicator | Metal-ion indicator used for calcium; endpoint change is from green fluorescent to orange [55]. |
| Hydroxy Naphthol Blue (HNB) Indicator | Alternative metal-ion indicator for calcium; endpoint is a color shift to red [55]. |
| Webcam (RGB Detector) | Serves as a cost-effective colorimetric detector. Software analyzes color components (R, G, B, Hue) to pinpoint the endpoint objectively in turbid solutions [55]. |
| Buffer Solution (pH ≈ 12) | Maintains alkaline conditions necessary for the selective titration of calcium in the presence of magnesium [54]. |
3.2.2 Procedure
- Setup: Position a webcam securely to view the titration vessel from above or the side. Ensure consistent lighting. Use software (e.g., in-house script or color analysis tool) to track a selected color component (e.g., Green channel for Calcein) or the Hue parameter in real-time.
- Sample Preparation: For dairy products like milk, prepare a 1% (v/v) dispersion in deionized water. For other samples, appropriate dissolution or digestion may be required. Add a suitable volume of pH 12 buffer and a few drops of Calcein or HNB indicator.
- Titration: Under continuous stirring, titrate the sample with a standardized EDTA solution.
- Endpoint Detection: The webcam software will record the color changes. For Calcein, the optimal signal for endpoint detection is the Green component or the Hue value; for HNB, it is the Red component or Hue [55]. The endpoint is identified as the point of maximum rate of change in the selected signal versus titrant volume.
- Calculation: The calcium content is calculated based on the volume of EDTA consumed at the endpoint, its concentration, and the stoichiometry of the reaction (1:1 Ca²⁺:EDTA).
Diagram 2: Semi-Auto Complexometric Titration.
Protocol: HPLC Analysis for Drug Substance Assay
This protocol outlines a general reversed-phase HPLC method for the assay of an active pharmaceutical ingredient (API), such as formoterol fumarate, highlighting its use for purity assessment [58].
3.3.1 Research Reagent Solutions
Table 5: Essential Materials for HPLC Analysis of an API
| Item | Function/Explanation |
|---|---|
| HPLC/UHPLC System | System with pump, autosampler, column oven, and detector (e.g., UV/Vis or DAD). Modern systems offer high-pressure operation (e.g., 1300 bar) [57]. |
| C18 Column | Reversed-phase stationary phase; the most common for small molecule separation. Newer phases offer enhanced pH stability and alternative selectivity (e.g., phenyl-hexyl) [56]. |
| Bio-inert HPLC System | For analyzing metal-sensitive compounds (e.g., phosphorylated molecules), systems with MP35N, gold, or PEEK flow paths prevent adsorption and improve recovery [56] [57]. |
| Mobile Phase | Typically a mixture of aqueous buffer (e.g., phosphate, formate) and an organic solvent (e.g., acetonitrile, methanol). |
| Standard & Sample Solutions | Solutions of the reference standard and the test sample, prepared in a suitable solvent, often matching the mobile phase. |
3.3.2 Procedure
- Method Configuration: Set the chromatographic conditions on the HPLC system and CDS software. This includes mobile phase composition (isocratic or gradient), flow rate, column temperature, injection volume, and detector wavelength.
- System Suitability: Perform injections of the standard solution to ensure the system meets predefined criteria (e.g., retention time reproducibility, peak area RSD, theoretical plate count, and tailing factor).
- Sample Analysis: Inject the prepared sample solutions.
- Data Analysis: The CDS software will integrate the peaks. The assay of the API in the sample is calculated by comparing the peak area (or height) of the sample to that of the standard, using the formula:
% Assay = (Area_sample / Area_standard) x (Conc_standard / Conc_sample) x 100%
Potentiometric titration, complexometric titration, and HPLC are complementary techniques, each with a distinct role in the analytical laboratory. For a thesis focused on acid-base analysis, potentiometric titration offers unparalleled accuracy, objectivity, and potential for automation. Complexometric titration remains a robust, cost-effective choice for specific metal ion determinations, with recent innovations making it more reliable. HPLC, however, stands apart for its superior resolving power in complex mixtures, making it the technique of choice for purity and assay testing in drug development. The choice of technique ultimately depends on the analytical question, sample matrix, required sensitivity, and available resources.
Potentiometric titration is a cornerstone analytical technique in modern laboratories, with its utility extending far beyond simple acid-base analysis. This application note details two advanced, indirect uses of the method: the determination of acid dissociation constants (pKa) of active pharmaceutical ingredients (APIs) and the establishment of mixing ratios for ecotoxicological studies on salt mixtures. pKa values are critical physicochemical parameters that profoundly influence a drug's solubility, permeability, and ultimate bioavailability [59]. Concurrently, understanding the combined toxic effects of chemical mixtures, such as salts in aquatic environments, requires precise determination of their mixing ratios, a process for which potentiometric methods provide foundational data [60]. This document provides detailed protocols and contextual background to enable researchers in pharmaceutical development and ecotoxicology to implement these specific applications effectively.
Theoretical Background
The Potentiometric Method
Potentiometric titration is an electroanalytical technique where the electric potential across an analyte is measured to monitor the progress of a titration reaction. Instead of a colorimetric indicator, the setup uses a pair of electrodes: an indicator electrode (e.g., glass, metal, or metal oxide) and a reference electrode (e.g., Ag/AgCl) [1] [3]. The overall electric potential of the cell is given by:
Ecell = Eind - Eref + Esol [1]
Where Ecell is the total measured cell potential, Eind is the potential of the indicator electrode, Eref is the potential of the reference electrode, and Esol is the potential drop over the test solution. In acid-base titrations, the indicator electrode responds to the activity of hydronium ions (H₃O⁺), producing a sigmoidal titration curve of potential (or derived pH) versus titrant volume. The inflection point of this curve corresponds to the equivalence point [61] [59].
The Henderson-Hasselbalch Equation
Fundamental to the interpretation of acid-base equilibria in both pKa determination and physiological analysis is the Henderson-Hasselbalch equation. It relates the pH of a solution to the pKa of a weak acid and the ratio of the concentrations of its conjugate base (A⁻) and protonated acid (HA) species:
pH = pKa + log ([A⁻]/[HA]) [59] [62]
This equation is most accurate for dilute aqueous solutions. For more concentrated solutions or extreme pH values, activity coefficients must be considered [59]. The equation can also be expressed in terms of the degree of dissociation (α), leading to a linear relationship where the pKa is the x-intercept when log(α/(1-α)) is plotted against pH [59]. In clinical blood gas analysis, a modified form of this equation, incorporating a solubility coefficient for CO₂, is used to verify the internal consistency of reported pH, PaCO₂, and bicarbonate (HCO₃⁻) values [62].
Application 1: pKa Determination for Active Pharmaceutical Ingredients (APIs)
Principle and Workflow
The pKa of an API is a critical parameter that influences its ionization state across physiological pH gradients, thereby affecting its solubility and membrane permeability. In potentiometric pKa determination, the API is dissolved in an aqueous buffer and titrated with either acid or base while the pH is continuously monitored [63]. The titration curve is analyzed for inflection points, which correspond to the dissociation of acidic or basic functional groups. The pKa value is derived from the midpoint of the buffer region or the half-equivalence point on the titration curve [63]. The following workflow outlines the core steps of this protocol:
Detailed Experimental Protocol
1. Instrument Calibration:
- Calibrate the pH meter using fresh standard aqueous buffers, typically at pH 4, 7, and 10 [63].
- Ensure the temperature is constant throughout calibration and the subsequent titration, as pKa and pH measurements are temperature-sensitive [59].
2. Sample Preparation:
- Weigh the required quantity of the pure API.
- Dissolve the API in the appropriate solvent (typically water with a co-solvent if solubility is low) and dilute to a concentration of at least 10⁻⁴ M to ensure a detectable change in the titration curve shape [61] [63].
- For sparingly soluble compounds, measurements may be performed in solvent-water mixtures (e.g., methanol), followed by extrapolation using methods like the Yasuda-Shedlovsky technique to deduce the aqueous pKa [61].
3. Titration Procedure:
- Transfer a known volume (e.g., 20 mL) of the API solution to a reaction vessel on a magnetic stirrer.
- Immerse the calibrated pH electrode into the solution.
- Purge the solution with nitrogen gas for several minutes to displace dissolved carbon dioxide, which can interfere with the titration, especially near neutral pH [61] [63].
- Titrate the solution with 0.1 M sodium hydroxide (for acidic compounds) or 0.1 M hydrochloric acid (for basic compounds). Add the titrant in small increments.
- After each addition, wait for the signal to stabilize (drift < 0.01 pH units per minute) before recording the pH [63].
- Continue the titration until the pH stabilizes at a high (for base addition) or low (for acid addition) value (e.g., from pH 2 to 12) [63].
4. Data Analysis:
- Plot the recorded pH against the volume of titrant added to generate a titration curve.
- Identify the buffer region(s) where the pH change is minimal. The pKa corresponds to the pH at the midpoint of this region [63].
- Alternatively, identify the half-equivalence point volume (where half the moles of titrant needed to reach the equivalence point have been added). The pH at this volume is equal to the pKa [63].
- Perform a minimum of three separate titrations to ensure reliability and calculate the average pKa and standard deviation [63].
Research Reagent Solutions
Table 1: Key reagents and materials for pKa determination via potentiometric titration.
| Reagent/Material | Function/Explanation |
|---|---|
| Standard Buffer Solutions (pH 4, 7, 10) | To calibrate the pH meter and ensure accurate potentiometric measurements [63]. |
| 0.1 M Sodium Hydroxide (NaOH) | Titrant used for the analysis of acidic compounds [63]. |
| 0.1 M Hydrochloric Acid (HCl) | Titrant used for the analysis of basic compounds [63]. |
| 0.15 M Potassium Chloride (KCl) | Used to maintain a constant ionic strength in the solution, which is critical for obtaining accurate pKa values as ionic strength influences activity coefficients [59] [63]. |
| Nitrogen Gas | To create an inert atmosphere by purging dissolved CO₂ from solutions, preventing carbonic acid interference [63]. |
| pH Combination Electrode | The primary sensor, typically a combined glass electrode, which houses both the indicator and reference electrodes in one body [59]. |
Application 2: Determining Mixing Ratios in Ecotoxicological Mixtures
Principle and Workflow
In ecotoxicology, assessing the combined effects of chemical mixtures is essential for accurate environmental risk assessment. A key challenge is determining the correct proportions, or mixing ratios, of individual substances in a mixture at any desired concentration level [60]. A novel procedure uses toxicity data from single-substance exposure tests to calculate these ratios. The core of the method is the Relative Toxic Fraction, which represents the proportion of the total toxic effect attributable to an individual salt in a mixture. Once determined from single-salt tests, this fraction is used to calculate the concentration of each salt in a mixture designed to produce a specific overall toxic effect. Potentiometric titration can support this methodology by providing precise concentration data for stock solutions or by characterizing the acid-base properties of ions in the mixture, which can influence their toxicity. The logical relationship of this procedure is outlined below:
Detailed Experimental Protocol
1. Single Salt Exposure Tests:
- Expose the test organism (e.g., Caridina nilotica, a freshwater shrimp) to a range of concentrations of each individual salt (e.g., MgCl₂, NaCl, MgSO₄, Na₂SO₄) [60].
- Determine the concentration that induces a specific toxic effect (e.g., LC₅₀) for each salt.
2. Calculation of Relative Toxic Fractions:
- The relative toxic fraction for an individual salt is calculated from the toxic effects observed in the single-salt tests. The specific mathematical formula for aggregating these individual toxicities into a combined effect model is central to the procedure [60].
- These fractions are normalized so that the sum of all fractions in a mixture equals 1.
3. Determining Mixing Ratios at a Desired Concentration:
- To create a mixture at a specific total desired concentration, the concentration of each individual salt is calculated by multiplying the total mixture concentration by its respective relative toxic fraction [60].
- Formula: Concentration of Salt A in Mixture = Total Desired Mixture Concentration × Relative Toxic Fraction of A [60].
4. Application Example:
- The developed procedure has been successfully applied to ecotoxicological experiments involving binary salt mixtures such as MgCl₂ + MgSO₄ and NaCl + Na₂SO₄ [60].
- This ensures that the correct proportions of each salt are administered in the mixture to accurately reflect the combined toxic effect at the desired concentration level.
Comparison of Techniques and Advanced Considerations
Alternative Methods for pKa Determination
While potentiometric titration is a standard method, other techniques are available, each with distinct advantages and limitations, as summarized in the table below.
Table 2: Comparison of common techniques for pKa determination.
| Method | Principle | Concentration Range | Key Advantages | Key Limitations |
|---|---|---|---|---|
| Potentiometric Titration [61] [59] | Monitoring pH during acid/base titration. | ~10⁻⁴ M and above [61]. | High precision; automated instruments; well-established. | Requires pure compounds; challenging for very low solubility compounds. |
| UV-Vis Spectrophotometry [61] | Monitoring UV-Vis spectral changes vs. pH. | >10⁻⁶ M [61]. | Higher sensitivity; lower sample concentration. | Requires a UV-active chromophore near the ionizable site; purity critical. |
| Conductometry [61] | Measuring solution conductivity vs. concentration. | Varies with electrolyte strength. | Well-suited for acids with pKa 1.9-5.2 [61]. | Laborious; less reliable for very weak electrolytes. |
Emerging Trends and Materials
Innovation in electrode materials is a key area of development for potentiometry. Stainless steel electrodes (e.g., AISI 304) are being investigated as a low-cost and robust alternative to traditional glass electrodes [3]. Studies show that even without artificial oxidative treatment, stainless steel can exhibit a Nernstian response (sensitivity of ~59 mV/pH) and can be successfully used for acid-base potentiometric titration, with endpoint determinations matching those of glass electrodes [3]. This makes them particularly suitable for applications where glass electrodes are fragile or for cost-sensitive analyses.
This application note has detailed the principles and protocols for two sophisticated, indirect applications of potentiometric titration: determining the pKa of pharmaceuticals and establishing mixing ratios for ecotoxicological salt mixtures. The pKa protocol provides a robust framework for obtaining a critical parameter in drug development, while the mixing ratio procedure addresses a fundamental challenge in the ecotoxicological assessment of chemical mixtures. The continued evolution of the technique, including the development of novel electrode materials like stainless steel, ensures its relevance and expands its potential for future analytical applications in diverse scientific fields.
Meeting ICH and USP Guidelines for Pharmaceutical Quality Control
Within pharmaceutical quality control, the validation of analytical methods is a regulatory imperative to ensure the safety, identity, strength, quality, and purity of drug substances and products. For techniques like potentiometric titration, adherence to established compendial guidelines is paramount. This application note delineates the process for validating a potentiometric titration method for acid-base analysis, framed within the context of United States Pharmacopeia (USP) General Chapter <1225> and harmonized with International Council for Harmonisation (ICH) Q2(R2) principles on analytical procedure development [64]. We provide a detailed protocol, using a case study of hydrochloric acid quantification with a novel stainless steel electrode, to illustrate the practical application of these guidelines [3].
Regulatory Framework: ICH and USP
Core Principles of Method Validation
Validation of an analytical method is the process whereby laboratory studies establish that the method's performance characteristics are suitable for its intended analytical applications [64]. For compendial methods, users must verify their suitability under actual conditions of use, whereas new methods require full validation [64].
Table 1: Key Analytical Performance Characteristics for Assay Validation [64]
| Performance Characteristic | Definition | Typical Validation Requirement for Assays |
|---|---|---|
| Accuracy | Closeness of test results to the true value. | Minimum of 9 determinations over 3 concentration levels. |
| Precision | Degree of agreement among individual test results. | - Repeatability: Min. 9 determinations at 100% test concentration or 3 concentrations/3 replicates each.- Intermediate Precision: Variation within a laboratory (different days, analysts, equipment). |
| Specificity | Ability to assess the analyte unequivocally in the presence of potential impurities. | Demonstration that the procedure is unaffected by the presence of impurities or excipients. |
| Linearity | Ability of the method to obtain test results proportional to analyte concentration. | Established across a specified range, typically with a minimum of 5 concentrations. |
| Range | The interval between the upper and lower levels of analyte for which suitable levels of precision, accuracy, and linearity are demonstrated. | Confirmed from the linearity study, encompassing the expected test concentrations. |
| Robustness | Capacity of a method to remain unaffected by small, deliberate variations in procedural parameters. | Evaluation of factors such as titration rate, electrode conditioning, or temperature. |
The Scientist's Toolkit: Essential Materials for Potentiometric Titration
Table 2: Key Research Reagent Solutions and Equipment
| Item | Function / Explanation |
|---|---|
| Indicator Electrode | Senses the change in potential during titration. Options include a standard glass pH electrode or alternative sensors like the described AISI 304 stainless steel laminar electrode [3]. |
| Reference Electrode | Provides a stable, fixed potential against which the indicator electrode's potential is measured (e.g., Ag/AgCl) [3]. |
| Potentiometer | A high-impedance pH meter capable of measuring millivolt differences with high accuracy [3]. |
| Standardized Titrant | A reagent of exactly known concentration (e.g., 0.1 M Sodium Hydroxide) used to react with the analyte [3]. |
| Supporting Electrolyte | A solution of high ionic strength (e.g., 0.1 M KCl) used to maintain a constant ionic strength, minimizing junction potential variations. |
| Redox Mediators | Used in oxidation-reduction titrations to facilitate electron transfer and ensure a stable equilibrium potential at the electrode surface [6]. |
Case Study: Acid-Base Titration with a Stainless Steel Electrode
Experimental Protocol
The following protocol details the titration of hydrochloric acid with sodium hydroxide, utilizing a non-artificially oxidised AISI 304 stainless steel electrode as the potentiometric sensor [3].
Materials and Reagents
- Analyte: Hydrochloric acid (HCl), approximately 0.08 M (to be standardized).
- Titrant: Sodium hydroxide (NaOH), approximately 0.09 M. Standardize against primary standard potassium hydrogen phthalate.
- Indicator Electrode: AISI 304 stainless steel laminar electrode (4 cm x 0.5 cm x 0.5 mm), cleaned with deionized water and dried [3].
- Reference Electrode: Ag/AgCl reference electrode with KCl electrolyte bridge.
- Apparatus: Magnetic stirrer, 50 mL burette, 100 mL beaker, and a precision pH meter.
Procedure
- Standardization: Pre-standardize the HCl solution by titrating against anhydrous sodium carbonate using a visual indicator (e.g., methyl orange) [3].
- Setup: Pipette 10.00 mL of the standardized HCl solution into a 100 mL beaker. Add deionized water to fully immerse the electrodes.
- Electrode Placement: Immerse the cleaned stainless steel indicator electrode and the reference electrode in the solution.
- Titration: Under constant stirring, add the NaOH titrant from the burette in small increments (e.g., 0.1-0.5 mL). After each addition, wait for the potential to stabilize and record the volume of titrant added and the corresponding millivolt (or pH) reading.
- Endpoint Determination: Add titrant in smaller increments as the potential change per volume unit increases sharply (near the endpoint). Continue until the potential change becomes small again, indicating the endpoint has been passed.
- Data Analysis: Plot the measured potential (E) versus the volume of titrant added (V). The endpoint is determined as the volume at the maximum of the first derivative (ΔE/ΔV) or the zero-crossing of the second derivative (Δ²E/ΔV²) plot.
The workflow for this method validation is outlined below:
Application in Research
In the featured study, this methodology was successfully employed. The stainless steel electrode demonstrated a Nernstian sensitivity of 59.18 ± 0.37 mV/pH [3]. The titration of 0.0841 M HCl yielded an endpoint of 9.25 mL of NaOH, corresponding to a calculated HCl concentration of 0.0845 mol/L, which was in excellent agreement with the result from a traditional glass electrode (deviation of 0.0004 mol/L) [3]. This validates the non-oxidised stainless steel electrode as a robust and low-cost alternative for acid-base titrimetry.
Validation of the Potentiometric Titration Method
Experimental Design for Validation
The following experiments should be conducted to gather data for the performance characteristics listed in Table 1.
- Accuracy: Spike a placebo or drug product matrix with known quantities of the analyte (e.g., HCl) across the specified range (e.g., 80%, 100%, 120% of the target concentration). Perform the titration and calculate the recovery percentage for each level. The mean recovery should be within 98.0–102.0% for an API assay [64].
- Precision (Repeatability): Perform a minimum of six independent assays of a homogeneous sample at 100% of the test concentration. The relative standard deviation (RSD) of the results should typically be ≤ 2.0% for an API [64].
- Specificity: For an acid-base titration, demonstrate that excipients or potential degradation products do not contribute to the titration endpoint. This can be shown by titrating a placebo mixture and confirming the absence of a significant endpoint, or by demonstrating that the endpoint from a stressed sample (e.g., after acid/base hydrolysis) matches that of a reference method [64].
- Linearity and Range: Prepare and analyze standard solutions of the analyte at a minimum of 5 concentration levels over a defined range (e.g., 50-150% of the target concentration). Plot the measured analyte concentration (or the titrant volume used to reach the endpoint) against the theoretical concentration. The correlation coefficient (r) should be ≥ 0.999 [64].
- Robustness: Deliberately introduce small variations in method parameters, such as titration rate (± 0.1 mL/min), stirring speed (± 50 rpm), or electrode conditioning time. Evaluate the impact on the final assay result to establish system suitability limits.
Data Presentation and Analysis
The relationship between the measured potential and the titrant volume is the core of the analysis, and the endpoint is a critical data point for quantification.
Table 3: Exemplary Titration Data and Results from Case Study [3]
| Parameter | Stainless Steel Electrode | Glass Electrode (Reference) |
|---|---|---|
| Analyte | 0.0841 M HCl | 0.0841 M HCl |
| Titrant | 0.0914 M NaOH | 0.0914 M NaOH |
| Observed Endpoint | 9.25 mL | 9.25 mL |
| Calculated HCl Concentration | 0.0845 mol/L | 0.0841 mol/L (standard) |
| Deviation from Standard | 0.0004 mol/L | - |
| Electrode Sensitivity | 59.18 ± 0.37 mV/pH | N/A |
Rigorous validation, as mandated by ICH and USP guidelines, is the cornerstone of implementing a reliable potentiometric titration method in a pharmaceutical quality control setting. The case study of the AISI 304 stainless steel electrode demonstrates that with a structured validation approach, even alternative, cost-effective sensors can be qualified for accurate quantitative analysis, such as the determination of acid concentration. By systematically addressing the performance characteristics of accuracy, precision, specificity, linearity, range, and robustness, scientists can ensure that their analytical procedures generate data that is fit for purpose, thereby upholding the highest standards of drug product quality and patient safety.
Conclusion
Potentiometric titration remains an indispensable analytical technique in pharmaceutical analysis, offering exceptional accuracy, reproducibility, and regulatory compliance for acid-base determinations. The method's adaptability spans from conventional API quantification to innovative micro-scale applications in early drug development, while automated systems significantly enhance reliability by minimizing human error. As the market continues expanding at 7.0% CAGR, future directions include increased integration with laboratory information management systems, advanced sensor technologies for complex matrices, and broader application in personalized medicine formulations. For biomedical research, these developments promise more efficient drug characterization, enhanced quality control protocols, and accelerated development timelines through robust, validated analytical methods that ensure patient safety and product efficacy.
References
- 1. Potentiometric titration [https://en.wikipedia.org/wiki/Potentiometric_titration]
- 2. Recognition of endpoints (EP) [https://www.metrohm.com/en/discover/blog/20-21/recognition-of-endpoints--ep-.html]
- 3. Acid-base potentiometric titration using a stainless steel ... [https://pmc.ncbi.nlm.nih.gov/articles/PMC10760551/]
- 4. 2: Potentiometric Titrations (Experiment) [https://chem.libretexts.org/Courses/University_of_California_Davis/Chem_4C_Lab%3A_General_Chemistry_for_Majors/Chem_4C%3A_Laboratory_Manual/05%3A_Potentiometric_Titrations_(Experiment)]
- 5. Potentiometric Titration: Data and Results | PDF [https://www.scribd.com/presentation/469125696/Potentiometric-Titration]
- 6. Potentiometric Titration - an overview [https://www.sciencedirect.com/topics/chemistry/potentiometric-titration]
- 7. Aspects and Implementation of Pharmaceutical Quality by ... [https://pmc.ncbi.nlm.nih.gov/articles/PMC12114689/]
- 8. Rethinking Pharmaceutical Industry with Quality by Design [https://www.pharmaexcipients.com/news/rethinking-pharmaceutical-industry-qbd/]
- 9. New USP-NF Publication Model [https://www.uspnf.com/new-usp-nf-publication-model]
- 10. Official Dates for Monographs in Redesigned Format [https://www.uspnf.com/notices/uspnf-2026-issue-3-redesign-20251121]
- 11. Regulatory Perspectives on QbD, RBQM, and RBM in ... [https://resource.ddregpharma.com/blogs/regulatory-perspectives-on-qbd-rbqm-and-rbm-in-pharma-and-clinical-research/]
- 12. of Orthogonal Determination Methods of Comparison / Acid ... Base [https://pmc.ncbi.nlm.nih.gov/articles/PMC11641643/]
- 13. Evaluation of acidity of hierarchical zeolites using a ... [https://www.sciencedirect.com/science/article/abs/pii/S2468519424000272]
- 14. vs. Potentiometry: Which Method is Better for... | Lab Manager Titration [https://www.labmanager.com/titration-vs-potentiometry-which-method-is-better-for-ph-analysis-33658]
- 15. Understanding potentiometric titration: A vital technique in ... [https://www.metrohm.com/en/discover/blog/2025/titration-pharma-analysis.html]
- 16. Give the advantages and disadvantages of potentiometric . titration [https://www.vedantu.com/question-answer/give-the-advantages-and-disadvantages-of-class-11-chemistry-cbse-60d095e8b7697a43161e82c6]
- 17. Validation of titration methods [https://www.metrohm.com/en/discover/blog/20-21/validation-of-titration-methods.html]
- 18. Next in pharma 2025: The future is now [https://www.pwc.com/us/en/industries/pharma-life-sciences/pharmaceutical-industry-trends.html]
- 19. 2025 World Preview: Pharma Growth Steady Amid Turbulent ... [https://www.evaluate.com/thought-leadership/2025-world-preview/]
- 20. How 2025 can be a pivotal year of progress for pharma [https://www.weforum.org/stories/2025/01/2025-can-be-a-pivotal-year-of-progress-for-pharma/]
- 21. 2025 life sciences outlook | Deloitte Insights [https://www.deloitte.com/us/en/insights/industry/health-care/life-sciences-and-health-care-industry-outlooks/2025-life-sciences-executive-outlook.html]
- 22. Pharmaceutical industry trends 2025, outlook and strategies [https://www.zs.com/insights/pharmaceutical-trends-2025-outlook-ai-supplychain-and-beyond]
- 23. Explained: Principles, Curve & Steps Potentiometric Titration [https://www.vedantu.com/chemistry/potentiometric-titration]
- 24. Acid–base titration [https://en.wikipedia.org/wiki/Acid%E2%80%93base_titration]
- 25. Assay by Potentiometric Titration in Pharmaceutical ... [https://blog.metrohmusa.com/assay-potentiometric-titration-pharmaceutical-production]
- 26. Potentiometric Titration Principle [https://byjus.com/chemistry/potentiometric-titration/]
- 27. Development of Potentiometric Microtitration for Early ... [https://www.americanpharmaceuticalreview.com/Featured-Articles/38370-Development-of-Potentiometric-Microtitration-for-Early-Chemistry-Development/]
- 28. Anatomy of pH Electrodes [https://www.ysi.com/ysi-blog/water-blogged-blog/2019/02/anatomy-of-ph-electrodes?srsltid=AfmBOop-s7oOfR784ZoAX6Z5DvDmg8699YpzxCXdz5jiPILhuPE51unP]
- 29. pH Electrode Selection Guide [https://www.coleparmer.com/tech-article/ph-electrode-selection-guide]
- 30. Understanding pH Electrodes: A Comprehensive Guide [https://sensorex.com/ph-electrodes-guide/?srsltid=AfmBOopHIubnNZz1xB9wp_E5t_6LK1Egwk-hZ6gN-yATNo7ufXjMl7mn]
- 31. Electrodes for pH Sensing Based on Stainless Steel [https://www.mdpi.com/2227-9040/13/5/160]
- 32. Comparing Glass Membrane Versus Optical pH Sensors [https://www.hamiltoncompany.com/knowledge-base/article/comparing-glass-membrane-versus-optical-ph-sensors?srsltid=AfmBOooXjhIQKZBm8xxO1D8T2_-SoC_KfA2J-nM65-u5AXq9w3hPCzuM]
- 33. Automatic titration detection method of organic matter content ... [https://pmc.ncbi.nlm.nih.gov/articles/PMC12212985/]
- 34. Potentiometric titration [https://www.protocols.io/view/potentiometric-titration-kxygxrxkg8j2/v1]
- 35. Critical evaluation of the gran method for free acidity ... [https://ojs.brazilianjournals.com.br/ojs/index.php/BASR/article/view/82339]
- 36. Multivariate evaluation of weak acid mixtures by automated ... [https://periodicos.ufv.br/jcec/article/view/22105]
- 37. Recent trends in microsampling and reduced-volume ... [https://www.sciencedirect.com/science/article/pii/S277258202500035X]
- 38. Dried urine spot as a stable, green, and practical ... [https://pubs.rsc.org/en/content/articlehtml/2025/gc/d5gc00956a]
- 39. How to avoid titration errors in your lab [https://www.metrohm.com/en/discover/blog/2024/avoid-titration-errors.html]
- 40. Best practice for electrodes in titration [https://www.metrohm.com/en/discover/blog/20-21/best-practice-for-electrodes-in-titration.html]
- 41. How to Store, Clean, and Recondition pH Electrodes [https://www.coleparmer.com/tech-article/how-to-store-clean-and-recondition-ph-electrodes]
- 42. Common Titration Errors to Avoid and How to Correct Them [https://microbiozindia.com/common-titration-errors-to-avoid-and-how-to-correct-them/]
- 43. Automatic Potentiometric Titrator Market Outlook 2025-2032 [https://www.intelmarketresearch.com/automatic-potentiometric-titrator-market-market-15906]
- 44. Processing and analysis of potentiometric data [https://pubmed.ncbi.nlm.nih.gov/3697475/]
- 45. How to get correct and reproducible results in titration [https://www.xylemanalytics.com/en/company/blog/blog/2022/09/how%20to%20get%20correct%20and%20reproducible%20results%20in%20titration]
- 46. Video: Potentiometric Titration: Overview [https://www.jove.com/science-education/v/14557/potentiometric-titration-overview]
- 47. Monograph: Non-aqueous titration of acids and bases with ... [https://www.metrohm.com/en/products/8/1085/81085086.html]
- 48. Novel and validated titrimetric method for determination of ... [https://pmc.ncbi.nlm.nih.gov/articles/PMC5760927/]
- 49. 11.2: Potentiometric Methods [https://chem.libretexts.org/Bookshelves/Analytical_Chemistry/Analytical_Chemistry_2.1_(Harvey)/11%3A_Electrochemical_Methods/11.02%3A_Potentiometric_Methods]
- 50. A More Modern and Robust Approach to Titration [https://www.americanpharmaceuticalreview.com/Featured-Articles/613573-Instrument-Based-Testing-A-More-Modern-and-Robust-Approach-to-Titration/]
- 51. Development and Validation of a Method for the Analysis of ... [https://pmc.ncbi.nlm.nih.gov/articles/PMC8179769/]
- 52. 2.3.6. Robustness [https://bio-protocol.org/exchange/minidetail?id=8751577&type=30]
- 53. Potentiometric Titrators Market | Global Market Analysis ... [https://www.futuremarketinsights.com/reports/potentiometric-titrators-market]
- 54. Complexometric Titration - an overview [https://www.sciencedirect.com/topics/chemistry/complexometric-titration]
- 55. Application of the Semi-Automatic Titration Method Using a ... [https://www.mdpi.com/1420-3049/30/17/3553]
- 56. 2025 HPLC Column and Accessories Review [https://www.chromatographyonline.com/view/innovations-in-liquid-chromatography-2025-hplc-column-and-accessories-review]
- 57. New HPLC, MS, and CDS Products from 2024–2025 [https://www.chromatographyonline.com/view/new-hplc-ms-and-cds-products-from-2024-2025-a-brief-review]
- 58. Comparison of hplc with potentiometric titration and tlc [https://www.academia.edu/figures/8699203/table-7-comparison-of-hplc-with-potentiometric-titration-and]
- 59. Development of Methods for the Determination of pKa Values [https://pmc.ncbi.nlm.nih.gov/articles/PMC3747999/]
- 60. Development of a Procedure for Determining the Mixing ... [https://pubmed.ncbi.nlm.nih.gov/28669045/]
- 61. APPENDIX A: MEASUREMENT OF ACIDITY (pKA) [https://www.ecetoc.org/technical-report-123/appendix-a-measurement-of-acidity-pka/]
- 62. Mastering blood gas interpretation: A practical guide for ... [https://pmc.ncbi.nlm.nih.gov/articles/PMC12067511/]
- 63. Protocol for Determining pKa Using Potentiometric Titration [https://www.creative-bioarray.com/support/protocol-for-determining-pka-using-potentiometric-titration.htm]
- 64. <1225> VALIDATION OF COMPENDIAL METHODS [http://www.uspbpep.com/usp29/v29240/usp29nf24s0_c1225.html]